Peanut Butter Butterfinger Cookies
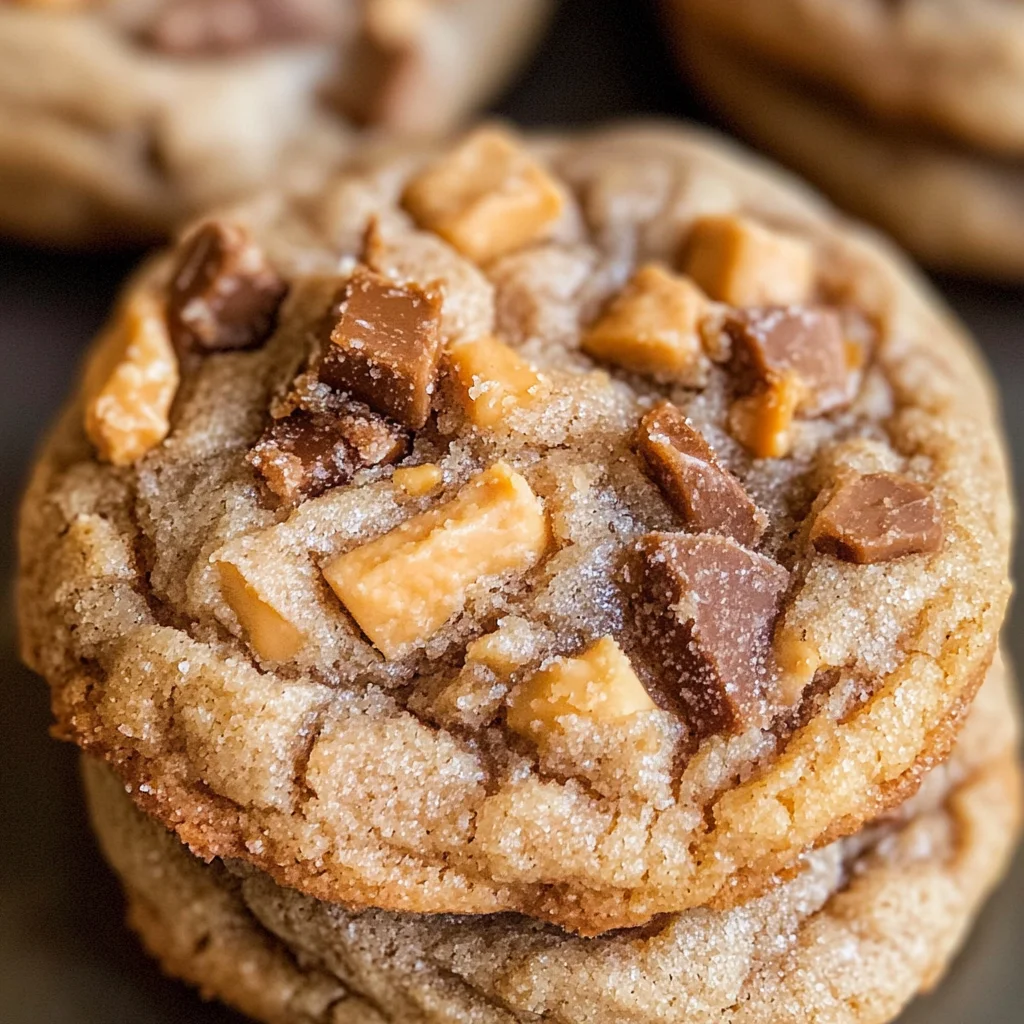
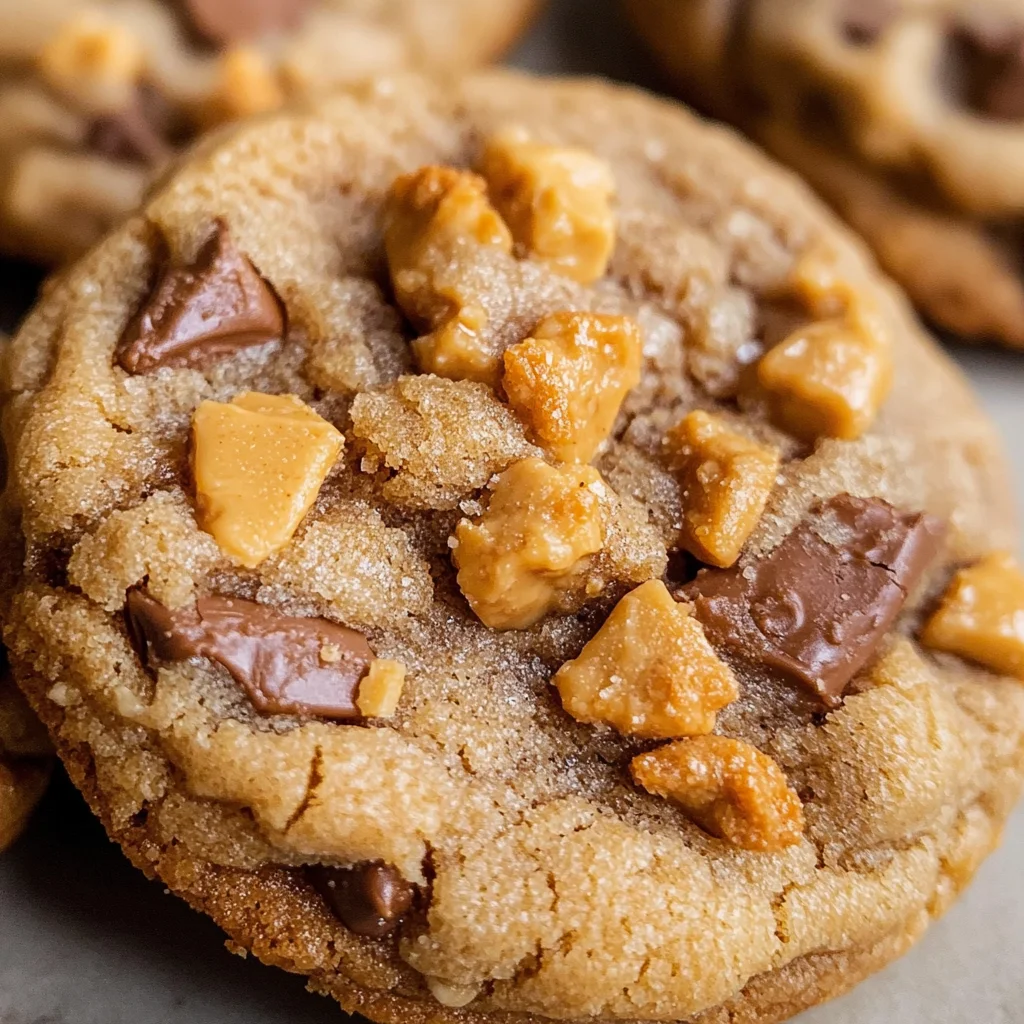
When I think about the Peanut Butter Butterfinger Cookies, it’s hard to contain my excitement. These aren’t just cookies; they’re a delightful journey of flavors and textures that will take your taste buds on an unforgettable ride. Picture this: a warm, soft peanut butter cookie cradling chunks of that sweet, crunchy Butterfinger. With each bite, you’re greeted by a rich, nutty flavor combined with the unmistakable sweetness of chocolate and the satisfying crunch of candy. It’s like they were destined to be together! The moment you pull them from the oven, your kitchen fills with an intoxicating aroma that promises something truly special. I promise you, once you indulge in these beauties, traditional peanut butter cookies will seem downright ordinary.
What draws us to bake these cookies is not just their delectable taste but also the experience they provide. Memories flood back of family gatherings and late-night baking sessions with friends where laughter filled the air along with the scent of freshly baked treats. And let’s not forget that magical contrast between sweet and salty — it’s a combination that never fails to captivate our hearts and bellies alike. Whether you’re celebrating a special occasion or simply craving a comforting dessert at home, these Peanut Butter Butterfinger Cookies are perfect for any moment in life. They’re here to elevate our everyday experiences into something magnificent.
Peanut Butter Butterfinger Cookies: A Sweet Symphony in Every Bite
Welcome to this delightful cookie adventure! If you’ve ever thought peanut butter cookies couldn’t get any better, prepare yourself for an experience that will change your mind forever. The addition of chopped Butterfinger bits creates an extraordinary texture and flavor profile that dances on your palate. Trust me when I say this recipe is one you’ll want to share with everyone you know!
Ingredients:
As we embark on this culinary journey together, let’s take a moment to appreciate each ingredient. Each one plays a vital role in crafting these delightful cookies, creating not just flavor but also texture and personality.
- 3/4 cup (1 and 1/2 sticks) unsalted butter, softened: This is crucial for achieving that smooth and creamy base we want in our cookie dough. Softened butter blends beautifully with sugars to create air pockets during creaming, which leads to lightness in our final product. Look for high-quality butter—European-style varieties tend to have higher fat content, lending richness to your cookies. Remember, if your butter is too cold or melted, it can drastically change the texture of the cookies.
- 1/2 cup granulated sugar: This sweetener contributes not only sweetness but also helps create a lovely crisp edge on your cookies while keeping the center chewy. It works in harmony with brown sugar for a balanced taste that truly elevates the overall flavor profile. Don’t skimp on this ingredient; it’s what gives those delectable cookies their sugary allure!
- 1/2 cup packed brown sugar: The molasses in brown sugar adds depth and moisture, which ensures your cookies remain soft and chewy even as they cool down. Don’t underestimate how essential this ingredient is—its rich flavor complements the peanut butter perfectly while enhancing that classic cookie experience we all adore.
- 1 cup creamy peanut butter: Here’s where we really start building flavor! Creamy peanut butter (I recommend using Jif for its consistency) brings a luscious nuttiness to our recipe that binds everything together beautifully. Avoid natural peanut butter with its oil separation—this recipe thrives on smoothness that integrates seamlessly into our dough.
- 1 large egg: Eggs are essential for binding all our ingredients together while contributing moisture and richness. They help create that tender crumb we crave in baked goods by providing structure as they set during baking.
- 1 and 1/2 teaspoons vanilla extract: Vanilla is like a warm hug for your flavor palette—it enhances all other flavors without standing out too much itself. A quality vanilla extract can transform your cookie dough into something truly extraordinary; trust me on this!
- 1 and 1/2 cups all-purpose flour (spooned and leveled): Flour provides structure; however, it needs to be measured correctly so as not to overwhelm our delicate balance of wet ingredients. Spoon flour into your measuring cup rather than scooping directly from the bag—this prevents compaction which could lead to dense cookies.
- 1/2 teaspoon baking soda: This leavening agent gives our cookies lift while also contributing slight alkalinity which balances out acidity from other ingredients. It’s essential for helping achieve that perfect puffy appearance without compromising texture.
- 1/2 teaspoon baking powder: Similar to baking soda but containing acidic components itself, baking powder also aids in loftiness—creating those delightful thick cookies we adore! Both leavening agents work together harmoniously here; skipping either could affect how well our cookies rise.
- 1/4 teaspoon kosher salt: A touch of salt enhances sweetness by providing contrast; it amplifies flavors rather than making them salty! Kosher salt dissolves easily within doughs—you want every bite packed full of extraordinary taste sensations.
- 16 ounces Butterfinger bars (chopped): This candy masterpiece adds crunchy bits throughout each cookie; its unique texture contrasts beautifully against soft dough while delivering bursts of chocolatey goodness complemented by peanut buttery notes—it’s simply irresistible! If you can’t find Butterfinger Bits at your store (a rarity), chop regular bars into rough chunks just big enough for those satisfying bites.
Equipment You’ll Need:
Having the right tools makes our cooking experience smoother, more enjoyable, and even more rewarding! While they may not be ingredients, these essential partners play an undeniable role in creating something wonderful—let’s dive into what you’ll need!
- Stand mixer or large mixing bowl & hand mixer: A stand mixer takes away effort during creaming processes while ensuring consistent results—definitely worth considering if you bake often! If using a hand mixer instead, make sure it’s powerful enough as you’ll be blending quite thick mixtures here.
- Measuring cups & spoons: Precise measurements are vital in baking; having good quality measuring cups with clear markings ensures accuracy so you get perfect results every time! Invest in both dry measuring cups (for flour/sugar) as well as liquid ones (for extracts).
- Parchment paper or silicone baking mat: Lining your baking sheets helps prevent sticking while ensuring even heat distribution for optimal browning—a win-win situation! Parchment paper is disposable whereas silicone mats can be reused endlessly—both options are excellent choices!
- Cookie scoop or tablespoon: Using a cookie scoop lets you portion out uniform-sized balls effortlessly—which translates into evenly baked cookies across-the-board! If you don’t have one handy? A tablespoon works too but may require more effort getting those shapes just right.
Now that we’re fully equipped let’s move onto preparing these delicious Peanut Butter Butterfinger Cookies!
Preparing the Peanut Butter Butterfinger Cookies
Step 1: Creaming Together Your Base
In a large bowl or using a stand mixer fitted with the paddle attachment—start by beating together 3/4 cup softened butter until smooth and creamy. This process known as creaming incorporates air into the mixture which creates tiny bubbles—the secret behind lightness in baked goods! Scrape down any stubborn bits clinging onto sides throughout mixing—it’s vital we achieve consistency here without chunks left behind because nobody wants unevenly textured cookies! Once fluffy (about 2 minutes), add both granulated sugar followed by packed brown sugar—beat again until everything has blended harmoniously together creating an irresistible aroma wafting through your kitchen.
Step 2: Adding Flavorful Elements
Next up is adding 1 cup of creamy peanut butter alongside one large egg plus 1 and 1/2 teaspoons vanilla extract into this mix—we’re building layers upon layers of flavor! Keep beating until combined nicely—being sure once again not leave any remnants stuck around edges behind since every last drop counts towards perfection today! The rich nutty essence paired with warm notes from vanilla sets us up beautifully ahead before diving deeper into dry ingredients later on… Ahh so dreamy already!
Step 3: Incorporating Dry Ingredients
Now it’s time for some serious science—we’re going to add dry elements starting off with 1 and 1/2 cups all-purpose flour sprinkled gently atop before layering over it half teaspoon each baking soda plus baking powder plus finally finishing off with quarter teaspoon kosher salt sprinkled generously above everything else waiting patiently below… This method encourages proper blending without creating lumps too early which leads us closer toward even distributions later down line—it’s non-negotiable folks! Grab yourself a spoon stirring softly through dry components until there are no visible clumps remaining amongst those gorgeous whites surrounding them—they should feel light yet still hold shape nicely when pressed gently against side walls inside bowl after being mixed adequately throughout…
Step 4: Folding In Those Irresistible Crunchy Bits
Now comes one of my favorite parts—adding those chopped-up 16 ounces of glorious Butterfinger bars straight into dough mixture before gently folding them through until barely incorporated throughout… You want distinct pieces remaining intact rather than pureed mushiness taking over entire batch—that textural contrast reigns supreme here after all so don’t rush please friends!! Cover up bowl now allowing rest period where flavors meld wonderfully together chillin’ out comfortably within fridge anywhere between fifteen minutes up towards full hour if preferred longer than usual waits allow deeper nuances develop further enhancing overall indulgence later down line…
Stay tuned for more steps where we’ll transform this luscious dough into perfectly golden-brown masterpieces ready tantalize taste buds everywhere they go next time around friends—I promise it’ll be worth every minute spent waiting patiently while smelling mouthwatering aromas filling spaces surrounding us meanwhile…
Step 5: The Heart of Cookie Creation
Now that you’ve blended your butter and sugars into a fluffy, creamy masterpiece, it’s time to introduce the stars of our show: the peanut butter and egg. Add 1 cup of peanut butter—I always reach for Jif for its perfectly smooth texture—and 1 large egg into the mix. This combination is crucial because the peanut butter not only imparts that luscious, nutty flavor but also adds moisture and richness that makes these cookies truly unforgettable. The egg acts as a binder, ensuring our cookies hold together while providing a delightful chewiness. As you beat this mixture together, take note of how the color transforms from pale yellow to a warm golden hue; this visual cue signals that everything is well combined. You’ll want to scrape down the sides again here, making sure no remnants of peanut butter or egg are left behind—every bit counts in this flavor adventure!
Step 6: The Foundation of Flavor
Next up is introducing our dry ingredients, which consist of 1 and 1/2 cups all-purpose flour, 1/2 teaspoon baking soda, 1/2 teaspoon baking powder, and 1/4 teaspoon kosher salt. Now, when measuring flour, take a moment to spoon it gently into your measuring cup rather than scooping directly from the bag; this prevents packing it down too tightly and ensures you have just the right amount. We’re adding the leavening agents here—baking soda and baking powder—which are essential for creating that lovely rise in our cookies. Baking soda provides lift while helping to develop a rich color and flavor as they bake. Trust me on this: don’t rush mixing in these elements! Carefully sprinkle your dry ingredients on top of the wet blend without stirring yet; this method allows you to combine them more evenly later.
Step 7: The Art of Mixing
Once your dry ingredients are in place, grab your mixer (or spatula if you prefer) and begin incorporating everything together with gentle mixing. Be cautious not to overdo it here! Mix until everything just barely comes together—you should still see some flecks of flour in the bowl, which is perfectly normal. Overmixing can lead to tough cookies due to gluten development—what we want is soft and chewy perfection! If you want an extra tip for success: think of mixing as folding rather than beating; this gentle approach keeps your cookies tender and light.
Now comes one of my favorite parts—the Butterfinger bits! Add in 16 ounces of chopped Butterfinger candy bars, which will transform these already delicious cookies into something utterly extraordinary. If you can find Butterfinger Bits in the baking aisle, go for those as they save some chopping time! Otherwise, chop your regular Butterfingers into coarse pieces—the goal is to have those irresistible chunks spread throughout the dough without fully dissolving during baking. Mix them in cautiously until they’re just incorporated; again, we’re aiming for tenderness here.
Step 8: Chilling Out for Cookie Perfection
As tempting as it may be to dive straight into baking, let’s embrace patience by chilling our dough! Cover that glorious bowl with plastic wrap and pop it in the fridge for at least 15 minutes, but if you can spare an hour (or even overnight), do it! This chilling period does wonders for developing flavors and enhancing texture—think about how the cold dough helps prevent excessive spreading while baking, resulting in thicker cookies with perfectly chewy centers. It’s like giving your dough a mini spa day before it heads into the oven! Plus, resting allows those flavors to meld beautifully so each bite bursts with that addictive peanut-buttery goodness.
When you’re ready to bake—and believe me, waiting will be worth it—preheat your oven to 350°F (that’s about 175°C). Line two baking sheets with parchment paper or silicone mats; this simple step ensures even baking and makes cleanup a breeze.
Our Peanut Butter Butterfinger Cookies are now ready for enjoying or storing away if you’re feeling generous (but really who could resist?). Enjoy every mouthwatering bite knowing you’ve mastered yet another delightful recipe filled with love and joy!
Storage and Enjoyment Tips for Your Peanut Butter Butterfinger Cookies
With your kitchen filled with the intoxicating aroma of freshly baked cookies, it’s time to dive into enjoying these delightful Peanut Butter Butterfinger Cookies! Trust me, every bite is like a warm hug from a loved one, and they’re perfect for sharing (or keeping all to yourself—no judgment here!). But before you indulge too much, let’s talk about how to keep those cookies fresh and fabulous for as long as possible, ensuring each morsel is just as heavenly as the first.
Storing Leftover Peanut Butter Butterfinger Cookies
To preserve the magic of your Peanut Butter Butterfinger Cookies, store them in an airtight container at room temperature. This helps maintain their softness while keeping those crunchy butterfinger bits intact. I recommend using a glass or plastic container with a tight lid, which works wonders for maintaining that delightful texture. If you want to go the extra mile, placing a slice of bread in the container can help keep your cookies moist—you’ll be amazed at how well this simple trick works! These cookies will stay fresh for up to three days, but let’s be real: they probably won’t last that long! After storage, they still taste wonderfully rich and peanut buttery; however, if you prefer them warm and melty again, pop them in the microwave for about 10-15 seconds. It’s like bringing the bakery back to life right in your own home!
Freezing Cookie Dough for Later
If you’re anything like me and love having homemade treats on hand without the fuss of starting from scratch every time, freezing cookie dough is an absolute game-changer! To freeze your Peanut Butter Butterfinger Cookie dough properly, scoop out individual cookie portions (about 2 inches apart) onto a baking sheet lined with parchment paper. Pop it in the freezer until firm—this usually takes about an hour—then transfer those frozen dough balls into a ziplock bag. Make sure to label them with the date so you can keep track of freshness! They’ll stay good for up to three months in the freezer. When you’re ready to bake, just take them out straight from frozen (how convenient is that?), add an extra minute or two to the baking time, and flatten them slightly once they come out of the oven if needed. The joy of biting into freshly baked cookies any day? Pure bliss!
What a treat it is to have these delectable delights ready whenever you need them—now that’s what I call sweet convenience!
Peanut Butter Butterfinger Cookies

Indulge in these delightful Peanut Butter Butterfinger Cookies that combine rich flavors and textures. Bake some today for an unforgettable treat!
- Prep Time: 20 minutes
- Cook Time: 10 minutes
- Total Time: 30 minutes
- Yield: Approximately 24 servings 1x
- Category: Dessert
- Method: Baking
- Cuisine: American
Ingredients
- 3/4 cup unsalted butter, softened
- 1/2 cup granulated sugar
- 1/2 cup packed brown sugar
- 1 cup creamy peanut butter
- 1 large egg
- 1 and 1/2 teaspoons vanilla extract
- 1 and 1/2 cups all-purpose flour
- 1/2 teaspoon baking soda
- 1/2 teaspoon baking powder
- 1/4 teaspoon kosher salt
- 16 ounces Butterfinger bars, chopped
Instructions
- Preheat your oven to 350°F (175°C) and line two baking sheets with parchment paper.
- In a large bowl or stand mixer, cream together the softened butter, granulated sugar, and brown sugar until light and fluffy.
- Add in the creamy peanut butter, egg, and vanilla extract; mix until fully combined.
- Gradually incorporate the flour, baking soda, baking powder, and salt until the dough comes together.
- Gently fold in the chopped Butterfinger pieces until evenly distributed.
- Chill the dough in the refrigerator for at least 15 minutes.
- Scoop out about 2-inch balls of dough onto prepared baking sheets, spaced apart.
- Bake for about 10 minutes or until edges are set but centers remain puffy.
- Allow cookies to cool on sheets for about 5 minutes before transferring them to wire racks.
Nutrition
- Serving Size: 1 cookie (30g)
- Calories: 150
- Sugar: 8g
- Sodium: 70mg
- Fat: 7g
- Saturated Fat: 3g
- Unsaturated Fat: 4g
- Trans Fat: 0g
- Carbohydrates: 19g
- Fiber: <1g
- Protein: 3g
- Cholesterol: <5mg