Butterbeer Pancakes
There’s something utterly enchanting about breakfast, don’t you think? It’s the first meal of the day, a chance to awaken our senses and set a delightful tone for what lies ahead. And when it comes to making breakfast an experience rather than just a routine, these Butterbeer Pancakes are the answer. Imagine standing in your kitchen, the scent of warm butterscotch wafting through the air as you whip up a batch of pancakes that look as magical as they taste. They’re fluffy, sweet, and oh-so-satisfying, bringing a taste of the wizarding world right to your table. The first bite is like a cozy hug—warm and comforting—making every morning feel like an adventure waiting to unfold.
As I was developing this recipe, I found myself reminiscing about those precious moments spent with friends and family around the breakfast table, sharing stories and laughter over plates piled high with pancakes. These Butterbeer Pancakes are not just food; they’re a bridge to those cherished memories. Each ingredient plays its part in creating a symphony of flavors that dance on your palate—think sweet butterscotch chips melting into fluffy batter, while a drizzle of syrup adds an extra layer of decadence. This isn’t just another pancake recipe; it’s an invitation to create unforgettable moments with loved ones over a plate of something truly extraordinary.
Butterbeer Pancakes: A Magical Morning Delight
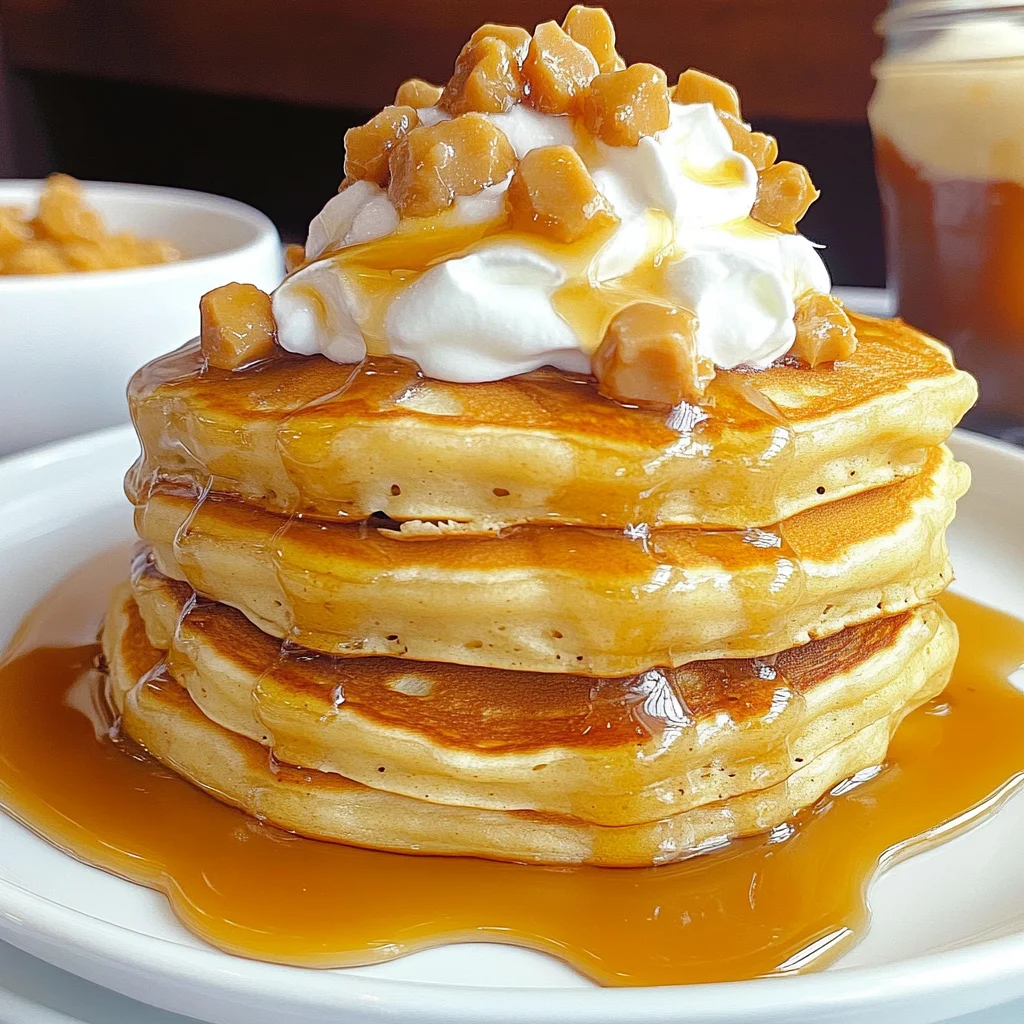
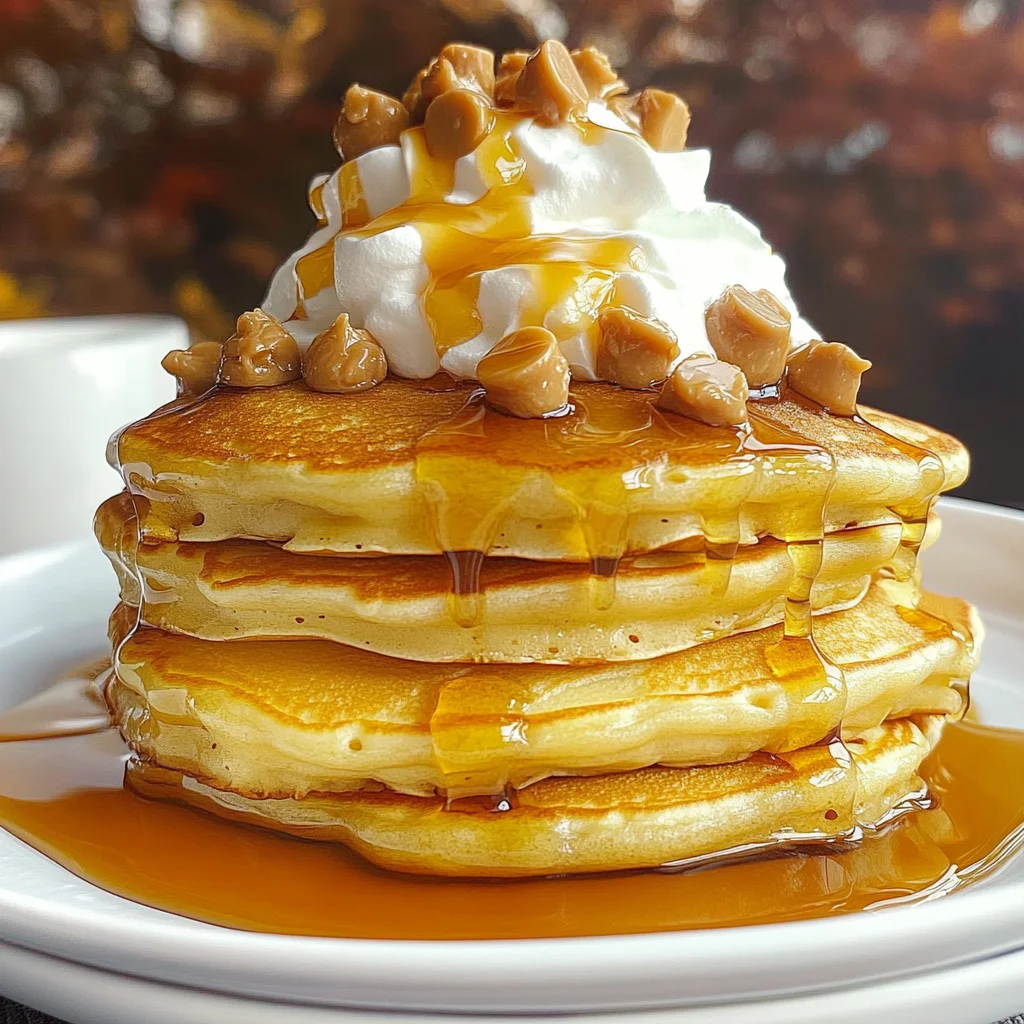
These Butterbeer Pancakes are more than just breakfast; they’re an experience that transports you to another world with each delicious bite. Inspired by the beloved wizarding world, these pancakes are infused with sweet butterscotch chips and syrup that will make your heart flutter and your taste buds sing. Whether you’re hosting a brunch or simply treating yourself on a lazy Sunday morning, these pancakes will surely elevate your breakfast game to new heights.
Ingredients:
Let’s embark on this culinary journey together! As we gather our ingredients, remember that each one has its own role in crafting these delightful pancakes. From providing structure to adding sweetness, understanding what each component brings will make us more intentional cooks.
- 2 eggs. Eggs are like the glue that holds our pancake masterpiece together. They provide moisture and richness while helping to create that light and fluffy texture we all crave in pancakes. When whisked, eggs incorporate air into our batter—a process known as aeration—which is crucial for achieving those lovely fluffy stacks. So don’t skip this step! Be sure to use fresh eggs for the best flavor and texture.
- 3 Tablespoons sugar. Sugar isn’t just there for sweetness; it also helps caramelize the pancakes during cooking, giving them that beautiful golden-brown exterior we all adore. Beyond flavor, sugar contributes to moisture retention and keeps our pancakes tender—who doesn’t want soft pancakes melting in their mouth? You can even experiment with brown sugar for a deeper flavor profile if you wish!
- 2 ¼ cups milk. Milk acts as the liquid gold in our batter—it hydrates the dry ingredients while providing creaminess and softness to each bite. Whole milk is perfect for achieving rich flavor; however, if you’re looking for lighter alternatives, almond or oat milk would work beautifully here too! Just remember that different kinds of milk can subtly change the final taste.
- 3/4 cup vegetable oil. This ingredient ensures our pancakes remain moist and tender without becoming too dense or heavy—a common pitfall of pancake recipes! Vegetable oil has a neutral flavor which lets the butterscotch shine through without any interference while also aiding in browning during cooking. If you want to get fancy, feel free to replace it with melted coconut oil for an exotic twist!
- 2 ½ cups flour. Flour is essential for structure; it forms gluten when mixed with wet ingredients which gives our pancakes their shape and chewiness. All-purpose flour works wonderfully here—it’s versatile and provides just the right texture we desire in fluffy pancakes! If you’re keen on experimenting with whole wheat flour or gluten-free alternatives like almond flour or gluten-free blends, just keep in mind that it may slightly alter texture.
- 3/4 teaspoon salt. A pinch of salt might seem trivial but trust me—it enhances every other flavor present in your batter! It balances out sweetness while amplifying those rich butterscotch notes we’re aiming for in these magical pancakes.
- 2 Tablespoons baking powder. This leavening agent is absolutely paramount! Baking powder creates tiny bubbles during cooking which contribute to our airy pancake texture; without it, we’d be left with flat discs instead of luscious stacks! Ensure it’s fresh (check expiration dates) so it works effectively.
- ½ cup butterscotch chips. The star ingredient! Butterscotch chips melt beautifully into your batter as they cook, creating pockets of gooey sweetness throughout each pancake. They add depth and richness unlike anything else—so don’t skimp on these little gems!
- ½ cup butterscotch syrup. Drizzling this onto your finished pancakes takes them from delicious to divine! It’s thick and sweet—perfectly complementing our buttery batter while enhancing those warm flavors even further. Feel free to adjust according to your preference; after all, who doesn’t love syrup?
- Whipped cream (optional). While not necessary for success here, whipped cream adds an indulgent touch that makes everything feel extra special! Lighten up those rich flavors by topping off your stack before diving in—you won’t regret it!
Equipment You’ll Need:
Cooking is always more enjoyable when you have the right tools at your fingertips! While ingredients are crucial players in creating delightful dishes like these Butterbeer Pancakes, having dependable equipment makes all the difference between chaos and creativity in the kitchen.
- Large mixing bowl – A spacious bowl is essential for comfortably mixing all our ingredients together without spilling over the sides—trust me; nobody enjoys cleaning up pancake batter splatters! Look for one that’s sturdy enough so it won’t slide around while whisking away.
- Whisk – A good whisk is indispensable when it comes time to combine wet ingredients effortlessly or beat those eggs into submission until they’re light and fluffy—the foundation of fantastic pancakes!
- Measuring cups & spoons – Precision matters when baking (or cooking!) because every little measurement contributes towards achieving that perfect balance of flavors we seek here today!
- Spatula or pancake flipper – A flexible spatula allows you easy access under each pancake without tearing them apart during flipping—no one wants broken stacks on their plate!
- Electric griddle or skillet – Both options work wonders; however, using an electric griddle often provides even heat distribution across multiple pancakes at once—which means less time waiting around before feasting!
Now that we have gathered all our ingredients along with trusty tools by our side let’s dive into preparing these scrumptious Butterbeer Pancakes together!
Step 1: Whisking Up Magic
Start by cracking those fresh eggs into your large mixing bowl—feel free to channel any wizardry within as you break them open! Use your whisk vigorously until they transform into a light lemon-yellow hue that’s frothy and full of air bubbles—the key here is aeration which contributes significantly toward fluffiness later on.
Next up: add sugar into this egg mixture because we’re building layers upon layers of flavor here! Continue whisking until everything looks light & fluffy again—this typically takes about 2–3 minutes max but trust me: it’s worth every second spent coaxing out maximum volume from these humble yet powerful eggs!
Step 2: Liquid Gold Awaits
With your egg-sugar concoction ready now comes time for adding milk alongside vegetable oil into this delightful mix—you’ll notice how creamy everything starts looking already! Whisk away until fully incorporated so no streaks remain visible; this ensures each bite remains consistently delicious throughout every pancake stack served hot off the griddle later on down this culinary journey we’ve embarked upon together!
Step 3: Dry Ingredients Unite
Now grab some flour along with salt & baking powder—we’re about ready for magic here folks! Gently sift these dry ingredients into wet ones while continuing stirring gently (we want some lumps left intact). The lumps may seem scary at first glance…but fear not—they’ll soften beautifully once heated up against sizzling surfaces later during cooking processes we’ll engage next!
Step 4: Sweet Surprises Inside
It’s time now—to infuse sweetness back into life again via adding both butterscotch chips AND syrup straightaway into this glorious batter mixture we’ve created thus far together…swirling them carefully until evenly distributed throughout whole lot—that way everyone gets equal share goodness packed within every single glorious flapjack made from scratch earlier above!
And there you have it—a tantalizing start towards crafting dreamy Butterbeer Pancakes filled with warmth & love destined leave lasting impressions long after breakfast ends…
Stay tuned as we continue exploring how best prepare these delightful treats next!
Step 5: Mixing in the Magic
Now that your batter is ready to be transformed into something extraordinary, it’s time to add those delightful butterscotch chips and syrup. This step isn’t just about tossing in ingredients; it’s about creating a symphony of flavors that will dance on your taste buds. Carefully fold in ½ cup of butterscotch chips and ½ cup of butterscotch syrup, allowing the sweet, rich notes of butterscotch to become an integral part of your pancake batter. The syrup not only enhances the flavor but also adds a lovely sweetness that harmonizes beautifully with the fluffy pancakes. As you swirl these ingredients through your batter, take a moment to appreciate how they meld together, creating a luscious mixture that promises comfort and joy at breakfast time.
Don’t rush this step! Letting the batter rest for a few minutes is absolutely paramount; it allows the flour to hydrate fully, which results in softer, fluffier pancakes. Think of it as giving the pancake batter time to relax and come together—just like we all need a little unwinding after a busy day. Aim for about 5-10 minutes for this resting period; during this time, you can preheat your skillet or electric griddle so that everything is perfectly timed when you’re ready to cook!
Step 6: Heating Your Canvas
Next up is heating your skillet or electric griddle. Preheat it to medium heat, which is crucial for achieving that perfect golden-brown crust on each pancake. You want enough heat so that the pancakes cook evenly without burning—the balance here is key! To test if your skillet is ready, drop a small amount of water onto the surface; if it dances and evaporates almost immediately, you’re right where you need to be!
Once heated, add a small pat of butter or a drizzle of oil to ensure your pancakes won’t stick. The sizzle you hear as you pour in the batter should be music to your ears—it means you’re well on your way to pancake perfection! Using either a ladle or a measuring cup (a half-cup scoop works beautifully), pour out an even amount of batter onto the griddle; I usually aim for about ¼ cup per pancake. This helps ensure they cook evenly and fit nicely on your plate when it’s time to serve. Keep an eye on them as they cook; you’ll notice small bubbles forming around the edges—a sign they’re ready for flipping!
Step 7: Flipping with Finesse
Ah, the moment you’ve been waiting for—flipping those beautiful pancakes! When you see those tiny bubbles start appearing and bursting at the edges (usually around 2-3 minutes), it’s time to flip them over with confidence. Use a thin spatula or pancake flipper, sliding it gently underneath one side of the pancake and lifting it with care. This technique—known as flipping—is essential because it allows both sides of each pancake to develop that gorgeously golden hue while ensuring they remain fluffy inside.
As you flip, trust yourself! If you’ve followed along diligently so far, you’re doing great! The second side will typically take less time than the first—watch closely for another minute or two until it’s golden brown and slightly puffed up. You want them cooked through but not overdone; too much heat can lead to dry pancakes, which we absolutely don’t want! Once flipped and cooked properly, remove them from the griddle with love and place them on a warm plate while you continue cooking more batches.
Step 8: Building Your Butterbeer Pancake Tower
Now comes my favorite part—stacking those beautiful Butterbeer Pancakes high! As each batch finishes cooking, layer them up on a serving plate like a glorious tower of fluffy goodness. Don’t be shy about stacking them high; there’s something utterly intoxicating about seeing those warm pancakes piled one atop another. It feels festive—and believe me when I say that everyone deserves such indulgence at breakfast!
As an optional finishing touch (but I highly recommend it!), top off your stack with some whipped cream. Just imagine how that smooth texture complements each bite of soft pancake beneath—it’s like magic unfolding on your plate! For an extra drizzle of sweetness, add more butterscotch syrup over the top. The rich flavor combined with light whipped cream creates what I can only describe as breakfast bliss—a truly extraordinary experience everyone will rave about!
Serve immediately while they’re still warm—there’s nothing quite like enjoying these delectable stacks fresh off the griddle. Trust me, once those incredible aromas fill your kitchen and waft through your home, no one will be able to resist diving right in!
Conclusion:
As we wrap up our journey through this enchanting recipe for Butterbeer Pancakes, I can’t help but feel a wave of joy wash over me! These pancakes are more than just a breakfast dish; they embody warmth and nostalgia with every bite. The rich notes of butterscotch dancing alongside fluffy batter create an experience that transcends ordinary mornings. I hope this recipe has inspired you as much as it has captivated my heart—trust me when I say that every time you whip up this dish, you’re not just cooking; you’re creating lasting memories.
Why is this recipe a must-try? Well, beyond their heavenly taste, these pancakes offer sheer joy in their preparation—the kind that invites laughter in the kitchen and sparkles of magic at the breakfast table. They shine brightly on special occasions like birthday brunches or cozy family gatherings where everyone gathers around to share stories over plates piled high with golden goodness. Picture pulling your stack from the skillet—the warm steam rising as they beckon everyone closer with their sweet aroma—it’s truly a celebration on a plate!
For pairing suggestions that would elevate your pancake experience even further, imagine savoring one with fresh berries bursting with flavor or drizzling some maple syrup over the top for an extra touch of sweetness that dances harmoniously with butterscotch notes. For an afternoon pick-me-up, consider serving these pancakes alongside a steaming cup of spiced chai tea or maybe even a frothy cappuccino—what bliss! And if you want to indulge further, why not pile on some whipped cream topped with toasted nuts or dark chocolate shavings? The possibilities are endless!
Feeling adventurous? This recipe is wonderfully adaptable! You could swap out butterscotch chips for chocolate chips or even add crushed nuts for texture—each tweak opens up new avenues of flavor exploration! If you’re longing for something seasonal, try incorporating pumpkin puree during autumn or some zesty lemon zest for spring flair—it’s all about making this recipe your own! So grab your mixing bowl and whisk away; I can’t wait for you to share your experiences and variations with me because every creation tells its own story filled with love and magic.
Butterbeer Pancakes
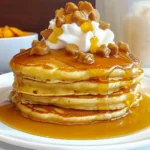
Butterbeer Pancakes bring a sprinkle of magic to your breakfast table, creating a delightful experience with every fluffy bite. Inspired by the whimsical world of fantasy, these pancakes are infused with sweet butterscotch chips that melt into the batter, creating pockets of gooey goodness. Drizzled with butterscotch syrup and topped with optional whipped cream, each stack feels like a cozy hug on a plate. Perfect for family gatherings or lazy Sunday mornings, these pancakes not only taste indulgent but also create lasting memories around the table.
- Prep Time: 15 minutes
- Cook Time: 20 minutes
- Total Time: 35 minutes
- Yield: About 10 pancakes 1x
- Category: Breakfast
- Method: Griddling
- Cuisine: American
Ingredients
- 2 eggs
- 3 tablespoons sugar
- 2 ¼ cups milk (dairy or plant-based)
- ¾ cup vegetable oil (or melted coconut oil)
- 2 ½ cups all-purpose flour (or whole wheat/gluten-free alternatives)
- ¾ teaspoon salt
- 2 tablespoons baking powder
- ½ cup butterscotch chips
- ½ cup butterscotch syrup
- Whipped cream (optional)
Instructions
- In a large mixing bowl, whisk together 2 eggs and 3 tablespoons of sugar until light and fluffy.
- Add in 2 ¼ cups of milk and ¾ cup of vegetable oil; mix until fully combined.
- Gently sift in 2 ½ cups of flour, ¾ teaspoon of salt, and 2 tablespoons of baking powder; stir until just combined (lumps are okay).
- Fold in the butterscotch chips and syrup gently.
- Let the batter rest for about 5-10 minutes.
- Preheat your skillet or electric griddle to medium heat.
- Pour about ¼ cup of batter onto the skillet for each pancake; cook until bubbles form on the surface before flipping.
- Cook until golden brown on both sides; serve warm with additional syrup and whipped cream if desired.
Nutrition
- Serving Size: 1 pancake
- Calories: 160
- Sugar: 6g
- Sodium: 180mg
- Fat: 6g
- Saturated Fat: 1g
- Unsaturated Fat: 5g
- Trans Fat: 0g
- Carbohydrates: 24g
- Fiber: <1g
- Protein: 3g
- Cholesterol: 35mg