Mango Chia Pudding
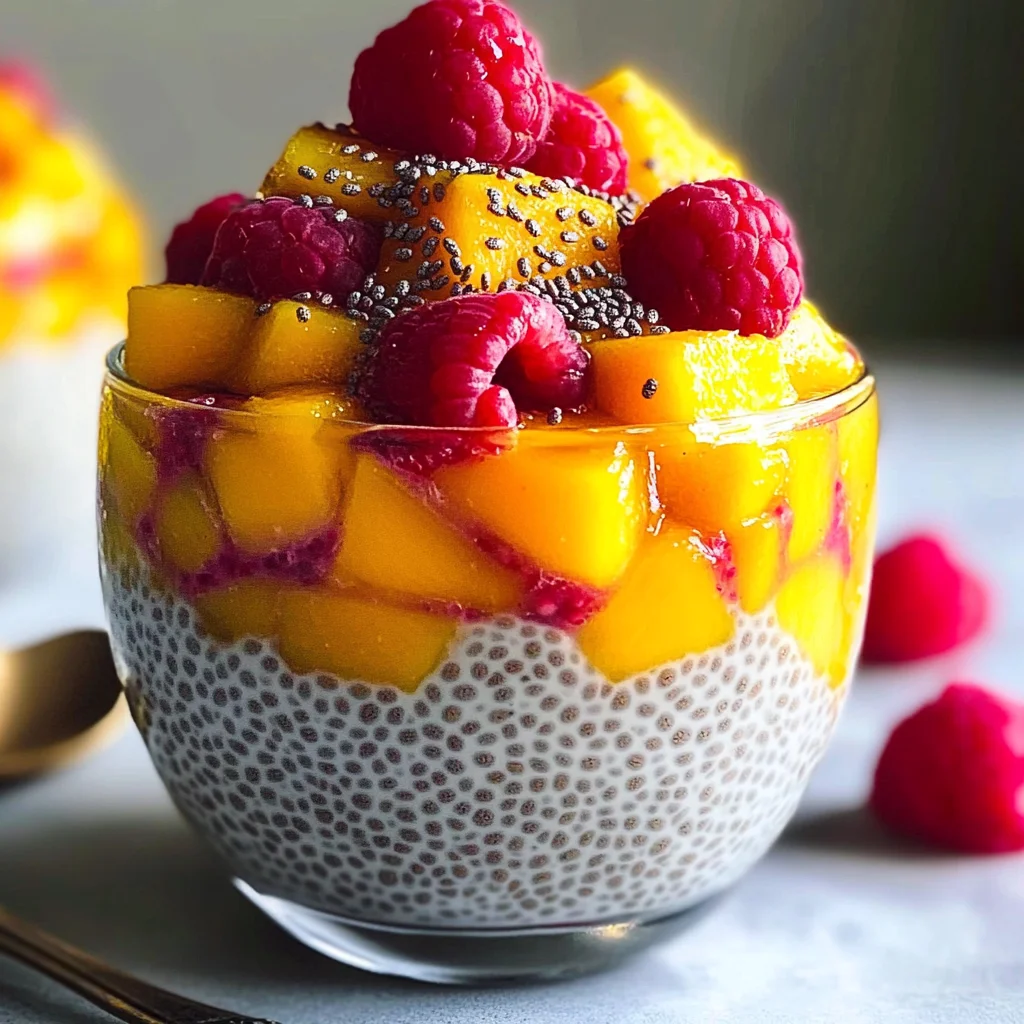
There’s something utterly magical about the act of creating a dish that feels like a warm hug. You know, that feeling when you stir together simple ingredients and transform them into something that not only nourishes but also delights? This Mango Chia Pudding is just that—a celebration of freshness, health, and sheer joy wrapped up in a beautiful glass. Picture this: velvety chia pudding layered with luscious mango coulis and bright, tangy raspberries. It’s more than just food; it’s an experience that dances on your palate and brings a smile to your face.
Now, as I share this cherished recipe with you, let’s talk about why this Mango Chia Pudding is perfect for any time of day. Whether you’re looking for a quick breakfast that will power you through your morning or a light dessert to enjoy after dinner, this pudding fits the bill beautifully. It’s quick to prepare—ready in mere minutes—and it gives you the chance to indulge in the vibrant flavors of fresh fruit without compromising on health. Plus, the combination of creamy soy milk with the sweet, tropical notes of mango creates a symphony of flavors that is simply irresistible!
Mango Chia Pudding: A Tropical Escape in Every Spoonful
Let me introduce you to my version of Mango Chia Pudding—a dish that effortlessly transports you to sun-soaked shores with every bite. This recipe is one I hold dear to my heart because it’s not just about satisfying hunger; it’s about embracing the beauty of wholesome ingredients and celebrating nature’s bounty. With its creamy texture and delightful layers, it’s sure to become a beloved staple in your kitchen as well.
Ingredients:
As we embark on this culinary journey together, let’s take a moment to appreciate each ingredient’s role in crafting our delightful Mango Chia Pudding. Each one contributes its own unique flavor and texture, coming together in perfect harmony.
- 1 1/2 cups Soy Milk (or Almond/Coconut Milk). The base of our pudding, soy milk—or any plant-based alternative like almond or coconut milk—is vital for achieving that creamy consistency we all crave. Soy milk is particularly rich in protein, which helps give the pudding its satisfying texture while remaining dairy-free. When selecting your milk, look for unsweetened varieties to control sugar levels—trust me; it makes all the difference!
- 1 1/2 tablespoons Maple Syrup (or Agave Nectar). Ah, sweetener! This maple syrup adds a touch of natural sweetness that perfectly balances the creaminess of the soy milk and the tartness of the fruit layers. If you prefer agave nectar, go ahead—both options are lovely here! Just remember that adjusting sweetness to your taste is key; you want just enough to enhance those fruity notes without overpowering them.
- 1 Pinch Sea Salt. This may seem like a small detail, but trust me when I say it’s non-negotiable! A pinch of sea salt elevates all the flavors in your pudding by enhancing their natural sweetness and complexity. It’s like adding a secret ingredient that makes everything sing!
- 1 teaspoon Pure Vanilla Extract. Vanilla extract brings an element of warmth and depth to our chia pudding—a little whisper from nature’s pantry that rounds out the flavors beautifully. Opt for pure vanilla extract over imitation whenever possible; it truly enhances your dish with its rich aroma and flavor profile.
- 6 tablespoons Chia Seeds. These tiny seeds are our star players! They absorb liquid like sponges while providing essential omega-3 fatty acids and fiber—talk about nutritious! As they soak up the soy milk mixture, they expand into delightful little gelatinous beads that create that signature pudding texture we love so much.
- 1 large Mango. The pièce de résistance! Choosing a ripe mango is crucial for achieving a smooth and flavorful coulis; it should feel slightly soft when gently pressed but not mushy. The natural sweetness and tropical vibrancy will elevate this dish from delightful to extraordinary!
- 1/2 cup Raspberries. These little gems add both color and brightness to our layers—offering a lovely contrast against the creamy pudding and sweet mango coulis. Fresh raspberries burst with tartness that’s incredibly refreshing; if they’re out of season or unavailable, frozen raspberries can work beautifully too!
- 2 teaspoons Maple Syrup (for raspberry mixture). A dash more syrup here ensures our crushed raspberries have just enough sweetness without losing their charming tanginess.
Equipment You’ll Need:
Now that we’ve gathered our ingredients, let’s talk tools! Having the right equipment can truly elevate your cooking experience from good to great—it makes everything easier and more enjoyable as you create something wonderful.
- Measuring Jug or Bowl – Precision is key when baking or cooking! A clear measuring jug or bowl allows you to accurately measure liquids while keeping things neat as you mix everything together.
- Whisk or Spoon – For stirring up our chia seeds into their creamy base mixture effectively! A whisk can incorporate air into your mixture if needed while breaking up any clumps—an essential tool for ensuring even distribution.
- Blender or Food Processor – You’ll need this for puréeing your ripe mango into an indulgent coulis. A blender will ensure silky smooth results while maintaining all those vibrant flavors intact!
- Fork – Perfect for lightly crushing those raspberries into just-the-right chunky coulis texture without turning them into puree; we want some delightful bits left intact for added interest!
Step 1: Combine Your Ingredients
To kick off this wonderful process, grab your measuring jug or bowl and combine 1 ½ cups of soy milk (or whatever plant-based alternative you’ve chosen), 1 ½ tablespoons maple syrup (or agave), a pinch of sea salt, one teaspoon pure vanilla extract, and finally six tablespoons chia seeds. Now comes an important moment: stir thoroughly using either a whisk or spoon until everything melds beautifully together! This step not only blends flavors but also gives those chia seeds their initial hydration before resting time begins—this is absolutely crucial for achieving that lovely pudding-like consistency later on! Once mixed well, cover it with plastic wrap (or transfer it into an airtight container) before placing it in the fridge for at least four hours—or ideally overnight if you can resist digging in straight away!
Step 2: Prepare Your Mango Coulis
While we wait patiently for our chia pudding magic to happen in the fridge, let’s turn our attention towards preparing an equally delightful mango coulis! Once those hours have passed (don’t worry; you’ll be rewarded!), retrieve your ripe mango from wherever it has been sitting patiently—it should be nicely soft but firm enough not to fall apart completely when handled. Carefully slice open its juicy flesh around the pit before scooping out all golden goodness inside using either a spoon or knife—what you’re aiming for here is luscious purée perfection! Place this beautiful mango flesh into your blender or food processor before blending until smooth like silk—you’ll be amazed at how quickly this transforms into an utterly intoxicating sauce ready to layer onto our pudding later on!
Step 3: Create Your Raspberry Coulis
Next up on our delicious agenda is whipping up another vibrant layer—the raspberry coulis! In a small bowl (a mixing bowl works fine), toss together half a cup of fresh raspberries along with two teaspoons maple syrup—this combination will coax out their natural sweetness while adding depth without completely masking their tart essence! With either clean hands or using a fork (my personal favorite method), gently crush these beauties until they reach a chunky consistency—think attractive little bits suspended amid juicy goodness rather than completely smooth puréeing—the texture adds so much personality!
Step 4: Layer It All Together
Now comes perhaps my favorite part—the assembly where we showcase all these beautiful components you’ve created so far! Grab four glasses (or bowls if preferred)—the kind that’ll allow everyone to admire those stunning layers—and start by spooning generous portions of your chia seed pudding at the bottom first; remember how thick it’ll become once set? So don’t skimp out on filling each vessel nicely! Follow this by drizzling over some luscious mango coulis next—the bright yellow-orange hue serves as an eye-catching contrast against darker chia seeds below before topping off with dollops of raspberry coulis right atop everything else already piled high within each glass container… oh my goodness—it looks incredible already!
And there we have it—a stunning presentation filled with color, flavor profiles dancing harmoniously across every layer waiting eagerly upon consumption—all crafted through patience & love shared amongst friends & family alike who’ll undoubtedly appreciate every spoonful taken from these glorious servings prepared specifically just for them today! Trust me when I say each bite will leave everyone longing for seconds…and maybe even thirds if you’re feeling generous enough…
Enjoy every moment spent savoring what truly embodies comfort wrapped up within deliciousness itself across multiple occasions too whether breakfast time arrives early morning sunshine shining brightly down upon us…or simply indulging late-night snacking curled up cozily under blankets enjoying peaceful solitude knowing goodness awaits inside those lovely glasses prepared ahead earlier today!!
Crafting Your Flavorful Layers of Mango Chia Pudding
Step 5: Chill Like You Mean It
Now that you’ve combined your soy milk, maple syrup, sea salt, vanilla extract, and chia seeds, it’s time for the magic to unfold in the refrigerator. Pour this mixture into a container with a tight-fitting lid or cover it with cling film, and let it rest in the fridge for at least 4 hours, but ideally overnight. Why chill? This crucial step allows the chia seeds to absorb the liquid and swell, transforming from tiny specks into delightful little gelatinous orbs that create that wonderful pudding texture we crave. You’ll want to keep an eye on it—don’t be surprised if you notice that the mixture thickens unevenly; it’s perfectly normal! To ensure even consistency, give it a gentle stir halfway through chilling. I promise you, taking that extra moment will pay off when you dig into your creamy pudding!
As you wait—perhaps enjoying a cup of herbal tea or catching up on your favorite show—let yourself savor the anticipation. The longer you allow the chia seeds to soak, the more they’ll expand and create that rich texture. Just imagine how satisfying it will be when you finally scoop into that velvety pudding! Trust me, patience is indeed a virtue in this delicious endeavor.
Step 6: Puréeing Perfection
Once your pudding has transformed into its luscious form after chilling, it’s time to prepare your mango coulis. For this part of the recipe, grab your ripe mango—look for one that’s just slightly soft to the touch; that’s when they are sweetest and juiciest! Carefully slice off one side of the mango cheek and scoop out the flesh with a spoon. Then, pop that beautiful golden flesh into your blender or food processor. Blend until completely smooth; this process is known as puréeing and will create a vibrant sauce that elevates our dish to something truly extraordinary.
Why go through all this trouble? A well-made mango coulis not only adds stunning color but also brings an exquisite sweetness and tropical flavor that pairs beautifully with our creamy chia pudding. Plus, blending releases all those delightful juices and flavors trapped within the fruit, making each bite utterly intoxicating. Once you’ve achieved a silky-smooth purée, take a moment to taste—it should be bright and refreshing! If needed, you can adjust sweetness with additional maple syrup according to your preference.
Step 7: The Raspberry Crush
Now let’s bring in some tangy goodness with our raspberry coulis! In a separate bowl, combine your fresh raspberries with two teaspoons of maple syrup. With the back of a fork or even just your fingers (which I find delightfully hands-on), gently crush them together until they form a chunky mixture. You don’t want this turning into a smooth puree—the charm lies in those little bursts of raspberry throughout! The contrasting sweet-tart notes from the raspberries will balance beautifully with both the creamy mango coulis and chia pudding layers.
This step is not just about creating another layer; it’s about weaving together flavors that dance on your palate. Raspberries add brightness and complexity to our dessert; their natural acidity cuts through any richness while providing another dimension entirely. Plus, visually speaking, those jewel-like berries make everything look so inviting! Remember to taste-test along the way; adjusting sweetness here can elevate this dish even further based on how tart or sweet your berries are.
Step 8: Layering Your Masterpiece
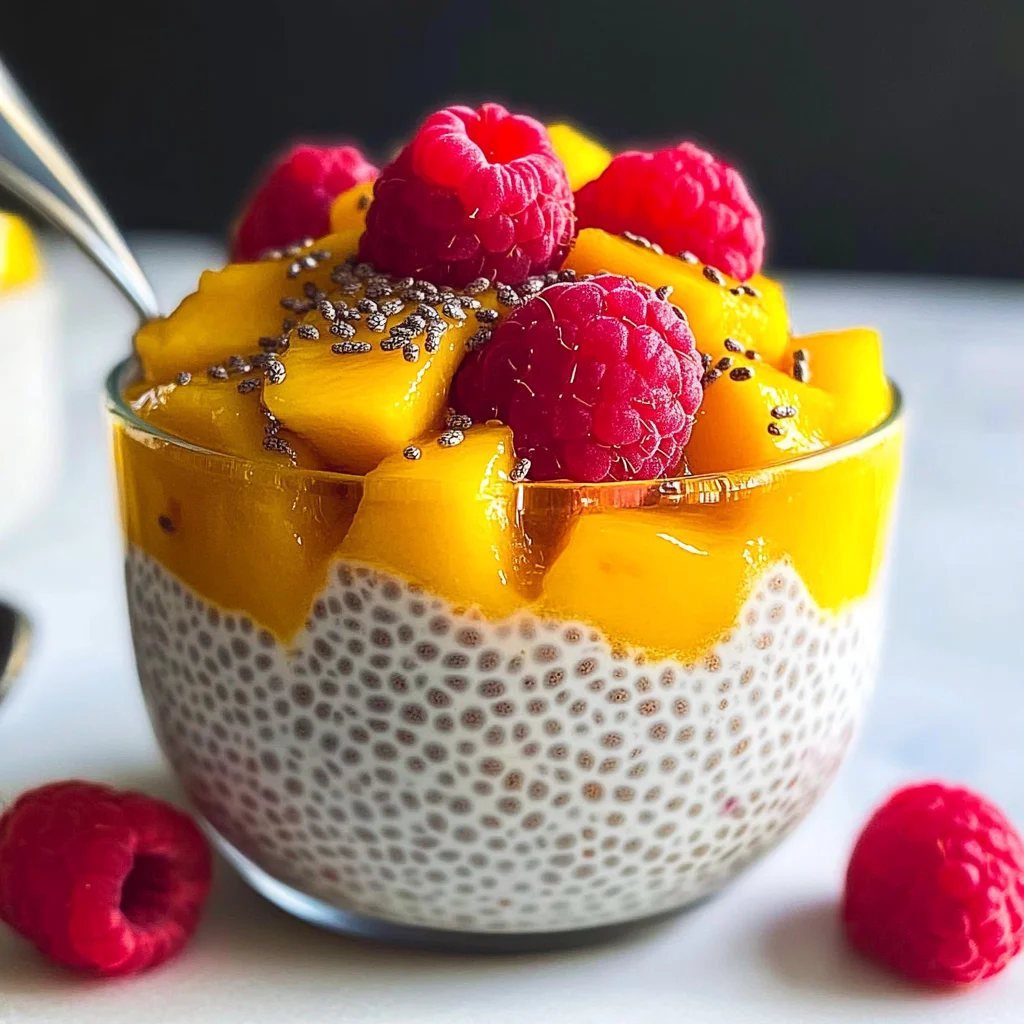
With all components ready—your luscious chia pudding, vibrant mango coulis, and tangy raspberry mixture—it’s time for assembly! Grab your favorite glasses or bowls (the presentation is part of the joy here) and begin layering these magical elements. Start by spooning in a generous layer of chia pudding at the bottom; let it sit like a comforting foundation for what’s to come. Next comes a lovely drizzle of mango coulis over that creamy base—imagine pouring liquid gold over clouds!
The technique here is key: Take care not to disturb the chia pudding too much as you pour; we want distinct layers showcasing each component’s beauty rather than blending them prematurely. After adding your mango layer, follow up with dollops of that heavenly raspberry mixture on top. You can finish off each glass with an extra sprinkle of fresh raspberries or even some mint leaves for color if you’re feeling fancy! This layering not only makes each spoonful a delightful surprise but also creates visual appeal—a feast for both eyes and taste buds!
As you assemble these layers of flavor with love and attention, take pride in knowing how every detail contributes to something profoundly satisfying. Each bite becomes an experience—a symphony of flavors harmonizing together beautifully!
Final Touches: Serving Your Mango Chia Pudding
Step 9: Chill Again (Optional) & Serve!
If you’ve got time before serving (maybe you’re hosting brunch!), consider returning these layered beauties back into the fridge for an additional hour or two after assembling them. This chilling step allows all those flavors to meld together beautifully while ensuring everything remains refreshingly cool when served—a perfect treat during warmer months or any day when you crave something light yet indulgent.
When you’re ready to serve these stunning desserts—be prepared for compliments galore! As you present them at your table or enjoy them solo while basking in their glorious colors and textures—you’ll feel warmth spreading through as friends take their first bites full of wonderment. Encourage everyone to dig deep into their glasses so they can experience every element you’ve lovingly crafted together.
I guarantee once you’ve tasted this Mango Chia Pudding—the velvety creaminess combined with fruity explosions—it’ll become one of those recipes you’ll cherish forever! So go ahead—embrace those moments spent creating something special because this isn’t just food; it’s love served in layers!
Storage and Enjoyment Tips for Your Mango Chia Pudding
Now that your Mango Chia Pudding has been lovingly prepared and layered into beautiful glasses, it’s time to dive into the delightful journey of enjoying it! But before you indulge, let’s talk about how to store any leftovers so that you can savor this sweet treat for days to come. I promise you, knowing how to preserve these lovely layers will keep them tasting fresh and vibrant, allowing you to enjoy a burst of tropical goodness whenever the craving strikes.
Storing Leftover Mango Chia Pudding
To keep your Mango Chia Pudding at its best, I recommend using airtight containers—glass containers work beautifully here as they not only preserve freshness but also showcase the stunning layers of pudding and fruit. Pop these containers in your refrigerator, where they’ll stay delicious for up to five days. However, you might want to consider a little trick: place a slice of bread inside the container before sealing it. This simple hack helps absorb any excess moisture and keeps your pudding from getting watery or losing its delightful texture. Trust me on this; it’s a game changer! After storage, the flavors meld together beautifully, creating an even more profound taste experience. When you’re ready to enjoy again, simply give it a gentle stir; there’s no need to reheat this treat since it’s perfect served cold.
Freezing Components for Later
If you find yourself with an abundance of this creamy delight—or if you’re just planning ahead—you can easily freeze some components without sacrificing flavor or texture. To freeze your Mango Chia Pudding effectively, pour individual servings into freezer-safe containers. Make sure they’re labeled with the date so you’ll remember when you made them! They can be frozen for up to three months. When you’re ready for a quick breakfast or snack, just transfer a container from the freezer to the fridge for several hours or overnight to thaw gently. This option is not only convenient but also allows you to have healthy snacks on hand whenever life gets busy. Imagine pulling out a frozen treat on a hectic morning—it’s like having sunshine in your fridge!
Mango Chia Pudding
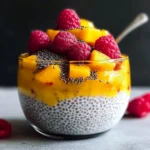
Mango Chia Pudding is a delightful, creamy dessert that captures the essence of tropical flavors in every spoonful. This easy-to-make recipe combines nutrient-packed chia seeds with rich soy milk, sweet mango coulis, and a hint of tart raspberries for a refreshing treat that’s perfect for breakfast or dessert. Not only is it quick to prepare, but it also celebrates the beauty of wholesome ingredients. Enjoy the vibrant layers and luscious textures as you indulge in a guilt-free dessert that nourishes both body and soul!
- Prep Time: 10 minutes
- Cook Time: None
- Total Time: 0 hours
- Yield: Serves 4
- Category: Dessert
- Method: Chilling
- Cuisine: Tropical
Ingredients
- 1 1/2 cups soy milk (or almond/coconut milk)
- 1 1/2 tablespoons maple syrup (or agave nectar)
- 1 pinch sea salt
- 1 teaspoon pure vanilla extract
- 6 tablespoons chia seeds
- 1 large ripe mango
- 1/2 cup fresh raspberries
- 2 teaspoons maple syrup (for raspberry mixture)
Instructions
- In a mixing bowl, combine soy milk, maple syrup, sea salt, vanilla extract, and chia seeds. Stir well until fully blended.
- Cover and refrigerate for at least 4 hours or overnight to thicken.
- For the mango coulis, blend the ripe mango until smooth.
- In another bowl, mix raspberries with maple syrup and crush gently to create a chunky mixture.
- Layer the chilled chia pudding with mango coulis and raspberry mixture in serving glasses.
Nutrition
- Serving Size: 1 cup (250g)
- Calories: 290
- Sugar: 25g
- Sodium: 150mg
- Fat: 12g
- Saturated Fat: 1g
- Unsaturated Fat: 11g
- Trans Fat: 0g
- Carbohydrates: 40g
- Fiber: 10g
- Protein: 8g
- Cholesterol: 0mg