Homemade Subway Raspberry Cookies
There’s something truly magical about baking cookies at home, isn’t there? The aroma of sugar and butter wafting through the house, the anticipation building as you wait for that perfect golden brown hue to emerge from the oven—it’s an experience that transcends mere cooking. Homemade Subway Raspberry Cookies are not just a treat; they are a celebration of flavors and textures that come together in a harmonious dance, creating a symphony of sweetness that warms the heart and soul. Each bite is a delightful reminder of childhood memories and cozy afternoons spent in the kitchen with loved ones. I promise you, these cookies will envelop you in their comforting embrace long before they even reach your taste buds.
As I share this recipe with you, I invite you to take a moment to imagine yourself standing in your own kitchen, mixing together vibrant ingredients that spark joy and creativity. These homemade delights capture the essence of nostalgia while adding your own personal touch. With soft, chewy centers studded with bursts of tart raspberry and creamy white chocolate chunks, each cookie is like a little treasure waiting to be discovered. So grab your apron, preheat that oven, and let’s embark on this delicious journey together to craft our very own batch of Homemade Subway Raspberry Cookies!
Homemade Subway Raspberry Cookies: A Sweet Escape
Are you ready to indulge in some homemade magic? These cookies are not just about satisfying a sweet tooth; they’re about creating a warm moment for yourself or sharing love with friends and family. The combination of freeze-dried raspberries and luscious white chocolate is simply divine, striking that perfect balance between sweet and tangy. Trust me when I say this—you’ll want to have these cookies on hand for any occasion!
Ingredients:
Now that we’ve set the stage for our cookie adventure, let’s dive into the ingredients! Each one plays a vital role in crafting our Homemade Subway Raspberry Cookies into something truly special.
- 2 cups plain flour. This is what gives our cookies structure and stability. Using all-purpose flour allows for just the right amount of chewiness without making them too dense or heavy. When measuring flour, be sure to spoon it into your measuring cup and level it off—scooping directly can lead to packing it down too much, resulting in dry cookies.
- 2 teaspoons corn flour. This might sound unusual at first, but corn flour adds an incredible tenderness to our cookies. It helps create a softer texture that’s reminiscent of those famous bakery treats we all know and love—those tender edges that melt in your mouth! If you can’t find corn flour, feel free to replace it with more all-purpose flour.
- 1/2 teaspoon salt. Salt may seem like a small addition, but it’s absolutely paramount in enhancing flavors! It balances out the sweetness of the sugars and elevates every other ingredient’s profile. Don’t skip this step; it’s essential for achieving that well-rounded taste.
- 1 teaspoon baking soda. This magical leavening agent creates those lovely air pockets within our cookies as they bake, making them soft and chewy rather than flat and hard. Baking soda needs an acid to activate it (like brown sugar or cream cheese), which is why it fits perfectly into our recipe!
- 3/4 cup unsalted butter, softened. The butter is crucial for creaming properly—we want a light texture! Softened butter incorporates air into the dough during mixing, helping us achieve those beautifully fluffy cookies we desire. For best results, let your butter sit at room temperature until it’s soft but not melted.
- 2/3 cup granulated sugar. This sugar provides sweetness and contributes to the cookie’s crisp exterior while keeping the inside delightfully chewy. Granulated sugar also enhances browning during baking—so don’t shy away from using it!
- 1/2 cup brown sugar. The addition of brown sugar introduces moisture thanks to its molasses content; this will keep our cookies soft for days! Plus, it offers a deeper flavor profile than granulated sugar alone—a beautiful complexity that pairs perfectly with our raspberries.
- 2 teaspoons vanilla essence. Vanilla is like liquid gold in baking—it rounds out all flavors beautifully! Opting for pure vanilla extract over imitation makes all the difference here; you’ll appreciate its warm depth as it mingles with our sweet ingredients.
- 1 large egg & 1 egg yolk. The egg binds everything together while adding richness; meanwhile, an extra yolk ensures we get an even chewier texture! Make sure your eggs are at room temperature—they mix better into the batter than cold eggs would.
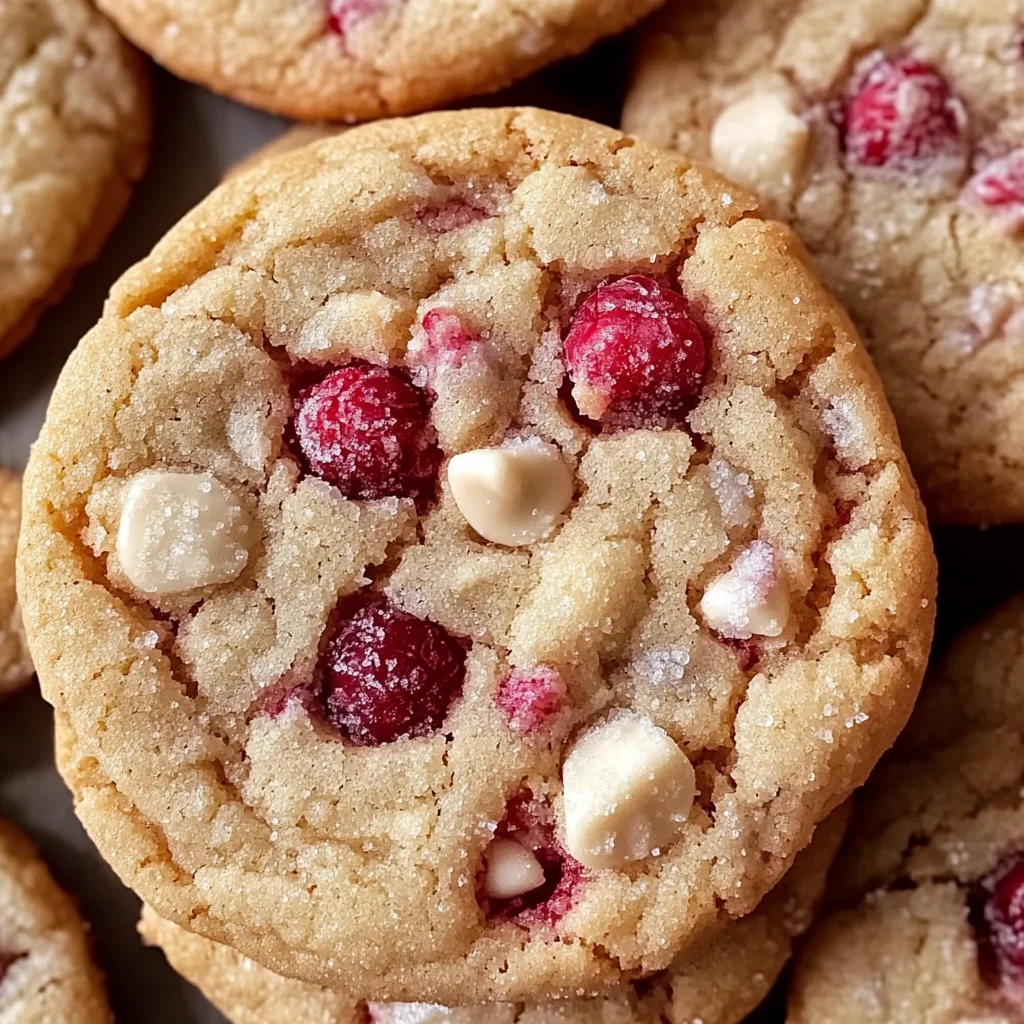
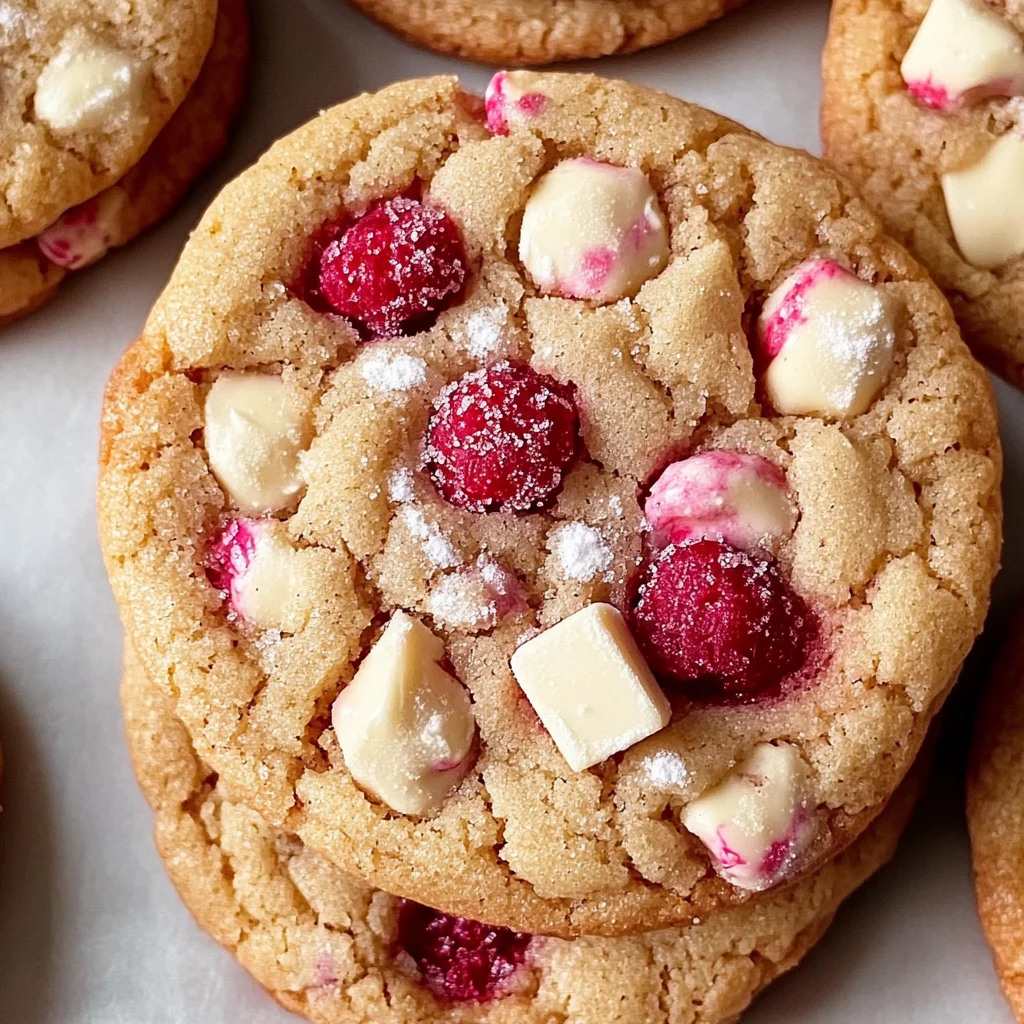
- 3/4 cup white chocolate chunks. Oh my goodness—this is where indulgence kicks in! White chocolate has such a creamy flavor that complements our raspberries wonderfully; you’ll be left craving more after each bite! If you’re feeling adventurous, feel free to use dark or milk chocolate instead.
- 1/2 cup freeze-dried raspberries. These little beauties pack an intense burst of flavor without extra moisture affecting our cookie dough’s balance! They lend both tartness and color—a visual delight as well as a flavorful one!
- 4 ounces softened cream cheese. Cream cheese adds richness while also contributing to moisture—bringing everything together with its smooth texture! Just make sure it’s softened so you can blend it seamlessly with your other ingredients.
- 1/4 cup icing sugar. This light dusting makes for an appealing finish while offering just enough sweetness without overwhelming flavors—think of it like fairy dust on top of your delicious creations!
- 1/2 teaspoon vanilla essence (for cream cheese). Just like before, this will enhance flavors so beautifully—you’ll want every bite bursting with delightful notes!
Equipment You’ll Need:
Before we jump into mixing up our cookie dough masterpiece, let’s talk about some essential tools that will make your baking experience smoother and more enjoyable! While they aren’t ingredients, having these trusty partners by your side can really elevate the entire process.
- **Mixing bowl – A sturdy mixing bowl is essential for combining all those luscious ingredients smoothly without any spills or messes around your kitchen counter (we’re not trying to create chaos here!). A glass or stainless-steel bowl works great because they’re non-reactive and easy to clean afterward—bonus points if you have one large enough so everything fits comfortably!
- **Electric mixer – Whether handheld or stand-alone mixers work wonders here; they save time when creaming butter and sugars together compared to doing it by hand (and trust me—you’ll appreciate saving those arm muscles!). An electric mixer efficiently incorporates air into mixtures quickly—leading us towards airy textures we crave.
- **Measuring cups & spoons – Precision is key when baking! Accurate measurements ensure proper ratios between wet/dry elements which results directly impacts how cookies turn out—no one wants dry bricks instead of chewy bites after all! Invest in quality measuring tools for best results every time.
- **Spatula – A flexible spatula allows us easily scrape down sides during mixing sessions ensuring nothing goes unwasted—we want every last drop incorporated into those mouthwatering morsels after all! Plus it’ll help fold delicate ingredients like chocolate chunks gently so they don’t break apart unnecessarily during prep stages either!
Now that we’ve gathered all our tools along with ingredients prepared ahead-of-time let’s begin working towards perfection by creating these scrumptious Homemade Subway Raspberry Cookies!
Step 1: Creaming Together Sugars With Butter
To start off this wonderful journey toward creating delicious Homemade Subway Raspberry Cookies begins with creaming together our unsalted butter along with both granulated sugar and brown sugar until light & fluffy (about 3 minutes). This vital step helps incorporate air which creates that sought-after light texture we adore—the science behind this transformation involves tiny bubbles forming throughout batter allowing gases released during baking rise properly resulting ultimately resulting fluffy masterpieces instead dense lumps upon cooling later on down line if skipped altogether could lead disastrous consequences unfortunately!. Don’t rush through this process; take time needed achieve ideal consistency—it’ll pay off tenfold when biting into soft chewy centers packed full flavorful surprises shortly thereafter!.
Step 2: Incorporating Eggs & Vanilla Essence
Once you’ve achieved ideal creamy state from previous step add both egg plus additional yolk followed by measured amount vanilla essence slowly mixing until fully combined (another minute should suffice). Eggs contribute richness binding everything neatly whereas additional yolk provides added moisture ensuring chewy interiors stay intact once baked up nicely later down road!. Be vigilant here watching mixture closely – if overmixed could lead tough textures ruining end product entirely instead meltingly divine bites desired desperately instead!.
Step 3: Sifting Dry Ingredients
Now comes another critical portion sifting dry elements including plain flour cornflour salt plus baking soda altogether directly onto wet mixture gently folding carefully using spatula until just combined—avoid overmixing though otherwise developing gluten strands causing tough undesirable outcomes altogether ruining what could’ve been heavenly treats instead leaving behind disappointing dry remnants merely shadows what envisioned before hand!. Sifting ensures even distribution prevents clumping whilst adding airiness crucial maintaining soft result desired desperately throughout entire experience!.
Step 4: Folding In Chocolate & Raspberries
Here’s where magic really begins: fold white chocolate chunks freeze-dried raspberries gently incorporating evenly throughout dough ensuring every bite contains bursts flavor combined with rich sweetness contrasts against tartness provided from berries themselves seamlessly blending harmoniously together producing divine symphony sensations tantalizing palates eagerly awaiting next morsel soon become reality shortly thereafter!. Remember patience required here again don’t rush through last steps either—we need delicate balance must remain intact so nothing breaks apart unnecessarily losing precious textures built carefully earlier stages leading up final outcome achieved effortlessly soon enough!.
I hope you’re feeling excited as we continue preparing these delightful treats! Stay tuned as we’ll delve deeper into shaping these cookies next…
Baking Your Perfect Homemade Subway Raspberry Cookies
Step 5: Creaming the Butters and Sugars
Now, let’s get into one of the most delightful parts of cookie-making – creaming your butter and sugars! In a large mixing bowl, add your softened unsalted butter along with both the granulated sugar and brown sugar. I can almost hear you asking, “Why do we cream these together?” Well, this is crucial to achieving that wonderfully light and airy texture we all adore in cookies. When you beat the butter and sugar together, you’re incorporating air into the mixture, which will help your cookies rise beautifully while baking. Grab a hand mixer or stand mixer fitted with a paddle attachment and beat on medium speed for about 2-3 minutes until the mixture is light in color and fluffy. You should see it turning into what looks like a luscious cloud; trust me, this step is non-negotiable if you want cookies that are truly extraordinary!
Once you’ve achieved that creamy perfection, it’s time to add in your egg and egg yolk along with the vanilla essence. The egg yolk is especially important here because it adds richness and moisture; this little guy is what makes your cookies even more tender. Mix everything together until well combined, but don’t overdo it! You want the ingredients to be just incorporated without overworking them. Remember, the longer you mix after adding eggs can lead to a tougher cookie – something we absolutely want to avoid!
Step 6: Sifting the Dry Ingredients
Now that your wet ingredients are singing together in harmony, let’s turn our attention to our dry ingredients. In a separate bowl, whisk together the plain flour, corn flour, salt, and baking soda. Sifting these dry ingredients is not just a formality; it serves two important purposes. First, it helps break up any lumps in your flour, ensuring that every bite of cookie will be smooth as silk. Second, by combining these elements ahead of time, you’re allowing for an even distribution of baking soda throughout your dough – essential for achieving that perfect rise!
Gradually add this dry mixture to your wet ingredients while mixing on low speed. I always recommend doing this slowly because too much flour added at once can lead to clumps forming rather than a smooth dough. As you mix, keep an eye on the texture; it should start coming together nicely but remain slightly sticky – this means it’s perfectly poised for those delicious add-ins we’re about to include.
Step 7: Folding in the Goodies
Ahhh… now comes one of my favorite parts! It’s time to fold in those white chocolate chunks and freeze-dried raspberries – truly the stars of our show here! Using a spatula or wooden spoon (and not an electric mixer), gently incorporate these treasures into your dough with care; think of it as tucking them in for a cozy slumber rather than stirring aggressively. This gentle folding ensures that you don’t break apart those beautiful raspberry pieces or melt any chocolate bits before they even hit the oven.
As you fold them in, you’ll notice how vibrant those freeze-dried raspberries are against the backdrop of your rich dough – both visually stunning and intoxicatingly aromatic! Don’t rush this step; take your time to make sure all those glorious flavors are evenly distributed throughout the dough so every bite will burst with that tangy-sweet raspberry goodness balanced by creamy white chocolate. This unison is what takes these cookies from good to utterly unforgettable!
Step 8: Chilling Your Dough
Now here comes a step that might require a wee bit of patience, but trust me when I say this: chilling your dough can make all the difference in achieving those perfectly textured cookies! Once everything is mixed together beautifully, cover your bowl tightly with plastic wrap or transfer it into an airtight container. Pop it into the fridge for at least 30 minutes – though if you can manage an hour or more, I promise you will thank yourself later.
But why chill? This gives the fats within your dough time to firm up again after being softened during mixing. Chilling also allows flavors to meld and develop further. It’s almost like letting a fine wine breathe before serving! Additionally, cold cookie dough spreads less during baking which means you’ll end up with thicker cookies rather than flat pancakes – no one wants that! So set a timer and use this time wisely; maybe prep some tea or coffee while dreaming about how amazing these cookies will be once baked.
And there you have it—your very own batch of Homemade Subway Raspberry Cookies ready to enjoy! Each bite promises layers of flavor from sweet white chocolate mingling with tart raspberries nestled within soft cookie goodness that melts away blissfully on your tongue. You’ve created something special here today—not just cookies but memories waiting to happen around sharing plates with friends and family. Enjoy every moment!
Storage and Enjoyment Tips for Your Homemade Subway Raspberry Cookies
Now that you’ve created these delightful Homemade Subway Raspberry Cookies, the moment has come to savor every chewy, sweet bite! But what happens if you find yourself with a few leftovers? Trust me, these cookies will still be a treat even after they’ve cooled down. Properly storing them can preserve their soft texture and rich flavors, ensuring that each cookie remains as indulgent as the first. Let’s dive into how you can keep the magic alive!
Storing Leftover Homemade Subway Raspberry Cookies
To keep your cookies fresh and delicious, store them in an airtight container at room temperature. This will prevent them from drying out while maintaining that signature soft texture. They can last about 4 to 5 days, but I must warn you—once they’re within reach, they might not last that long! If you want to take it a step further, placing a slice of bread in the container can work wonders; it helps maintain moisture levels so your cookies stay tender and delightful. After storage, you’ll find that the flavors meld beautifully, creating an even more profound raspberry experience with hints of vanilla swirling around. When you’re ready to indulge again, simply pop one in the microwave for about 10-15 seconds to revive its warmth and softness before enjoying!
Freezing Homemade Subway Raspberry Cookies for Later
If you’re anything like me, sometimes you just can’t resist making a double batch—and that’s where freezing comes in handy! To freeze your Homemade Subway Raspberry Cookies properly, allow them to cool completely before placing them in a single layer on a baking sheet lined with parchment paper. Once they’re frozen solid—about an hour or two—you can transfer them into a freezer bag or an airtight container. They’ll keep beautifully for up to three months! The best part? When cravings strike, there’s no need to wait long; just take out however many you desire and let them thaw at room temperature for about 30 minutes or heat them straight from the freezer for a warm treat in minutes. This convenience is absolutely paramount when unexpected guests drop by or when you’re craving something sweet after a long day!
Homemade Subway Raspberry Cookies

Indulge in the delightful experience of baking with these Homemade Subway Raspberry Cookies. Each bite offers a perfect blend of soft, chewy cookie dough enriched with sweet white chocolate chunks and tart freeze-dried raspberries. This recipe celebrates the joy of home baking, filling your kitchen with an irresistible aroma that will have everyone eagerly awaiting a taste. Whether you’re enjoying them as a cozy afternoon treat or sharing them at gatherings, these cookies bring warmth and nostalgia to every occasion. Easy to prepare and utterly delicious, they promise to become a family favorite that you’ll want to make time and again.
- Prep Time: 20 minutes
- Cook Time: 12 minutes
- Total Time: 32 minutes
- Yield: Approximately 24 cookies 1x
- Category: Dessert
- Method: Baking
- Cuisine: American
Ingredients
- 2 cups plain flour
- 2 teaspoons corn flour
- 1/2 teaspoon salt
- 1 teaspoon baking soda
- 3/4 cup unsalted butter, softened
- 2/3 cup granulated sugar
- 1/2 cup brown sugar
- 2 teaspoons vanilla essence
- 1 large egg & 1 egg yolk
- 3/4 cup white chocolate chunks
- 1/2 cup freeze-dried raspberries
- 4 ounces softened cream cheese
- 1/4 cup icing sugar
Instructions
- Preheat your oven to 350°F (175°C) and line two baking sheets with parchment paper.
- In a large mixing bowl, cream together the softened butter, granulated sugar, and brown sugar until light and fluffy.
- Add the egg, egg yolk, and vanilla essence, mixing until well combined.
- In a separate bowl, sift together the plain flour, corn flour, salt, and baking soda. Gradually add to the wet mixture while stirring on low speed until just combined.
- Gently fold in the white chocolate chunks and freeze-dried raspberries until evenly distributed.
- Chill the dough in the refrigerator for at least 30 minutes.
- Scoop tablespoons of dough onto the prepared baking sheets, spacing them about two inches apart.
- Bake for 10-12 minutes until lightly golden around the edges but still soft in the center. Allow cooling on the sheets for five minutes before transferring to wire racks.
Nutrition
- Serving Size: 1 cookie (40g)
- Calories: 180
- Sugar: 12g
- Sodium: 85mg
- Fat: 8g
- Saturated Fat: 5g
- Unsaturated Fat: 2g
- Trans Fat: 0g
- Carbohydrates: 25g
- Fiber: 1g
- Protein: 2g
- Cholesterol: 20mg