Hillbilly Cole Slaw
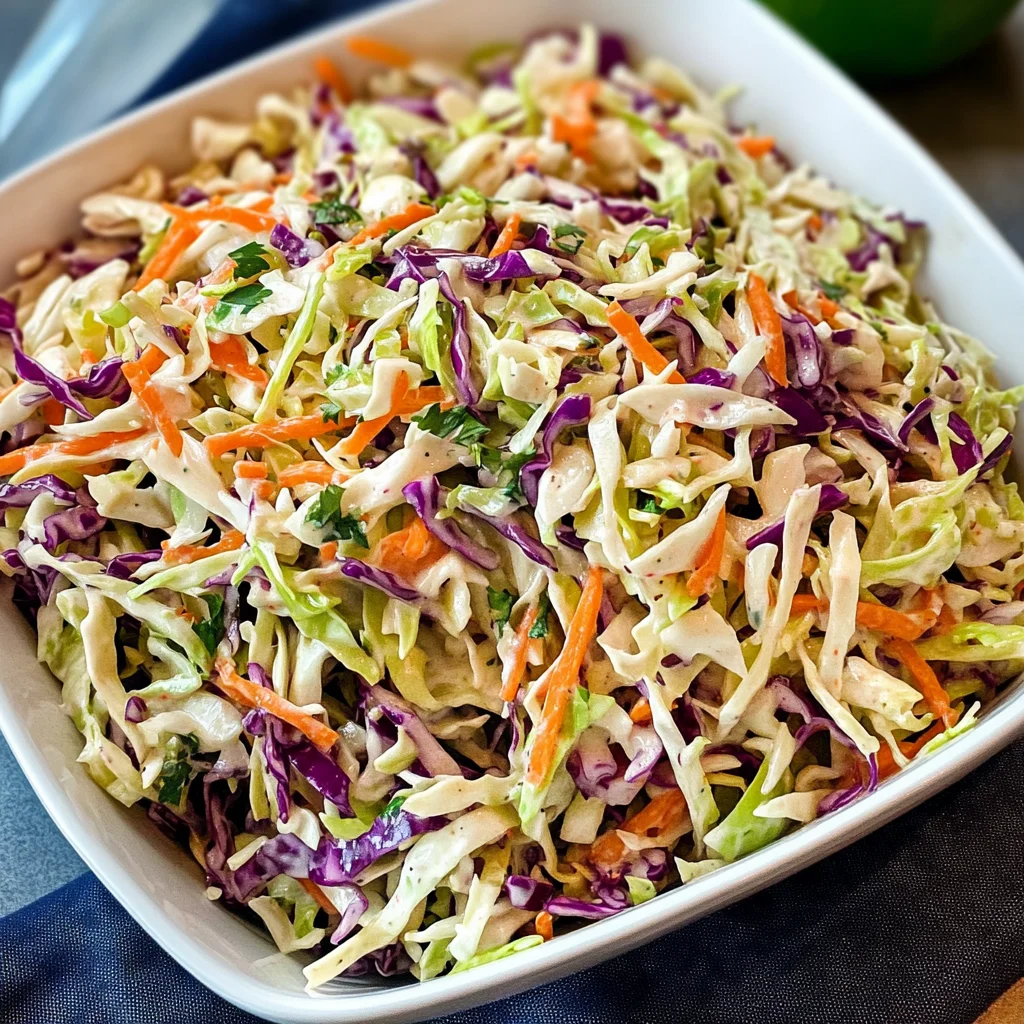
There’s something incredibly evocative about the simple act of creating a dish like Hillbilly Cole Slaw. It’s more than just a recipe; it’s a tapestry of flavors, memories, and an invitation to gather around the table. Imagine the crunch of fresh cabbage mingling with vibrant carrots and the subtle sweetness from the sugar, all enveloped in a zesty dressing that dances on your palate. This isn’t just side food; it’s a celebration of home-cooked comfort that transports you to sun-soaked picnics or family reunions filled with laughter and love. When you prepare this Hillbilly Cole Slaw, I promise you’ll not only delight your taste buds but also create lasting memories that will linger long after the last bite.
As we dive into this recipe, I want to share not just how to make it but also why it holds a special place in my heart. There’s something profoundly satisfying about transforming humble ingredients into an utterly extraordinary dish. Every scoop of this slaw bursts with freshness, embodying the spirit of Southern cuisine—simple yet brimming with flavor. It’s perfect for summer barbecues or as a refreshing side during winter meals; its versatility truly knows no bounds. So, roll up your sleeves and get ready to embark on this culinary journey that promises to be as enjoyable as it is delicious.
Hillbilly Cole Slaw: A Southern Classic with Heart
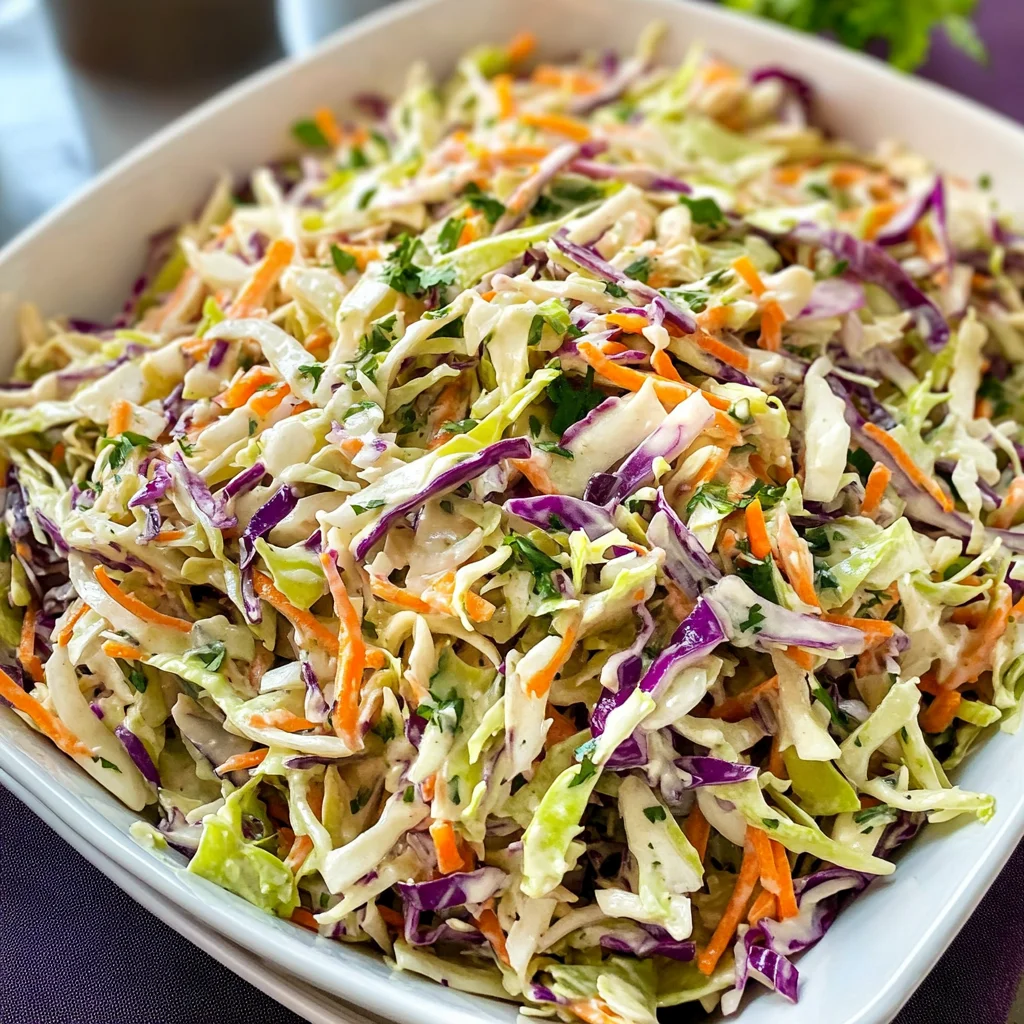
Hillbilly Cole Slaw is one of those cherished recipes that feels like a warm hug on a plate. It’s bursting with color and texture, making it not just visually appealing but also delightful to eat. The balance of fresh vegetables combined with a tangy-sweet dressing creates an experience that’s hard to resist. Whether you’re serving it alongside grilled fare or enjoying it as a light lunch, each bite tells a story—a story of togetherness and joy shared around the dinner table.
Ingredients:
As we gather our ingredients for Hillbilly Cole Slaw, think of each component as an essential player in creating this beautiful medley of flavors. Each ingredient brings its unique contribution to the party!
- 2 1/2 lb head green cabbage (About 6 cups chopped): Fresh green cabbage is the backbone of this slaw, providing both volume and crunch that keeps everything lively. When selecting your cabbage, look for one that’s heavy for its size with tightly packed leaves—this freshness directly translates to flavor and texture in your dish. To prepare it, remove the core thoughtfully before chopping; this allows for even distribution throughout your slaw.
- 3 medium carrots: Adding sweetness and vibrant color, grated carrots brighten up our dish—both visually and flavor-wise! Peel them first to ensure there’s no bitter skin affecting your taste experience. When grating, aim for fine shavings; they blend seamlessly into the slaw while providing bursts of natural sweetness that counterbalance the acidity of other ingredients.
- 1 small green bell pepper: The green bell pepper adds a lovely crunch and hints of earthiness to our slaw mix. Make sure to seed and chop it finely so that its flavor melds beautifully rather than overpowering other ingredients. This little addition contributes not only taste but also essential nutrients like vitamin C—how wonderful is that?
- 1 small red onion: A small red onion diced finely introduces a mild sharpness that elevates the overall flavor profile without overwhelming any single element. Its color is equally important; nestled amongst green and orange hues, it adds visual appeal while offering antioxidant properties too!
- 3 green onions: These bright little bulbs bring both mild onion flavor and vibrant green color into our mix! Chopping them adds freshness and makes each bite feel light and airy—a perfect contrast to denser veggies like cabbage.
- 1 tsp garlic salt: This seasoning brings depth; it’s not just about adding saltiness but infusing every bite with aromatic garlic essence that ties all flavors harmoniously together. By using garlic salt instead of plain salt, we enhance our cole slaw’s character effortlessly.
- 1 tsp celery seeds: Often overlooked, celery seeds are little powerhouses! They contribute an earthy tone reminiscent of fresh celery stalks without adding bulk—perfect for maintaining our desired texture while enhancing that classic slaw flavor profile.
- 1/2 tsp lemon pepper: This zesty seasoning brings brightness through acidity alongside subtle heat from black pepper—just enough kick without overpowering! It acts as a natural enhancer for all ingredients involved.
- 3/4 cup white distilled vinegar: The star ingredient in our dressing! Vinegar lends necessary tanginess to balance out sweet elements while preserving veggies’ crispness through quick pickling effects during chilling time—a crucial step for optimal results!
- 3/4 cup vegetable oil: Acting as the base for our dressing, vegetable oil ensures everything combines smoothly while providing richness without overshadowing other flavors’ nuances. For best results, choose neutral oils like canola or sunflower—all about supporting those fresh ingredients!
- 3/4 cup granulated sugar: Sweetness meets tang here! Sugar balances out vinegar’s acidity perfectly—creating an addictive harmony everyone will crave once they try your homemade Hillbilly Cole Slaw.
Equipment You’ll Need:
Having the right tools at hand can turn cooking into an enjoyable adventure rather than a chore! These essentials will help you navigate through preparing Hillbilly Cole Slaw confidently.
- Sharp chef’s knife: A good-quality chef’s knife is vital for efficiently chopping vegetables uniformly—a crucial factor for ensuring even cooking times (or marinating). A sharp blade glides effortlessly through produce without bruising them too much!
- Cutting board: Opt for one large enough so you have space when chopping up all these beautiful veggies; it’ll make things easier as you layer them together later on!
- Box grater or food processor: Grating carrots can be done by hand using a box grater if you enjoy some hands-on work—or if you’re short on time (or energy!), use a food processor instead! Both methods yield fantastic results; just remember not to over-process them into mush!
- Mixing bowl: Choose one large enough to hold all those gorgeous veggies without spilling over—this is where we’ll combine everything together before letting those flavors mingle beautifully in the fridge!
- Small saucepan: We need this little guy for boiling our essential vinegar mixture—it’s where magic happens when sugar dissolves into liquid gold! Make sure it’s sturdy enough to handle high heat safely.
Preparing the Hillbilly Cole Slaw
Step 1: Layering Your Fresh Ingredients
To begin crafting your delightful Hillbilly Cole Slaw, start by meticulously layering your chopped cabbage at the bottom of your mixing bowl—the foundation upon which all other ingredients will build their symphony of flavors! Follow closely behind by adding those beautifully grated carrots next—they lend sweetness along with their sunny hue against vibrant greens contrasting within each layer! Then sprinkle in chopped bell pepper followed by diced red onion and fresh green onions atop everything else—each colorful addition contributes unique textures while creating visual appeal even before diving into taste testing!
Step 2: Seasoning Your Vegetables
Once you’ve created this stunning layered masterpiece in your bowl (and admired it long enough), sprinkle garlic salt evenly across those fresh veggies along with celery seeds followed by lemon pepper too—a gentle reminder here about how important seasoning is! Each pinch elevates individual tastes within every bite taken later on—it’s absolutely paramount not only for ensuring balance but also allowing every ingredient’s essence shine through distinctly amidst others during consumption!
Step 3: Creating Your Dressing
Now let’s shift gears towards crafting our dressing—this step requires some attention since what happens here transforms raw veggies into something truly unforgettable! In your small saucepan over medium heat (not too high!), combine white distilled vinegar along with vegetable oil and granulated sugar stirring gently until everything begins swirling together nicely—the moment when sugar starts dissolving marks success here! Keep an eye out—the mixture should come just barely up towards boiling point without bubbling furiously away from us—that would be disastrous—and once dissolved fully remove from heat promptly so flavors remain bright rather than dull!
Step 4: Marrying Flavors
Now comes perhaps my favorite part – pouring this warm dressing evenly over layered vegetables scattered throughout earlier steps—it’s almost poetic watching how liquid gold envelops each colorful ingredient transforming them magically right before our eyes! Remember now—it’s vital not rush this step because allowing time between pouring dressing & chilling overnight gives exceptional results down road when serving day arrives; think deeply infused flavors mingling beautifully together thanks diligence taken today promising profound satisfaction tomorrow upon first joyous bites enjoyed alongside loved ones gathered ’round table sharing stories amid laughter echoing warmly through hearts filled joyfulness whilst savoring culinary creation made lovingly crafted from scratch—trust me friends—you won’t regret taking time needed here!
Stay tuned as we continue exploring further steps leading towards tasting blissful culmination awaiting us soon…
Step 5: Layering the Vibrant Vegetable Medley
Now that we have our beautiful array of chopped vegetables prepped, it’s time to create a stunning layered presentation that not only looks fabulous but also ensures each bite is an explosion of flavor. You’ll want to start by laying the chopped cabbage as your base; this creates a crunchy foundation, and trust me, that texture is absolutely crucial for a delightful Hillbilly Cole Slaw. The cabbage acts like a canvas, absorbing the dressing beautifully while maintaining its crispness. Next, grate those vibrant carrots over the top—this adds not only sweetness but also a glorious pop of color that will make your dish irresistibly inviting.
Once you’ve got your cabbage and carrot layers down, sprinkle your diced green bell peppers, red onions, and chopped green onions in separate layers atop the cabbage. This method allows each vegetable to shine through, creating a symphony of flavors as they mingle together once dressed. Don’t rush this step! The layering isn’t just for aesthetics; it’s about building depth in flavor. Each vegetable has its unique role—the crunch of the cabbage, the sweetness of the carrot, and the slight bite from the onions come together in perfect harmony. Trust me when I say this step sets the stage for an utterly intoxicating coleslaw experience!
Step 6: Infusing with Flavorful Seasonings
With our vegetables beautifully layered, it’s time to add some seasoning magic! Begin by sprinkling garlic salt evenly over your colorful vegetable medley. Garlic salt is non-negotiable here; it brings a wonderful umami depth that enhances all those fresh flavors without overwhelming them. Follow this with a generous dusting of celery seeds and lemon pepper—these are more than just spices; they’re flavor boosters that elevate your Hillbilly Cole Slaw to extraordinary heights! Celery seeds add an earthy note reminiscent of classic coleslaw while lemon pepper introduces a zesty brightness that cuts through richness beautifully.
Why do we season before adding our dressing? This crucial step allows those bold flavors to penetrate deeper into the veggies rather than just sitting on top after dressing. It’s all about building layers of flavor that will dance harmoniously on your taste buds when you take that first heavenly bite! Remember to be mindful here—too much seasoning can overpower the freshness of your ingredients. Just enough is key; you want every component to shine through without overshadowing one another.
Step 7: Crafting the Perfect Dressing
Now comes one of my favorite parts—the dressing! In a small saucepan over medium heat, combine white distilled vinegar, vegetable oil, and granulated sugar. You’ll want to bring this concoction to a gentle boil while stirring consistently until all the sugar dissolves completely. This process is essential because it transforms these simple ingredients into liquid gold; it balances acidity with sweetness perfectly—a hallmark of any great cole slaw dressing!
Keep an eye on your saucepan as it heats up—what you’re looking for is an inviting bubbling action without letting it boil over or burn at the bottom. As soon as you see those little bubbles forming around the edges, remove it from heat immediately! This timing is paramount because if you overcook it even slightly, you’ll lose that delicate balance between sweet and tangy which makes this dressing so extraordinarily delicious. Once removed from heat, give it a good stir one last time before pouring it evenly over your layered vegetables. The warmth from the dressing helps meld everything together beautifully so that every veggie gets lovingly coated by this sweet-and-sour elixir.
Step 8: Chilling for Maximum Flavor Infusion
Here comes perhaps one of the most important steps in preparing Hillbilly Cole Slaw: chilling! After you’ve poured your warm dressing over the vegetables, cover your dish tightly with plastic wrap or a lid and place it in the refrigerator for at least 24 hours (yes, I mean it!). I know waiting can feel torturous—especially when you’re staring at something so mouthwatering—but trust me on this one! Chilling allows time for all those vibrant flavors to marry together beautifully; it’s like they’re having their own little reunion in there!
During this resting period, something magical happens as they absorb each other’s essence—the cabbage wilt slightly but retains its satisfying crunch while soaking up all those lovely notes from our homemade dressing. The longer you let them chill, the more profound and cohesive their flavors become. If you’re short on time and can only manage a few hours, that’s okay too; just keep in mind that patience truly pays off here! When you’re finally ready to serve, give everything a gentle stir to redistribute those magical flavors throughout before dishing up.
Next Major Phase – Final Touches on Your Hillbilly Cole Slaw
Step 9: Serving Your Perfect Hillbilly Cole Slaw
You’ve made it through each meticulous step and now you’re greeted with a beautiful bowl filled with crisp vegetables swimming in tangy-sweet goodness—it’s time to serve up your masterpiece! When you’re ready to unveil this stunning dish at family gatherings or summer barbecues, remember to take pride in what you’ve created because each bite reflects all those loving hours spent crafting this recipe.
Use serving tongs or a large spoon to gently mix everything one last time before plating—it’s crucial for ensuring every guest gets an equal share of those deliciously seasoned veggies along with plenty of dressing drizzled throughout! As you spoon out portions onto plates or into bowls, make sure everyone gets those colorful bursts of carrots alongside crunchy bits of cabbage and flavorful onion pieces; it’s what makes every mouthful truly extraordinary!
This Hillbilly Cole Slaw pairs wonderfully with grilled meats or stands alone as a refreshing side salad on warm days—its versatility knows no bounds! And don’t forget: if you happen to have leftovers (which is rare!), store them in an airtight container in your fridge where they’ll continue marinating for up to one week—though I promise they won’t last long because once people taste how scrumptiously satisfying this slaw is… they’ll be coming back for seconds—and thirds! Enjoy every single bite knowing you’ve crafted something special filled with love and tradition—happy cooking!
Storage and Enjoyment Tips for Your Hillbilly Cole Slaw
Now that you’ve crafted this delightful bowl of Hillbilly Cole Slaw, the anticipation of sharing it with family and friends is almost palpable! But before you dive into those crunchy, tangy bites, let’s talk about how to store this treasure properly. Trust me, knowing how to keep those flavors fresh is just as important as the recipe itself. This cole slaw is not only a stunning side dish at gatherings but also a fantastic treat to enjoy throughout the week. You can savor its bright, zesty crunch for days, making it a staple in your fridge that you’ll want to turn to time and again.
Storing Leftover Hillbilly Cole Slaw
To keep your Hillbilly Cole Slaw fresh and delicious after it graces your dinner table, I highly recommend transferring any leftovers into an airtight container—this is absolutely crucial! Glass containers are fantastic for this purpose, as they won’t absorb odors or stains like plastic might. If stored correctly in the refrigerator, your cole slaw will maintain its delightful freshness for up to a week. I also have a little pro tip: if you notice any excess moisture accumulating in the container over time, simply add a slice of bread on top of the slaw before sealing it. This nifty trick helps absorb moisture and keeps your slaw crispier! After a few days in the fridge, you’ll find that the flavors deepen beautifully; that vinegar dressing melds with the vegetables into a truly extraordinary symphony of tastes. There’s no need to reheat this dish; it’s best enjoyed cold right out of the fridge—perfect for those spontaneous lunch cravings!
Freezing Hillbilly Cole Slaw for Later
If you find yourself with an abundance of cole slaw or just want to prep ahead for those busy weeks, freezing can be an excellent option. However, you’ll want to consider that freezing can alter the texture slightly due to water content in the cabbage. To freeze your Hillbilly Cole Slaw properly, pack it into freezer-safe bags or containers, ensuring all air is removed before sealing—this prevents freezer burn from ruining your hard work. When done right, it can last up to three months in the freezer! When you’re ready to enjoy it again, simply transfer it to the refrigerator overnight to thaw gently. While some crunchiness may be lost during freezing, you’ll still get that vibrant flavor explosion when you serve it up again. The convenience factor here is immense; imagine pulling out a jar of this homemade goodness on a hectic night—it’s like a little taste of sunshine waiting for you!
Hillbilly Cole Slaw
Hillbilly Cole Slaw is a delightful Southern classic that brings vibrant flavors and textures to your table. This crunchy, tangy salad features fresh cabbage, sweet carrots, crisp bell peppers, and zesty onions, all enveloped in a homemade dressing that’s both refreshing and addictive. Perfect for summer barbecues or as a side dish during family gatherings, this coleslaw not only looks appealing but also tastes incredible. Each bite is a celebration of freshness, evoking memories of sun-soaked picnics and joyful reunions. With its easy preparation and delicious results, Hillbilly Cole Slaw is sure to become a staple in your kitchen.
- Prep Time: 20 minutes
- Cook Time: None
- Total Time: 0 hours
- Yield: Approximately 8 servings 1x
- Category: Salad
- Method: Mixing
- Cuisine: Southern
Ingredients
- 2 1/2 lbs green cabbage (chopped)
- 3 medium carrots (grated)
- 1 small green bell pepper (chopped)
- 1 small red onion (diced)
- 3 green onions (chopped)
- 1 tsp garlic salt
- 1 tsp celery seeds
- 1/2 tsp lemon pepper
- 3/4 cup white distilled vinegar
- 3/4 cup vegetable oil
- 3/4 cup granulated sugar
Instructions
- In a large mixing bowl, layer the chopped cabbage followed by grated carrots, chopped bell pepper, diced red onion, and chopped green onions.
- Sprinkle garlic salt, celery seeds, and lemon pepper evenly over the layered vegetables.
- In a small saucepan over medium heat, combine white distilled vinegar, vegetable oil, and granulated sugar. Stir until sugar dissolves and the mixture is warm.
- Pour the dressing over the layered vegetables and gently mix to combine.
- Cover the bowl and refrigerate for at least 24 hours to allow flavors to meld before serving.
Nutrition
- Serving Size: 1/2 cup (120g)
- Calories: 150
- Sugar: 7g
- Sodium: 190mg
- Fat: 10g
- Saturated Fat: 1g
- Unsaturated Fat: 9g
- Trans Fat: 0g
- Carbohydrates: 15g
- Fiber: 3g
- Protein: <1g
- Cholesterol: 0mg