Greek Honey Pistachio Cheesecake Bars: Creamy Delight!
There’s something undeniably magical about desserts that transport us to a different place and time—a blend of flavors that have the power to evoke memories and create new ones. As I sit down to share my recipe for Greek Honey Pistachio Cheesecake Bars: Creamy Delight!, I can’t help but feel a wave of nostalgia wash over me. This isn’t just any dessert; it’s a celebration of creamy textures wrapped in the soothing embrace of honey, highlighted by the delightful crunch of roasted pistachios. Each bite is like a warm hug, comforting yet invigorating, reminiscent of sun-soaked afternoons spent with friends and family around the table. The combination of tangy cream cheese and luscious honey creates a symphony of flavors that dance on your palate, while the earthy notes of pistachios add a layer of sophistication that makes this dessert truly unforgettable.
What I adore most about these cheesecake bars is their ability to straddle tradition and innovation—drawing inspiration from classic Greek flavors while offering a modern twist that everyone can enjoy. Imagine gathering your loved ones for a special occasion, perhaps during the holidays or at a cozy dinner party, and presenting them with these beautiful bars. Their vibrant green flecks from the pistachios contrast beautifully with the golden drizzle of honey on top, making them not only delicious but visually stunning as well. Trust me when I say that they will leave your guests raving long after the last crumb has vanished!
Greek Honey Pistachio Cheesecake Bars: Creamy Delight! A Sweet Symphony Awaits
Now, let’s embark on this delightful culinary journey together! Making Greek Honey Pistachio Cheesecake Bars is more than just following a recipe; it’s about creating an experience filled with love and joy. You’ll find that each step is straightforward yet rewarding, allowing you to connect with every ingredient as you craft something truly special.
Ingredients:
As we gather our ingredients for this heavenly treat, think of each one as an essential note in our sweet symphony. Each plays its part in creating a rich flavor profile that will make your heart sing.
- 1 ½ cups graham cracker crumbs: These little crunchy gems are what create our delectable crust, offering both texture and sweetness. When selecting graham crackers, look for brands that use whole grains for added depth and nutrition. Their slightly nutty flavor perfectly complements the creamy filling above them, providing just enough base to hold everything together without overwhelming it.
- ½ cup unsalted butter, melted: Butter serves as the binding agent here and brings richness to our crust. Using unsalted butter gives you control over the sodium levels in your bars; trust me on this—nothing is worse than an overly salty dessert! Make sure it’s melted but not too hot when you mix it in; otherwise, it can cook the crumbs and change their texture.
- ¼ cup granulated sugar: Sugar adds sweetness and helps create that delightful caramelization in our crust during baking. It also balances out the tanginess from our filling beautifully. If you’re aiming for a more complex flavor profile, consider using brown sugar instead; it brings hints of molasses that can elevate your crust even further.
- 16 oz cream cheese, softened: The star player in our cheesecake filling! Softened cream cheese is crucial here because it allows for smooth blending without lumps—nobody wants chunky cheesecake! Look for high-quality cream cheese (organic if possible), as it will impart a richer flavor and creamier texture to your bars.
- ½ cup Greek yogurt: This ingredient adds tanginess while also contributing to an airy texture we desire in cheesecakes. The probiotics found in yogurt can also enhance digestion—so you can indulge guilt-free! Be sure to use full-fat yogurt for optimal creaminess; trust me when I say it makes all the difference.
- ½ cup honey: Here comes the liquid gold! Honey not only sweetens but infuses each bite with floral notes that elevate our cheesecake bars beyond ordinary desserts. When choosing honey, opt for raw or locally-sourced varieties if possible; they come packed with nutrients and flavor complexity that’s simply irresistible.
- 2 large eggs: Eggs are essential for binding our filling together while also contributing richness. They help set the cheesecake as it bakes so don’t skip this step—they’re absolutely non-negotiable here!
- 1 tsp vanilla extract: This aromatic addition rounds out our flavor profile beautifully by adding warmth and depth without overpowering other ingredients. Always choose pure vanilla extract over imitation—the difference will be evident immediately!
- ½ cup finely chopped pistachios: These little green nuggets bring delightful crunch along with their nutty flavor to every bite of cheesecake bar goodness. When chopping pistachios, aim for small pieces so they distribute evenly throughout the filling; larger chunks could disrupt the smooth texture we’re aiming for.
- ¼ cup honey for drizzling: A finishing touch that enhances both presentation and flavor! Drizzling honey over these bars right before serving creates an inviting gloss that beckons everyone to dig in. Plus, who doesn’t love an extra hint of sweetness?
- ¼ cup chopped pistachios for garnish: Just like sprinkles on a cupcake, these provide visual appeal along with added crunch when you serve up your creation! They also remind everyone what flavors they’re about to enjoy—it’s all about anticipation!
Equipment You’ll Need:
Having the right tools at hand not only makes cooking easier but also adds joy to your baking experience! Think of these utensils as your trusted companions on this sweet adventure—we’re working together towards one goal: making something wonderful!
- 9×9 inch baking pan – This square pan is perfect for creating thick cheesecake bars that slice beautifully into squares or rectangles. If you don’t have one on hand, a round pan works too; just be aware it’ll alter how you cut those gorgeous pieces later!
- Mixing bowls (various sizes) – A good set of mixing bowls allows you flexibility as you combine different components without any mess. Opting for glass or stainless steel means less staining or odors lingering after baking—plus they look chic on your counter!
- Electric mixer (handheld or stand) – This tool can save you time when beating together ingredients like cream cheese until they’re perfectly smooth—no one wants lumpy cheesecake! A handheld mixer usually suffices but if you’re making larger batches frequently, consider investing in a stand mixer—it’s worth every penny.
- Rubber spatula – Essential for scraping down sides while mixing or folding ingredients gently together without deflating whipped mixtures; trust me—you want one handy here!
- Measuring cups & spoons – Precision matters when baking; having reliable measuring tools ensures consistency between batches so each time turns out just as lovely as expected!
With all these essentials gathered around us—from ingredients steeped in history to trusty tools waiting eagerly—we are ready to dive into crafting these dreamy Greek Honey Pistachio Cheesecake Bars!
Step 1: Preheat & Prepare Your Crust
First things first—let’s get that oven roaring at 350°F (175°C). Preheating sets up an ideal environment where science meets art—the heat begins working its magic even before we introduce our mixture into its warm embrace! While waiting patiently (don’t rush this step!), grab yourself a mixing bowl where you’ll combine those graham cracker crumbs with melted butter and sugar until everything looks like damp sand ready for molding into something extraordinary. Press this mixture firmly into your greased 9×9 inch baking pan so it forms an even layer across the bottom—this helps create structure later when we’re slicing into those delicious bars.
Step 2: Bake & Cool
Once you’ve laid down your crust evenly across its base (and possibly sampled some crumbs—who could resist?), pop it into your preheated oven for about 10 minutes until golden brown emerges from within those walls! Baking at this stage solidifies everything before adding our luscious filling later on—don’t skip this vital step! After ten minutes has passed (or once you’ve encountered delightful aromas wafting through), remove from oven gently allowing cooling time while we prepare ourselves mentally—and physically—for what’s next!
Step 3: Beat That Cream Cheese
Now comes one of my favorite parts—the introduction of creamy ingredients into play! In another mixing bowl (preferably large), beat softened cream cheese until smoothness prevails—it should resemble cloud-like fluffiness before moving forward onto adding Greek yogurt followed closely behind by honey alongside eggs plus vanilla extract—all those glorious flavors melded harmoniously together await us next!
Step 4: Fold In Those Pistachios
With everything combined seamlessly now comes time (and space) dedicated solely towards incorporating our finely chopped pistachios gently into this rich batter we’ve crafted so far—it brings forth added crunchiness alongside nutty undertones meant purely enhance every bite taken afterward… Ahh yes—the moment where flavors unite!
Let’s pause here as we savor each step taken thus far before diving deeper into building upon these layers we’ve lovingly crafted together…
Stay tuned because there’s so much more deliciousness ahead as we continue assembling these magical Greek Honey Pistachio Cheesecake Bars later on!
Step 5: Fold in the Magic of Pistachios
Now comes a truly enchanting moment in our Greek Honey Pistachio Cheesecake Bars journey—it’s time to introduce the star ingredient, the pistachios! After you’ve blended the cream cheese mixture into a silky, smooth dream, gently fold in the finely chopped pistachios. I can’t stress enough how essential this step is; the way those earthy, nutty flecks add texture and flavor is absolutely paramount. By folding instead of mixing vigorously, you’re preserving that luscious creaminess while ensuring every bite of cheesecake bursts with delightful crunch. The key here is to use a rubber spatula or a wooden spoon, which allows for gentle incorporation without deflating that beautifully airy mixture we’ve worked so hard to create. Trust me on this—when you take a bite of your finished bars, you’ll understand why this careful technique makes such a difference!
As you fold in those vibrant green nuts, take a moment to appreciate their stunning color against the creamy backdrop. This visual contrast not only adds to the overall appeal but also hints at the delicious flavor profile awaiting you. Just imagine sinking your teeth into that first piece and experiencing that perfect marriage of sweet honey and savory pistachios dancing on your palate! So be patient and ensure everything is evenly distributed; it will make all the difference when it comes time to indulge.
Step 6: Pouring Perfection
With your cheesecake mixture now fully infused with those delightful pistachios, it’s time for an exciting transformation—pouring that dreamy filling over our cooled crust! Carefully spoon the creamy concoction onto your baked graham cracker base, ensuring it covers every inch evenly. This step may seem straightforward but bear with me as it’s where our cheesecake begins to take its final form. Use an offset spatula or simply the back of a spoon to spread it out gently; this will help create a smooth surface that’s just begging for attention.
Why is this smoothing process so important? Well, when you pour an uneven mixture, it can lead to uneven baking and texture issues—nobody wants a lumpy dessert! You want that luxurious consistency throughout each bar, where every slice reveals its rich layers and inviting colors. Once you’ve achieved that perfect spread, take a moment to admire your handiwork because trust me—the anticipation builds at this stage!
Step 7: Bake Until Set
Now we are heading into what I like to call the “baking magic” phase. Preheat that oven to 350°F (175°C) if you haven’t already done so—you want it nice and hot before introducing your cheesecake masterpiece. Carefully place your pan in the middle rack of your oven (this position is crucial for even heat distribution), and set your timer for 25-30 minutes. As it bakes, keep an eye on those edges; they should start setting while the center remains slightly jiggly—think of it as a gentle dance rather than complete rigidity!
This slight jiggle is absolutely normal; in fact, it’s what we’re aiming for! You see, allowing your cheesecake bars to remain just undercooked at this stage will lead us into a luxuriously creamy texture once they cool down—a truly extraordinary outcome that ensures each bite melts in your mouth like liquid gold! If you notice any browning at the edges or cracking across the top, don’t panic—it happens! It doesn’t affect taste; however, do strive for that soft jiggle as your primary cue for doneness.
Step 8: Patience Is Key – Cooling and Chilling
Once those delectable bars have baked to perfection and filled your kitchen with an utterly intoxicating aroma (seriously, resist snacking on them right away!), remove them from the oven and allow them to cool down to room temperature. This cooling phase is not just about letting them sit; it’s about giving them time to settle into their magnificent form before heading into the chilling stage. Letting them rest will allow any residual heat within the bars to distribute evenly while minimizing cracks as they cool.
After about 30 minutes of patience (you can do this!), cover them loosely with plastic wrap or foil—don’t press down too hard—and place them in the fridge for at least four hours. I know waiting can feel torturous when you know something delicious awaits you! But trust me on this—this chilling time allows flavors to meld together beautifully and sets up that velvety texture we crave when biting into cheesecake. It’s during these hours that our Greek Honey Pistachio Cheesecake Bars truly transform from delightful batter into an extraordinary dessert experience—so grab a book or binge-watch your favorite show while you wait!
Conclusion:
As we wrap up this delightful journey through making Greek Honey Pistachio Cheesecake Bars: Creamy Delight!, I hope my excitement has sparked your passion for baking these scrumptious treats. The combination of rich cream cheese with sweet honey and crunchy pistachios creates a symphony of flavors that truly elevates this dessert beyond ordinary expectations. Each layer plays its role beautifully — from the buttery graham cracker crust that cradles the luscious filling to the delightful topping that enhances its presentation. It’s not just food; it’s an experience waiting to happen.
This recipe is an absolute must-try not only because of its enchanting taste but also due to the joy that comes with crafting it from start to finish. Imagine gathering friends or family around as you pull these gorgeous bars from the oven, filling your kitchen with an intoxicating aroma that beckons everyone closer. They’re perfect for celebrations or casual get-togethers alike, ensuring that every occasion feels special when served alongside coffee or tea as a delightful afternoon treat.
For serving suggestions, imagine savoring one of these bars with a dollop of whipped coconut cream on top or perhaps pairing it with some fresh berries like tart raspberries or juicy strawberries — such combinations are simply heavenly! For an afternoon pick-me-up, serve alongside a robust cup of coffee or aromatic herbal tea; it creates such balance between sweetness and warmth. And if you’re feeling adventurous, why not drizzle some melted dark chocolate over them for an indulgent twist?
Feeling adventurous? This recipe is wonderfully adaptable; consider substituting walnuts for pistachios or even adding citrus zest into your filling for a vibrant pop of flavor! You could even make them gluten-free by swapping graham cracker crumbs with ground almonds or gluten-free cookies — there’s so much room for creativity here! So go ahead and try making these stunning cheesecake bars; I can’t wait to hear how they turn out for you! Don’t forget to share your experiences and variations; let’s celebrate our love for baking together!
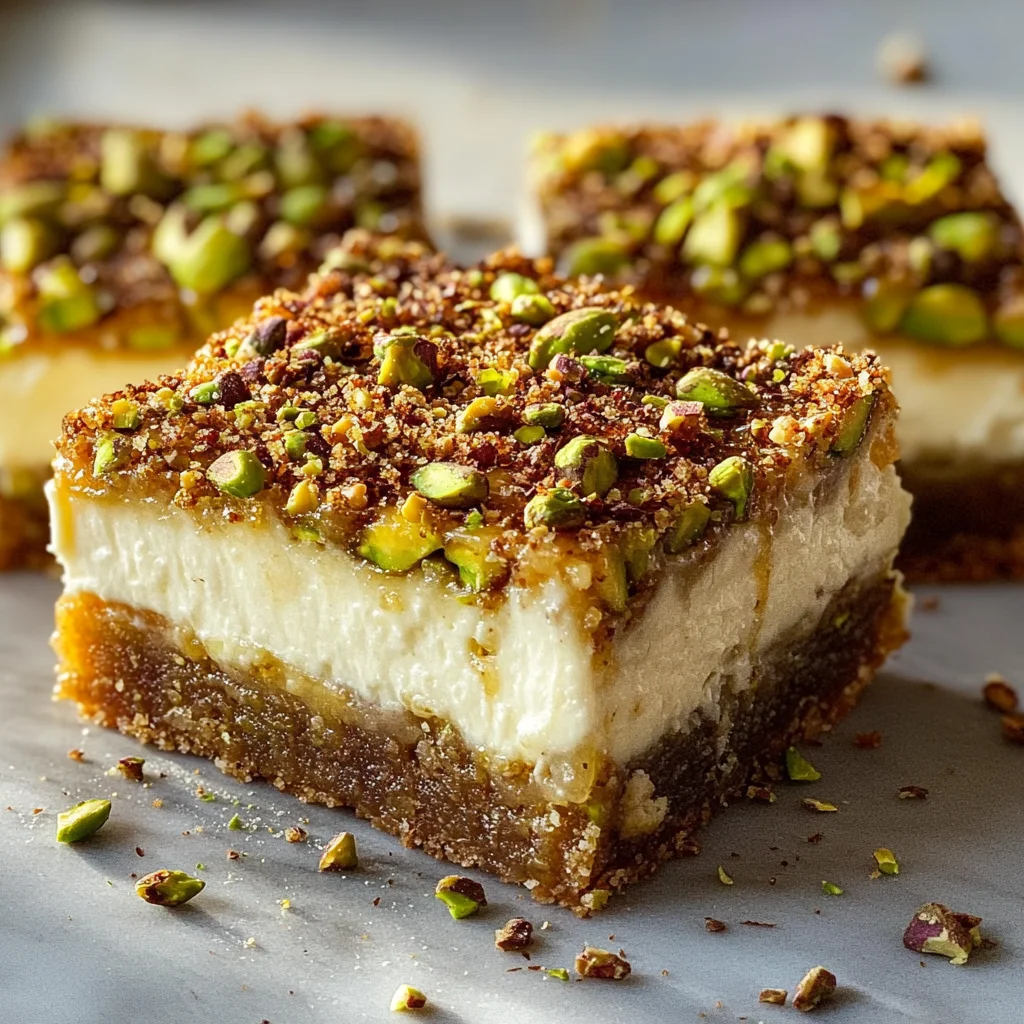
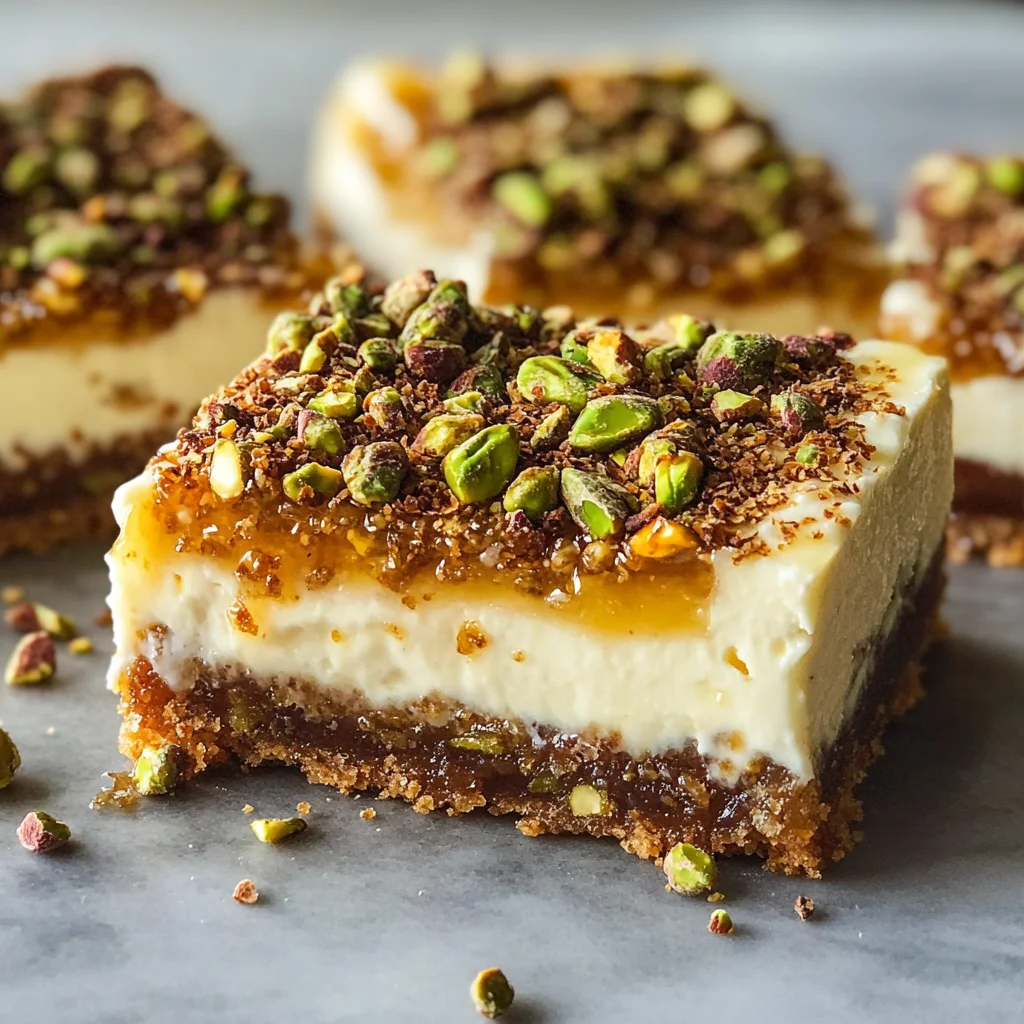
Greek Honey Pistachio Cheesecake Bars: Creamy Delight!

Get ready to indulge in a slice of paradise with our Greek Honey Pistachio Cheesecake Bars: Creamy Delight! These bars perfectly blend the rich creaminess of cream cheese with the floral sweetness of honey, all enhanced by crunchy pistachios. Each bite offers a delightful contrast of textures, making them an unforgettable dessert perfect for any occasion. Whether you’re entertaining guests or simply treating yourself, these cheesecake bars are sure to impress with their vibrant presentation and luscious flavor. Easy to prepare and even easier to enjoy, they’ll quickly become a favorite at your gatherings!
- Prep Time: 20 minutes
- Cook Time: 40 minutes
- Total Time: 1 hour
- Yield: Approximately 12 servings 1x
- Category: Dessert
- Method: Baking
- Cuisine: Greek
Ingredients
- 1 ½ cups graham cracker crumbs
- ½ cup unsalted butter, melted
- ¼ cup granulated sugar
- 16 oz cream cheese, softened
- ½ cup Greek yogurt
- ½ cup honey
- 2 large eggs
- 1 tsp vanilla extract
- ½ cup finely chopped pistachios
Instructions
- Preheat oven to 350°F (175°C) and grease a 9×9 inch baking pan.
- In a mixing bowl, combine graham cracker crumbs, melted butter, and sugar until well blended. Press this mixture into the bottom of the prepared pan.
- Bake for about 10 minutes until golden brown; allow to cool.
- In another bowl, beat softened cream cheese until smooth. Add Greek yogurt, honey, eggs, and vanilla extract; mix until well combined.
- Gently fold in chopped pistachios.
- Pour the cheesecake filling over the cooled crust and spread evenly.
- Bake for 25-30 minutes or until edges are set but center is still slightly jiggly.
- Cool to room temperature, then refrigerate for at least four hours before serving.
Nutrition
- Serving Size: 1 serving
- Calories: 210
- Sugar: 15g
- Sodium: 100mg
- Fat: 14g
- Saturated Fat: 7g
- Unsaturated Fat: 6g
- Trans Fat: 0g
- Carbohydrates: 19g
- Fiber: 1g
- Protein: 3g
- Cholesterol: 55mg