Easy Mini No Bake Key Lime Pie Recipe
There’s something truly magical about the way a dessert can transport you to a sun-drenched beach, with the scent of salt in the air and the sound of waves gently lapping at the shore. The Easy Mini No Bake Key Lime Pie is not just a recipe; it’s an experience steeped in nostalgia, a delightful little morsel that embodies summer’s sweet embrace. When I take a bite of these adorable mini pies, I’m reminded of family gatherings where laughter echoed and joy was palpable. The bright, zesty flavor of key limes dances on my palate, while the creamy filling melts effortlessly, creating an utterly intoxicating symphony of flavors that beckons me to take another bite.
This Easy Mini No Bake Key Lime Pie Recipe is more than just a treat; it’s a bridge between tradition and innovation. We often think of key lime pie as a classic summer dessert, but these mini versions bring a playful twist that makes them perfect for any occasion. Whether you’re hosting a backyard barbecue or simply looking for a sweet ending to your weeknight dinner, these pies are sure to impress your friends and family. It’s amazing how such simple ingredients can come together to create something so profoundly satisfying! Trust me on this one—once you serve these little gems, everyone will be raving about them.
Easy Mini No Bake Key Lime Pie Recipe: A Delightful Summer Treat
Welcome to the world of easy desserts! Today, we’re diving into the refreshing realm of no-bake key lime pies. These mini versions are not only adorable but also incredibly simple to make—perfect for those warm days when you don’t want to turn on the oven. Plus, who doesn’t love individual servings? They’re like tiny treasures waiting to be discovered! Let’s embark on this culinary journey together and create something truly extraordinary.
Ingredients:
As we get started on our Easy Mini No Bake Key Lime Pie Recipe, let’s gather our ingredients. Each component plays an essential role in crafting these delightful little pies that will have everyone begging for seconds!
- 1 & 1/2 cups graham cracker crumbs (or 1 sleeve graham crackers). The graham cracker crust is fundamental—it provides that lovely crunch that contrasts beautifully with the smooth filling. When making your crumbs, you can either buy pre-made graham cracker crumbs or crush whole crackers yourself for a fresher taste and texture. Just pop them in a food processor or place them in a zip-top bag and crush them with a rolling pin—such fun! Aim for fine crumbs to ensure they adhere well when mixed with butter.
- 4 ounces unsalted butter (melted). Butter acts as a binding agent for our crust and contributes richness and flavor. Using unsalted butter allows us to control the saltiness of our dish more precisely; we want our key lime pie to shine without interference from salt’s briny notes. Make sure your butter is melted but not scalding hot—this ensures it combines smoothly with the crumbs without cooking them prematurely.
- 8 oz cream cheese (softened). Cream cheese creates that velvety texture we crave in any good pie filling. Softening it before use is crucial; if it’s too cold, it won’t blend smoothly and you’ll end up with lumps instead of luxurious creaminess. If you’re short on time, cut it into small cubes and leave it out for about 15 minutes—the goal is to achieve that soft spreadable consistency that will meld perfectly with our other ingredients.
- 14 ounce can sweetened condensed milk. This liquid gold is what gives our filling its sweetness and creamy depth without needing additional sugar. Sweetened condensed milk also helps stabilize our mixture so it holds its shape when frozen—a non-negotiable aspect for achieving beautiful mini pies! Be sure to give it a good stir in the can before using; sometimes it settles and you want every last drop of that sweetness incorporated into your filling.
- ¾ Cup key lime juice (fresh squeezed or good bottled key lime juice). The star ingredient! Key limes impart that signature tartness which balances beautifully against the sweetness of the condensed milk and cream cheese. Fresh-squeezed juice really elevates this recipe—if you’ve never juiced fresh limes before, prepare yourself for an aromatic experience that’s both invigorating and rewarding! If you opt for bottled juice, ensure it’s high quality—it should still taste bright and tangy without any artificial aftertaste.
- 8 oz whipped topping (plus more for garnish). Whipped topping adds lightness to our filling; folding it in gently ensures we maintain our pie’s airy texture while providing an extra creamy finish that’s irresistible! For garnishing later, feel free to whip up some heavy cream if you prefer a homemade touch—just make sure not to overwhip until it’s grainy!
Equipment You’ll Need:
Before diving into the actual preparation process, let’s talk about some essential tools that will make this cooking experience smoother and more enjoyable. While these items may not be ingredients, they play crucial roles as partners in creating something wonderful!
- Electric mixer – This handy tool makes creaming your cream cheese effortless! It saves time and energy compared to mixing by hand while ensuring everything blends smoothly without any lumps—a crucial step in achieving that perfect consistency.
- Mixing bowls – Having multiple sizes allows you to mix ingredients comfortably without worrying about overflow or messes! A large bowl is perfect for combining your filling ingredients while smaller bowls can help keep things organized during prep.
- Silicone cups or paper cupcake liners – These are ideal for portioning out your mini pies because they allow easy release once frozen! Silicone cups are especially great because they bend easily, helping you unmold your treats without fuss.
- Sheet tray – A simple yet invaluable tool when freezing your pies; placing them on a tray ensures stability while they set up nicely without tipping over—which would be quite disastrous!
Now that we’ve gathered all our ingredients and equipment together let’s move on to crafting these delightful Easy Mini No Bake Key Lime Pies!
Step 1: Crafting the Perfect Crust
To begin this culinary adventure, let’s focus on making the graham cracker crust—a fundamental layer supporting all those vibrant flavors from our filling! Start by mixing 1 & 1/2 cups of graham cracker crumbs with 4 ounces of melted unsalted butter in your mixing bowl until well combined; you want it to resemble wet sand—this means every crumb is coated beautifully with buttery goodness! Don’t rush this step—it’s essential as it establishes both flavor and texture throughout each bite of pie later on. Once mixed thoroughly, press this mixture firmly into each silicone cup so they hold their shape after freezing; pressing down firmly will create an even base ready to cradle our luscious filling.
Step 2: Whipping Up That Dreamy Filling
With your crust ready, let’s whip together the dreamiest key lime filling ever! Begin by creaming 8 ounces of softened cream cheese using an electric mixer until it’s completely smooth—this process known as creaming helps incorporate air into the mixture which contributes lightness later on! Gradually add in the entire can (14 ounces) of sweetened condensed milk while mixing continuously until fully combined—we’re aiming for silky perfection here! Next comes my favorite part: adding ¾ cup freshly squeezed key lime juice; you’ll notice how quickly everything transforms into this glorious mix bursting with zesty aromas—it’s absolutely intoxicating!
Step 3: Folding In Whipped Topping
Once all components are harmoniously blended together—and trust me when I say you’ll want to take a taste test at this point!—it’s time to gently fold in 8 ounces of whipped topping until no streaks remain visible within your mixture; this step is vital as folding maintains airiness allowing us ultimate fluffiness throughout each pie slice later on! Be gentle here; overmixing could deflate all those wonderful bubbles we just incorporated during creaming!
Step 4: Filling Those Cups
Now comes one of my favorite moments—the assembly process! Carefully spoon generous amounts of your luscious key lime filling into each prepared silicone cup until they’re filled about three-quarters full—you want enough space left at top for adding those delectable graham cracker crumbs later on too! Place each filled cup onto your sheet tray before transferring them carefully into freezer space where they’ll need at least four hours—or until completely set—to transform into delightful little bites awaiting their moment under sunny skies (or cozy evenings indoors!).
I hope you’re feeling excited about trying out this Easy Mini No Bake Key Lime Pie Recipe because trust me—the end result will have everyone asking for more than just one slice (or two!). Let’s continue making magic happen step by step together…
Step 5: The Magic of Creamy Filling
Now that you’ve got your luscious graham cracker crust set aside, it’s time to create the creamy filling that will take your Easy Mini No Bake Key Lime Pie Recipe to new heights. Begin by taking your softened cream cheese and placing it into a large mixing bowl. I can’t stress enough how important it is that the cream cheese is at room temperature—this ensures that when you whip it, it turns into an utterly smooth and velvety texture without any lumps. Using an electric mixer, beat the cream cheese on medium speed until it’s completely smooth. This step is crucial because a well-blended base helps all the flavors meld beautifully together, creating a harmonious symphony of flavors in each bite.
Once you’re satisfied with the consistency of the cream cheese, it’s time to introduce the sweetened condensed milk. Pour it in slowly while continuing to mix; this allows for a gradual incorporation of the milk into the mixture, preventing any splattering (and keeping your kitchen clean!). Blend everything until the mixture is silky and cohesive. This sweetened condensed milk acts as both a sweetener and a stabilizer, giving our pie that rich, luscious mouthfeel we crave. Afterward, add in your freshly squeezed key lime juice—oh, my friends, this is where the magic truly begins! The acidity from the lime juice not only brightens up the dessert but also helps to balance out the sweetness from the condensed milk. Mix until everything is thoroughly combined and you have a beautiful pale yellow filling that tastes like summer in every spoonful.
Step 6: Folding in Whipped Topping
Now we’re getting into one of my favorite parts—the whipped topping! Gently fold in 8 ounces of whipped topping into your creamy mixture using a spatula. It’s important to be gentle here; we want to preserve that airy texture so each pie feels light as a cloud when you take a bite. Start by adding about one-third of your whipped topping to lighten up the mixture first—this technique helps incorporate air without deflating everything else you’ve worked so hard on. Fold gently with a sweeping motion, bringing the mixture from the bottom of the bowl over to the top.
As you do this, trust me when I say that patience pays off! You want there to be no visible streaks left; a uniform color indicates that you’ve achieved that perfect blend of fluffy goodness and zesty filling. This step is non-negotiable because achieving that lightness ensures each mini pie will melt in your mouth rather than feeling dense or heavy. Once combined completely, resist the urge to taste just yet—I know it’s tempting! Instead, take a moment to appreciate how far you’ve come; soon enough you’ll be indulging in these delightful bites.
Step 7: Filling Those Cups with Love
With your filling ready and bursting with flavor, it’s time for one of my absolute favorite steps: filling those individual silicone cups! If you’ve got silicone molds handy (or even paper cupcake liners), grab them now because they are perfect for these mini delights. Carefully spoon or pour your key lime filling into each cup until they’re filled about three-quarters full—trust me on this one; leaving some space allows for expansion as they freeze without overflowing.
It might feel daunting at first, but don’t rush this step! Take your time and ensure each cup gets equal amounts—this way everyone gets their fair share of tangy goodness! As you fill them up, imagine their delightful transformation as they chill and solidify in the freezer. Once they’re filled, sprinkle some remaining graham cracker crumbs on top—this crunchy layer adds texture and visually signals what delectable treat awaits inside. Then place these cups on a sheet tray before transferring them to your freezer; this will make it easier to move them around without spilling any filling.
Step 8: Freezing – A Crucial Patience Test
Now comes perhaps one of the most crucial steps—the freezing process! Pop those adorable little cups into your freezer for about four hours or until they are completely set. Why freeze? Well, it’s during this time that all those magical flavors meld together while transforming into an actual pie-like texture that’s firm yet creamy at once—just imagine how satisfying it’ll be when you finally dig in! I encourage you not to rush this step; allow them plenty of time to freeze properly so they reach their fullest potential.
You’ll know they’re ready when they’ve got firmness throughout but still have just enough give when pressed gently—a bit like a perfectly chilled cheesecake texture! If you’re feeling patient (which I totally understand if you’re not!), letting them freeze overnight can enhance their flavor even more as they continue setting up beautifully while developing deeper notes from those key limes. Trust me—your taste buds will thank you later!
Conclusion:
As we wrap up our journey through this Easy Mini No Bake Key Lime Pie Recipe, I hope you feel as excited as I do about crafting these little beauties! Each step has been crafted with love, bringing together the perfect blend of zesty key lime and creamy filling nestled within a buttery graham cracker crust. It’s not just about making dessert; it’s about creating an experience that delights the senses and brings smiles all around. The way these mini pies transform simple ingredients into something truly extraordinary speaks volumes about how cooking can create joy.
Why is this recipe a must-try? Well, aside from being incredibly easy to whip up—perfect for those busy weeknights or spontaneous gatherings—it’s rich in flavor yet light enough to leave everyone feeling refreshed afterward. Picture yourself pulling these delightful treats from the freezer on a warm afternoon; their coolness instantly brings relief on hot days while simultaneously exciting your taste buds with that signature tangy sweetness. Whether it’s a casual family dinner or a festive gathering with friends, these mini pies shine bright at any occasion.
Imagine savoring one with a cup of iced tea on your porch as you bask in the sunshine or serving them at your next get-together alongside fresh fruit skewers and lemonade; the possibilities are endless! For an afternoon pick-me-up while working from home, pair it with your favorite herbal tea—it’s pure bliss! And if you’re feeling adventurous, why not add a sprinkle of toasted coconut on top? Or swap out regular whipped topping for flavored varieties like coconut cream or even lemon zest-infused cream? Each twist adds its unique flair while staying true to that charming key lime essence.
So gather your ingredients and get ready to create something special! This recipe is wonderfully adaptable—whether you want to experiment with different citrus juices like blood orange or grapefruit or even try adding fresh herbs like mint for an unexpected twist—let your creativity flow! I can’t wait to hear how yours turn out. Share your experiences and connect; let’s celebrate this joyous journey together!
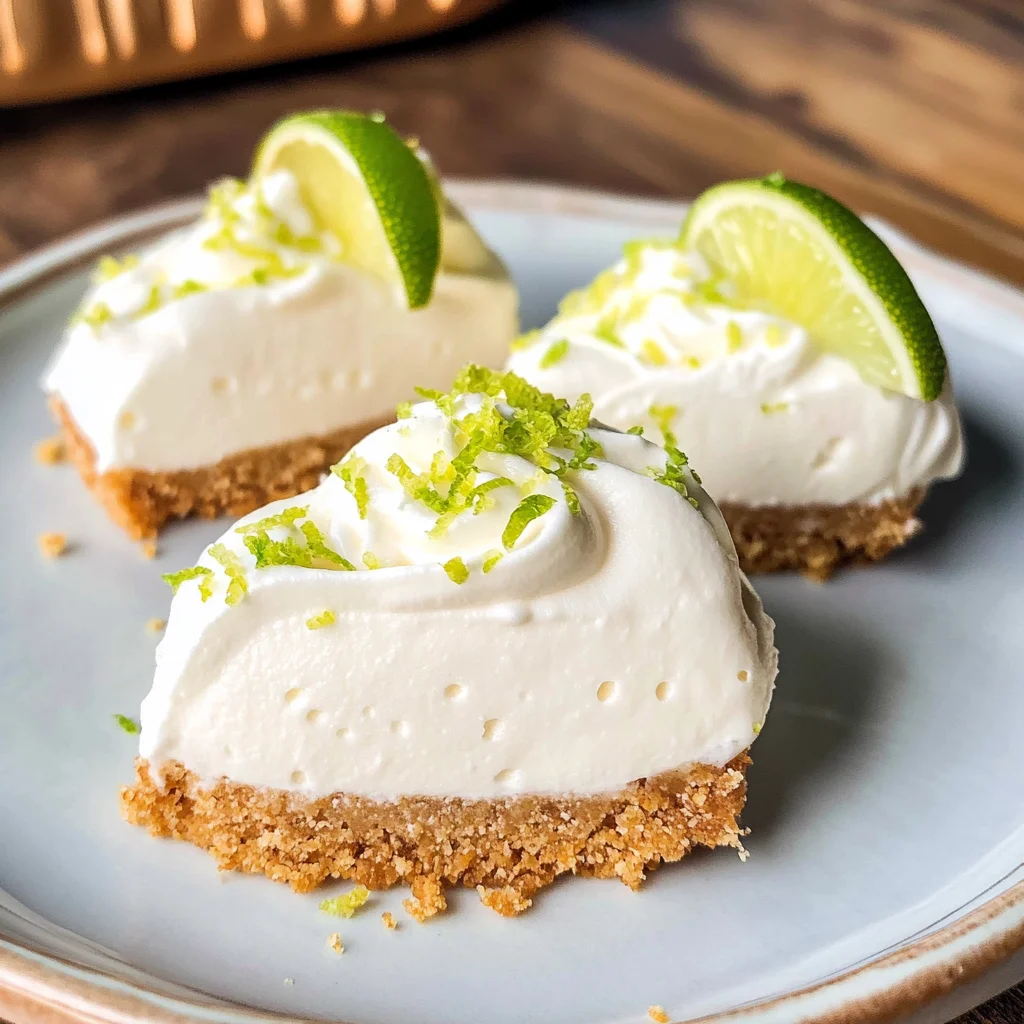
Easy Mini No Bake Key Lime Pie

Discover the joy of summer with this Easy Mini No Bake Key Lime Pie Recipe! Each bite of these delightful individual pies is a burst of zesty, creamy goodness that transports you to sunny shores. With a buttery graham cracker crust and a luscious filling made from velvety cream cheese, sweetened condensed milk, and fresh key lime juice, these mini desserts are not only easy to whip up but also perfect for any occasion. Whether you’re hosting a backyard barbecue or simply treating yourself, these adorable little pies will surely impress your family and friends. Best of all, they require no baking—just freeze and enjoy!
- Prep Time: 30 minutes
- Cook Time: none
- Total Time: 0 hours
- Yield: Makes about 12 mini pies 1x
- Category: Dessert
- Method: Freezing
- Cuisine: American
Ingredients
- 1 & 1/2 cups graham cracker crumbs
- 4 ounces unsalted butter (melted)
- 8 oz cream cheese (softened)
- 14 ounces sweetened condensed milk
- ¾ cup key lime juice
- 8 oz whipped topping
Instructions
- In a mixing bowl, combine graham cracker crumbs and melted butter until the mixture resembles wet sand. Press firmly into silicone cups.
- In another bowl, beat softened cream cheese until smooth. Gradually mix in sweetened condensed milk followed by key lime juice until well combined.
- Gently fold in whipped topping until no streaks remain.
- Spoon the filling into the prepared crusts, leaving space at the top. Freeze for at least four hours or until set.
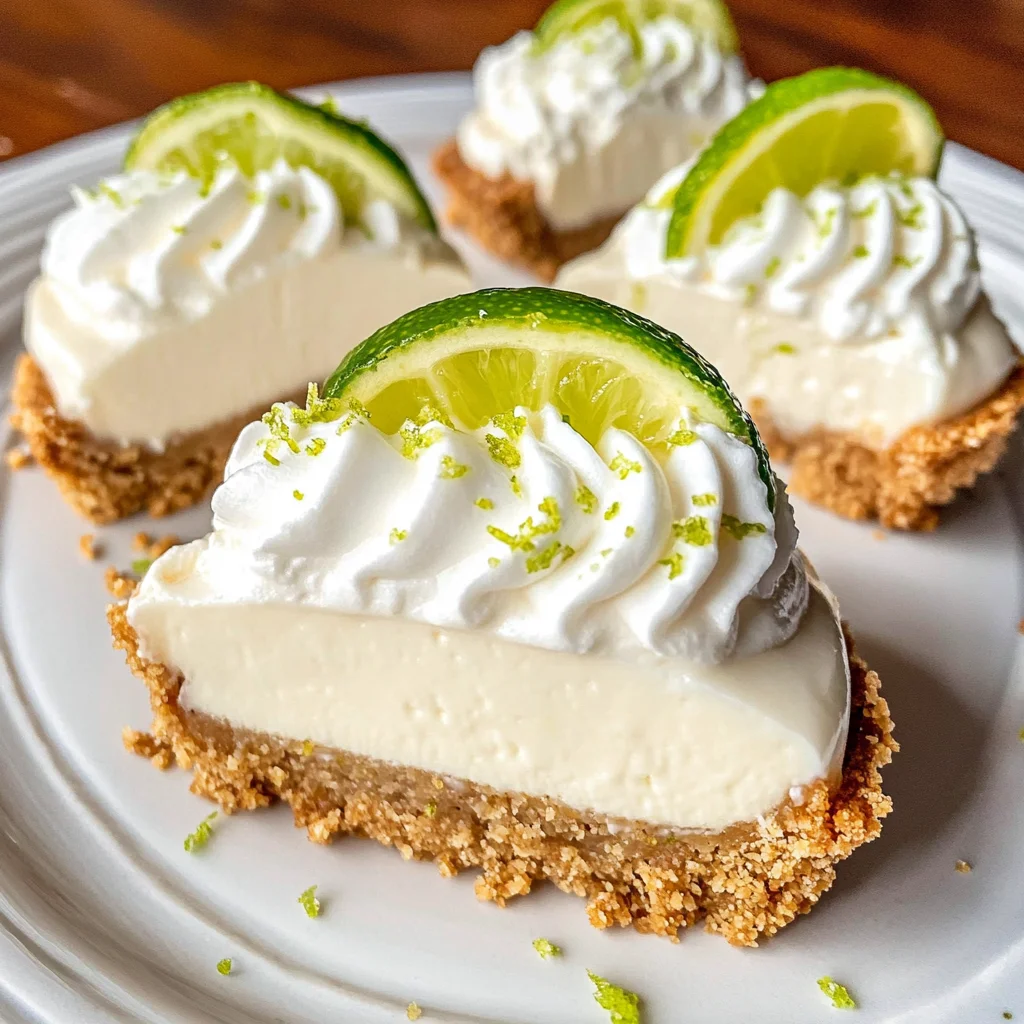
- Unmold and garnish with additional whipped topping or lime slices before serving.
Nutrition
- Serving Size: 1 mini pie (75g)
- Calories: 200
- Sugar: 17g
- Sodium: 150mg
- Fat: 12g
- Saturated Fat: 7g
- Unsaturated Fat: 4g
- Trans Fat: 0g
- Carbohydrates: 23g
- Fiber: 1g
- Protein: 3g
- Cholesterol: 25mg