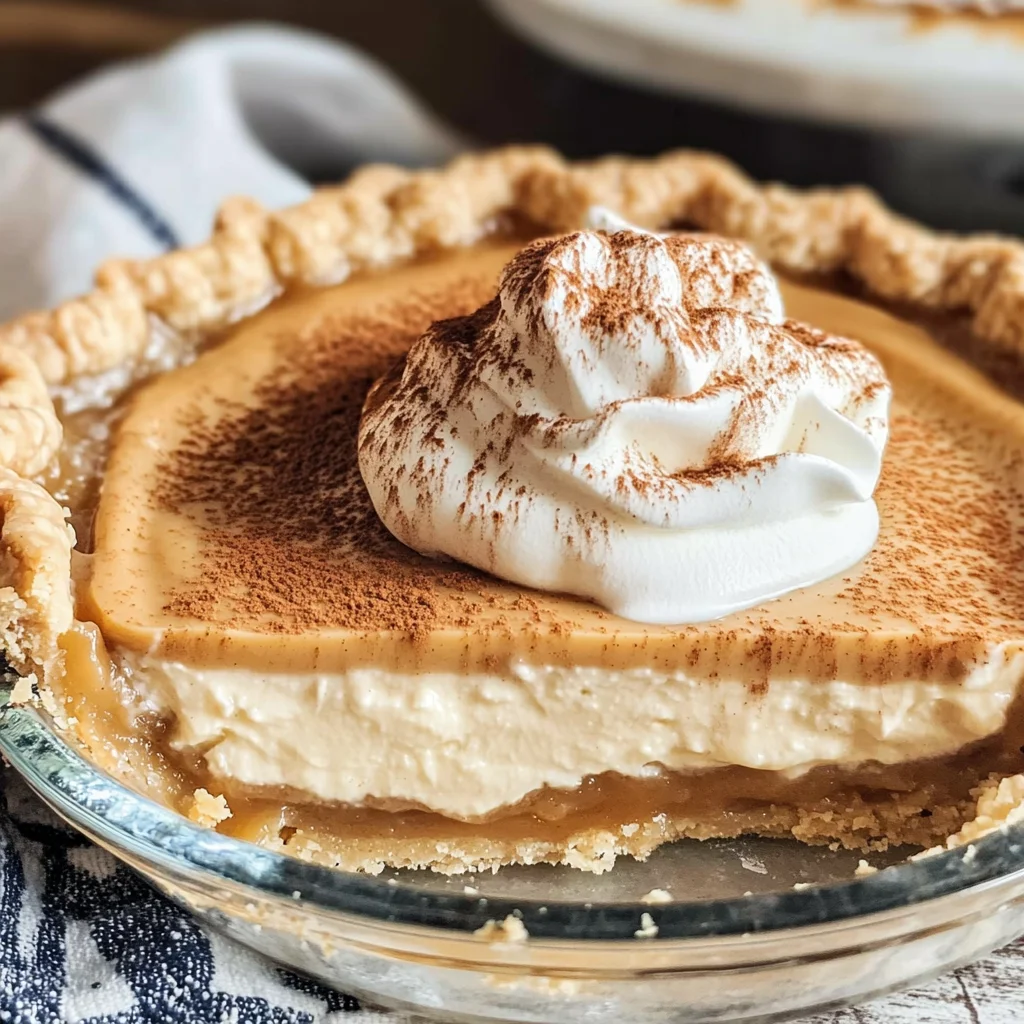
Cinnamon Butterscotch Pie
There’s something truly magical about the way food can evoke emotions, create memories, and connect us with our loved ones. When I think of my favorite desserts, one that brings a smile to my face every time is Cinnamon Butterscotch Pie. This isn’t just any pie; it’s a creamy, decadent delight that’s both comforting and sophisticated, capturing the essence of home in every luscious bite. Imagine sinking your fork into a velvety layer of butterscotch filling, with the delightful crunch of a Biscoff crust that crumbles perfectly beneath your touch. The aroma of cinnamon wafting through the kitchen as it chills is enough to make anyone feel like they’re wrapped in a warm hug. This is more than just food; it’s an experience—a revelation that transcends the ordinary and takes you on a journey through comfort and nostalgia.
What makes this Cinnamon Butterscotch Pie so special? Not only is it no-bake—perfect for those hot summer days when you want dessert without heating up the kitchen—but it also boasts layers of flavor that dance harmoniously together. The buttery sweetness of Biscoff cookies melds beautifully with the rich butterscotch filling, while the hint of cinnamon adds just the right touch of warmth. It’s perfect for gatherings with friends or family celebrations, where laughter fills the air and sweet treats are always welcome. I promise you, once you make this pie, it will quickly become a beloved staple in your dessert repertoire.
Cinnamon Butterscotch Pie: A Decadent Delight for Any Occasion
Get ready to embark on a delightful culinary journey! This no-bake Cinnamon Butterscotch Pie is not only easy to make but also sure to impress anyone lucky enough to indulge in its creamy goodness. With layers upon layers of flavor and texture, this pie is destined to become your new go-to dessert for every occasion.
Ingredients:
As we prepare to create this incredible pie, let’s take a moment to appreciate each ingredient we’ll be using. Every component plays a vital role in crafting this masterpiece; understanding their purpose will elevate your baking experience and ensure success!
- 200g Biscoff cookies (around 26 cookies) – These cookies bring an irresistible caramelized flavor and crunchy texture that forms the base of our pie crust. Their unique spice blend enhances the overall taste profile of the pie, providing a delightful contrast against the creamy filling. Look for authentic Biscoff cookies or similar speculoos varieties for that signature taste. If you’re looking for alternatives due to dietary preferences or availability, graham crackers work well too; just add a bit more sugar to mimic the sweetness.
- 85g (6 tablespoons) butter, melted – Butter acts as the glue that holds our crumbly crust together and adds richness and depth to its flavor. It’s important to use unsalted butter here so we can control all aspects of seasoning ourselves throughout this recipe. Always melt it gently—too hot can lead to separation issues when combined with cookie crumbs.
- 150g (3/4 packed cup) brown sugar – This ingredient is crucial for creating that deeply flavored butterscotch filling we adore! Brown sugar has molasses content which provides moisture and contributes to a lovely caramel color when cooked down. Using dark brown sugar will intensify those flavors even further—trust me, you’ll want every bit of sweetness!
- 3 Tablespoons water – Adding water into our brown sugar mixture helps dissolve it evenly as it heats up on the stove. It’s essential because it prevents any crystallization from occurring while cooking, ensuring we achieve that smooth texture characteristic of high-quality butterscotch.
- 1/2 teaspoon salt – Salt may seem minor in dessert recipes but trust me—it’s absolutely paramount! It enhances sweetness by balancing out flavors and making them pop. Just like how adding salt elevates savory dishes, it does wonders here too!
- 120g (1/2 cup) heavy cream – The heavy cream adds luxurious richness and creaminess to our filling while providing stability as we whisk everything together over heat. Make sure you’re using heavy cream instead of light or whipping cream because we need that higher fat content for achieving silky results.
- 480g (2 cups) whole milk – Whole milk provides additional liquid while keeping everything rich without overwhelming heaviness—an essential balance in our butterscotch filling! If you’re looking for alternatives due to dietary restrictions, full-fat coconut milk works beautifully while adding its own subtle flavors.
- 5 tablespoons cornstarch – Cornstarch acts as our thickener here; it’s what transforms our liquid mixture into pudding-like consistency once heated properly! Be sure not to skip or skimp on this step; without enough cornstarch mixed through correctly at the right temperature range, you’ll end up with runny filling instead.
- 4 large egg yolks – Egg yolks enrich our filling significantly while providing structure once cooked down under heat—this is non-negotiable if you want that classic custard-like consistency everyone loves! Be gentle when separating them from egg whites; reserve those whites for another delicious use later down the road!
- 1 teaspoon ground cinnamon – Cinnamon infuses warmth into our pie giving off an intoxicating aroma as it bakes; its flavor lingers beautifully throughout each bite creating harmony between sweet notes within our filling.
- 1 teaspoon vanilla extract – Vanilla extract rounds out all these flavors perfectly enhancing sweetness without overpowering anything else present inside this pie! Always choose high-quality pure vanilla rather than imitation because quality counts when baking!
- 1 Tablespoon butter – A final tablespoon folded through after cooking ensures ultimate richness along with glossy sheen once poured over crust before chilling—it’s like liquid gold!
- 180g (3/4 cup) heavy cream – We need more whipped cream later on top which contributes lightness alongside adding decadence too—what’s not to love?
- 1 Tablespoon powdered sugar – Powdered sugar sweetens whipped cream while stabilizing it at soft peaks allowing us dollop generously over finished product!
- 1/2 teaspoon vanilla – A dash more vanilla extracts reinforces flavor profile within whipped topping delivering balanced harmony again across entire dish!
- 1/8-1/4 teaspoon ground cinnamon for dusting – The dusting at serving time finishes off presentation nicely bringing visual appeal alongside added aroma upon slicing into each piece—the little details matter immensely!

Equipment You’ll Need:
Now that we have all our ingredients gathered together like old friends reuniting after years apart, let’s talk about some essential tools you’ll need in order to whip up this Cinnamon Butterscotch Pie successfully! While they may not be “ingredients,” having the right equipment makes all difference during this delightful process.
- Food processor – This handy tool simplifies breaking down those Biscoff cookies into fine crumbs effortlessly; no need for tedious manual crushing here! If you don’t own one already though don’t fret too much—you could utilize a sturdy zip-top bag along with rolling pin instead if necessary.
- Medium saucepan – Opting for medium-sized pots enables even heat distribution allowing us maintain control while cooking sugary mixtures without burning them—a key aspect throughout recipe!
- Whisk – A trusty whisk ensures everything gets blended smoothly during preparation stages allowing airiness incorporated within pudding itself as well—it becomes lighter fluffier thanks consistent stirring technique employed throughout mixing process.
- Mixing bowls – Having multiple bowls available lets us compartmentalize tasks easily whether whisking egg yolks or combining ingredients separately before merging later on—all about efficiency here folks!
With these tools at hand plus careful attention paid towards each step outlined ahead lies nothing stopping anyone from creating their very own heavenly dessert masterpiece right within kitchens everywhere! Now let’s dive deeper into preparing this sumptuous treat!
Preparing the Cinnamon Butterscotch Pie
Step 1: Creating Our Crunchy Crust
Let’s start by making that unforgettable crust which sets up our entire pie so perfectly! Grab your food processor (or trusty rolling pin!) and toss those Biscoff cookies inside before blitzing them until they resemble fine crumbs—think sandy beach textures! Once you’ve achieved blissfully crumbly consistency pour melted butter over top then pulse again until everything combines beautifully into clumpy mixture resembling wet sand perfect for pressing down firmly into pie pan base & sides alike before chilling whilst working on other components ahead—it’ll help set better later too!
Step 2: Crafting Liquid Gold
Next up is preparing what I like call ‘liquid gold’—our decadent butterscotch filling bursting forth with flavors galore! In medium saucepan combine measured brown sugar alongside water/salt mix stirring gently until bubbly yet without agitation (we’re avoiding crystallization happening). Allow mixture cook undisturbed approximately five minutes until darker shade emerges coupled fragrant aroma wafting around kitchen indicating caramelization taking effect—a crucial moment indeed leading towards rich depths ahead!
Step 3: Whisk Those Yolks!
While waiting patiently watchful eye over bubbling concoction take opportunity whisk together remaining egg yolks/cornstarch/cinnamon plus splash vanilla/milk separate bowl until completely uniform texture established ensuring no lumps present whatsoever—we want silky smoothness moving forward don’t forget patience pays off here trust me!
Step 4: Temper Those Yolks
Now comes an exciting moment as we temper those precious egg yolk mixtures! Lower heat slightly beneath bubbling pot then slowly stream hot caramelized mix gradually towards yolks whisking continuously throughout—this step protects eggs from curdling ensuring smooth incorporation happens—the science behind custards requires finesse folks so don’t rush through process retain gentle rhythm keep whisking steadily until fully integrated before pouring back entire contents saucepan simmer briefly thickening further till desired pudding-like consistency achieved—oh my goodness just wait till aroma hits senses!!
Stay tuned as we continue crafting this breathtaking Cinnamon Butterscotch Pie! Each step brings us closer toward indulging ourselves in heavenly bites filled with nostalgia wrapped tightly around every slice shared amongst good friends & family alike—who wouldn’t want partake?
Crafting Your Dreamy Cinnamon Butterscotch Pie
Step 5: Transforming Sugar into Liquid Gold
Now, let’s dive right into the heart of our butterscotch filling. In a medium saucepan, whisk together the brown sugar, water, and salt, ensuring that everything is well combined. This mixture is where the magic begins! Place it over medium heat and do not stir—this is crucial because stirring can cause the sugar to crystallize, resulting in a grainy texture instead of that smooth, luxurious feel we’re aiming for. As the mixture heats up, keep an eye on it; you’ll soon notice tiny bubbles forming around the edges. Once those bubbles start to dance more vigorously across the surface, it’s time to let it boil undisturbed for about five minutes. During this time, you’ll start to smell that utterly intoxicating caramel aroma filling your kitchen; trust me when I say this scent is just a hint of what’s to come! After five minutes, you should see a beautiful dark amber color developing, which signifies that your sugar has reached that perfect caramelized point—this deep flavor is absolutely paramount for creating a rich and complex butterscotch.
Step 6: Whisking Up the Egg Mixture
While your sugar is bubbling away, grab a medium bowl and whisk together the egg yolks, cornstarch, cinnamon, vanilla extract, and just a tablespoon of milk. Take your time here; whisking these ingredients together thoroughly creates a creamy base that will help thicken your filling later on. The cornstarch acts as a thickening agent when heated and is essential for achieving that silky texture we all love in pie fillings. What makes this step so special is how each ingredient plays its part—the cinnamon adds warmth and depth while the vanilla brings out those sweet notes perfectly. Remember to set aside the rest of your milk for later; we’ll be needing it soon!
Step 7: Tempering—The Art of Gentle Heating
Once your sugar has achieved that glorious caramel color and aroma, it’s time to lower the heat just slightly to medium-low. Slowly stream in the heavy cream while whisking continuously—it’s like introducing two contrasting elements that need to find harmony! At first glance, it may seem like everything is clumping together as the hot mixture meets the cool cream; don’t worry! Just keep whisking with gentle determination until you’ve transformed it into a smooth liquid gold. This process of tempering is so important because it helps prevent your eggs from scrambling when they meet high heat—a common pitfall in custard-making! After everything is well combined and simmering nicely, take about half a cup of this hot mixture (it should be bubbling gently) and slowly pour it into your egg mixture while whisking vigorously—this gradual introduction warms up those egg yolks without cooking them too quickly.
Step 8: Creating That Luxurious Filling
With your tempered egg yolk mixture ready to go, carefully pour it back into the saucepan with the remaining butterscotch mixture while continuing to whisk away like there’s no tomorrow! Now comes another critical phase: cooking this luscious blend over low heat until it thickens beautifully. Keep an eye on it as you stir continuously; after about three minutes of bubbling gently (you’ll notice some very soft bubbles forming), you should see it starting to thicken up nicely. Don’t rush this step—allowing it to bubble for at least one and a half minutes ensures that you achieve proper thickness for your pie filling. If you skip this timing or don’t whisk enough during cooking, you might end up with a runny pie—not what we want at all! Once you’ve got that perfect pudding-like consistency (think velvety smoothness), remove it from heat and immediately stir through one tablespoon of butter until melted; this adds even more richness and depth to our already extraordinary filling.
Final Touches for Your Cinnamon Butterscotch Pie
Step 9: Pour It All Together
Now comes one of my favorite parts—pouring that dreamy butterscotch filling into our prepared Biscoff crust! First things first, pull your crust out of the refrigerator; it should be nice and firm by now—a comforting haven ready to cradle all that deliciousness. Slowly pour in your butterscotch mixture directly into the center of the crust. If you’re looking for an extra-smooth finish (and who wouldn’t want that?), consider pouring it through a fine sieve before adding it to the crust—you’d be surprised how much smoother this makes everything! This little detail can elevate your dessert from good to utterly extraordinary; trust me on this one!
Step 10: Chill Out!
Once you’ve poured in all that golden goodness, cover top tightly with plastic wrap—but here’s an essential tip: make sure the plastic touches the surface of the filling directly. This prevents any unsightly skin from forming as it chills in the refrigerator—nobody wants their gorgeous pie marred by unsightly lumps! Now comes perhaps one of the hardest parts—waiting patiently as it sets in the fridge for at least six hours or ideally overnight if you can manage. Why chill? This resting period allows all those flavors to meld beautifully while giving our butterscotch time to firm up just right—it transforms from a warm pudding-like state into something truly special.
Step 11: Whip It Good!
When you’re finally ready to serve this masterpiece—a moment I promise will be worth every minute spent waiting—it’s time for some heavenly whipped cream! In a medium bowl (preferably chilled!), combine heavy cream with powdered sugar and vanilla extract before whipping until soft peaks form—a process that’s both simple yet transformative! The sweetened cream adds an airy contrast against our dense butterscotch pie while accentuating its flavors wonderfully. Be gentle during this step; over-whipping can lead to graininess rather than lightness!
Step 12: The Grand Finale
Dollop generous amounts of whipped cream atop each slice before dusting lightly with ground cinnamon—this final touch not only enhances presentation but also ties back beautifully into our cinnamon theme throughout this recipe! As you serve up slices laden with fluffy cream against rich butterscotch hues nestled in crunchy Biscoff crusts, watch as faces light up around you—the profound satisfaction from each bite will remind everyone why dessert is such an important part of any meal.
And there you have it—a Cinnamon Butterscotch Pie that’s creamy beyond belief and decadently delicious without any fuss whatsoever! Each bite brings warmth wrapped in nostalgia as if every forkful tells its own story—one filled with love shared around tables where memories are made over food. Enjoy every moment—and don’t forget: sharing makes everything sweeter!
Storage and Enjoyment Tips for Your Cinnamon Butterscotch Pie
Now that your Cinnamon Butterscotch Pie has set beautifully in the refrigerator, it’s time to relish the fruits of your labor! Trust me when I say that the anticipation builds with every passing hour as those rich, creamy layers meld together. But before you dive into that first luscious slice, let’s talk about how to preserve this treasure so you can enjoy it long after the first bite.
Storing Leftover Cinnamon Butterscotch Pie
To keep your Cinnamon Butterscotch Pie fresh and delightful for days to come, store it in an airtight container in the refrigerator. This is crucial because it locks in that velvety texture and prevents any unwanted odors from mingling with your pie. Ideally, it should last for about 4 to 5 days—though I promise you, it will likely be devoured long before then! If you’re looking to maintain its quality, consider placing a slice of bread on top of the filling, which helps retain moisture without compromising flavor. Even after a few days, the pie maintains that intoxicating sweet butterscotch flavor along with the hint of cinnamon that dances on your palate. If you find yourself needing to serve it chilled again, simply pop slices back into the fridge for a bit before indulging—no reheating necessary!
Freezing Cinnamon Butterscotch Pie for Later
Feeling like extending your pie’s life even further? Freezing is a fantastic option! To do this properly, slice the pie into individual servings and wrap each piece tightly in plastic wrap before placing them in an airtight container or freezer bag. This method is excellent because it protects each slice from freezer burn while allowing you to enjoy just what you crave at any given moment. You can keep your Cinnamon Butterscotch Pie frozen for up to three months without losing any of its charm. When you’re ready to indulge again, simply transfer a slice from the freezer to the fridge overnight to thaw—or if you’re feeling impatient like I often am—let it sit at room temperature for about 30 minutes. The convenience of having this decadent dessert at your fingertips is nothing short of magical!
Cinnamon Butterscotch Pie
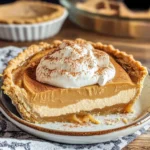
Cinnamon Butterscotch Pie is a delightful, no-bake dessert that promises to captivate your taste buds with its creamy butterscotch filling and crunchy Biscoff crust. This pie combines layers of flavor and texture, making it a perfect centerpiece for any gathering or celebration.
- Prep Time: 30 minutes
- Cook Time: 15 minutes
- Total Time: 45 minutes
- Yield: Serves approximately 8 slices 1x
- Category: Dessert
- Method: No-bake
- Cuisine: American
Ingredients
- 200g Biscoff cookies
- 85g unsalted butter
- 150g brown sugar
- 3 tablespoons water
- 120g heavy cream
- 480g whole milk
- 5 tablespoons cornstarch
- 4 large egg yolks
- 1 teaspoon ground cinnamon
- 1 teaspoon vanilla extract
- More heavy cream for topping
Instructions
- Crush Biscoff cookies into fine crumbs using a food processor, then mix with melted butter until combined. Press into a pie pan and chill.
- In a saucepan, combine brown sugar, water, and salt over medium heat without stirring until bubbly (about 5 minutes).
- In a separate bowl, whisk together egg yolks, cornstarch, cinnamon, vanilla extract, and some milk until smooth.
- Slowly pour the hot sugar mixture into the egg mixture while whisking continuously to temper the eggs.
- Return everything to the saucepan over low heat; stir until thickened (about 3 minutes).
- Stir in one tablespoon of butter for richness; remove from heat.
- Pour the butterscotch filling into the chilled crust and refrigerate for at least 6 hours (preferably overnight).
- Before serving, whip additional heavy cream with powdered sugar and vanilla; dollop on top and dust with cinnamon.
Nutrition
- Serving Size: 1 slice
- Calories: 390
- Sugar: 24g
- Sodium: 170mg
- Fat: 29g
- Saturated Fat: 17g
- Unsaturated Fat: 10g
- Trans Fat: 0g
- Carbohydrates: 34g
- Fiber: 1g
- Protein: 4g
- Cholesterol: 130mg