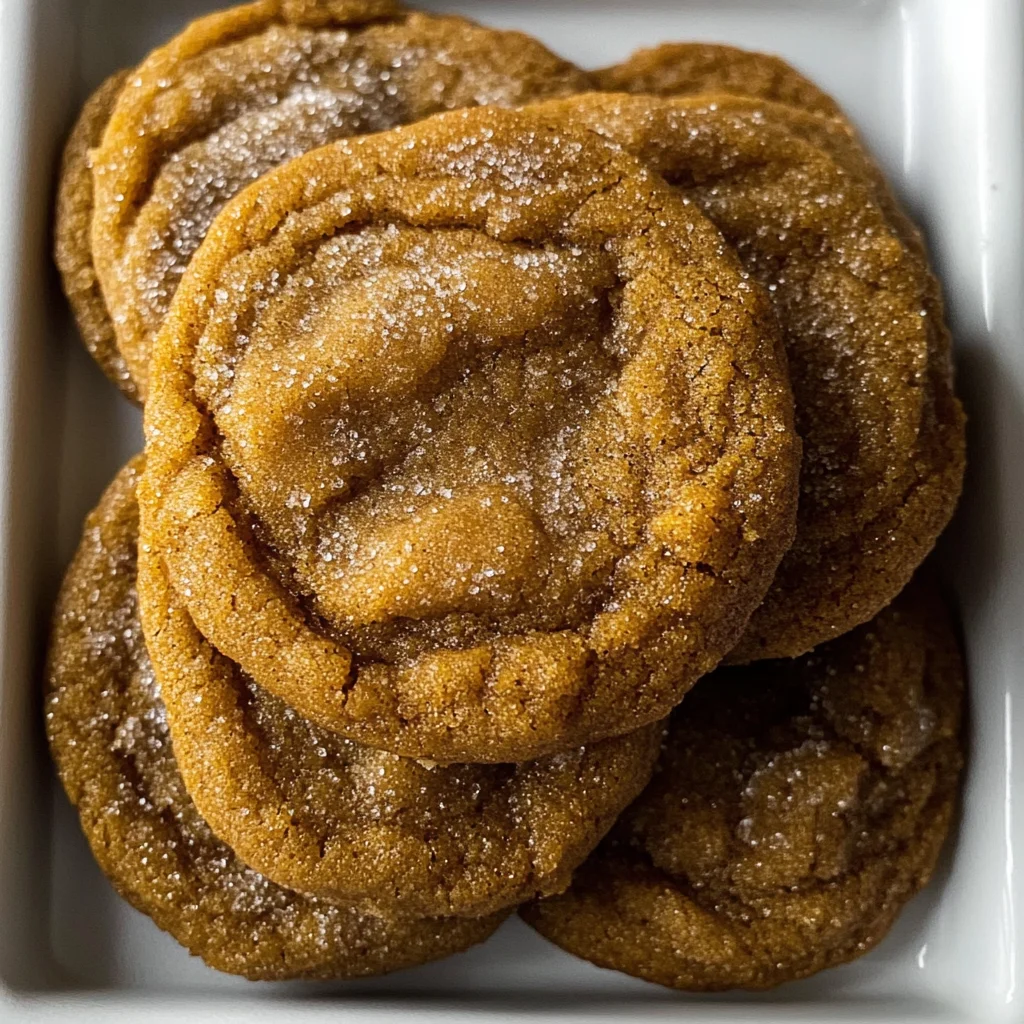
chewy maple pumpkin cookies
There’s something undeniably magical about the changing seasons, particularly when autumn whispers its arrival with a crisp breeze and a symphony of vibrant colors. As the leaves turn shades of amber and gold, my heart swells with anticipation for all the cozy flavors that this season brings. And there’s no flavor more captivating than pumpkin, is there? With each bite of these chewy maple pumpkin cookies, you’re not just tasting a cookie; you’re experiencing a heartfelt embrace of warm spices, rich maple sweetness, and the buttery richness that can only come from brown butter. The texture is perfectly chewy—just like a cherished memory—and they are delightfully coated in a spiced sugar that’s reminiscent of falling leaves dancing in the wind. Trust me when I say these cookies are a bridge between nostalgia and innovation; they’re perfect for sharing with friends or savoring quietly while wrapped in your favorite blanket.
When I first stumbled upon this recipe for chewy maple pumpkin cookies, it felt like uncovering a hidden treasure. You see, these cookies are not just any ordinary treats; they encapsulate everything I adore about fall baking. The combination of canned pumpkin and pure maple syrup creates an utterly intoxicating flavor profile that dances on your taste buds and warms your soul. These cookies make the perfect companion for a chilly day spent inside, where you can enjoy the aroma wafting through your home as they bake. Whether you’re hosting a gathering or just treating yourself after a long week, these cookies bring joy to every occasion—like wrapping yourself in a hug from someone you love.
chewy maple pumpkin cookies: A Taste of Autumn Bliss
Get ready to embark on a delightful culinary journey with these chewy maple pumpkin cookies! This recipe is not just about baking; it’s about creating memories filled with warmth and laughter. So gather your ingredients and let’s dive into this delicious experience together!
Ingredients:
As we prepare to create our chewy maple pumpkin cookies, let’s take a moment to appreciate each ingredient that contributes to this delightful experience. Each one plays a crucial role in making these cookies not only delicious but also unforgettable.
- 2 1/4 cups (270g) all-purpose flour. This is truly the backbone of our cookie dough. All-purpose flour provides structure while still allowing for that delightful chewiness we crave in every bite. When measuring flour, it’s essential to avoid compacting it—lightly spoon it into your measuring cup and level it off with a knife for accuracy. If you’re looking for an alternative, you could use half whole wheat flour to add an extra nutty depth to your cookies without compromising their texture.
- 2 teaspoons pumpkin or chai spice blend. This is where the magic happens! The right spice blend will elevate these cookies from good to extraordinary, infusing them with fragrant notes of cinnamon, nutmeg, ginger, and clove. If you find yourself low on spices or want to customize flavors further, feel free to mix your own blend according to your taste preferences—it’s all about what makes your heart sing!
- 1/2 teaspoon baking soda. A little leavening agent goes a long way! Baking soda helps our cookies rise slightly while creating that perfect chewy texture we adore so much. It’s essential that this ingredient is fresh; expired baking soda can leave your cookies flat and dense instead of light and airy.
- 1/2 teaspoon salt. Salt is often overlooked but trust me when I say it’s non-negotiable! It enhances flavors beautifully and balances out the sweetness in our dough. Use fine sea salt if possible as it dissolves well in the batter for even flavor distribution.
- 1 cup (226g) European-style unsalted butter, browned and cooled but still liquid. Oh my goodness—browning butter transforms an ordinary ingredient into liquid gold! The nutty aroma and depth of flavor from brown butter will take these cookies over the top. It’s crucial to let it cool enough before adding it to avoid cooking the egg yolk prematurely—this step adds richness that’s simply unparalleled.
- 1 cup (200g) light brown sugar. This sugar adds moisture as well as caramel notes that complement our pumpkin wonderfully! Light brown sugar has more molasses than granulated sugar, resulting in softer, chewier cookies with deeper flavor nuances.
- 1/3 cup (79ml) pure maple syrup. Pure maple syrup isn’t just an optional sweetener; it’s essential! Its unique flavor pairs perfectly with pumpkin while enhancing overall sweetness without being overwhelmingly sugary. Make sure you choose 100% pure maple syrup—the kind that comes straight from nature without additives or fillers—for the best results.
- 1 large egg yolk, at room temperature. The yolk adds richness and moisture to our cookie dough while also helping bind everything together beautifully—a key component for achieving that tender yet chewy texture we’re after!
- 1/2 cup (125g) canned pumpkin, blotted dry. Using canned pumpkin ensures consistency in texture and flavor across batches—plus it’s incredibly convenient! Just be sure to blot it dry using paper towels before adding it to reduce excess moisture which could make our cookie dough too wet.
- 2 teaspoons (10ml) vanilla extract. Vanilla extract is like the secret weapon in baking; its warm undertones round out flavors beautifully without overpowering them—think of it as adding harmony to our melody of ingredients!
- 1/2 teaspoon (2.5ml) maple extract, optional but highly recommended if you’re looking for that extra layer of depth in flavor! A touch enhances the natural sweetness from other ingredients while contributing aromatic notes reminiscent of freshly tapped maple trees.
- 1/2 cup (100g) granulated sugar combined with spice mix for coating before baking lends both crunchiness and added flavor on the outside while keeping each bite soft inside—a delightful contrast!
- 1/2 teaspoon pumpkin or chai spice blend, again used here within our sugar coating mixture creates that beautiful aromatic finish when baked—what’s better than having those lovely spices greet you at first bite?
Equipment You’ll Need:
Before we jump into the joyously messy part—mixing up those ingredients—it’s important we have all our tools ready! Having the right equipment makes every step easier and more enjoyable.
- Mixing bowls – A set of various-sized mixing bowls will help keep things organized as we combine dry ingredients separately from wet ones before merging them harmoniously together later on!
- Measuring cups & spoons – Accurate measurements are key players here since even slight variations can alter textures dramatically; invest in high-quality measuring tools for consistent results every time!
- Silicone spatula – This kitchen workhorse allows us to scrape down sides efficiently without losing precious batter stuck around edges—we want every bit counted towards deliciousness!
- Cookie scoop – A medium-size cookie scoop ensures uniformity among baked goods so they cook evenly whilst also giving us perfectly portioned bites which look invitingly scrumptious when served!
- Parchment paper – Lining baking sheets ensures easy release post-baking plus helps prevent sticking issues while providing even heat distribution during baking sessions—trust me; it’s worth investing in good quality parchment paper for less hassle later on!
Now that we’re equipped with all we need let’s prepare those chewy maple pumpkin cookies that’ll fill hearts (and bellies!) with warmth this fall season…
Step 1: Brown That Butter!
To begin crafting our chewy maple pumpkin cookies, you’ll want to start by browning your butter—a process that’s as simple as it is transformative! In a heavy-bottomed saucepan over low heat, melt your European-style unsalted butter slowly until it begins foaming gently—that foamy stage signals we’re nearing magic! As you whisk continuously during this time, keep an eye out for those lovely golden-brown specks forming at the bottom—they’re what give brown butter its distinctive nutty aroma we’ll fall head over heels for once incorporated into our dough! Once you notice this gorgeous transformation happening (it usually takes around 15 minutes), remove from heat immediately because burning is not part of our plan here! Pour it into a clean bowl so cooling can commence—it should take about 30 minutes until it’s at room temperature but still warm enough to blend effortlessly later on when mixed with sugars.
Step 2: Prepare Your Pumpkin
While waiting patiently through those moments filled with anticipation as brown butter cools down gracefully beside us (it’s worth savoring!), let’s turn attention towards prepping our canned pumpkin puree next! Take two or three paper towels laid across wide shallow bowls then generously scoop half a cup right onto them—you’ll see excess water collect below which would otherwise yield overly moist cookie dough if left unchecked during mixing processes later down line so squeeze gently before proceeding further until no drips remain visible afterward—we want concentrated flavorful essence packed tight instead! Blotting ensures richness shines through without excessive moisture ruining texture integrity altogether—a small step indeed but profoundly satisfying result awaits ahead once blended properly into batter soon after…
Step 3: Mix Dry Ingredients
With browned butter now chilled alongside carefully prepared pumpkin sitting nearby waiting patiently like eager friends ready join forces soon enough—we’ll whisk together dry elements next until thoroughly combined ensuring optimal unity amongst components exists beforehand leading us closer towards ultimate success here today! Grab another mixing bowl then add measured all-purpose flour along with chosen spice blend (pumpkin or chai work wonders)—mix them well alongside baking soda plus salt ensuring everything gets fully integrated without clumps lingering around anywhere left behind afterwards either–this step matters greatly because uneven distribution could lead inconsistent textures upon final outcome being baked away later down line too!
Step 4: Combine Wet Ingredients
Now comes one exhilarating moment—the merging process begins where wet ingredients meet dry counterparts creating magic before our eyes unfold beautifully together! In another larger bowl combine cooled brown butter first followed by luscious light brown sugar plus rich pure maple syrup until no visible grains remain apparent within mixture’s depths—they should meld seamlessly producing glossy appearance resembling liquid silk somewhat—it sounds divine already just imagining textures transforming right there ahead doesn’t it? Next up stir egg yolk gently blending into mixture until everything looks cohesive again followed closely afterward by addition blotted-down canned pumpkin alongside aromatic vanilla extracts both bringing delightful warmth infusions too…
As we continue progressing through steps further ahead don’t forget about keeping spirits high throughout entire preparation process here today—each small detail matters enormously culminating towards those final results awaiting eagerly once baked perfectly golden brown eventually… Stay tuned because exciting moments lie ahead where visions come alive before very eyes shortly thereafter too…
The Sweet Symphony of Chewy Maple Pumpkin Cookies
I can hardly contain my excitement as I share this recipe with you for chewy maple pumpkin cookies! These little delights are more than just a treat; they are a warm hug on a chilly autumn day, a reminder of cozy afternoons spent baking in the kitchen with loved ones. With every bite, they envelop you in a symphony of flavors that dance harmoniously between the sweet richness of maple syrup and the gentle earthiness of pumpkin. So let’s dive into the next stages of our cookie adventure, ensuring each step is infused with love and passion.
Step 5: Stirring in Love – The Egg Yolk Connection
Now, it’s time to bring in the egg yolk, which acts like a magical binding agent in our cookie dough. You’ll want to gently stir in that large room-temperature egg yolk until it’s fully incorporated into your brown butter-sugar mixture. Why room temperature, you ask? Well, using an egg that’s at room temperature helps achieve better emulsification, which means your cookie dough will be smoother and more cohesive. This step is crucial because it ensures that your cookies will have that lovely chewy texture we’re striving for. As you mix, take a moment to admire how the mixture transforms into a glossy batter—that sheen is your cue that everything is coming together beautifully!
Step 6: Pumpkin’s Grand Entrance – Adding Flavor and Moisture
Next up is our beloved canned pumpkin! Make sure you’ve blotted it thoroughly; excess moisture can lead to soggy cookies, which we definitely want to avoid. Fold in the blotted pumpkin along with the vanilla extract and maple extract if you’re using it. Each ingredient adds another layer to our flavor profile—vanilla brings warmth while maple enhances that sweet depth. Trust me on this: these extracts work together like an ensemble cast in a heartwarming movie! Stir them gently until well combined; you want to see those vibrant orange flecks evenly distributed throughout the dough. It’s such a joyful moment when you realize how rich and inviting your mixture looks—like autumn itself has come alive!
Step 7: Marrying Wet and Dry Ingredients – The Dough’s Transformation
Now we’re ready for one of my favorite parts: blending our dry ingredients into our wet mixture! This step might seem straightforward, but let me assure you it’s where the magic truly happens. Gently fold the whisked flour, baking soda, and spice blend into your wet ingredients until just combined. This means stopping while there are still some visible streaks of flour—overmixing can lead to tough cookies instead of the tender bites we’re aiming for. Remember this: gluten development is a double-edged sword; too much leads to toughness while just enough creates structure without sacrificing chewiness. Take a moment here to appreciate how this simple mixture transforms into something so promising—hold onto that anticipation because soon you’ll be tasting pure bliss!
Step 8: Patience Pays Off – Chilling Your Dough
Ah, now comes perhaps one of the most vital steps—chilling your dough! Cover it snugly with plastic wrap and pop it into the refrigerator for at least 8 hours or even overnight if you’re feeling patient (and trust me, good things come to those who wait!). This chilling phase allows flavors to deepen and meld together beautifully, enhancing not only taste but also texture. As it rests, moisture redistributes within the dough, leading to perfectly balanced cookies that won’t spread too much during baking. You’ll know it’s ready when you pull it out after its slumber and see a slightly firmer consistency; this means it will hold its shape beautifully while baking.
Baking Your Perfect Chewy Maple Pumpkin Cookies
With all these delightful preparations behind us, it’s time for the grand finale—baking! This step is where all that patience pays off as we watch our little balls of joy transform into golden-brown masterpieces.
Step 9: Preheating Perfection – Setting Up for Success
First things first: preheat your oven to 350°F (177°C). This is absolutely paramount because an adequately preheated oven ensures uniform cooking throughout each cookie. While that’s heating up, let your chilled dough sit at room temperature for about 30 minutes before baking; this allows it to soften slightly so that those cookies can spread perfectly without turning flat or being too puffy. Line your baking sheets with parchment paper—a non-negotiable step if you’re looking for easy removal later on! As you prepare your workspace, mix together granulated sugar with a touch more pumpkin or chai spice blend in a separate shallow bowl; this spiced sugar coating will give your cookies that irresistible crunch on the outside.
Step 10: Scooping Joy – Rolling Into Sugar
Now comes one of my favorite tasks: scooping out those beautiful balls of dough! Using a 2-inch cookie scoop (or simply two tablespoons), portion out your cookie dough and roll each ball gently in that spiced sugar mixture until they’re completely coated—this step adds such delightful texture and sweetness! Place these sugar-coated beauties onto your lined baking sheets about 2-3 inches apart; remember they’ll spread as they bake so give them some room to breathe! It’s okay if they look slightly lopsided—the charm lies in their homemade imperfections.
Step 11: The Baking Dance – Timing Is Everything
Slide those trays into your preheated oven and set your timer for 12-14 minutes. But here’s where experience comes into play—around the 9-10 minute mark, take a peek through the oven door (no peeking before then!). If they appear puffier than you’d like—a common occurrence when baking—firmly bang the pan against the oven rack once or twice; this technique encourages them to settle down just right without compromising their delightful chewiness! Keep an eye on them during those final minutes; look for edges that are golden brown while centers remain softly set—they’ll continue firming up as they cool outside.
Step 12: Cooling with Care – The Final Touch
Once baked to perfection, allow these chewy maple pumpkin cookies to cool on their sheets for about 3-5 minutes before transferring them onto cooling racks. This resting period lets them firm up just enough so they won’t fall apart when moved—but don’t leave them too long because warm cookies fresh from the oven are simply irresistible! As they cool completely on racks (a crucial step!), take a moment to breathe in their intoxicating aroma wafting through your kitchen—it’s nothing short of heavenly!
And there you have it—a complete guide on creating chewy maple pumpkin cookies that encapsulate all things cozy and comforting about fall. Enjoy every soft bite filled with love and memories shared around tables adorned with laughter and warmth! 🍂✨
Storage and Enjoyment Tips for Your chewy maple pumpkin cookies
Now that your kitchen is filled with the warm, inviting aroma of freshly baked chewy maple pumpkin cookies, it’s time to share this delightful treat with family and friends—or maybe even keep a few for yourself! Trust me, the anticipation of enjoying these cookies is half the fun. But if you find yourself with leftovers—though I can’t imagine how that’s possible!—here are some tips to keep them fresh and delicious.
Storing Leftover chewy maple pumpkin cookies
To keep your chewy maple pumpkin cookies at their best, store them in an airtight container at room temperature. This will help maintain that fabulously chewy texture while keeping out unwanted air. Ideally, they’ll last about 5-7 days, but I promise you—they taste even better on day two as the flavors have a chance to deepen and meld together beautifully! To ensure they remain soft and delightful, consider placing a slice of bread in the container; the moisture from the bread will keep your cookies from drying out. When you take one out after storage, expect that same comforting chewiness and burst of fall flavor that makes each bite utterly intoxicating. If you’re feeling a bit indulgent, pop them in the microwave for a few seconds before enjoying; it revives that fresh-baked goodness!
Freezing chewy maple pumpkin cookies for Later
If you’re looking to preserve your chewy maple pumpkin cookies for an extended period—perhaps to surprise someone special later on or just to have a stash ready for those late-night cravings—you can absolutely freeze them! Allow your cookies to cool completely before placing them in an airtight freezer bag or container. Layering parchment paper between them will prevent sticking and help maintain their lovely shape. When stored properly, they can last up to three months in the freezer without losing any of their delightful flavor. When you’re ready to indulge again, simply remove them from the freezer and let them thaw at room temperature; or if you’re impatient like I often am, a quick pop in the microwave will do wonders too! The convenience of having these sweet morsels ready at a moment’s notice is simply fantastic—perfect for unexpected guests or cozy nights at home.
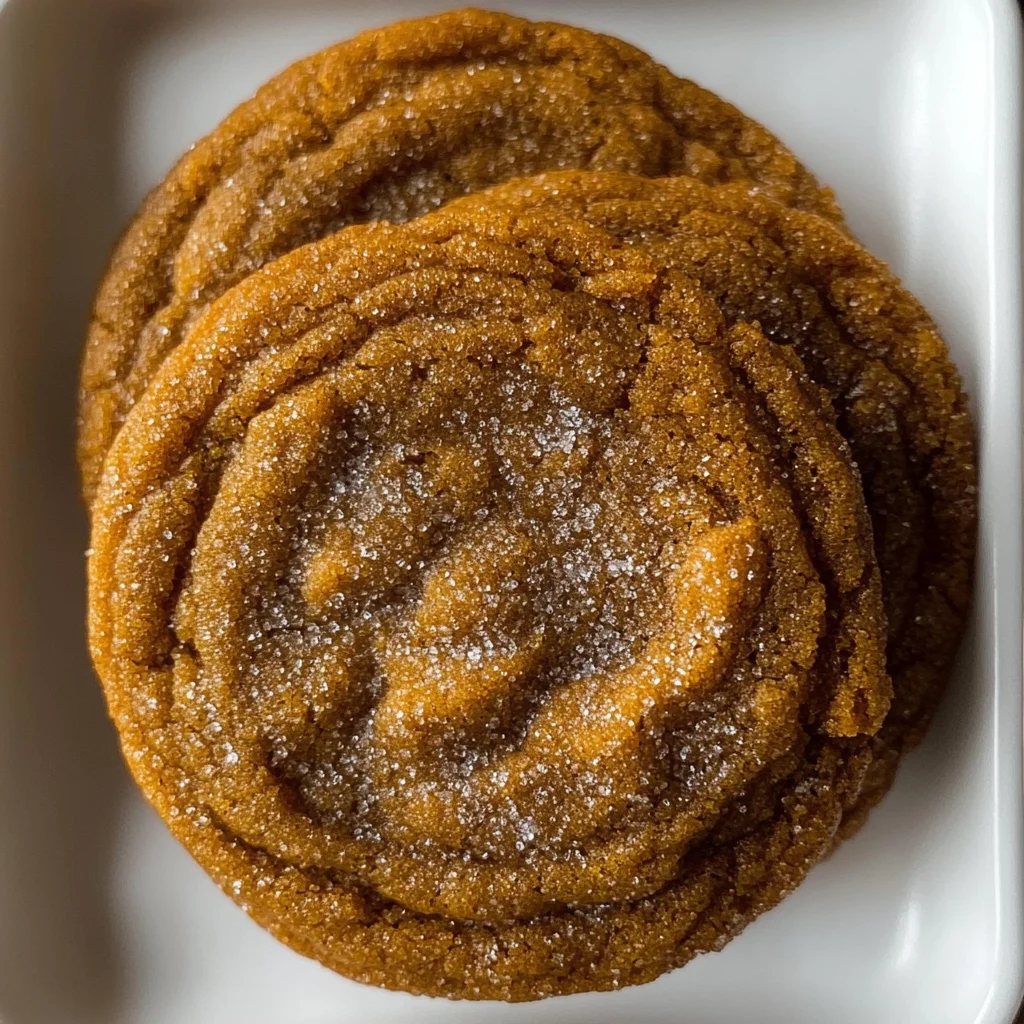
Chewy Maple Pumpkin Cookies
Indulge in the cozy flavors of fall with these chewy maple pumpkin cookies. This delightful recipe captures the essence of autumn, blending sweet maple syrup and creamy pumpkin into a perfectly chewy treat. Each bite is infused with warm spices, offering a comforting hug for your taste buds. Whether enjoyed fresh from the oven or shared with friends over a warm beverage, these cookies are sure to evoke nostalgia and create new memories. Easy to make and incredibly satisfying, they are the perfect addition to any autumn gathering or a quiet evening at home.
- Prep Time: 30 minutes
- Cook Time: 14 minutes
- Total Time: 44 minutes
- Yield: About 24 cookies 1x
- Category: Dessert
- Method: Baking
- Cuisine: American
Ingredients
- 2 1/4 cups all-purpose flour
- 2 teaspoons pumpkin or chai spice blend
- 1/2 teaspoon baking soda
- 1/2 teaspoon salt
- 1 cup European-style unsalted butter (browned)
- 1 cup light brown sugar
- 1/3 cup pure maple syrup
- 1 large egg yolk (room temperature)
- 1/2 cup canned pumpkin (blotted dry)
- 2 teaspoons vanilla extract
- Optional: 1/2 teaspoon maple extract
- For coating: 1/2 cup granulated sugar mixed with spice blend
Instructions
- Begin by browning the butter in a saucepan until golden and fragrant. Allow it to cool slightly.
- In a mixing bowl, whisk together flour, pumpkin spice blend, baking soda, and salt.
- In another bowl, combine cooled brown butter with light brown sugar and maple syrup until smooth. Mix in the egg yolk, then fold in canned pumpkin, vanilla extract, and optional maple extract.
- Gradually incorporate the dry ingredients into the wet mixture until just combined.
- Chill the dough for at least 8 hours or overnight for best results.
- Preheat your oven to 350°F (177°C). Scoop dough portions, roll in spiced sugar, and place on lined baking sheets.
- Bake for 12-14 minutes or until edges are golden and centers are soft.
- Cool on baking sheets for a few minutes before transferring to racks.
Nutrition
- Serving Size: 1 cookie (34g)
- Calories: 150
- Sugar: 10g
- Sodium: 75mg
- Fat: 7g
- Saturated Fat: 4g
- Unsaturated Fat: 3g
- Trans Fat: 0g
- Carbohydrates: 20g
- Fiber: 0g
- Protein: 2g
- Cholesterol: 15mg