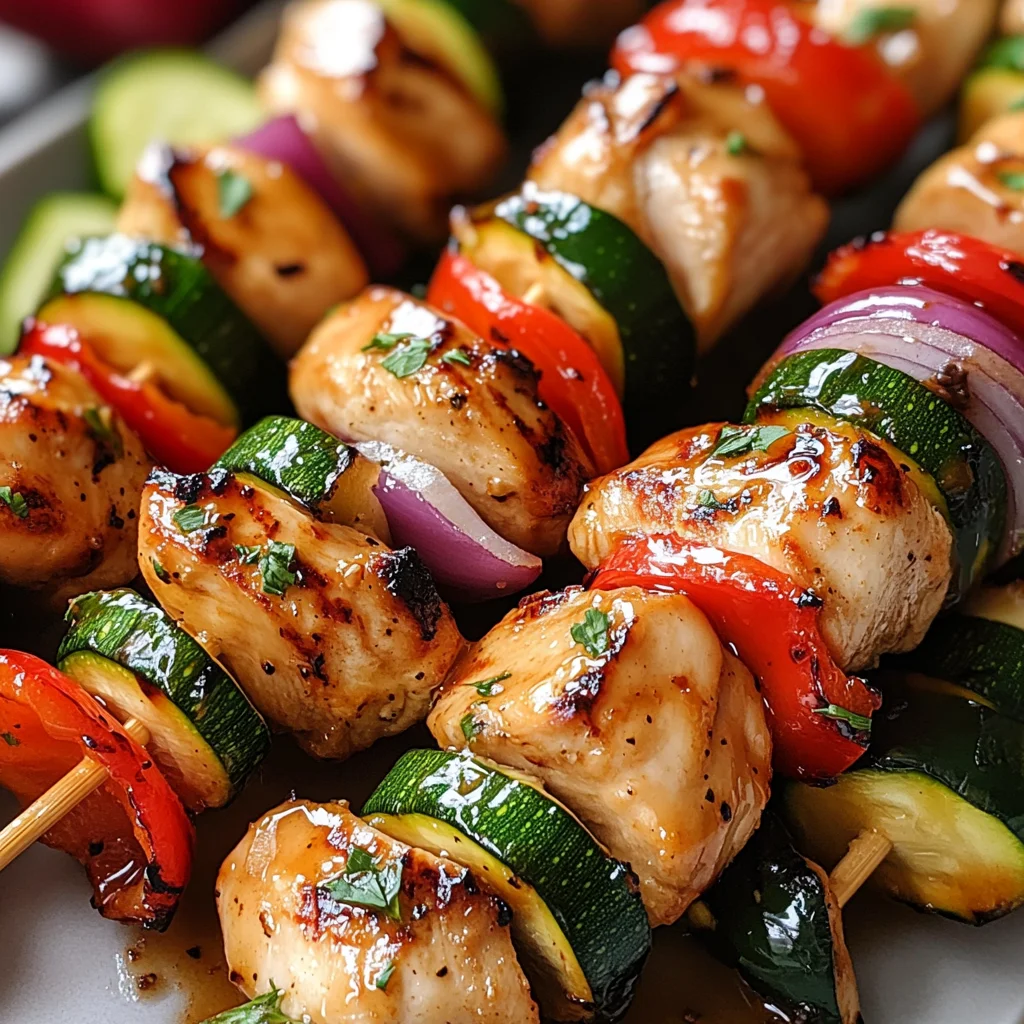
Grilled Honey Garlic Chicken Skewers with Veggies
There’s something truly magical about cooking that goes beyond simply nourishing our bodies; it’s an expression of love, a vessel for memories, and a celebration of the senses. The aroma of grilled chicken mingling with sweet honey and fragrant garlic can transport you to sun-drenched summer evenings spent with loved ones. It is in these moments that recipes like my Grilled Honey Garlic Chicken Skewers with Veggies come to life. Each skewer tells a story, bursting with vibrant colors and flavors that create a joyful symphony on your plate. I promise you, the moment you take that first bite, you’ll find yourself in a blissful dance between the succulent chicken and the delightful crunch of fresh vegetables, all enveloped in a sticky-sweet glaze that feels profoundly satisfying.
As we embark on this culinary journey together, I want you to know that this isn’t just another dinner idea; it’s an invitation to connect—both with your kitchen and with those who will gather around your table. Whether you’re hosting family for a weekend BBQ or simply treating yourself to a flavorful weeknight meal, these skewers are the perfect embodiment of comfort food meets healthy eating. The easy preparation and quick cooking time make it an ideal choice for busy nights when you crave something delicious without hours in the kitchen. So grab your apron and let’s dive into this wonderfully simple yet utterly extraordinary recipe!
Grilled Honey Garlic Chicken Skewers with Veggies: A Summer Delight on a Stick
I can’t help but feel excited as I share this recipe for Grilled Honey Garlic Chicken Skewers with Veggies with you! This dish perfectly combines juicy chicken breast, colorful vegetables, and a mouthwatering honey garlic sauce—a true crowd-pleaser that keeps everyone coming back for seconds (and thirds!). Trust me when I say this is not just food; it’s an experience waiting to unfold right in your backyard or kitchen.
Ingredients:
Now that we’ve set the scene, let’s talk ingredients! Each element plays a significant role in crafting these delectable skewers, so let’s explore what makes them essential to our dish.
- 500g chicken breast, cubed: The star of our show! Chicken breast is known for its lean protein content, making it not only healthy but also incredibly versatile. When cubed into bite-sized pieces, it cooks evenly and becomes juicy when grilled. Look for cuts that are plump and have minimal fat; they should feel firm yet tender to the touch. Remember, marinating is crucial here—it infuses flavor deep into the meat while keeping it moist during grilling.
- 1 red bell pepper, chopped: Ah, the vibrant red bell pepper! Not only does it add stunning color to our skewers, but it’s also packed with vitamins A and C. Its sweet flavor perfectly complements the savory notes of our honey garlic sauce. Choose peppers that are firm with glossy skin—this indicates freshness. If you’re feeling adventurous, try swapping in yellow or orange peppers for variety!
- 1 zucchini, sliced: Zucchini brings a lovely texture to our skewers—a subtle crunch that balances out the juiciness of the chicken. High in water content and low in calories, it’s an excellent addition for those looking to incorporate more veggies into their meals. Slice them thick enough so they don’t fall apart on the grill but thin enough so they cook through beautifully.
- 1 red onion, cut into chunks: The sweetness of grilled red onion is truly something special! As it cooks over high heat, it caramelizes slightly and becomes tender while adding depth of flavor to each skewer. Aim for chunks large enough so they hold their shape but small enough to cook through quickly—about an inch works well!
- 3 tbsp honey: This golden liquid adds rich sweetness to our marinade—it’s what transforms ordinary grilled chicken into something extraordinary! Honey not only enhances flavor but also helps create that gorgeous caramelization on the grill due to its natural sugars. When selecting honey, look for raw or locally sourced varieties for maximum flavor impact.
- 3 tbsp soy sauce: Soy sauce introduces an umami punch—think savory goodness that rounds out our dish beautifully. The saltiness helps elevate all other flavors present while enhancing tenderness in the chicken as it marinates. If you’re looking for alternatives due to dietary restrictions or preferences, tamari is an excellent gluten-free substitute!
- 2 garlic cloves, minced: Garlic isn’t just aromatic; it adds a robust flavor profile that’s utterly intoxicating! Freshly minced garlic releases essential oils that create depth in our marinade—a non-negotiable step if you’re aiming for bold flavors! I always recommend using fresh over pre-minced products whenever possible; trust me—the difference is night and day.
- 1 tbsp olive oil: A drizzle of good-quality olive oil helps emulsify our marinade while adding richness and moisture during grilling. It also prevents sticking on the grill grates—this step is absolutely paramount! Look for extra virgin olive oil if you want intense flavor; its fruity notes pair beautifully with our other ingredients.
- Salt & black pepper: While they might seem simple compared to other ingredients, don’t underestimate their importance! Salt draws out moisture from both meat and vegetables while enhancing all flavors present—this step boosts everything else we’ve added dramatically! Freshly cracked black pepper adds warmth without overwhelming sensitivity—season generously!
Now that we have all our components ready to bring together something spectacular let’s gather up some essential tools before diving into preparation!
Equipment You’ll Need:
Having the right tools at your disposal can make all the difference when cooking up these delicious skewers. Let’s take stock of what we’ll need so we can move smoothly through each step without any hiccups along the way!
- Grill (Gas or Charcoal): Your trusty grill is where all the magic happens! Whether you opt for gas or charcoal depends on personal preference; both can produce incredible results if used correctly. Gas grills provide consistent heat control that’s easier for beginners while charcoal gives authentic smoky flavors beloved by many seasoned barbecue enthusiasts.
- Skewers (Wooden or Metal): You’ll need some sturdy skewers to thread all those delightful ingredients onto! If you’re using wooden skewers (which I adore), be sure to soak them in water beforehand—this prevents burning on direct heat during grilling. Metal skewers are reusable and eliminate this step but might get hot quickly; use caution when handling them!
- Mixing Bowl: A large mixing bowl will be essential when preparing your marinade; it allows plenty of room for whisking everything together thoroughly so every piece gets coated evenly—the secret behind flavorful bites!
- Basting Brush: I highly recommend having a basting brush handy as well—it allows you to brush extra marinade onto your skewers while they cook effortlessly enhancing their flavor profile even further!
With all our tools ready and ingredients prepped let’s jump right into preparing those amazing Grilled Honey Garlic Chicken Skewers with Veggies!
Step 1: Whisk Up That Flavorful Marinade
Start by combining honey, soy sauce, minced garlic cloves, olive oil along with salt & black pepper within that trusty mixing bowl we gathered earlier! Using a whisk here not only mixes everything well but also aerates giving us better incorporation across each ingredient creating depth within flavors overall. Don’t rush this step—take time ensuring each component blends seamlessly until smooth like liquid gold pouring down from above—this base will be crucial once marinating begins shortly after.
Step 2: Marinate Your Chicken
Once mixed thoroughly pour half of this glorious mixture over cubed chicken breast placed within another bowl (or resealable bag). Cover tightly allowing those heavenly aromas penetrate deep inside each piece while preventing dryness during grilling later on too—a win-win situation if I’ve ever seen one! Ideally allow at least 30 minutes here resting within refrigerator although longer yields even better results as time allows flavors meld together harmoniously becoming utterly intoxicating when cooked through later on.
Step 3: Prepare Your Vegetables
While waiting patiently (trust me—it’s worth every second!), chop up your colorful veggies accordingly ensuring uniformity across sizes especially about peppers & zucchini since they’ll cook more evenly alongside chicken pieces themselves once threaded onto skewers afterwards too—no one wants unevenly cooked bites ruining their experience right? Ensure pieces are roughly similar dimensions about one inch thick preferably letting them maintain structural integrity throughout grilling process ahead maximizing taste sensations encountered later down road too!
Step 4: Assemble Those Skewers
Now comes my favorite part—the assembly where creativity shines bright alongside gastronomical delights await discovery ahead! Take one skewer at hand starting off by threading through marinated chicken chunk before alternating between various vegetable options until reaching very end allowing small space towards tip ensuring easy handling whilst flipping upon grill directly afterward too—don’t forget brush lightly remaining marinade onto assembled skewer surface before placing upon hot grill surface underneath making sure every inch gets coated adequately leading towards maximum flavor intensity erupting shortly after begin cooking process itself unfolding right before eyes like magic happening amidst flames dancing joyfully away underneath bright summer skies overhead!
And just like that my friend—we’re well on our way towards experiencing pure culinary bliss one bite at a time! Stay tuned as we continue navigating through finishing touches ensuring delightful aromas fill air surrounding us tantalizing taste buds curious minds alike urging everyone gather around table soon ready indulge unforgettable feast ahead…
Step 5: Marinating Magic – Unleashing Flavor
Now that your chicken is cut into tender, bite-sized cubes, it’s time to dive into the transformative process of marinating. In a bowl large enough to accommodate all your chicken pieces comfortably, mix together the honey, soy sauce, minced garlic, olive oil, salt, and black pepper. This mixture is more than just a marinade; it’s a symphony of flavors that will infuse every piece of chicken with sweetness, saltiness, and that irresistible garlicky aroma. I can’t help but feel a rush of excitement at this stage—each ingredient plays a pivotal role in creating those utterly intoxicating flavors you’re going to love.
Once everything is combined into a glossy liquid gold, toss in your cubed chicken breast. Make sure every piece is generously coated—this step is absolutely paramount. Why? Because marinating isn’t just about flavor; it also tenderizes the meat by breaking down tough proteins. I recommend letting this sit for at least 30 minutes at room temperature or even longer in the refrigerator if you have the time (up to 2 hours max). The longer you allow the chicken to soak up those rich flavors, the more profound and satisfying each bite will be. Just think about how vibrant and juicy your skewers will be after soaking in that delicious concoction!
Step 6: Skewering Your Way to Perfection
After your chicken has luxuriated in that flavorful bath for long enough—you might even catch yourself sneaking tastes while preparing—the next step is to assemble your skewers. Grab some sturdy skewers; if you’re using wooden ones, make sure to soak them in water for at least 30 minutes prior to avoid burning on the grill. Trust me on this—this simple step makes all the difference between a charred disaster and beautifully grilled perfection.
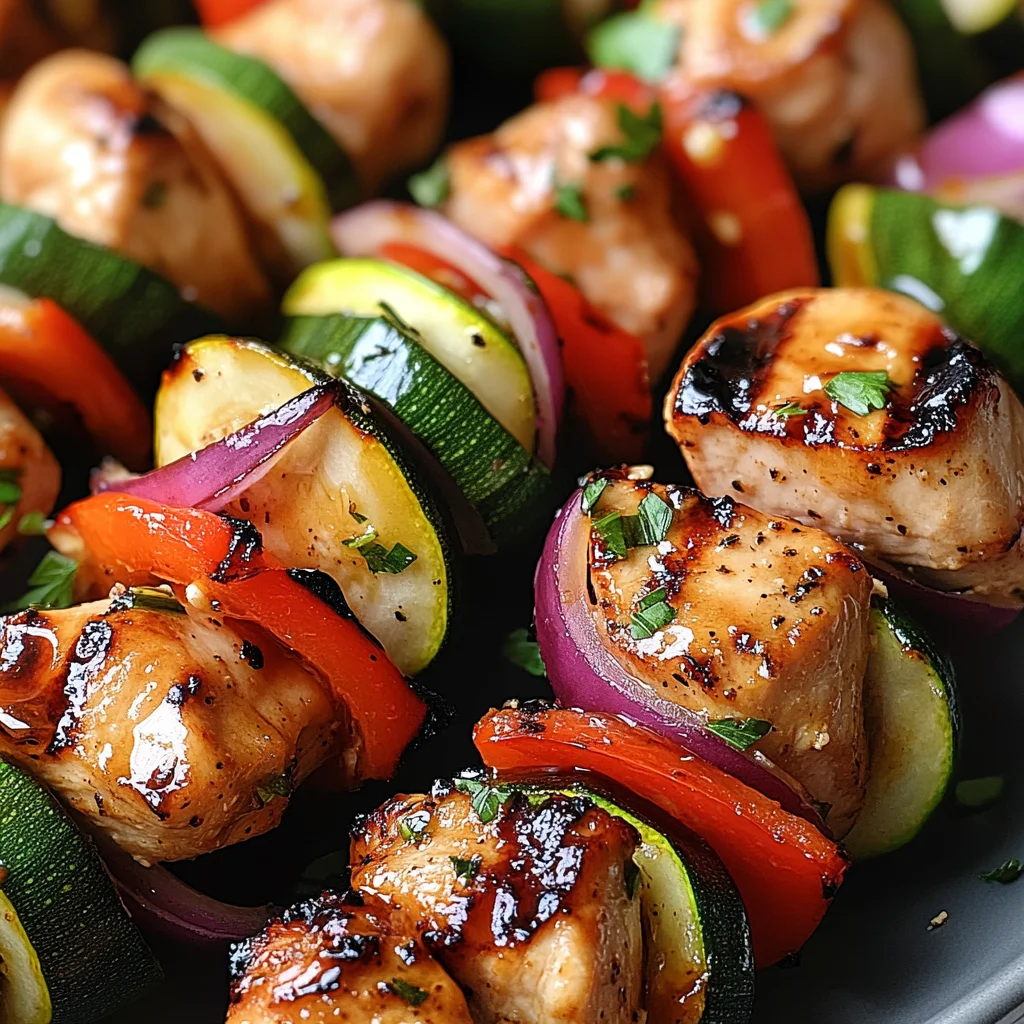
Now comes the fun part! Thread each piece of marinated chicken onto the skewer, alternating with colorful chunks of red bell pepper, slices of zucchini, and hearty pieces of red onion. Not only does this add visual appeal with its rainbow of colors but each vegetable contributes its own unique texture and flavor profile when grilled. As you skewer them up, don’t rush this step! Take your time arranging them snugly but not overcrowded—this ensures even cooking and allows those beautiful grill marks to form later on. Visual cue? You want a delightful balance where each ingredient feels like it has its own space yet dances together harmoniously on the skewer.
Step 7: The Art of Grilling – Timing is Everything
Now that your skewers are assembled and ready for their glorious transformation over heat, let’s talk about grilling techniques! Preheat your grill over medium-high heat until it’s nice and hot—this should take about 10-15 minutes depending on your grill type. A hot grill is essential as it sears the meat quickly while locking in moisture; this creates those coveted grill marks that scream summer BBQ.
Once you’ve achieved that perfect preheat, carefully place the skewers on the grill grates. Here’s where patience becomes key; resist the urge to flip them too soon! Allow them to cook undisturbed for about 5-6 minutes on one side until they develop a gorgeous charred color and start releasing tantalizing scents that waft through the air—your neighbors will definitely be envious! After that initial cooking period, turn them gently using tongs, being mindful not to pierce through any portions; we want all those juices trapped inside! Grill for an additional 5-6 minutes or until the chicken reaches an internal temperature of 165°F (75°C). Use an instant-read thermometer if you have one—it’s non-negotiable for ensuring food safety while maintaining juiciness.
Step 8: Glazing for Glory – Adding That Extra Touch
As your beautiful skewers near completion—oh my goodness, the aroma alone will send you into rapture—it’s time for one last magical touch: glazing them with an extra drizzle of that heavenly honey garlic sauce from earlier! Using a brush or spoon (my favorite method), generously coat each skewer with the remaining marinade during their final moments on the grill—about two minutes before they finish cooking completely. This crucial step not only enhances flavor but also adds a shiny glaze that creates an appealing texture contrast against each charred piece.
While glazing, keep an eye out! You’ll notice as it cooks down slightly on contact with heat; it thickens into an almost syrup-like consistency which clings beautifully to every morsel—absolutely divine! Just be cautious not to leave them unattended during this phase; sugars can burn quickly if left too long. Once glazed and cooked through perfectly (the juices should run clear when pierced), remove these beauties from the grill and let them rest briefly before serving.
Conclusion:
As we wrap up our journey through crafting these mouthwatering Grilled Honey Garlic Chicken Skewers with Veggies, I hope you’re feeling as excited as I am! This recipe isn’t just about throwing some chicken on a skewer; it’s about creating cherished moments filled with laughter and love around the dinner table. The combination of juicy chicken marinated in that intoxicating honey garlic sauce paired with vibrant veggies creates a symphony of flavors that elevate this dish beyond ordinary BBQ fare—it’s truly extraordinary!
Why is this recipe a must-try? Because it’s not only about taste but also about joy—the joy of making something wholesome and delicious that everyone will adore. It’s incredibly versatile too! Whether it’s a casual family dinner or an outdoor gathering with friends, these skewers shine brightly on any occasion. Picture yourself pulling these beauties off the grill, their sizzling aroma wrapping around you like a warm hug—it’s an experience that brings everyone together.
When thinking about serving suggestions, imagine savoring one skewer alongside fragrant jasmine rice drizzled with lime juice to enhance all those sweet notes from the honey glaze. Or perhaps pairing it with a crisp garden salad dressed lightly in olive oil and balsamic vinegar—oh my goodness! For late-night snacks or meal prep goodness throughout the week, think about tucking leftover pieces into wraps filled with fresh greens and creamy avocado!
Feeling adventurous? This recipe is wonderfully adaptable! You might swap out chicken for tofu or shrimp if you’re looking for something different—it would be equally delicious! Perhaps try marinating other vegetables like mushrooms or cherry tomatoes that could add even more depth to that glorious glaze we’ve created together. I encourage you to experiment and make it your own! So go ahead; whip up these Grilled Honey Garlic Chicken Skewers with Veggies and share your culinary journey with me—I can’t wait to hear how they turn out!
Grilled Honey Garlic Chicken Skewers with Veggies

Experience delightful Grilled Honey Garlic Chicken Skewers with Veggies—perfect for summer nights! Make this family favorite today!
- Prep Time: 15 minutes
- Cook Time: 12 minutes
- Total Time: 27 minutes
- Yield: Serves 4
- Category: Dinner
- Method: Grilling
- Cuisine: American
Ingredients
- 500g chicken breast, cubed
- 1 red bell pepper, chopped
- 1 zucchini, sliced
- 1 red onion, cut into chunks
- 3 tbsp honey
- 3 tbsp soy sauce
- 2 garlic cloves, minced
- 1 tbsp olive oil
- Salt & black pepper
Instructions
- In a mixing bowl, whisk together honey, soy sauce, minced garlic, olive oil, salt, and black pepper.
- Pour half of the marinade over the cubed chicken in a separate bowl or resealable bag. Marinate for at least 30 minutes in the refrigerator.
- Prepare vegetables by cutting them into even-sized pieces.
- Thread marinated chicken and vegetables onto skewers, alternating between each.
- Preheat grill over medium-high heat and cook the skewers for about 5-6 minutes on each side or until chicken reaches an internal temperature of 165°F (75°C).
- Brush remaining marinade onto skewers during the last two minutes of grilling.
Nutrition
- Serving Size: 1 skewer (approximately 150g)
- Calories: 275
- Sugar: 9g
- Sodium: 620mg
- Fat: 7g
- Saturated Fat: 1g
- Unsaturated Fat: 6g
- Trans Fat: 0g
- Carbohydrates: 32g
- Fiber: 2g
- Protein: 24g
- Cholesterol: 75mg