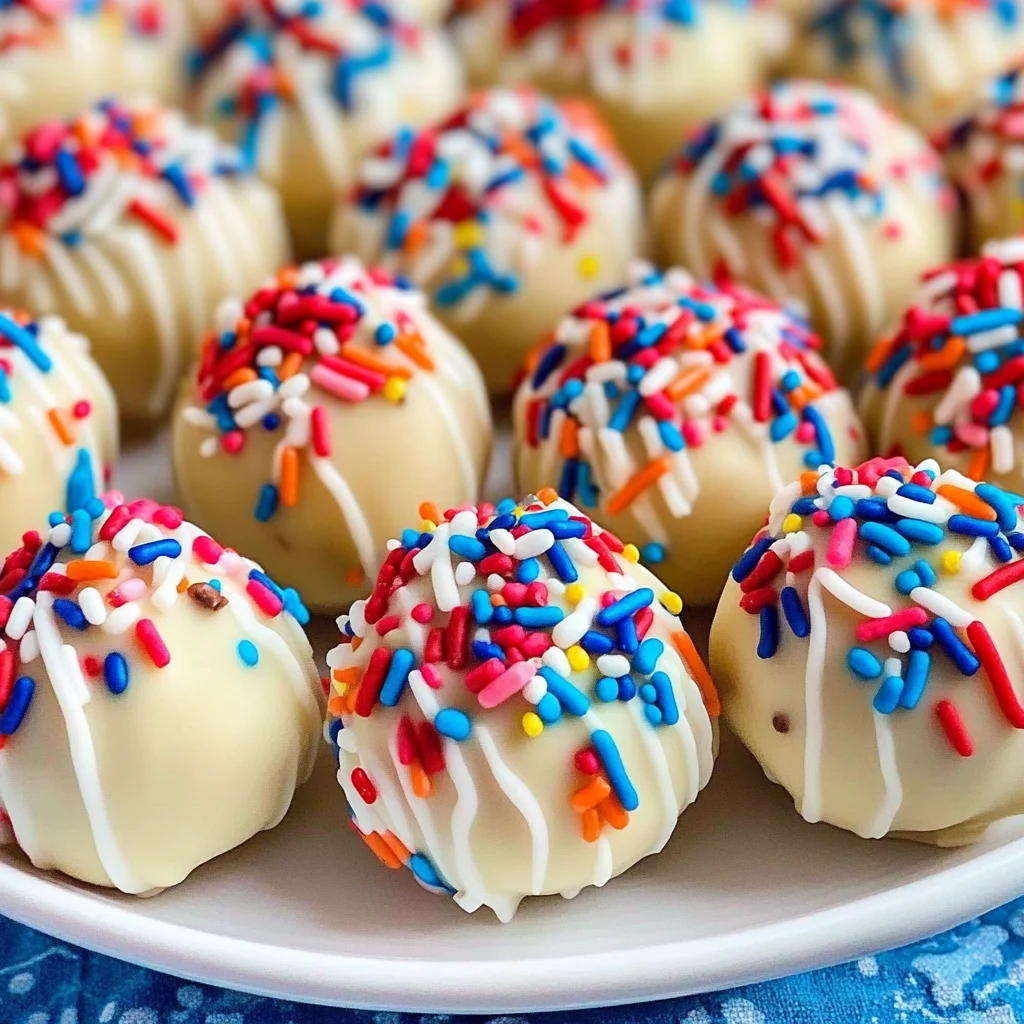
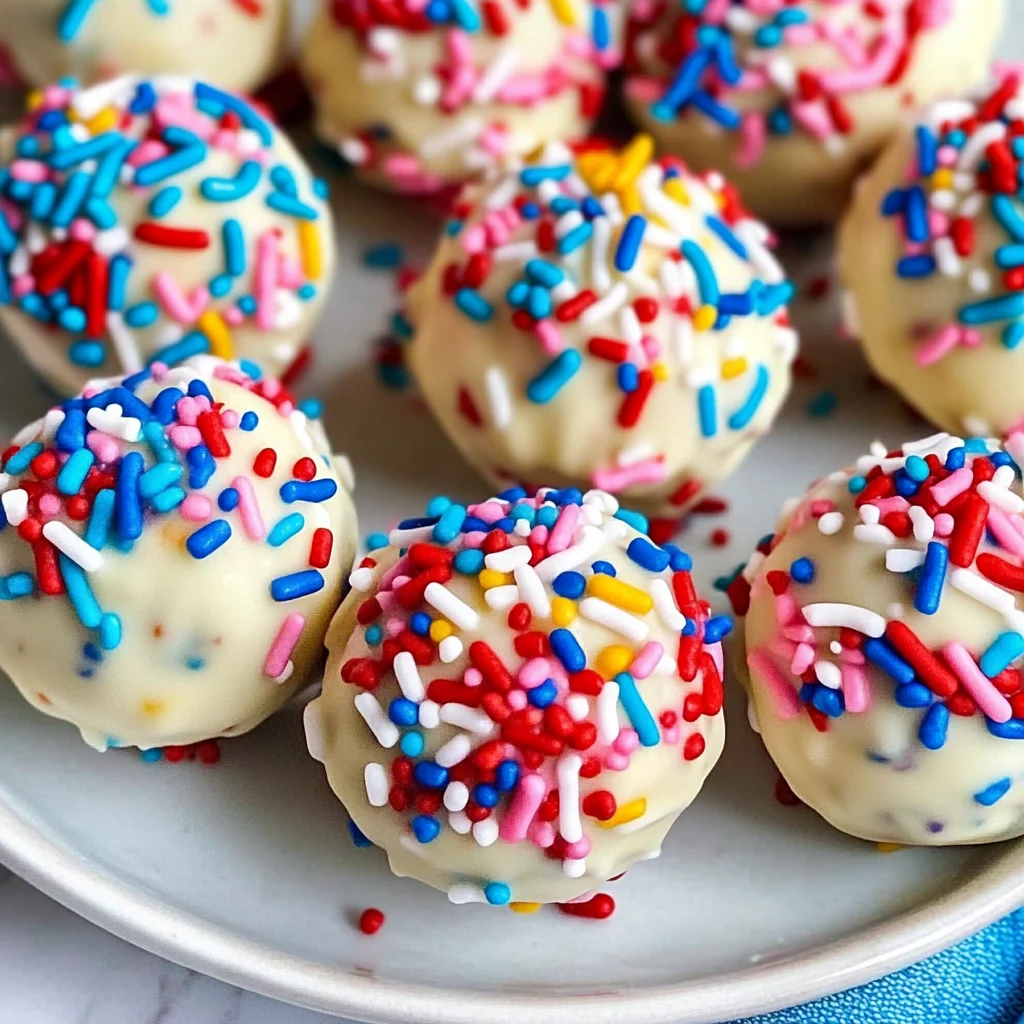
Patriotic No-Bake Cake Batter Truffles
There’s something magical about whipping up a batch of treats that not only taste incredible but also bring a burst of color and joy to any gathering. Let me take you on a delightful journey of creating my beloved Patriotic No-Bake Cake Batter Truffles! These little bites are more than just dessert; they’re a celebration wrapped in vibrant red, white, and blue hues, perfect for BBQs, picnics, or simply a cozy night at home. Imagine taking a bite and being enveloped in the nostalgic flavor of cake batter mixed with the sweetness of sprinkles—it’s like childhood in confection form. Each truffle is a tiny morsel of happiness, offering that profound satisfaction that comes with indulging in something utterly delightful. I promise you, once you make these, you’ll find yourself making them again and again!
Now, let’s talk about the experience of making these truffles. From the moment you start mixing ingredients to the time they chill in the fridge, you’ll be captivated by the process. The blend of soft butter and sweet sugar creates an intoxicating aroma that dances through your kitchen, inviting everyone to gather around. And trust me, when you dip those colorful balls into melted almond bark, it feels like painting—each one becoming a masterpiece decorated with festive sprinkles. It’s not just about eating; it’s about sharing joy and laughter with loved ones as they pop these delightful truffles into their mouths. So gather your loved ones, roll up your sleeves, and let’s dive into this colorful adventure together!
Ingredients:
As we embark on this culinary journey together, let’s explore each ingredient that makes these Patriotic No-Bake Cake Batter Truffles so special. Every component plays its role in crafting these delightful treats.
- 1-1/2 cups cake flour. This ingredient is essential for achieving that classic cake-like texture we’re aiming for in our truffles. Unlike all-purpose flour, cake flour has a finer grain and lower protein content, which results in softer and more tender treats. When purchasing cake flour, look for brands that are labeled specifically for cakes—this will ensure you get that light crumb we all adore in baked goods. If you’re in a pinch and don’t have cake flour on hand, you can substitute it by using all-purpose flour and removing 2 tablespoons per cup before measuring.
- 1 cup strawberry cake mix. Using strawberry cake mix not only adds sweetness but also infuses these truffles with a gorgeous pink hue reminiscent of summer celebrations. This isn’t just about flavor—it’s about nostalgia too! The fruity notes evoke memories of carefree days spent at gatherings filled with laughter and sunshine. Feel free to experiment with other flavors if you’d like to switch things up; chocolate or vanilla would work beautifully as well.
- 1/2 cup unsalted butter, softened to room temperature. This is crucial for creaming properly and creating that light texture we’re aiming for in our Patriotic No-Bake Cake Batter Truffles. If your butter is too cold, it won’t cream effectively; if it’s melted, your treats will spread too much when chilled later on. I always recommend using high-quality butter since it makes such a difference in flavor—European-style butters with higher fat content yield richer results.
- 1/2 cup white sugar. The sweetener here not only balances the flavors but also contributes to the structure and texture of our truffles. Sugar helps create that delightful chewiness that contrasts perfectly with the smoothness of the melted coating later on. Make sure to use granulated sugar for this recipe; brown sugar would alter the intended outcome by adding moisture.
- 1 teaspoon vanilla extract. Ahh, vanilla—the secret weapon in any dessert! It elevates flavors beautifully and adds depth to our truffles without overpowering them. Always opt for pure vanilla extract rather than imitation for an authentic taste experience; it makes all the difference!
- 1/8 teaspoon salt. You might wonder why we add salt to something sweet like this—it’s absolutely non-negotiable! Salt enhances sweetness while balancing out flavors; think of it as a symphony conductor guiding each note into harmony.
- 3-4 tablespoons milk. This liquid gold is what brings everything together into a cohesive dough-like consistency! Adjusting the amount based on how dry or wet your mixture feels is essential here; too much will make it too sticky to handle while too little might result in crumbliness.
- 1-2 teaspoons red food coloring. This ingredient is what truly transforms our truffles into patriotic bites! A little goes a long way here—just enough to achieve that vibrant red hue reminiscent of fireworks lighting up the sky on Independence Day.
- 2 tablespoons sprinkles (the fun kind!). Sprinkles add whimsy both visually and texturally—they’re little bursts of joy that bring delight not only to children but adults too! Look for assorted colorful sprinkles so every bite feels like a party.
For the coating:
- 16 oz (8 squares) almond bark or vanilla-flavored coating. Almond bark serves as an easy-to-melt coating that provides a deliciously creamy shell around our truffles while keeping them stable at room temperature—a major plus during outdoor events! If almond bark isn’t available near you, feel free to use white chocolate instead; just keep an eye on melting times because chocolate can be finicky!
- Sprinkles in red, white, and blue (for topping)—because what’s better than finishing off these beauties than decorating them with festive colors? These sprinkles not only make your truffles look stunning but also enhance their playful spirit!
Equipment You’ll Need:
Before we get started making these scrumptious truffles, having the right tools can elevate your baking experience from good to extraordinary! Think of each piece as an essential partner guiding us toward deliciousness.
- Electric mixer – A handheld or stand mixer saves time and effort when creaming butter and sugar together until fluffy—a step that’s crucial for achieving lightness in our truffle mixture! If you don’t have one handy though don’t fret; mixing by hand works just fine too—just know it may take some extra elbow grease!
- Mixing bowls – Having two medium-sized mixing bowls will help keep things organized as we prepare our dough before rolling them into balls later on.
- Parchment or wax paper – Line your cookie sheet with parchment paper so those beautiful little truffle balls don’t stick when they’re chilling out before being coated!
- Cookie sheet – A sturdy cookie sheet will provide ample space for resting those lovely balls while ensuring even cooling throughout their chilling phase—this helps them firm up nicely before we dip them!
Now that we’ve gathered our ingredients and equipment let’s dive deeper into preparing these delightful Patriotic No-Bake Cake Batter Truffles!
Step 1: Creaming Together Butter & Sugar
To kick things off right, grab your electric mixer and combine the softened butter along with white sugar in a mixing bowl until they’re well incorporated—it should resemble pale yellow whipped cream once fully mixed! This process known as creaming is absolutely paramount because it introduces air into the mixture which leads us towards achieving airy textures within our final product—a crucial aspect when dealing with no-bake desserts like these truffles where textures matter immensely! Make sure not to rush this step; take at least 3–5 minutes beating until it’s fluffy—trust me on this!
Step 2: Adding Flavor & Structure
Next comes adding the strawberry cake mix along with sifted cake flour directly into our creamed mixture alongside salt—and don’t forget that splash of heavenly vanilla extract too! Mix gently yet thoroughly until combined completely—a wooden spoon or spatula works wonders here if you’d prefer less noise than an electric mixer offers at this stage! Observe how quickly everything blends together creating rich aromas wafting through your kitchen—it’s utterly intoxicating already!
Step 3: Kneading In Milk & Color
Once blended well enough without any visible dry spots left behind from flour/cake mix combo—we’re ready now for some moisture magic coming from milk alongside those vibrant drops of red food coloring which transform everything visually appealing whilst enhancing flavor profiles simultaneously! Start by adding 3 tablespoons first then assess consistency—you want something resembling play dough where it’s pliable yet easily moldable without falling apart immediately upon touch! If needed add another tablespoon gradually until desired texture achieved—this step ensures no crumbling happens later after chilling phase begins…
Step 4: Rolling Into Balls
With dough perfected let’s roll small portions measuring approximately one inch diameter between palms forming perfect spheres before placing them onto prepared cookie sheets lined previously (remember those?). This part allows personal creativity flow freely so don’t hesitate experimenting slightly different sizes either if preferred—they’ll all taste fabulous regardless shape variations chosen here! Once done fitting neatly onto trays tuck away inside fridge allowing them chill out peacefully about fifteen minutes helping firm up nicely before next exciting phase awaits us ahead…
Stay tuned as we continue diving deeper into melting chocolate goodness alongside finishing touches soon thereafter… Trust me—you won’t want miss what comes next—it gets even better from here on out!
Step 5: Chilling the Dough Balls for Optimal Firmness
Now that your delightful truffle dough is ready, it’s time to give it a little time in the refrigerator. Trust me on this one—chilling is absolutely paramount! By allowing the dough balls to chill for about 15 minutes, you’re not just waiting; you’re ensuring that they firm up nicely, making them easier to handle and coat later on. The cool temperature helps solidify the butter and the other ingredients, giving you that perfect texture when you form them into those irresistible little spheres. As you lay them out on parchment or wax paper, take a moment to appreciate their vibrant colors; the red from the food coloring mixed with the sprinkles will make your heart sing with patriotic joy.
While they chill, resist the urge to peek too often; patience is key here! If you find yourself getting antsy, use this time to clean up your workspace or perhaps pour yourself a refreshing drink. You want these truffles to be perfectly firm when you retrieve them from the refrigerator—imagine biting into one only for it to fall apart in your hands! That’s not what we’re aiming for. After about 15 minutes, they should be slightly set but still soft enough that they don’t feel like rocks—think of it as finding that sweet balance between firm and tender.
Step 6: Melting the Coating to Liquid Gold
While those little beauties are chilling away, let’s talk about the next exciting step: melting the almond bark. This part is sheer magic! You’ll want to grab a microwave-safe bowl and break up your almond bark into manageable pieces. The goal here is to achieve a smooth, velvety coating that will envelop your truffles like a warm hug. Microwave in 30-second intervals because melting chocolate can be tricky—it’s easy to go from perfect to burned in just seconds! After each interval, give it a good stir; this will help distribute any heat evenly and encourage all those pieces to melt down into one silky mixture.
What makes this melting process special is understanding how heat works on chocolate-like substances. Unlike traditional chocolate that can seize if overheated, almond bark has a forgiving nature which makes it ideal for coating desserts like our truffles. However, do keep an eye on it because even almond bark can turn grainy if overcooked—your goal is liquid gold! Once fully melted and glossy, remove it from the microwave and take a moment to inhale that intoxicating aroma; this is where your kitchen begins to transform into a confectionery dreamland!
Step 7: Dipping with Love
Now comes the fun part: dipping those chilled dough balls into our luscious almond bark! Using a fork (or even two forks if you’re feeling adventurous), gently lower each truffle into the melted coating. This technique allows for a beautiful coverage while letting excess chocolate drip off back into the bowl—a crucial step because nobody wants clumpy truffles! Give each ball a little twirl as you lift it out; this motion not only removes excess coating but also creates an elegant swirl effect that adds charm once dried.
As you place each dipped truffle back onto the cookie sheet lined with parchment paper, sprinkle them immediately with additional colorful sprinkles while they’re still warm and sticky. This is non-negotiable if you want those festive touches to adhere beautifully! Make sure each truffle gets its fair share of sprinkles—they’re not just decoration; they enhance flavor and add delightful crunch as you bite into these morsels of joy. Take your time at this stage; it’s about ensuring every bite feels like a celebration of flavor and color.
Step 8: Letting Them Set Before Enjoying
After all your hard work dipping and decorating, it’s essential to let those gorgeous Patriotic No-Bake Cake Batter Truffles set completely before diving in. I know it’s tempting—the aroma wafting through your kitchen might make it hard to resist—but believe me when I say patience pays off immensely here. Place them back in the refrigerator for an additional 20-30 minutes so that they can solidify properly. This step is crucial because it ensures that each coating reaches its full potential of crispness while preventing any melty mishaps when you’re ready to serve them.
As they chill again, take advantage of this downtime by preparing platters or even thinking about how you’ll present these little gems at your next gathering or picnic. Imagine how proud you’ll feel serving these vibrant bites at summer barbecues or holiday picnics—their beauty alone will draw everyone in! When they come out of refrigeration after their final chill session, check for firmness by lightly pressing on one with your fingertip—if it holds its shape without leaving an imprint, you’re golden!
Final Touches: Presenting Your Patriotic No-Bake Cake Batter Truffles
Now that you’ve put in all this love and effort into creating these stunning Patriotic No-Bake Cake Batter Truffles, it’s time for one last flourish before serving them up! Carefully transfer your beautifully coated truffles onto a decorative plate or tiered stand—this presentation elevates them beyond mere treats into extraordinary bites worthy of celebration. Don’t forget about adding some extra sprinkles around them for visual appeal; it creates that festive atmosphere which is so important during gatherings!
When serving these delightful bites at parties or picnics, I recommend keeping them chilled until just before enjoyment because they hold their best texture when cool but don’t get too cold either—about room temperature works wonders as well! As friends gather around excitedly reaching for these colorful gems, watch their faces light up with joy as they experience that first bite—a symphony of flavors bursting forth from each truffle will leave everyone asking for seconds (and perhaps thirds). Enjoy every moment watching others relish what you’ve created; there’s nothing quite like sharing delicious food made with love!
Ultimately, whether it’s July Fourth celebrations or simply indulging on a sunny afternoon with loved ones, these truffles embody everything wonderful about homemade sweets—the memories made around tables filled with laughter are truly what make life deliciously unforgettable! So go ahead and whip up some joyful moments with these fantastic treats; I promise they’ll become an instant favorite among family and friends alike!
Storage and Enjoyment Tips for Your Patriotic No-Bake Cake Batter Truffles
Ah, the moment has arrived, my dear friend! Your Patriotic No-Bake Cake Batter Truffles are ready to shine. Just picture them glistening like little gems, the vibrant colors a feast for the eyes, as they await to be devoured at your next gathering or cozy night in. But before we dive into the delightful experience of savoring these treats, let’s talk about how to keep them fresh and enjoyable. After all, a little bit of knowledge goes a long way in preserving their flavor and texture!
Storing Leftover Patriotic No-Bake Cake Batter Truffles
To keep your truffles at their absolute best, you’ll want to store them in an airtight container—this is absolutely crucial! I recommend lining the bottom of the container with parchment paper to prevent sticking, especially if you’ve adorned them with sprinkles. Place the truffles in a single layer as much as possible, layering parchment between any additional rows if you have more than one. You can keep them refrigerated for up to a week; however, I promise you they’ll be devoured long before that! If you’re worried about moisture affecting their delightful texture, consider placing a piece of bread in the container with them. This handy trick helps maintain that perfect consistency by absorbing excess moisture without compromising flavor. Even after a few days in the fridge, these little bites remain irresistibly soft and satisfyingly sweet—a true testament to their no-bake nature!
Freezing Patriotic No-Bake Cake Batter Truffles for Later
Now, if you’re anything like me and find it impossible to resist having some truffles on hand at all times, freezing is your best friend! To properly freeze your truffles, place them on a baking sheet lined with parchment paper and pop them into the freezer until they’re solid—this usually takes about an hour. Once frozen, transfer them into an airtight freezer-safe container or zip-top bag. They can stay happily frozen for up to three months! Whenever you’re ready for a treat, simply take out however many you desire and let them thaw in the fridge for about 30 minutes before enjoying. This method ensures that you always have those delicious bites waiting for you after dinner or as a sweet pick-me-up during your afternoon slump. Isn’t it comforting to know that such joy is just a freeze away?
Patriotic No-Bake Cake Batter Truffles
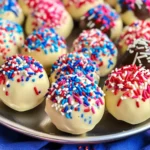
Indulge in the whimsical delight of Patriotic No-Bake Cake Batter Truffles! These vibrant, bite-sized treats are a perfect blend of nostalgia and festivity, making them an ideal addition to any gathering—be it a summer barbecue, picnic, or cozy night in. Each truffle captures the nostalgic flavor of cake batter, adorned with colorful sprinkles that evoke joy and celebration. With a creamy almond bark coating, these treats are not only visually appealing but also easy to make and share with loved ones. Embrace the fun of crafting these delightful morsels, and create sweet memories with every bite!
- Prep Time: 25 minutes
- Cook Time: None
- Total Time: 0 hours
- Yield: About 24 servings 1x
- Category: Dessert
- Method: No-Bake
- Cuisine: American
Ingredients
- 1–1/2 cups cake flour
- 1 cup strawberry cake mix
- 1/2 cup unsalted butter, softened
- 1/2 cup white sugar
- 1 teaspoon vanilla extract
- 3–4 tablespoons milk
- 1–2 teaspoons red food coloring
- Sprinkles for decoration
- 16 oz almond bark (or white chocolate) for coating
Instructions
- In a mixing bowl, cream together the softened butter and white sugar until fluffy.
- Gradually mix in the cake flour, strawberry cake mix, salt, and vanilla extract until fully combined.
- Add milk gradually until the dough is cohesive. Stir in red food coloring to achieve a vibrant hue.
- Roll the dough into 1-inch balls and chill for about 15 minutes on parchment paper.
- Melt almond bark in a microwave-safe bowl at 30-second intervals until smooth.
- Dip each chilled truffle into the melted almond bark using a fork, allowing excess to drip off.
- Decorate with sprinkles while still warm; let set in the refrigerator for an additional 20-30 minutes before serving.
Nutrition
- Serving Size: 1 truffle (30g)
- Calories: 130
- Sugar: 8g
- Sodium: 50mg
- Fat: 7g
- Saturated Fat: 4g
- Unsaturated Fat: 2g
- Trans Fat: 0g
- Carbohydrates: 16g
- Fiber: <1g
- Protein: 1g
- Cholesterol: <5mg