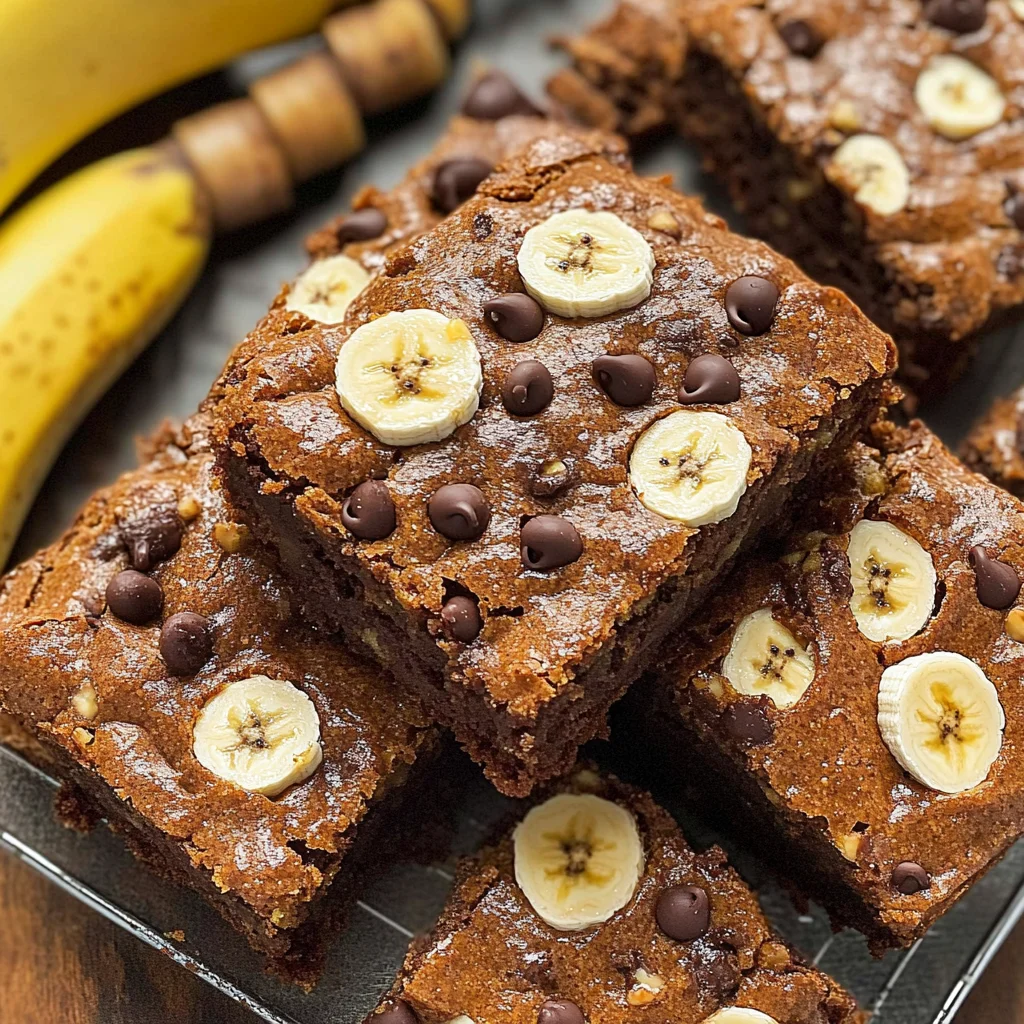
Banana Bread Brownies: A Sweet Twist Every Banana Lover Craves
There’s something truly magical about the aroma of freshly baked goods wafting through your home, isn’t there? It’s as if the very essence of comfort and happiness has taken form, wrapping around you like a warm hug. Today, I’m excited to share with you a recipe that is not just about indulging in something delicious, but about creating memories that linger long after the last bite. These Banana Bread Brownies: A Sweet Twist Every Banana Lover Craves are a delightful fusion of two beloved treats—banana bread and brownies—that will elevate your dessert game to new heights. Imagine slicing into a fudgy brownie with hints of banana sweetness, the chocolate chips melting luxuriously as they warm your heart. I promise you, this is more than just a recipe; it’s an experience that beckons you to savor every moment.
As we embark on this culinary journey together, I can’t help but feel a swell of excitement at the thought of sharing this beloved recipe with you. You see, I’ve always been captivated by the humble banana. Overripe bananas, often overlooked and destined for the compost bin, hold an untapped potential for creating something extraordinary. In my kitchen, they transform into pure magic when combined with chocolate and sugar, resulting in a dessert that is profoundly satisfying and utterly intoxicating. Whether you’re baking for friends or simply treating yourself after a long day, these brownies are perfect for any occasion—family gatherings, cozy evenings at home, or even just because it’s Tuesday!
Banana Bread Brownies: A Sweet Twist Every Banana Lover Craves
Welcome to the world of decadence where banana bread meets rich chocolatey goodness! This recipe takes everything you love about classic banana bread and amplifies it with the indulgence of brownies. The result? A dessert that is irresistibly moist, packed with flavor, and sure to make your taste buds dance with joy. Let’s not waste any more time—grab those overripe bananas from your countertop and let’s get baking!
Ingredients:
As we gather our ingredients for these delightful Banana Bread Brownies, let me assure you that each component plays an essential role in crafting this treat. From enhancing texture to adding depth of flavor, let’s explore what makes each ingredient special.
- 3 medium Ripe Bananas (Use overripe bananas for maximum sweetness and moisture.) The star of our show! Overripe bananas not only provide natural sweetness but also contribute to the moistness that makes these brownies so decadent. When selecting bananas for this recipe, look for those that have brown spots on their skin; they’ll be bursting with flavor! If you have only slightly ripe bananas on hand, fear not—just give them a little extra time in the oven wrapped in foil at 300°F (150°C) until soft and caramelized.
- 1/2 cup Melted Butter (Enhances richness; swap with coconut oil for a dairy-free option.) Melted butter adds richness and helps create that luscious texture we all adore in brownies. It’s crucial to melt it gently; if too hot when mixed with other ingredients, it can cook them prematurely. For those looking for a dairy-free alternative, coconut oil works beautifully here while infusing a subtle tropical aroma into your brownies.
- 1 cup Granulated Sugar (Sweetens the brownies and contributes to the perfect texture.) The granulated sugar not only sweetens our dessert but also aids in creating that beautiful crust we all love on top of brownies. When sugar dissolves during baking, it interacts with proteins in eggs to create structure while also adding moisture—a critical balance in achieving fudgy perfection.
- 2 large Eggs (Provides structure and helps bind everything together.) Eggs are non-negotiable in this recipe as they lend structure while keeping our brownies moist and chewy. As they bake, their proteins coagulate to help set the mixture—giving us that delightful brownie texture we crave.
- 1 teaspoon Vanilla Extract (Adds depth to the overall flavor profile.) This little bottle of liquid gold enhances every flavor present in our brownies. Vanilla extract works by elevating both sweet and savory notes alike; trust me when I say it’s absolutely paramount to include it here!
- 1 cup All-Purpose Flour (Forms the base structure for the brownies.) Flour gives these delectable treats their body; without it, we’d be left with gooey mush instead of perfectly formed brownies! Be sure to spoon and level your flour rather than scooping directly from the bag—this will prevent adding too much flour which could lead to dry brownies.
- 1 teaspoon Baking Soda (Acts as a leavening agent.) While we want our brownies dense rather than fluffy like cake, baking soda still plays an important role by ensuring even rising during baking while also helping develop flavor through browning reactions.
- 1/2 teaspoon Salt (Balances flavors and brings out sweetness.) Salt may seem minor but don’t skip it! A pinch elevates sweetness significantly while balancing out flavors throughout our dish—this harmony is what makes each bite extraordinary!
- 1/2 cup Cocoa Powder (Infuses chocolate richness.) The cocoa powder adds depth—and let’s face it—a serious chocolate punch! Always choose high-quality cocoa powder as its flavor dramatically influences our final product; Dutch-process cocoa will yield darker results while natural cocoa gives us that classic brownie taste.
- 1/4 cup Milk (Incorporates moisture; substitute with almond milk for a lactose-free option.) Milk provides essential moisture which contributes towards achieving ultimate fudginess—it’s crucial! If you’re aiming for a dairy-free version here too, almond milk works wonders without compromising flavor or texture.
- 1 cup Chocolate Chips (Optional: add dark or white chocolate.) Chocolate chips are purely optional but highly recommended! They create pockets of melted chocolate throughout each brownie bite; opt for dark or semi-sweet varieties depending on how rich you want them!
- 1/2 cup Brown Sugar (Introduces a delightful caramel-like flavor.) Brown sugar adds complexity through its molasses content—it brings warmth alongside sweetness making these brownies truly irresistible! Use light brown sugar for milder notes or dark brown sugar if you prefer stronger caramel undertones.
- 1 teaspoon Ground Cinnamon (Enhances the banana flavor.) Cinnamon is amazing at enhancing flavors—especially banana! This non-negotiable spice transforms ordinary desserts into comforting classics; trust me on this one—it’ll sing beautifully alongside those sweet bananas!
- 2 tablespoons Butter (Adds richness when melted on top before baking.) Lastly but certainly not least—the butter brushed over top before baking creates an additional layer of richness that browns beautifully throughout cooking time… deliciously tempting!
Equipment You’ll Need:
Before diving into mixing up these scrumptious bites of joy, let’s take a moment to gather our tools! Having just the right equipment makes this whole process smoother—and trust me—you’ll want everything working harmoniously together as we create magic in the kitchen.
- Mixing Bowls – A good set of mixing bowls is essential here! Opt for various sizes so you can comfortably mash bananas while using larger ones for combining wet ingredients later on without worrying about spills or messes!
- Measuring Cups & Spoons – Accurate measurements are key when baking! Invest in sturdy measuring cups along with nested spoons so you’ll always have what you need close at hand—this little detail ensures success every time!
- Rubber Spatula – This tool might seem simple but it’s indispensable when folding ingredients together smoothly without over-mixing—allowing air into batter means better results later down line!
- Whisk or Electric Mixer – Whisking by hand works wonderfully if you’re feeling energetic but having an electric mixer saves lots of time too especially when incorporating butter + sugars thoroughly together—so choose whichever method suits your mood best!
Now that we’ve gathered everything we’ll need let’s move onto preparing these incredible Banana Bread Brownies: A Sweet Twist Every Banana Lover Craves!
Step 1: Preheat Your Oven & Prepare Your Pan
Start by preheating your oven to 350°F (175°C). This step may seem mundane but trust me—it’s absolutely vital! By preheating properly beforehand ensures even cooking throughout once we place our batter inside—the last thing anyone wants is unevenly baked goodies! While waiting patiently for those temperatures rise up perfectly within oven walls grab a non-stick baking pan measuring 9×13 inches (or similar size) then lightly grease using cooking spray or butter—we want nothing sticking here come serving time later down road!
Step 2: Mash Those Bananas!
Next comes one of my favorite parts—the mashing process! Place those ripe bananas into one large mixing bowl then grab either fork or potato masher gently mashing away until smooth consistency forms leaving some small lumps behind adds wonderful texture throughout our final product—it’ll be divine trust me! Once mashed completely set aside allowing flavors meld together beautifully while preparing remaining ingredients shortly thereafter…
Step 3: Cream Together Wet Ingredients
In another mixing bowl combine melted butter along granulated sugar whisking until light fluffy consistency forms—it should feel airy yet creamy at same time resembling whipped clouds floating above current headspace right now! This process known as creaming helps incorporate air bubbles within mixture leading lighter textures later down line so please don’t rush this step—it matters immensely folks!! Add eggs one at time blending fully before introducing vanilla extract next stirring again until evenly incorporated throughout mixture…
Step 4: Combine Dry Ingredients
Now let’s focus on combining dry ingredients separately—in another bowl mix together all-purpose flour along cocoa powder followed by ground cinnamon baking soda & salt thoroughly ensuring everything gets evenly distributed before moving forward towards next steps altogether… Remember—this blending ensures no clumps remain hidden within batter later down road causing issues like uneven rising during bake times since we’re aiming perfection here after all…
Stay tuned as we continue through this delicious journey because soon enough these heavenly treats will be ready for indulging blissfully enjoying every bite filled goodness offered up lovingly nestled between layers fudgey delight waiting patiently inside warm embrace awaiting arrival soon enough…
Step 5: Combining the Wet Ingredients with Care
Now that you’ve got your bananas beautifully mashed, it’s time to focus on merging the wet ingredients. In a large mixing bowl, combine those luscious overripe bananas with the melted butter—this is where the magic begins. The butter not only adds richness but also creates that wonderfully moist texture we all adore in brownies. Trust me, you want to use melted butter here; it ensures that you’re not left with any clumps when mixing in the sugar. Add in your granulated sugar and brown sugar next, which together create a beautiful balance of sweetness and depth. As you mix these ingredients together until well combined, allow yourself to get lost in the sweet aroma wafting through your kitchen; it’s simply intoxicating!
Now, let’s introduce the eggs and vanilla extract into this delightful mixture. Whisk them in gently but thoroughly—this step is crucial as it helps bind everything together while creating an airy texture. You want to see a glossy surface that speaks to the velvety goodness that awaits. It’s important not to rush this process; take your time to ensure each ingredient is fully incorporated before moving on. A smooth mixture will lead to a more uniform brownie with that desired melt-in-your-mouth quality! So, give your mixture a good stir, and relish in how beautiful it looks before moving on.
Step 6: The Sweet Symphony of Dry Ingredients
Now comes one of my favorite parts: integrating the dry ingredients! This step transforms our humble banana blend into something truly extraordinary. In another bowl, whisk together your all-purpose flour, cocoa powder, baking soda, salt, and ground cinnamon. This step isn’t just about combining; think of it as creating a symphony of flavors that will nestle perfectly within our banana-infused batter. Whisking helps aerate these dry components and evenly distribute the baking soda—this is absolutely paramount for achieving that light and fluffy brownie texture.
Once you’ve got a well-mixed bowl of dry goodness, it’s time to fold it into your wet mixture. To do this effectively, sprinkle about half of your dry mix over the wet ingredients and gently fold them together using a spatula or wooden spoon—think of folding like embracing those flavors rather than stirring aggressively. This technique prevents gluten from developing too much, which could result in dense brownies instead of those light treats we crave! Continue adding in the remaining flour mixture while folding until just combined; you should see some streaks of flour but avoid overmixing like it’s a chore—you want a tender brownie after all!
Step 7: The Chocolatey Goodness Awaits
Ahh, now we arrive at perhaps the most indulgent part of this whole experience: incorporating chocolate chips! I can almost hear my friends cheering at this news! Stir in your cup of chocolate chips (dark or white—whatever floats your boat) and marvel at how they meld into this rich batter like little treasures waiting to be discovered in every bite. These little morsels add pockets of molten chocolate that will make each mouthful an exquisite delight!
But let’s pause for a moment here because there’s something essential I want you to consider: don’t skip this step! The chocolate chips add not just sweetness but also that comforting richness we associate with brownies. Plus, they offer delightful contrasts against the banana flavor—a match made in dessert heaven! Once they are lovingly folded into the batter, take a moment to admire how decadent it looks before moving on to our final preparations for baking.
Step 8: Prepping for Baking Bliss
Before we can dive into that oven-fresh bliss, we must prepare our baking pan—this step is non-negotiable if you want perfectly shaped brownies! Grab an 8×8-inch baking dish and generously grease it with butter or line it with parchment paper for easy removal later on. If you choose parchment paper, allow some excess paper to hang over the edges; this little trick will give you handles when it’s time to lift out those warm brownies without losing any bits along the way.
Now pour your luscious batter into the prepared pan and use a spatula to spread it out evenly—make sure every corner is filled because no one wants an underwhelming brownie edge! Before placing it into the oven preheated at 350°F (175°C), don’t forget about our secret weapon: drizzle those two tablespoons of melted butter over the top of your unbaked batter. This final touch enhances richness while creating an incredible crust during baking; trust me on this one—you’ll thank me later when those brownies emerge from the oven golden and glistening!
Next Major Phase – Baking Your Perfect Banana Bread Brownies: A Sweet Twist Every Banana Lover Craves
Now comes one of my favorite moments—the actual baking! Slide that pan into your preheated oven and set your timer for about 30 minutes. But here’s where patience pays off; resist opening the oven door too soon—this can cause fluctuations in temperature that lead to uneven baking or sinking centers! Instead, keep an eye on them as they rise and begin to crack slightly on top—a sure sign they’re nearly ready.
As they bake away, indulge yourself in some sweet anticipation while enjoying their intoxicating aroma filling up your kitchen—it’s pure bliss! When those thirty minutes are up, perform a toothpick test by inserting it into the center; if it comes out with only a few moist crumbs clinging onto it (and not wet batter), congratulations—you’ve nailed them! If not quite there yet? No worries; pop them back into the oven for an additional five minutes—but be vigilant as every oven behaves differently!
I promise you’ll find joy in knowing you’ve crafted something unique today—a true masterpiece deserving praise at any gathering or cozy night-in treat!
Step 9: Cooling Down and Indulging
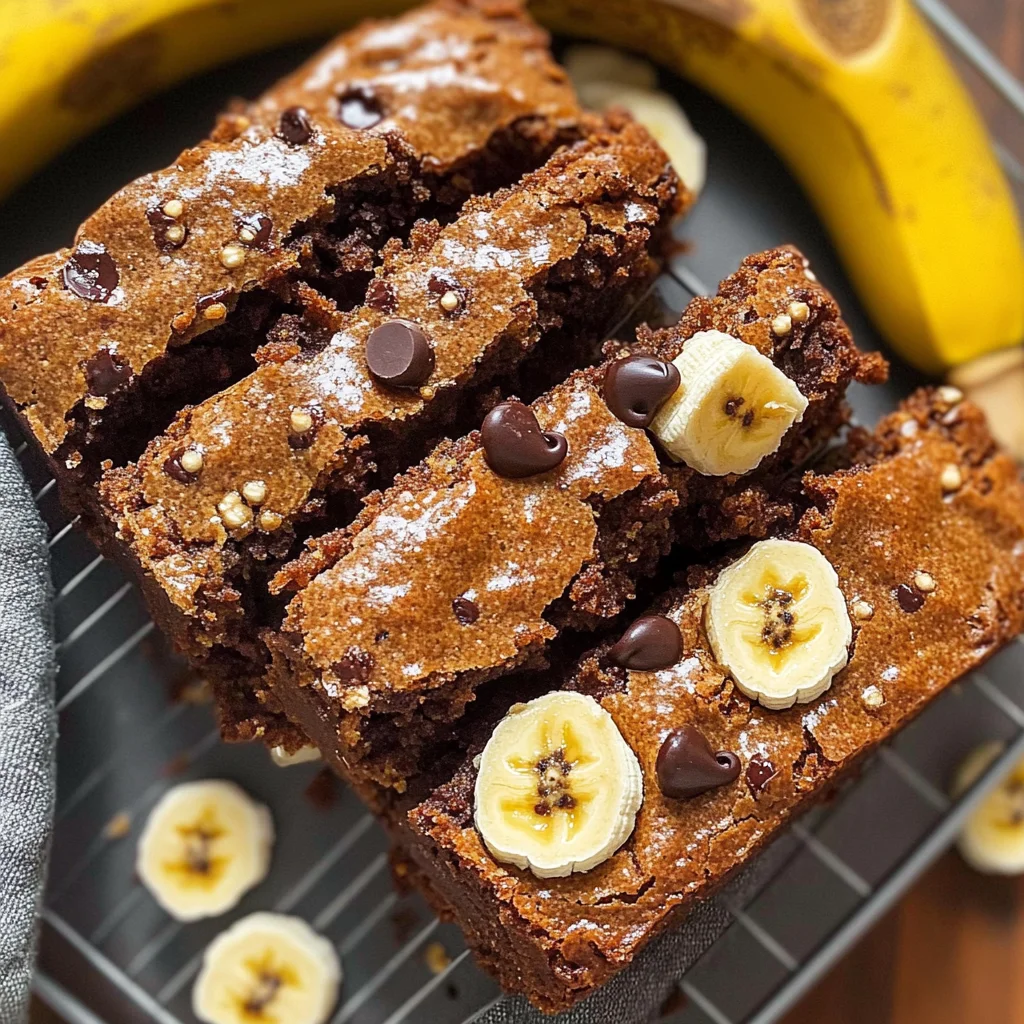
Once baked to perfection, remove these beauties from the oven and allow them to rest in their pan for about 10-15 minutes before transferring them onto a wire rack or cutting board. Cooling is absolutely crucial because cutting too soon could lead to messy squares—not exactly what we envision when dreaming about perfect brownies! Allowing them some time will help set their structure while still keeping them wonderfully moist inside.
When they’re cool enough to handle but still warm (about room temperature), grab a sharp knife and cut them into squares—don’t be shy here; each piece should showcase that gorgeous interior loaded with gooey chocolate chips peeking through like hidden gems! Serve these Banana Bread Brownies warm with perhaps a scoop of dairy-free ice cream or enjoy them straight from the tray—they’re lovely both ways!
And there you have it—the ultimate Banana Bread Brownies: A Sweet Twist Every Banana Lover Craves! I can hardly wait for you all to try these scrumptious delights because once you do, I promise they’ll become an instant favorite in your home as they have mine. So gather around friends and family because sharing is what makes these moments truly extraordinary—happy baking!
Storage and Enjoyment Tips for Your Banana Bread Brownies: A Sweet Twist Every Banana Lover Craves
Oh, my friends, now that you’ve baked this delightful batch of Banana Bread Brownies, the real joy begins! The tantalizing aromas have filled your kitchen, and you’re just itching to take that first bite. But what about the leftovers? If you’re anything like me, you’re going to want to savor every last crumb of these treats. Trust me when I say that knowing how to store them properly can keep that comforting flavor alive even after they’ve cooled.
Storing Leftover Banana Bread Brownies: A Sweet Twist Every Banana Lover Craves
When it comes to preserving your Banana Bread Brownies, the right container is absolutely paramount. Opt for an airtight container—this keeps those scrumptious brownies fresh and moist while preventing them from absorbing any unwanted odors from your fridge. You can easily store these goodies at room temperature for about three days, but if you want to prolong their deliciousness, pop them in the fridge where they’ll last up to a week. For maintaining that delightful texture, consider placing a slice of bread in the container with the brownies; this little trick helps retain moisture and keeps them from drying out. After a few days, they may develop an even deeper flavor as the bananas meld beautifully with the chocolate—just imagine that rich taste blossoming! When you’re ready for a treat again, simply warm them in the microwave for about 10-15 seconds or enjoy them cold; either way, they’ll bring a smile to your face!
Freezing Banana Bread Brownies for Later
Now let’s talk about freezing—what a fantastic option for those moments when you know you won’t be able to indulge right away! To freeze your Banana Bread Brownies, allow them to cool completely before slicing into squares. Wrap each brownie tightly in plastic wrap or aluminum foil before placing them in a freezer-safe bag or container. They can be frozen for up to three months without losing their charm! When you’re ready to dive back into this chocolatey goodness, there’s no need for defrosting; simply pop one out and let it sit at room temperature for about 15 minutes or give it a quick zap in the microwave. This convenience factor makes it such an easy indulgence during busy weeks or surprise guests—you’ll always have something extraordinary on hand!
Banana Bread Brownies: A Sweet Twist Every Banana Lover Craves

Indulge in the delightful fusion of banana bread and rich chocolate brownies with these Banana Bread Brownies. Perfectly moist and decadently fudgy, this recipe transforms overripe bananas into a sweet, comforting treat that’s sure to bring warmth to any occasion. Imagine biting into a luscious brownie filled with melting chocolate chips and the natural sweetness of bananas—an experience that will have your taste buds dancing! Perfect for family gatherings or a cozy night in, these brownies are not just dessert; they are an invitation to create joyful memories. Bake a batch today and savor every bite of this irresistible creation!
- Prep Time: 15 minutes
- Cook Time: 30 minutes
- Total Time: 45 minutes
- Yield: Approximately 16 servings 1x
- Category: Dessert
- Method: Baking
- Cuisine: American
Ingredients
- 3 medium ripe bananas
- 1/2 cup melted butter (or coconut oil)
- 1 cup granulated sugar
- 2 large eggs
- 1 teaspoon vanilla extract
- 1 cup all-purpose flour
- 1 teaspoon baking soda
- 1/2 teaspoon salt
- 1/2 cup cocoa powder
- 1/4 cup milk (or almond milk)
- 1 cup chocolate chips (optional)
- 1/2 cup brown sugar
- 1 teaspoon ground cinnamon
Instructions
- Preheat your oven to 350°F (175°C) and grease a 9×13-inch baking pan.
- In a large mixing bowl, mash the ripe bananas until smooth.
- Mix in the melted butter, granulated sugar, brown sugar, eggs, and vanilla until combined.
- In another bowl, whisk together flour, cocoa powder, baking soda, salt, and cinnamon.
- Gradually fold the dry ingredients into the wet mixture until just combined.
- Stir in milk and chocolate chips until evenly distributed.
- Pour batter into the prepared pan and smooth out evenly.
- Bake for about 30 minutes or until a toothpick comes out with moist crumbs.
- Allow to cool before slicing into squares.
Nutrition
- Serving Size: 1 brownie (50g)
- Calories: 190
- Sugar: 14g
- Sodium: 120mg
- Fat: 8g
- Saturated Fat: 5g
- Unsaturated Fat: 3g
- Trans Fat: 0g
- Carbohydrates: 29g
- Fiber: 2g
- Protein: 3g
- Cholesterol: 20mg