Lemon Meltaway Cookies
There’s something profoundly magical about baking, don’t you think? It’s a beautiful dance between flavors and techniques, where every ingredient plays its part in creating something wonderful. Today, I’m beyond excited to share a recipe that captures the essence of summer in the most delightful way: these ultra-soft lemon meltaway cookies. Light, buttery, and coated in a sweet lemon glaze — this is not just a dessert; it’s an experience that literally melts in your mouth. Imagine biting into one of these cookies; the bright citrus flavor gently envelops you, while the delicate texture gives way to a symphony of sweetness. Each cookie whispers secrets of sunny days spent outdoors, laughter with friends, and cherished moments shared over tea.
Baking these cookies is like welcoming sunshine into your kitchen. With every step, from creaming the butter to glazing the finished treats, you can feel the warmth radiating through your home. I’ve always been captivated by how a simple combination of ingredients can transform into something heavenly. Trust me on this: once you’ve tasted these meltaway cookies, you’ll want to make them again and again. They’re perfect for summer gatherings, picnics in the park, or even cozy evenings at home when you need a little treat to brighten your day.

Ingredients:
As we embark on this delightful culinary journey together, let’s take a moment to appreciate each ingredient that makes these ultra-soft lemon meltaway cookies so special. Every component has its role to play, contributing to that unforgettable taste and texture we all crave.
- 1 cup (2 sticks or 226g) unsalted butter, softened. This is crucial for creaming properly and creating that light, airy texture we’re aiming for in our cookies. The butter should be softened just enough so it creates a smooth mixture with powdered sugar — think of it as liquid gold! If it’s too cold, it won’t cream effectively; if it’s melted, your cookies will spread too much. The quality of butter matters here; European-style butter with higher fat content will give you even richer results.
- 1/2 cup powdered sugar. This fine sugar not only sweetens our cookies but also contributes to their wonderfully soft texture. When combined with butter during the creaming process, it helps trap air bubbles which create that delicate crumb we love so much. Make sure to sift it before use if it’s clumpy — we want everything smooth and fluffy!
- 1 tbsp lemon zest. Ah, this is where the magic truly begins! Zest is the outer peel of the lemon packed with aromatic oils that impart an intense citrus flavor without any bitterness from the juice itself. It’s like capturing sunshine in tiny flecks! Use a microplane for finely grated zest; it’s non-negotiable for achieving that vibrant burst of flavor.
- 2 tbsp fresh lemon juice. This ingredient adds moisture and that refreshing tang we all adore in lemon desserts! Freshly squeezed juice ensures you’re getting all those lovely acids and flavors that bottled versions just can’t compete with. It balances out the sweetness beautifully — without it, our cookies would taste flat.
- 1 tsp vanilla extract. This humble ingredient amplifies all other flavors present in your cookies and adds an extra layer of warmth and richness. Opt for pure vanilla extract rather than imitation; your taste buds will thank you! A little goes a long way in enhancing that buttery goodness.
- 2 cups all-purpose flour. Flour provides structure to our cookies while allowing them to hold up against that delectable glaze we’ll add later on. It’s essential to measure correctly; too much flour can lead to dry cookies while too little could make them crumble apart! I recommend spooning flour into your measuring cup and leveling off with a knife for precision.
- 1/4 tsp salt. Salt is often overlooked but plays an absolutely paramount role in baking! It enhances sweetness and balances flavors perfectly – trust me when I say it makes all the difference between good cookies and extraordinary ones!
Glaze:
- 1 cup powdered sugar – Just like before, this will add sweetness but also create that beautiful glossy finish we love on top of our meltaways.
- 2–3 tbsp lemon juice – This will thin out our glaze while infusing it with more bright flavor! Adjust according to how thick or runny you prefer your glaze — I personally love finding that perfect balance.
- 1 tsp lemon zest – We’re doubling down on flavor here by adding more zest into our glaze! This adds texture and brightness while ensuring every bite remains utterly intoxicating.
Equipment You’ll Need:
Now that we’ve gathered our ingredients, let’s talk about some essential tools that’ll make crafting these delightful cookies smoother and more enjoyable! Having the right equipment is like having trusted friends by your side during this baking adventure; they help ensure everything goes off without a hitch!
- Mixing bowl – A sturdy mixing bowl is key for combining ingredients effectively without any spills or messes! Look for one that’s large enough to accommodate all those fluffy cookie ingredients coming together beautifully.
- Electric mixer (handheld or stand) – Using an electric mixer simplifies the creaming process immensely! This tool saves time and effort when you’re working hard to achieve that light and airy texture we desire.
- Measuring cups & spoons – Accurate measurements are non-negotiable in baking! Invest in reliable measuring cups for dry ingredients as well as liquid measures so everything comes out just right—precision makes perfect!
- Sifter or fine mesh sieve – Sifting ensures there are no clumps left behind when adding powdered sugar or flour into our mixtures—trust me; nobody wants gritty cookies!
- Baking sheet lined with parchment paper – Parchment prevents sticking while helping us achieve evenly baked edges—no one likes burnt bottoms on their precious creations!
Now let’s dive into preparing these ultra-soft lemon meltaway cookies step by step because I promise you they’re worth every moment spent in the kitchen!
Step 1: Prepping Your Oven
First things first: preheat your oven to 175°C (350°F). This is an absolutely crucial step because starting with a hot oven sets the stage for even baking right from the get-go! While that’s happening, line a baking sheet with parchment paper — this not only prevents sticking but also allows easy cleanup afterward (and who doesn’t love minimizing dishes?). Make sure your oven rack is positioned in the center so heat circulates evenly around those soon-to-be heavenly cookies!
Step 2: Creaming Butter & Sugar
Next up is my favorite part: creaming together unsalted butter and powdered sugar until light and fluffy! In your mixing bowl (or stand mixer), add softened butter along with half-a-cup of powdered sugar—a duo destined for greatness! Begin mixing on low speed until combined before gradually increasing speed until fluffy (about 3 minutes). You’re looking for a pale yellow color here; think clouds filled with sunshine! This process traps air into your mixture which helps create those tender melt-in-your-mouth textures we adore so much — don’t rush this step!
Step 3: Adding Zesty Flavors
Once you’ve achieved that airy consistency—well done—it’s time to incorporate some brightness into our mix! Add one tablespoon of freshly grated lemon zest along with two tablespoons of fresh lemon juice followed by one teaspoon of vanilla extract—ahhh…can you smell it? That intoxicating aroma wafting through your kitchen? Mix everything together until fully combined — be careful not overmix at this point since we want those flavors melded perfectly without losing volume from beating too long.
Step 4: Forming The Dough
With our zesty mixture ready to go, now comes another exciting part: adding our dry ingredients! Gradually introduce two cups of all-purpose flour along with one-fourth teaspoon salt directly into your creamy concoction—mix gently until everything just comes together forming what should be a soft dough (this shouldn’t take more than a minute). Don’t worry if it seems slightly sticky at first—that’s completely normal—but avoid overworking—it’ll yield tough cookies instead of light-as-air delights!
Stay tuned as we continue crafting these delicious treats—each step closer to enjoying those warm meltaways fresh from our ovens!
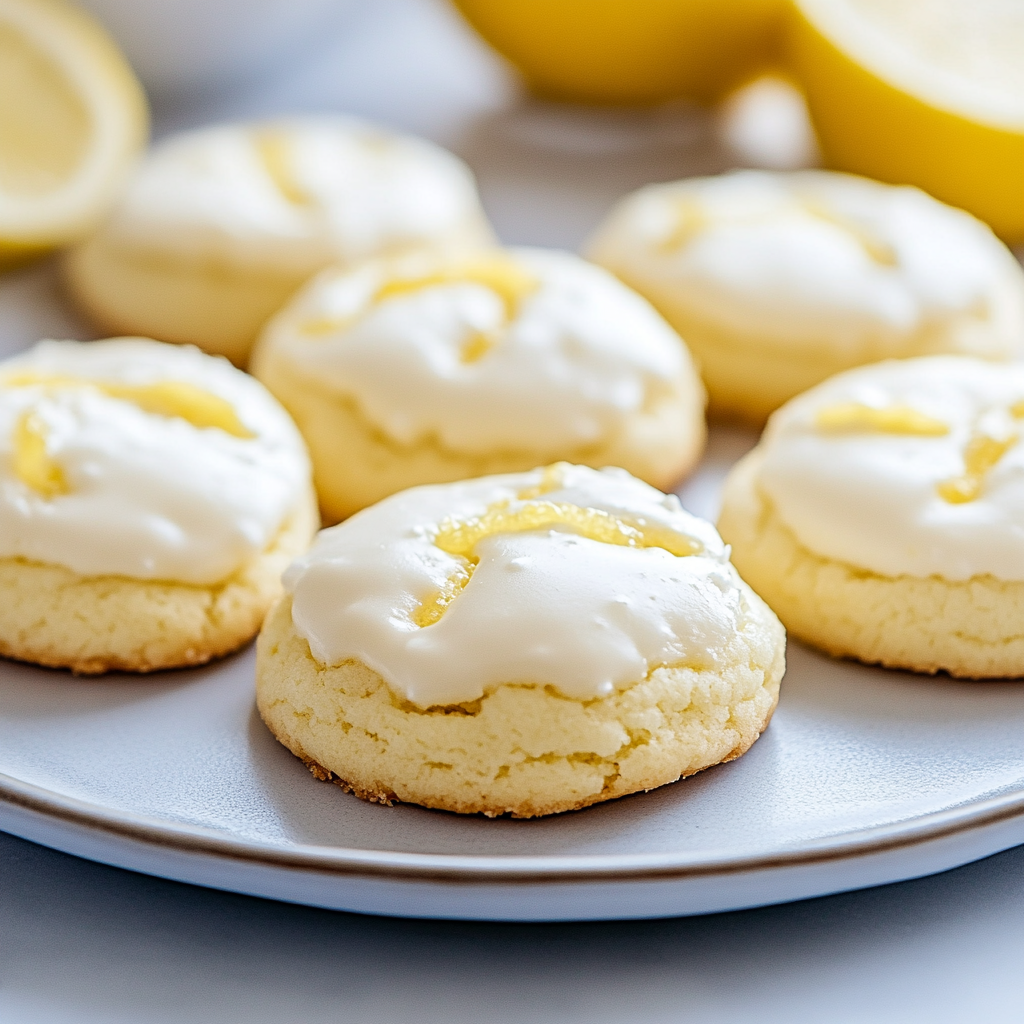
Step 5: Forming the Cookies – A Dance of Dough and Delight
Now that we have our luscious dough ready, it’s time to shape it into those irresistible meltaway cookies. I’m telling you, this is where the magic begins! Grab a small cookie scoop or simply use your hands to scoop out about a tablespoon of dough. It should feel soft and pliable, almost like a gentle cloud in your fingers. Roll these scoops into little balls — think of them as tiny edible treasures waiting to be discovered! Once you’ve formed your little dough balls, place them on the prepared baking sheet, leaving a couple of inches between each one. This space is crucial because as they bake, these cookies will expand slightly and need room to breathe.
After arranging them on the sheet, it’s time for the gentle flattening. Using the palm of your hand, gently press down on each ball until they are about half an inch thick. You don’t want them too flat; just enough to give them a lovely shape that will allow them to bake evenly. Why take this extra moment? Flattening helps create that signature meltaway texture we adore while ensuring they cook through perfectly without overbaking or browning too much—trust me on this! Keep an eye on your dough; it should remain soft but not sticky—if it gets too warm, pop it in the fridge for a few minutes before continuing.
Step 6: Baking Your Cookies – The Art of Perfection
With our cookies shaped and ready to go, let’s move on to the baking process — truly where the kitchen transforms into a fragrant haven! Slide that baking sheet into the preheated oven and set your timer for 10 minutes. Now here’s where patience comes in; resist the urge to open the oven door too soon! This step is absolutely paramount because every second counts towards achieving that perfect texture. As they bake, you’ll notice their edges may just start to firm up while their centers remain delightfully soft—a visual cue you should look for.
The key here is understanding how your oven behaves; not all ovens are created equal! If yours tends to run hot or cold, keep an eye on those cookies as they approach the 10-minute mark. You’re aiming for a pale golden edge with a slight puffiness in the center — anything darker means they’ve gone too far. Remember, these cookies will continue cooking slightly even after you take them out due to residual heat (a phenomenon known as carryover cooking), so don’t be alarmed if they look a tad underbaked when you pull them from the oven. I promise you; this is exactly what we want!
Step 7: Cooling Time – The Sweet Anticipation
Once those heavenly cookies have emerged from the oven (and filled your kitchen with an utterly intoxicating aroma), it’s time for another important step—cooling! Carefully transfer them from the baking sheet to a wire rack using a spatula; this allows air circulation around all sides so they can cool evenly. It’s tempting to dive right in while they’re still warm, but trust me when I say that letting them cool completely will make all the difference in texture and flavor development.
As they cool, take a moment to savor that lemony fragrance wafting through your home—it’s like summer captured in cookie form! Allow these beauties at least 15 minutes on the wire rack before proceeding with our glaze. Why wait? Because cooling helps prevent the glaze from melting into puddles rather than resting beautifully atop each cookie like a delicate crown. Patience here rewards you with that stunning presentation we all seek!
Step 8: Crafting Your Lemon Glaze – A Zesty Finish
Now comes my favorite part—the glaze! Mix together one cup of powdered sugar with 2–3 tablespoons of fresh lemon juice and one teaspoon of lemon zest in a medium bowl until smooth and glossy. This simple yet transformative mixture infuses our cookies with an extra layer of citrusy joy—the kind that makes each bite sing! You might be wondering about consistency; what you’re going for is something akin to syrup—thick enough to cling but thin enough to drizzle beautifully over your cookies.
Once you’ve achieved this liquid gold, grab a spoon or even a piping bag if you’re feeling fancy (though no pressure!). Drizzle generously over each cooled cookie for that finishing touch that elevates these treats from delightful to truly extraordinary! The sweet-tart glaze contrasts beautifully with the buttery richness of the cookie itself, creating a symphony of flavors that brings joy with every single bite.
Step 9: Enjoying Your Masterpiece – The Sweet Reward
Finally, after all this love and care poured into making these ultra-soft lemon meltaway cookies light, buttery, and oh-so-deliciously coated in sweet lemon glaze — it’s time for my favorite part: enjoying them! Gather with friends or family (or just treat yourself) because sharing food always makes it taste better somehow. As you take that first bite, close your eyes and let those flavors wash over you—it’s genuinely refreshing and satisfies every craving you didn’t even know you had!
Don’t forget; these cookies can be stored in an airtight container at room temperature for up to five days (if they last that long!). But I promise you won’t want them hanging around too long—they’re simply too good not to indulge in immediately! So whether you’re hosting friends or just craving something sweet after dinner, remember that these lovely little creations are not only easy but also bring sunshine into any day—and isn’t that what cooking is all about? Enjoy every delightful crumb!
Conclusion:
Baking these ultra-soft lemon meltaway cookies has been nothing short of a joyful journey—a journey filled with bright aromas and irresistible flavors! From creaming together the butter and powdered sugar until fluffy clouds emerge to watching those little orbs transform into golden delights in the oven, every step is an invitation to connect with the joy of baking. What makes this recipe truly special is not just its ease but also the way each cookie delivers a symphony of bright citrus notes paired with buttery richness that feels so comforting yet refreshingly light all at once.
This recipe is an absolute must-try—not only because your taste buds will sing praises with every bite but also because making them brings so much joy! Imagine gathering friends or family around as they pull from the oven those delicate beauties topped with glossy glaze; it’s bound to be a show-stopper at any gathering! Whether it’s a sunny afternoon tea party or simply enjoying a sweet treat after dinner on warm summer nights, these cookies shine brightly on any occasion.
Now let’s talk pairings—imagine savoring one with a crisp glass of iced tea or perhaps alongside a scoop of zesty lemon sorbet for an extra punch of citrus bliss. For an afternoon pick-me-up, why not enjoy these alongside your favorite herbal tea? And picture this: serving them during holiday gatherings where laughter fills the air—everyone reaching for another cookie as they reminisce over fond memories. The versatility of these meltaway cookies allows them to be enjoyed both casually and elegantly.
Feeling adventurous? This recipe is wonderfully adaptable—try incorporating different citrus zest like orange or lime for unique twists that elevate each cookie beyond its original charm! You could even add poppy seeds for delightful crunch or swap out some flour for almond flour if you’re looking for gluten-free options! I encourage you to get creative; baking is as much about expressing yourself as it is about following recipes! So roll up those sleeves, embrace the process wholeheartedly, and don’t forget to share your experiences with friends—I would love to hear how yours turn out!
Ultra-Soft Lemon Meltaway Cookies

Indulge in the delightful experience of baking with these ultra-soft lemon meltaway cookies. Perfectly light and buttery, each bite melts in your mouth, bringing a burst of zesty citrus flavor wrapped in a sweet lemon glaze. These cookies are ideal for summer gatherings, cozy evenings at home, or simply as a refreshing treat to brighten your day. The combination of fresh lemon juice and zest infuses every cookie with a sunny essence that evokes memories of warm days spent outdoors. Easy to prepare, these meltaway cookies will quickly become a favorite for anyone who loves bright, citrus desserts.
- Prep Time: 10 minutes
- Cook Time: 12 minutes
- Total Time: 22 minutes
- Yield: Approximately 18 cookies 1x
- Category: Dessert
- Method: Baking
- Cuisine: American
Ingredients
- 1 cup unsalted butter, softened
- 1/2 cup powdered sugar
- 1 tbsp lemon zest
- 2 tbsp fresh lemon juice
- 1 tsp vanilla extract
- 2 cups all-purpose flour
- 1/4 tsp salt
- 1 cup powdered sugar (for glaze)
- 2–3 tbsp lemon juice (for glaze)
- 1 tsp lemon zest (for glaze)
Instructions
- Preheat oven to 175°C (350°F) and line a baking sheet with parchment paper.
- In a mixing bowl, cream together the softened butter and powdered sugar until light and fluffy.
- Add in the lemon zest, fresh lemon juice, and vanilla extract; mix until well combined.
- Gradually add the flour and salt; mix until a soft dough forms.
- Roll small portions of dough into balls and gently flatten them on the prepared baking sheet.
- Bake for 10–12 minutes or until edges are just set but not browned.
- Allow cookies to cool completely before preparing the glaze.
- For the glaze, mix powdered sugar with lemon juice and zest until smooth; drizzle over cooled cookies.
Nutrition
- Serving Size: 1 cookie
- Calories: 120
- Sugar: 10g
- Sodium: 50mg
- Fat: 6g
- Saturated Fat: 4g
- Unsaturated Fat: 2g
- Trans Fat: 0g
- Carbohydrates: 14g
- Fiber: 0g
- Protein: 1g
- Cholesterol: 20mg