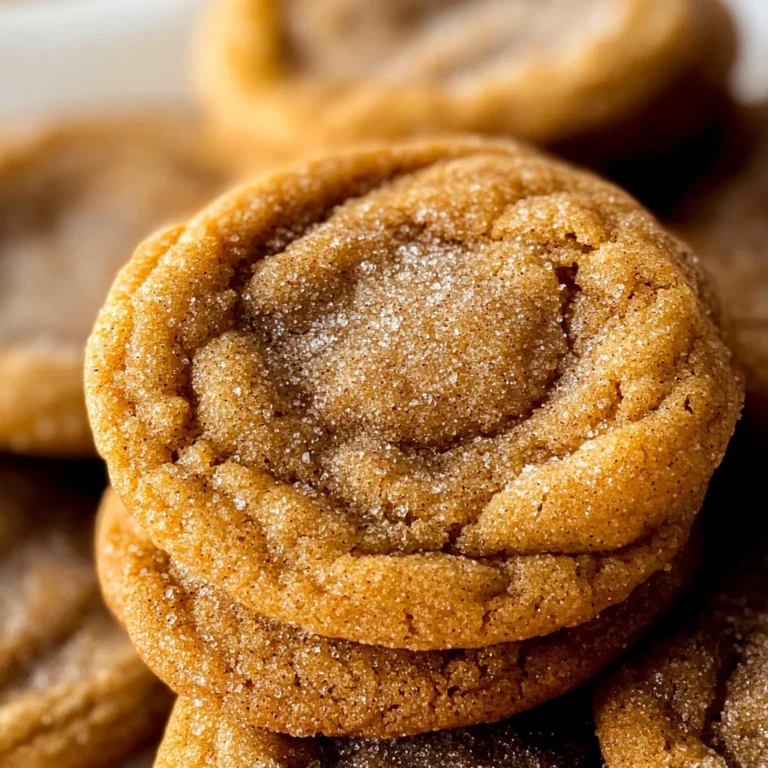
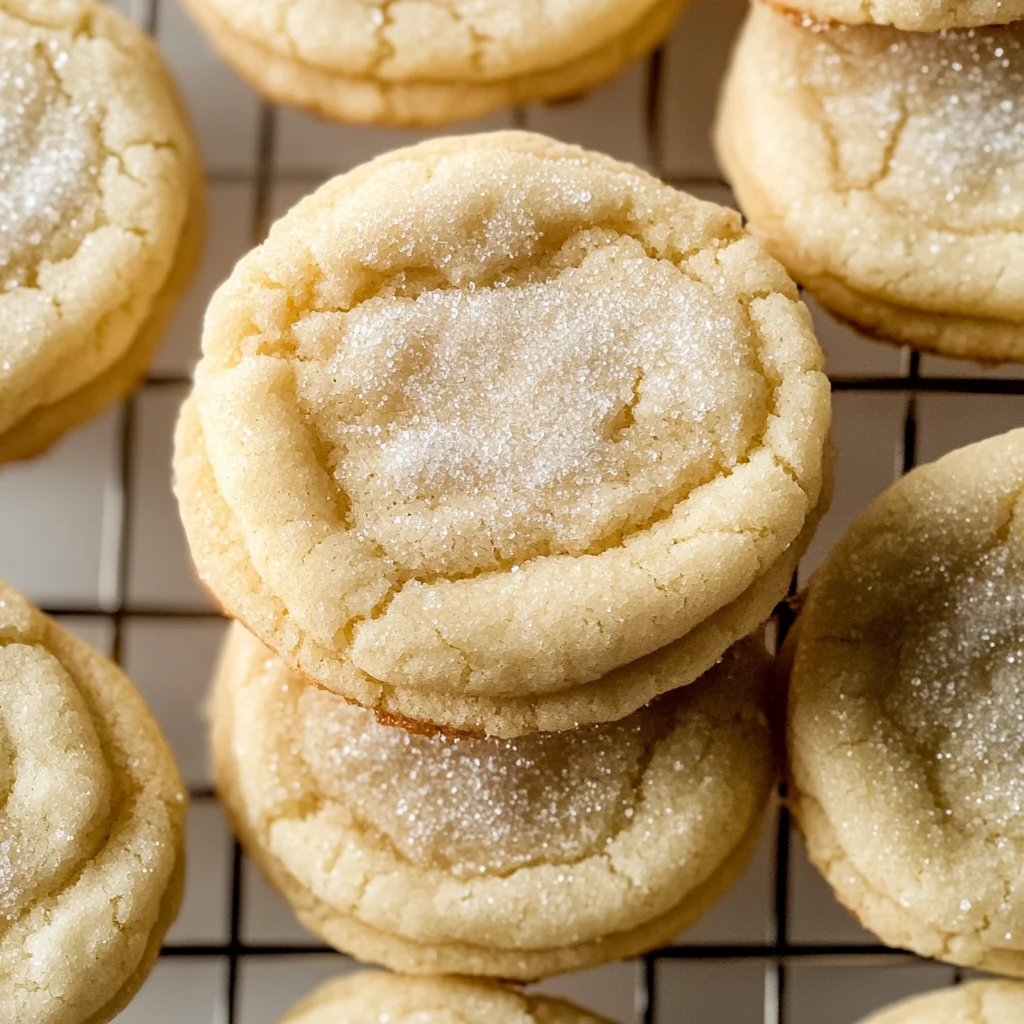
Vanilla Sugar Cookies
There’s something profoundly magical about the aroma of freshly baked cookies wafting through your home, isn’t there? It’s almost like a warm hug for your senses, each whiff whispering sweet promises of comfort and nostalgia. When I think of my favorite childhood memories, many of them are intertwined with the simple act of baking sugar cookies, especially these Vanilla Sugar Cookies. They are more than just a sweet treat; they’re a bridge to delightful moments shared with family and friends, laughter echoing in the kitchen as we eagerly awaited that first bite. The soft, pillowy texture combined with the enchanting essence of vanilla creates an experience that transcends mere taste. I promise you, each cookie is a little piece of happiness waiting to be savored.
What makes this recipe particularly special is its simplicity paired with the depth of flavor that comes from quality ingredients. You see, these cookies are not just about sweetness; they’re about celebrating the vibrant notes of real vanilla and the comforting richness of butter. As you embark on your journey to make these Vanilla Sugar Cookies, you’ll find that each step is infused with joy and anticipation. Whether it’s for a casual gathering or simply to indulge yourself after a long day, these cookies will never fail to deliver smiles. Trust me on this: once you take that first bite, you’ll understand why I keep coming back to this cherished recipe.
Vanilla Sugar Cookies: Sweet Simplicity in Every Bite
Ah, let’s dive into making these delightful Vanilla Sugar Cookies! They embody everything we love about baking—a straightforward process that yields irresistibly delicious results. Prepare yourself for a culinary adventure filled with cheer and sweet aromas as we gather our ingredients and set the stage for cookie magic!
Ingredients:
As we embark on this delicious journey together, let’s take a moment to appreciate the essential components that will bring our Vanilla Sugar Cookies to life. Each ingredient plays a vital role in crafting those soft and chewy delights that everyone adores.
- 2 cups (240g) all-purpose flour. This is the backbone of our cookies! Flour provides structure and stability while keeping our cookies tender. When purchasing flour, look for one labeled all-purpose, as it strikes the perfect balance between strength and elasticity without being too heavy or dense. Make sure to spoon it into your measuring cup and level it off—too much flour can lead to dry cookies! If you’re looking for alternatives, feel free to experiment with cake flour for an even softer texture or gluten-free blends if needed.
- ¾ teaspoon baking powder. This little leavening agent is crucial as it helps our cookies rise just enough to achieve that fluffy texture without becoming too cakey. Baking powder works by releasing carbon dioxide when mixed with moisture and heat, causing air pockets in your dough which leads to delightful softness. Always check expiration dates; old baking powder can leave you with flat cookies!
- ½ teaspoon baking soda. Similar to baking powder but stronger, baking soda requires an acid (like brown sugar or vinegar) to activate its leavening properties. In our recipe, it helps balance out sweetness while creating that perfect chewy texture we crave in sugar cookies. Remember—baking soda can cause over-spreading if mismeasured, so ensure accuracy!
- ½ teaspoon salt. Salt may seem small but is undeniably paramount in bringing flavors alive! It enhances sweetness while balancing out the richness from butter and sugar, leading to a well-rounded cookie profile you’ll absolutely adore.
- ½ cup (113g) unsalted butter, softened to room temperature. This is where some serious magic happens! Butter adds richness and moisture while providing flavor depth that’s hard to replicate with substitutes. Softened butter creams beautifully with sugar—this process creates tiny air pockets critical for achieving lightness in your cookies. If you’re opting for other fats like coconut oil or vegan margarine, remember they might alter texture slightly but can still yield tasty results.
- 1 cup (120g) powdered sugar. Different from granulated sugar, powdered sugar gives our cookies that melt-in-your-mouth quality we cherish so much! It dissolves quickly into batters without leaving graininess behind—perfect for achieving smooth textures! Make sure it’s fresh; stale powdered sugar clumps can affect the final product.
- 1 large egg, preferably at room temperature. Eggs bind everything together while adding moisture and richness—it’s an essential component for texture! Using room-temperature eggs ensures they incorporate evenly into your batter rather than shocking cold ingredients into separation.
- ¼ cup (56mL) vegetable oil. This liquid gold brings additional moisture without weighing down our cookies like butter might do alone! Vegetable oil keeps things light and fluffy while helping produce those perfectly soft centers we crave so dearly.
- 1 Tablespoon (21g) Rodelle vanilla paste—oh my goodness! This ingredient elevates our cookie game exponentially! Unlike vanilla extract which has alcohol content, vanilla paste gives us those glorious flecks of real vanilla bean while ensuring an intense flavor profile that’s utterly intoxicating. Using high-quality vanilla paste or extract will pay off in spades here—don’t skimp!
- ½ cup (100g) granulated sugar serves a dual purpose: it adds sweetness while providing a delightful crunch when rolled onto our cookie balls before baking! Granulated sugar helps create those iconic crispy edges while preserving soft centers inside—truly heavenly when baked just right!
Equipment You’ll Need:
Having the right tools at hand makes all the difference when baking—trust me on this one! These essential partners will help streamline your experience as you create something truly wonderful from scratch.
- Mixing bowls – It’s best to have both medium and large mixing bowls available; they provide ample space for all our ingredients during different stages of mixing without feeling cramped—a common pitfall in baking!
- Handheld mixer or stand mixer – Either works wonderfully here; however, using one makes creaming butter with sugar easy-peasy! A stand mixer allows multitasking if you have several recipes going at once since they do most of the work for you!
- Measuring cups & spoons – Precision matters immensely when baking! Investing in quality measuring tools ensures accuracy which leads directly towards consistent results every time—and who doesn’t want that?
- Rubber spatula – An absolute must-have tool while mixing ingredients together; it guarantees everything gets incorporated smoothly without leaving any stubborn bits behind clinging onto sides—a true lifesaver!
Now that we’ve gathered everything we need let’s dive into preparing these beautiful Vanilla Sugar Cookies together—the heart of our culinary adventure awaits!
Step 1: Preheat Your Oven & Prepare Baking Sheets
First things first—we need that oven preheating at 350ºF (177ºC). This temperature is absolutely perfect for achieving those gorgeously fluffy yet slightly crisp-edged results we’re after in our cookies! While that’s warming up nicely (and trust me—it’ll make such a difference), line your large baking sheet with parchment paper or silicone mats; this step prevents sticking and ensures even browning all around your precious cookie creations later on.
Step 2: Whisk Together Dry Ingredients
In a medium-sized bowl, combine flour, baking powder, baking soda, and salt using a whisk until blended thoroughly—this mix creates an even distribution throughout your dough so every bite packs maximum flavor punch without any surprises lurking within! By whisking separately before combining dry ingredients into wet ones later on helps avoid clumping—this is crucial if you want those smooth-textured Vanillla Sugar Cookies everyone loves!
Step 3: Cream Butter & Powdered Sugar
Now onto one of my favorite steps—the creaming process! In either your large bowl fitted with a handheld mixer or stand mixer equipped with paddle attachment (if using), blend softened unsalted butter along with powdered sugar on medium-high speed until light and fluffy—it should resemble clouds after about 2–3 minutes’ worth of effort here! This process introduces air into mixture leading towards higher volume plus lighter texture upon baking—so don’t rush it because patience pays off beautifully here.
Step 4: Add Egg & Wet Ingredients
Once you’ve reached peak fluffiness during creaming stage (seriously—you’ll know!), stop mixing briefly to add room-temperature egg alongside vegetable oil plus Rodelle vanilla paste into mixture then beat again at medium speed until fully combined; make sure nothing’s stuck against sides by scraping down periodically throughout blending process too—this ensures uniformity across entire batch so every bite remains equally delightful without any unevenness found within dough itself!
And there you have it—we’re already well on our way toward creating these exquisite Vanilla Sugar Cookies together! Stay tuned as we continue crafting deliciousness step-by-step through this joyous adventure ahead…
Step 5: Mixing the Dough – The Heart of Your Cookies
Now that we’ve whipped our butter and powdered sugar into a fluffy cloud of sweetness, it’s time to bring everything together into one cohesive, magical dough. This step is where the true alchemy happens, and I can’t stress enough how important it is to be gentle yet thorough during this phase. When you add the egg, vegetable oil, and Rodelle vanilla paste to your whipped butter mixture, you’re not just combining ingredients; you are building a beautiful base for your cookies. The egg acts as a binding agent, helping to hold everything together while also adding moisture, which will contribute to that pillowy soft texture we’re after. The oil adds richness without making the dough too heavy—trust me on this one!
Once you’ve added those ingredients, turn your mixer back on to medium speed and let it work its magic for about 1-2 minutes. You want everything mixed until it’s smooth and homogenous; there shouldn’t be any visible streaks of butter or egg. As you do this, take a moment to appreciate the intoxicating aroma wafting up from the bowl—the vanilla is truly the star here! Don’t forget to stop and scrape down the sides of the bowl occasionally; this is crucial for ensuring every bit of mixture is fully incorporated. We want that luscious vanilla flavor evenly distributed throughout our dough because who wants a cookie with just one bite of deliciousness? No one!
Step 6: Incorporating Dry Ingredients – A Delicate Balance
With our wet ingredients perfectly blended, it’s time to introduce our dry ingredients into the mix. This part requires a gentle touch—think of it as folding in layers of flavor rather than just mixing wildly. Grab your medium-size bowl where you’ve already whisked together the all-purpose flour, baking powder, baking soda, and salt. By whisking them beforehand, you’ve ensured that these leavening agents are evenly distributed throughout your flour; this makes for consistently baked cookies that rise beautifully.
Now comes the fun part: reduce your mixer speed to low (this will prevent flour from flying everywhere!) and slowly add half of your dry mixture into the wet ingredients. Wait until you see that first batch almost completely integrated before adding in the rest. This gradual incorporation allows you to maintain control over the texture of your dough. I promise you—it’s worth taking those extra moments! You’re looking for a dough that feels soft but isn’t overly sticky; it should be able to hold its shape when scooped but still have that inviting softness that sugar cookies are known for. If it’s too sticky at this point—don’t panic! Just sprinkle in a bit more flour until you reach perfection.
Step 7: Rolling in Sugar – A Sweet Transformation
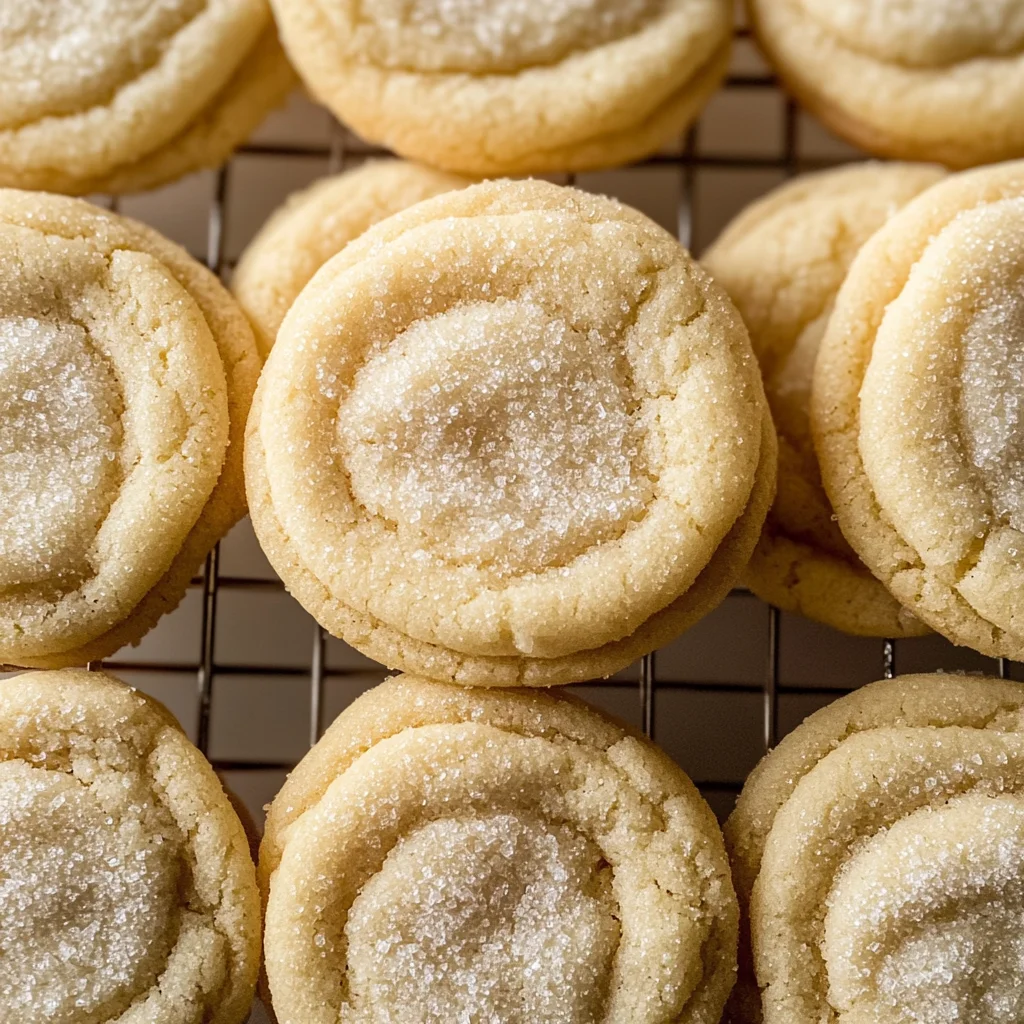
Ahh, this is where things get really exciting! Once your cookie dough is ready and has that perfect consistency, it’s time to give them their signature sugary coating. This step is not just for aesthetics—oh no! Dusting each ball of dough in granulated sugar before baking serves two delightful purposes: it creates a beautiful crackly surface during baking and offers a lovely contrast between sweet crunchiness on the outside and soft chewiness on the inside.
To prepare for this sweet transformation, place your granulated sugar into a small bowl—this allows for easy access as we roll each ball in pure sweetness. Using a cookie scoop (I absolutely adore my #50 scoop), drop generous balls of dough right into that sparkling sugar like little nuggets of joy! With clean hands, gently roll each ball around until completely coated in sugar; don’t rush this step! It’s essential for achieving that gorgeous finish we all admire on bakery-style cookies. Once covered, place them on your prepared baking sheet—aim for eight balls per sheet so they have enough room to spread out while baking.
Step 8: Baking Your Perfect Vanilla Sugar Cookies
Finally! We’re at the moment we’ve all been waiting for—baking these beauties! Preheat your oven to 350ºF (177ºC) if you haven’t already—it should feel like Christmas morning with anticipation! Slide those cookie sheets into your preheated oven and set a timer for about 8-9 minutes. Keep an eye on them during this time; what you’re looking for are edges that appear set while still maintaining a slight puffiness in their center—a sure sign they’ll remain tender once cooled.
As they bake, an utterly intoxicating aroma will begin to fill your kitchen—seriously, nothing compares to the smell of freshly baked cookies wafting through the air—and trust me when I say it’s worth lingering over! You might notice some slight golden edges forming; that’s perfectly normal and shows they’re nearing completion. Remember: don’t over-bake them! They should look slightly underdone because they’ll continue cooking even after being pulled from the oven due to residual heat (also known as carryover cooking). Allow them to cool on their baking sheet for about 2-3 minutes before transferring them onto a wire rack—you want them firm enough not to fall apart but still warm enough so they melt in your mouth!
Final Touches – Enjoying Your Vanilla Sugar Cookies
And there you have it—the warmest batch of Vanilla Sugar Cookies ready to delight both yourself and anyone lucky enough to share them with you! These cookies can be stored tightly covered at room temperature for up to one week—but let’s be real; they probably won’t last that long because who can resist? If by chance you find yourself with leftovers (or if you’re planning ahead), these little treasures freeze beautifully as well; just remember not to roll them in sugar before freezing!
As you take that first bite—soft yet chewy with an explosion of vanilla flavor—I hope you’ll feel that profound satisfaction I always do when sharing these cookies with loved ones. There’s something truly extraordinary about creating homemade treats—it connects us through generations and flavors shared around tables laden with laughter and love. So go ahead and gather family or friends around—you’ll create memories far sweeter than any cookie could ever be alone!
Happy baking friends; may every batch fill your home with joy and warmth just like mine does!
Storage and Enjoyment Tips for Your Vanilla Sugar Cookies
Now that your Vanilla Sugar Cookies are baked to perfection, it’s time to savor the delightful moment of enjoying these treats! Picture this: you take a bite, and the soft, chewy texture envelops your senses with that warm, comforting vanilla aroma. But what happens when you have leftovers? Well, I’ve got you covered because these cookies not only taste exquisite fresh out of the oven but can also be enjoyed over the next several days!
Storing Leftover Vanilla Sugar Cookies
To keep your Vanilla Sugar Cookies fresh and delightful, store them in an airtight container at room temperature. This simple step is crucial as it prevents them from drying out and maintains their pillowy softness. I usually recommend using a container made of glass or plastic with a tight-fitting lid—trust me; it makes all the difference! If you’re looking for a little trick to enhance freshness, place a slice of bread in the container with the cookies. The moisture from the bread keeps your cookies beautifully soft! These treats will last about a week if stored properly, but I promise they’ll be gone long before then! Even after a few days, they retain their delicious flavor—just slightly more chewy than when they were fresh out of the oven. For those who love their cookies warm, simply pop them in the microwave for about 10 seconds before serving; it’s like getting a hug from your favorite baked good all over again.
Freezing Vanilla Sugar Cookies for Later
If you find yourself with too many cookies (though is there really such a thing?), or if you’re simply looking to prepare ahead for an upcoming gathering, freezing these Vanilla Sugar Cookies is an absolute game changer! To freeze them properly, allow your cookies to cool completely first. Then, arrange them in a single layer on a baking sheet and freeze until solid—this prevents them from sticking together. Once frozen, transfer the cookies to a freezer-safe bag or container where they can be kept for up to three months. When you’re ready to indulge again, just take out as many as you want and let them thaw at room temperature or warm them directly in the oven for that freshly-baked experience. This method not only preserves their flavor but also adds convenience to your baking adventures!
Vanilla Sugar Cookies
Indulge in the warm, inviting aroma of freshly baked Vanilla Sugar Cookies, a delightful treat that brings joy with every bite. This easy recipe creates soft, chewy cookies infused with rich vanilla flavor, making them perfect for any occasion—be it family gatherings or cozy nights in. The simple combination of quality ingredients results in cookies that are not just delicious but also evoke cherished memories. Get ready to fill your home with happiness and create lasting moments while baking these scrumptious delights!
- Prep Time: 15 minutes
- Cook Time: 9 minutes
- Total Time: 24 minutes
- Yield: Approximately 24 cookies 1x
- Category: Dessert
- Method: Baking
- Cuisine: American
Ingredients
- 2 cups all-purpose flour
- ¾ teaspoon baking powder
- ½ teaspoon baking soda
- ½ teaspoon salt
- ½ cup unsalted butter, softened
- 1 cup powdered sugar
- 1 large egg, room temperature
- ¼ cup vegetable oil
- 1 tablespoon vanilla paste
- ½ cup granulated sugar
Instructions
- Preheat your oven to 350ºF (177ºC) and line baking sheets with parchment paper.
- In a bowl, whisk together flour, baking powder, baking soda, and salt.
- In a separate bowl, cream the softened butter and powdered sugar until light and fluffy.
- Beat in the egg, vegetable oil, and vanilla paste until well combined.
- Gradually mix in the dry ingredients until a smooth dough forms.
- Roll cookie dough into balls and coat each ball in granulated sugar before placing on prepared sheets.
- Bake for 8-9 minutes until edges are set but centers remain soft. Allow cooling briefly before transferring to wire racks.
Nutrition
- Serving Size: 1 cookie (20g)
- Calories: 91
- Sugar: 6g
- Sodium: 40mg
- Fat: 4g
- Saturated Fat: 2g
- Unsaturated Fat: 2g
- Trans Fat: 0g
- Carbohydrates: 13g
- Fiber: <1g
- Protein: <1g
- Cholesterol: 10mg