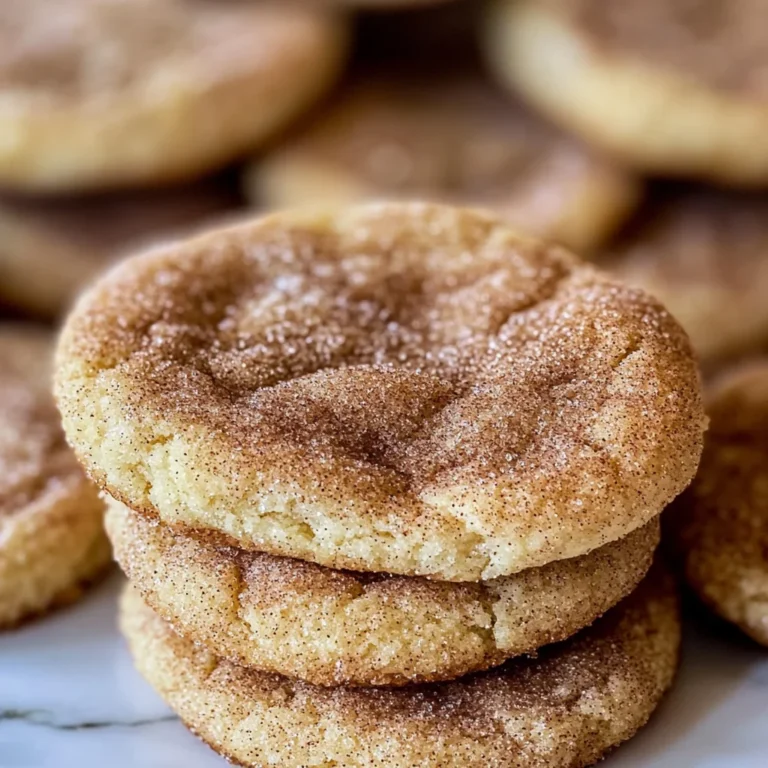
Chocolate Pistachio Cream Thumbprints
There’s something profoundly satisfying about the act of baking, especially when it comes to sharing a cherished recipe like these Chocolate Pistachio Cream Thumbprints. As the aroma of rich chocolate mingles with the nutty fragrance of pistachios wafts through your kitchen, you’ll feel transported to a world where every bite is not just food but an experience—a moment frozen in time that connects us to loved ones and traditions. These thumbprint cookies, with their buttery cocoa shortbread and luscious pistachio cream filling, are more than just a delightful dessert; they embody warmth, love, and the joy of creating something extraordinary. I promise you, once you take that first bite, you’ll understand why they have become a staple in my home.
Each ingredient in this recipe tells its own story—together they weave a beautiful tapestry of flavor and texture that’s simply irresistible. Chocolate Pistachio Cream Thumbprints are perfect for any occasion—whether you’re hosting a festive gathering or simply treating yourself after a long day. They hold an almost magical quality that brings smiles and satisfaction, evoking fond memories while creating new ones with family and friends. So grab your apron and let’s embark on this deliciously rewarding journey together!
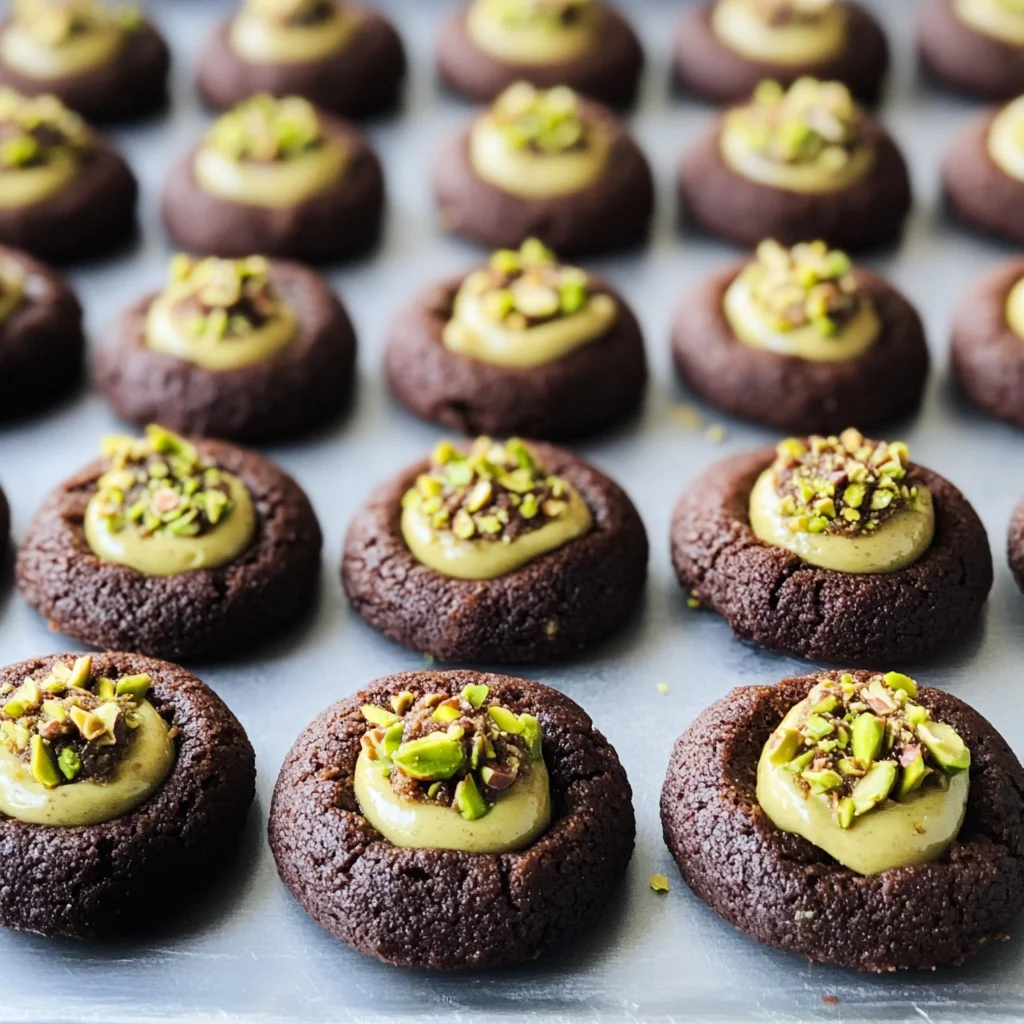
Chocolate Pistachio Cream Thumbprints: A Sweet Symphony of Flavor
If you’ve ever craved a cookie that combines rich chocolate goodness with the nutty elegance of pistachios, then you’re in for a real treat. This recipe is incredibly easy to follow, yet it yields treats that look and taste like they came straight from a gourmet bakery. Each cookie is adorned with a silky pistachio cream center that makes every bite an utter delight. Trust me when I say these cookies will disappear faster than you can bake them!
Ingredients:
As we dive into this delectable adventure, let’s gather our ingredients. Each one plays an essential role in crafting these heavenly thumbprints.
- 10 tablespoons unsalted butter (at room temperature). This is crucial for achieving that light and fluffy texture we desire in our Chocolate Pistachio Cream Thumbprints. Using unsalted butter lets us control the saltiness of our cookies—the last thing we want is for it to overpower the delicate flavors of chocolate and pistachio! Make sure your butter is at room temperature; otherwise, it won’t cream properly with the sugar. If you can find European-style butter, go for it! Its higher fat content will lend even richer results.
- 2/3 cup granulated sugar. Sugar isn’t just for sweetness; it also helps create the structure and texture of the cookie by aiding in creaming with the butter. This process introduces air into your dough, making each cookie tender and perfectly textured. I love using organic cane sugar because it has a lovely flavor profile that adds depth without being overly sweet.
- 1 large egg yolk (reserve the white if you will be rolling in nuts). The yolk adds richness and moisture while helping bind everything together—this is non-negotiable! If you choose to roll your cookies in chopped pistachios later on, keeping that egg white means you’ll create a beautiful coating that enhances both flavor and presentation.
- 1 teaspoon vanilla extract. Ahh, vanilla—the secret weapon in so many desserts! It enhances all other flavors present in your cookies and adds warmth to the overall taste experience. Always opt for pure vanilla extract over imitation; its complex notes will elevate your thumbprints significantly.
- 1/4 teaspoon pistachio extract (optional). While optional, this ingredient can take your cookies to another level by intensifying that nutty flavor profile we all adore about pistachios. Just be cautious not to overdo it; a little goes a long way!
- 1 1/4 cups all-purpose flour. Flour provides structure to our cookies while allowing them to spread just enough during baking for those classic thumbprint shapes we’re after. For best results, make sure to measure accurately—too much flour can lead to dry cookies.
- 1/3 cup Dutch-processed cocoa powder (sifted). Dutch-processed cocoa offers a smoother flavor compared to natural cocoa powder because it’s treated with an alkalizing agent that neutralizes acidity. This means our thumbprints will boast rich chocolate undertones without any bitter notes overshadowing them.
- 1/2 teaspoon fine sea salt. Salt isn’t just an afterthought; it’s essential for balancing sweetness! It enhances all other flavors present within our cookies while helping them maintain their moistness throughout baking.
- 1/2 cup coarsely chopped pistachios. Freshly chopped nuts add crunchiness and flavor contrast against our soft chocolate base—they’re also what gives these thumbprints their charming character! Look for bright green nuts without any signs of discoloration or rancidity.
- 1.5 ounces white chocolate (chopped). White chocolate serves as the luxurious base for our filling—it’s sweet yet creamy nature complements the nuttiness beautifully while providing an extra layer of richness.
- 3 tablespoons pistachio butter. This silky goodness creates an indulgent filling reminiscent of luxurious gelato! Not only does it taste divine but it also adds moisture back into our mixture; ensure you go for high-quality brands without added sugars or preservatives when purchasing!
- 2 teaspoons powdered sugar (sifted). Powdered sugar gives sweetness without altering texture too much; it dissolves quickly into our filling ensuring smooth consistency ideal for spooning into cookies later on!
- 1/8 teaspoon fine sea salt & 1/8 teaspoon pistachio extract (optional) & 1/8 teaspoon vanilla powder (optional)—these trio accents enhance overall taste while contributing beautifully balanced sweetness levels so don’t skip out if possible!
Now that we’ve gathered our ingredients let’s ensure we have everything else we need before diving into baking!
Equipment You’ll Need:
Having the right tools makes all the difference when embarking on this delightful baking adventure together! While these may not be ingredients, they are essential partners in creating something wonderful.
- Electric mixer – An absolute game-changer when it comes to creaming butter and sugar together! A stand mixer works wonders here since it’ll save your arms from tiring out during lengthy beating sessions—however handheld mixers are perfectly sufficient too! Achieving lightness through proper creaming sets up your dough beautifully for maximum fluffiness later on.
- Mixing bowls – A good-quality mixing bowl set allows flexibility while preparing different components simultaneously without causing cross-contamination between ingredients (like wet/dry). Glass or stainless steel options work great since they won’t retain odors or stains like plastic sometimes does over time.
- Parchment paper or silicone baking mat – These beauties prevent sticking while ensuring even heat distribution during baking processes which results in perfect golden brown edges rather than burnt bottoms—trust me on this one!
Now let’s roll up those sleeves and get started creating these mouthwatering Chocolate Pistachio Cream Thumbprints!
Step 1: Preheat Your Oven & Prepare Your Baking Sheet
Before anything else happens, preheat your oven to 350 degrees F (175 degrees C). This step is crucial because starting with a hot oven ensures even baking from start to finish—no one wants unevenly baked cookies! While waiting for those glorious temperatures to rise, line your heavy-weight baking sheet with parchment paper or a silicone baking mat; this prevents sticking—and trust me when I say there’s nothing worse than losing half your batch due to sticky mishaps!
Step 2: Cream Together Butter & Sugar
In your mixing bowl, combine room temperature unsalted butter along with granulated sugar using an electric mixer set at medium-high speed until light and fluffy—aiming for around 2–3 minutes here should do nicely! This process known as “creaming” introduces air bubbles into the mixture which ultimately leads us toward achieving those airy textures we crave so much! Keep an eye out; if things start looking grainy instead of fluffy don’t fret—it just means either under-mixing occurred or perhaps some stubborn bits remain stuck along sides needing scraping down gently before continuing onward!
Step 3: Incorporate Egg Yolk & Extracts
Once you’ve achieved that delightful fluffiness from creaming earlier on—now’s time add one large egg yolk along with vanilla extract followed by optional additions such as pistachio extract if desired—as mentioned earlier adding complexity isn’t mandatory but highly encouraged! Mix until combined thoroughly again making sure everything blends seamlessly together ensuring no lumps remain behind—all good things come from patience here folks!
Step 4: Sift Dry Ingredients Together
Sifting might seem tedious but trust me—it’s absolutely paramount when creating baked goods like these Chocolate Pistachio Cream Thumbprints where delicate textures matter deeply! Start sifting together all-purpose flour alongside dutch processed cocoa powder plus fine sea salt until evenly distributed within another bowl before gradually adding this dry mix into wet mixture prepared earlier taking care not overmix either—we want soft dough formed rather than dense brick-like mass which could result otherwise due excess gluten formation caused by vigorous stirring motions when combining wet/dry elements together initially—so gently fold until everything comes together beautifully forming stiff dough ready shaping soon thereafter!
And there you have it—the first few steps towards creating these beautiful Chocolate Pistachio Cream Thumbprints! Stay tuned as we continue crafting each cookie into perfection next time around…
Step 5: Embracing the Art of Shaping
Now that your dough is ready, it’s time to shape these delightful morsels into their iconic thumbprint form. With clean hands, take about a tablespoon of the chocolate shortbread dough and roll it into a ball – aim for a size just shy of an inch in diameter. This is the perfect size to create a cookie that’s not only visually pleasing but also allows for an ample amount of that luscious pistachio cream filling later on. As you line these little spheres up on your prepared baking sheet, give them enough space; they may spread slightly during baking, so about two inches apart is ideal.
For the classic thumbprint effect, gently press down the center of each dough ball using your thumb or the back of a measuring spoon (a round ½ teaspoon works beautifully!). You want to create a lovely indentation without cracking the edges—think of it like molding soft clay rather than smashing it flat. This step is crucial because you want to ensure there’s enough room for that rich pistachio cream to nestle in later. If you find that your thumbs are sticking to the dough, don’t hesitate to dust them with a little flour; this small action can make all the difference in achieving those perfectly shaped cookies.
Step 6: Adding Texture with Pistachios
If you’re feeling adventurous and want to give your cookies an extra layer of texture and flavor, consider rolling the dough balls in chopped pistachios before baking them. To do this, dip each ball lightly into the reserved egg white; this step helps the nuts adhere beautifully and creates a delightful crunch on every bite. Roll the coated dough between your palms until it’s evenly covered with egg white, then take your time rolling it through the coarsely chopped pistachios. Each nut will cling tightly, creating a vibrant green crust that not only looks stunning but adds an irresistible nutty flavor.
This technique isn’t just about aesthetics—it’s about enhancing every aspect of flavor and texture in your Chocolate Pistachio Cream Thumbprints. The pistachios will toast slightly as they bake, releasing their oils and deepening their flavor profile, while also offering a pleasant contrast against the smooth chocolate cookie base. Trust me on this; if you love the earthiness of pistachios as much as I do, you simply can’t skip this step.
Step 7: The Perfect Baking Time
With your cookies shaped and ready for action, it’s time for one of my favorite parts—baking! Preheat your oven to 350 degrees F (that’s about 175 degrees C for those outside the U.S.), ensuring that it reaches full temperature before placing your baking sheet inside. This is vital because an adequately preheated oven allows for even cooking and prevents sogginess—a common pitfall when baking cookies. Bake those beauties for 10 to 12 minutes; watch closely toward the end! The cookies should look set in the center and slightly puffed up around the edges with just a hint of darker color starting to form.
When they’re done, you might be tempted to yank them out immediately—but resist that urge! Patience here is key because letting them cool briefly on the sheet will allow them to firm up just enough before transferring them onto a cooling rack. You’ll know they’re perfect when they have golden edges but still feel soft when gently pressed down in their centers—a sign that they’ll remain chewy while still melting in your mouth.
Step 8: Redefining Those Indentations
As soon as those cookies come out of the oven, you’ll notice that they’ve puffed up beautifully—this is where we bring back our trusty measuring spoon! While they’re still warm (but not too hot), gently redefine those thumbprint indentations you made earlier. It’s critical not to skip this step; as they bake, some volume changes occur which can leave your cookies looking more like domes than thumbprints. By pressing down again with that same measuring spoon (dusted lightly with flour if needed), you’re ensuring there’s ample space for that heavenly pistachio cream filling we’ve been dreaming about.
Be gentle but firm; you don’t want to crack or break any cookie apart while doing this! Just push down until it feels secure yet forgiving—it should retain its shape while providing adequate room for filling later on. And here comes another fun part: let these beauties cool completely on a wire rack before adding any filling! Trying to fill warm cookies could cause everything from melted chocolate disaster zones to messy hand situations—and we absolutely don’t want that!
Final Touches: Creating Your Luxurious Filling
Step 9: Whipping Up That Irresistible Pistachio Cream
While your cookies are cooling down and settling into their gorgeous shapes, let’s prepare what truly makes these Chocolate Pistachio Cream Thumbprints shine—the luscious pistachio cream filling! Grab yourself a small microwave-safe bowl and toss in those finely chopped bits of white chocolate; we’ll melt this into creamy perfection first. Microwave it at 50% power in short bursts—about 30 seconds at a time—stirring vigorously after each interval until it’s completely melted and smooth as silk. Why use low power? Because heating too quickly can result in clumpy chocolate instead of what we’re aiming for—a glossy finish!
Once you’ve achieved that velvety consistency with no lumps left behind, stir in two tablespoons of silky pistachio butter along with sifted powdered sugar, sea salt, optional pistachio extract, and vanilla powder if desired—these last two ingredients really elevate flavors by enhancing both sweetness and nuttiness without overpowering anything else present in our cookies! Mix thoroughly until everything blends seamlessly together into what can only be described as pure liquid gold—a sweet treat waiting to happen.
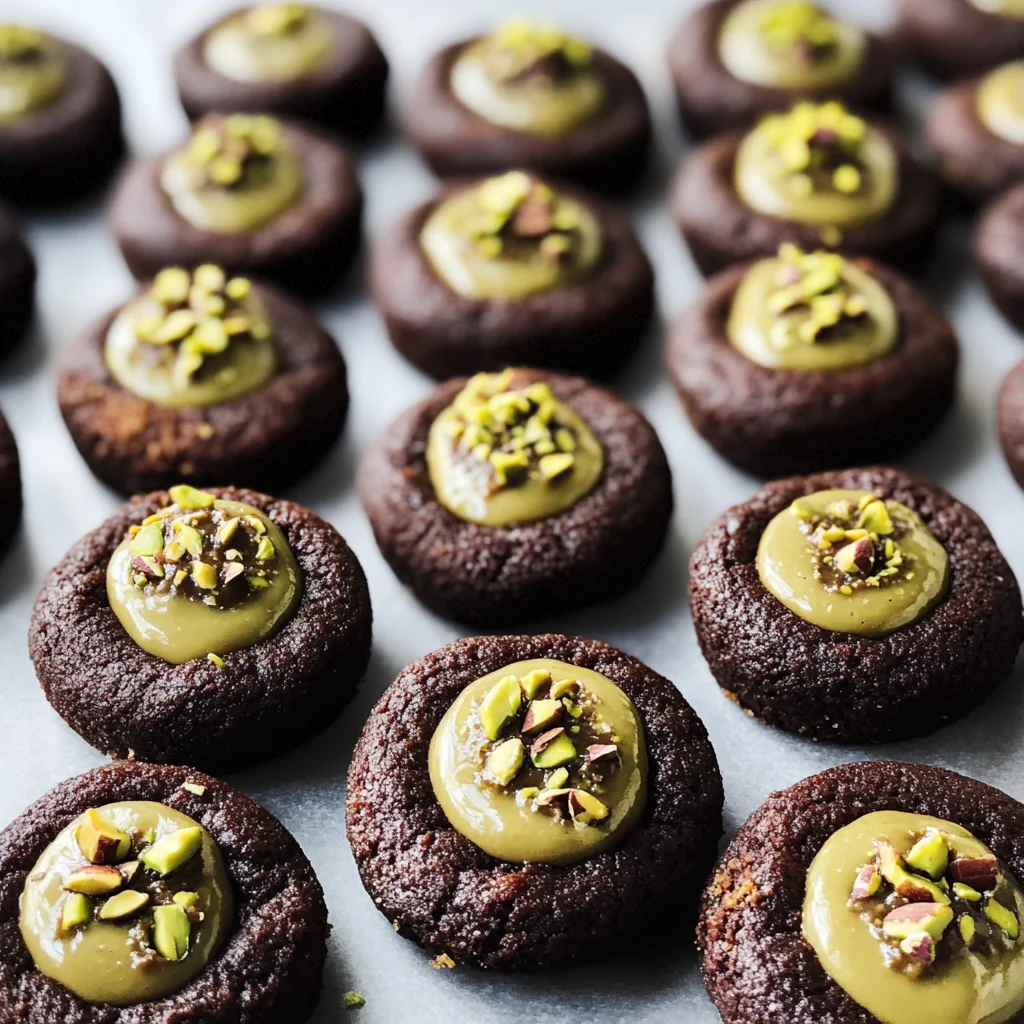
Step 10: Filling Your Cookies
Now comes one of my favorite moments—the filling phase! Using a small spoon or piping bag fitted with a round tip (or even just snipping off one corner), carefully spoon about half a teaspoon of this luxurious mixture right into each indentation of your cooled thumbprint cookies. Be cautious not to overflow; it’s easy to get carried away because trust me—they smell divine! You might find yourself needing slightly more or less filling depending on how deep those indentations turned out during baking; adjust accordingly!
And here’s where patience becomes essential once again—let these little bites rest at room temperature for about two hours until they set properly or quicken things up by placing them in the fridge for around 10-15 minutes until shiny surfaces become matte once more—a clear sign they’ve firmed up beautifully!
After all this love poured into each step, I promise you’ll have something truly extraordinary waiting at dessert time—Chocolate Pistachio Cream Thumbprints that not only look stunning but taste like pure bliss! Store any leftovers (if there are any!) in an airtight container at room temperature or refrigerate them for up to five days—I doubt they’ll last long enough though!
These delightful treats are perfect for sharing with loved ones during gatherings or simply indulging yourself after a long day—you deserve every decadent bite! So roll up those sleeves and embrace every moment spent crafting these delicious gifts from my kitchen to yours!
Storage and Enjoyment Tips for Your Chocolate Pistachio Cream Thumbprints
Now that your kitchen is filled with the intoxicating aroma of freshly baked Chocolate Pistachio Cream Thumbprints, it’s time to savor these delightful treats! But don’t worry if you can’t devour them all at once; I have some fantastic tips to ensure they stay as scrumptious as the moment they emerged from the oven. The key to maintaining their delectable charm lies in proper storage, so let’s dive into how you can keep that rich chocolate shortbread crust and luscious pistachio cream filling in peak condition.
Storing Leftover Chocolate Pistachio Cream Thumbprints
To keep your Chocolate Pistachio Cream Thumbprints in tip-top shape, I recommend using an airtight container—this is absolutely paramount for preserving their freshness and preventing them from drying out. If you’re like me and love a little extra moisture in your cookies, consider adding a slice of bread inside the container; this simple trick helps maintain that soft texture we adore. Stored properly at room temperature, these thumbprints will remain delightful for up to five days, although I promise they won’t last that long! Each day brings a slightly different experience: the flavors deepen and meld, creating a symphony of taste with every bite. When you’re ready to indulge again, simply enjoy them as is or pop them into the microwave for about 10-15 seconds if you’re craving a warm, gooey center—trust me, it’s heavenly!
Freezing Chocolate Pistachio Cream Thumbprints for Later
If you find yourself with an abundance of these luscious cookies—or if you want to plan ahead for future cravings—freezing them is an excellent option! Start by placing your thumbprints on a baking sheet lined with parchment paper and freeze them for about an hour until they are solid. Once frozen, transfer them to an airtight freezer-safe container or a resealable plastic bag, separating layers with parchment paper to prevent sticking. They’ll keep beautifully in the freezer for up to three months! When you’re ready to enjoy them again, there’s no need to thaw; simply bake directly from frozen at 350°F (175°C) for about 12-15 minutes. This method not only preserves their delightful flavors but also offers convenience—imagine pulling out a few cookies on a whim and treating yourself to freshly baked bliss any day of the week!
Chocolate Pistachio Cream Thumbprints
Indulge in the delightful experience of baking with these Chocolate Pistachio Cream Thumbprints. These exquisite cookies combine rich chocolate shortbread with a velvety pistachio cream filling, creating a treat that’s both visually stunning and irresistibly delicious. Perfect for any occasion—from festive gatherings to cozy evenings at home—these thumbprint cookies are sure to impress family and friends alike. The crunchy pistachios add a wonderful texture, while the creamy filling elevates each bite into a moment of pure bliss. Get ready to create lasting memories in your kitchen as you craft these easy yet elegant desserts!
- Prep Time: 20 minutes
- Cook Time: 12 minutes
- Total Time: 32 minutes
- Yield: Approximately 24 cookies 1x
- Category: Dessert
- Method: Baking
- Cuisine: American
Ingredients
- 10 tablespoons unsalted butter (room temperature)
- 2/3 cup granulated sugar
- 1 large egg yolk
- 1 teaspoon vanilla extract
- 1 1/4 cups all-purpose flour
- 1/3 cup Dutch-processed cocoa powder (sifted)
- 1/2 teaspoon fine sea salt
- 1/2 cup coarsely chopped pistachios
- 1.5 ounces white chocolate (chopped)
- 3 tablespoons pistachio butter
- 2 teaspoons powdered sugar (sifted)
Instructions
- Preheat your oven to 350°F (175°C) and line a baking sheet with parchment paper.
- In a mixing bowl, cream together the butter and sugar until light and fluffy.
- Incorporate the egg yolk and vanilla extract until well blended.
- Sift together the flour, cocoa powder, and salt; gradually add to the wet mixture until combined.
- Shape the dough into balls about an inch in diameter and place them on the baking sheet with space in between.
- Use your thumb or a spoon to create an indentation in each ball.
- Bake for 10 to 12 minutes until set, then cool on a wire rack.
- While cooling, melt white chocolate and mix with pistachio butter, powdered sugar, and salt for the filling.
- Spoon or pipe the pistachio cream into each cookie's indentation.
Nutrition
- Serving Size: 1 cookie
- Calories: 150
- Sugar: 8g
- Sodium: 45mg
- Fat: 9g
- Saturated Fat: 4g
- Unsaturated Fat: 4g
- Trans Fat: 0g
- Carbohydrates: 16g
- Fiber: 1g
- Protein: 2g
- Cholesterol: 15mg