Teriyaki Chicken Skewers
There’s something utterly magical about the aroma of teriyaki chicken wafting through the air, isn’t there? It’s not just a meal; it’s a vibrant tapestry of flavors that transports you to a bustling street market in Tokyo or a cozy backyard barbecue. When I think of Teriyaki Chicken Skewers, I reminisce about sun-drenched afternoons spent grilling with friends and family, laughter echoing amidst the crackling flames. This dish is more than a recipe; it’s an experience that marries tradition with the joy of cooking, creating a symphony of flavors that dances on your palate and warms your heart. The harmony of sweet and savory notes in the marinade creates a truly extraordinary flavor profile that makes every bite deeply satisfying. Trust me when I say that this recipe will become a cherished favorite in your home!
As we delve into this culinary adventure together, let me assure you: these Teriyaki Chicken Skewers are not only simple to prepare but also wholeheartedly delicious. They make for an incredible weeknight dinner, perfect for meal prep, or even as an eye-catching centerpiece for gatherings. The tender chicken paired with the luscious glaze will surely impress your loved ones, and they’ll be asking for seconds — maybe even thirds! So gather your ingredients and let’s embark on this flavorful journey together.
Teriyaki Chicken Skewers: A Grilled Delight
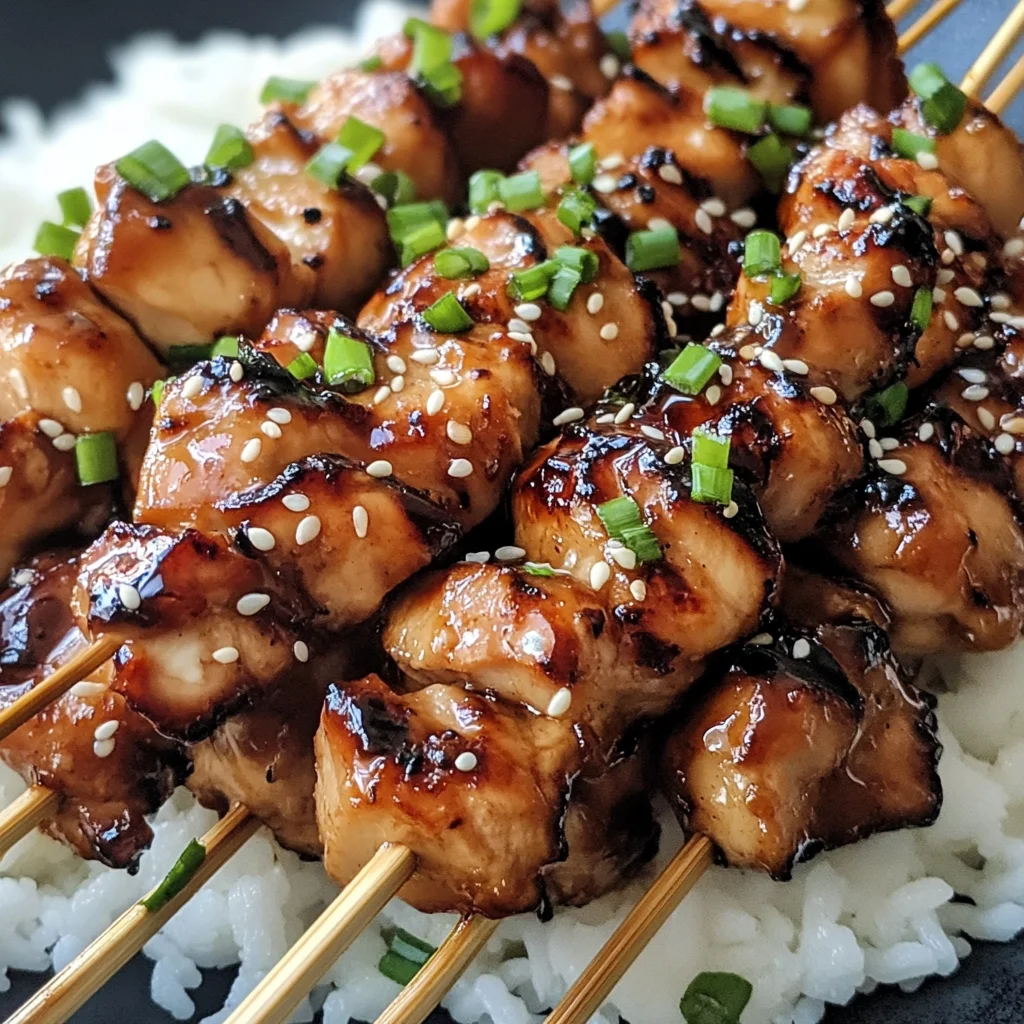
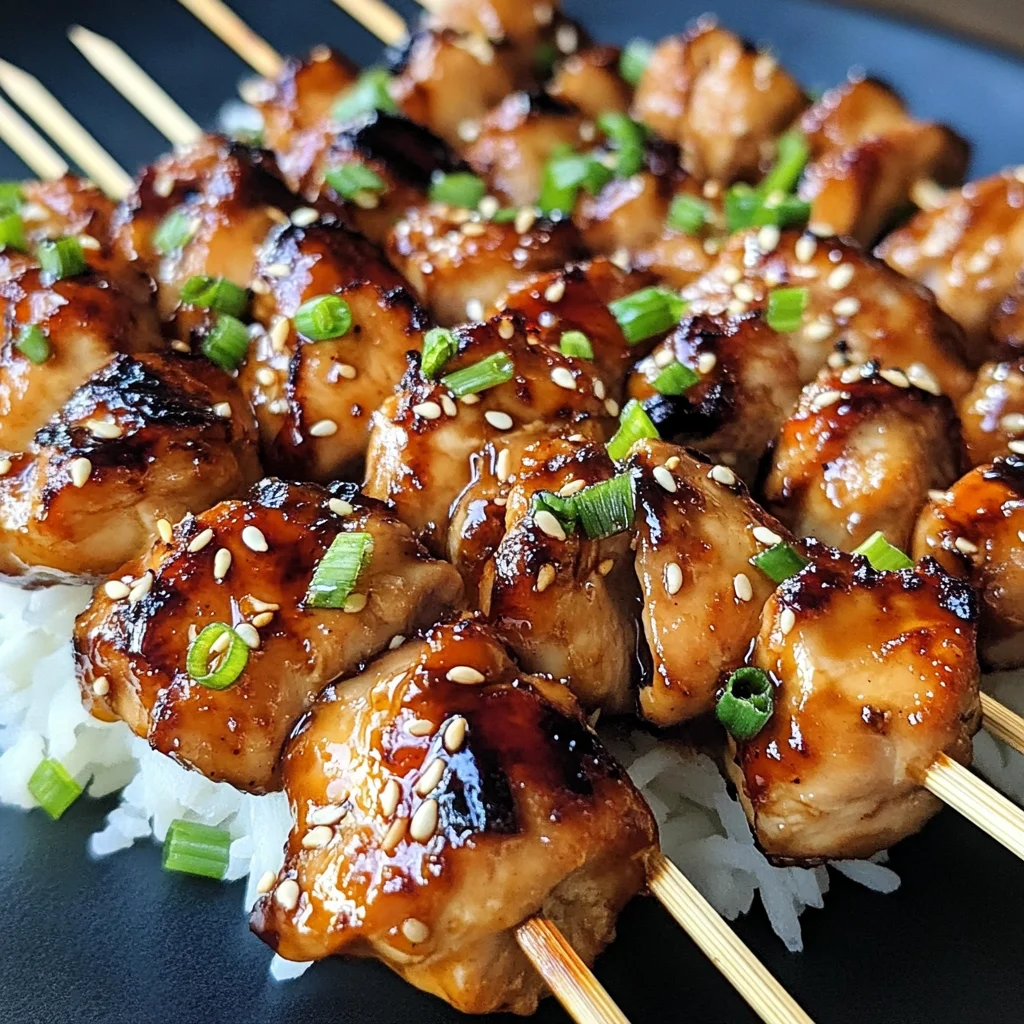
When it comes to satisfying dinner ideas, Teriyaki Chicken Skewers are an absolute gem. Not only are they incredibly tasty, but they also offer a beautiful presentation when served. Picture this: succulent pieces of chicken glistening with homemade teriyaki sauce, garnished with fresh green onions and crunchy sesame seeds, all resting atop a fluffy bed of steamed rice. It’s not just food; it’s comfort on a plate.
Ingredients:
Before we dive into cooking, let’s take a moment to appreciate each ingredient that contributes to this delightful dish. Every component plays its role in crafting those unforgettable flavors we love so much!
- 2 lbs. chicken thighs (or breasts), cut into 1 cubes. Choosing chicken thighs over breasts can elevate your skewers due to their higher fat content, which keeps them moist and tender during cooking. If you opt for breasts, just be aware they can dry out faster if overcooked – so keep an eye on them! Either way, cutting the chicken into uniform cubes ensures even cooking throughout; trust me, you want every piece perfectly grilled.
- 2 tbsp cornstarch. This ingredient might seem ordinary at first glance, but don’t underestimate its power! Cornstarch is crucial in creating that glossy texture in our teriyaki sauce while helping it cling beautifully to the chicken. It acts as a thickening agent when combined with water and is essential for achieving that velvety finish we all adore.
- 1 cup water. Water may seem like just a filler here, but it plays an essential role in dissolving the cornstarch and allowing all the flavors from the other ingredients to meld beautifully together as they simmer away on the stove. Using clean filtered water enhances the overall purity of taste in our sauce.
- 1/3 cup brown sugar. Ah, brown sugar — it adds such depth to our teriyaki sauce! The molasses content gives it that rich caramel flavor that balances out the saltiness of soy sauce beautifully. When melted down during cooking, it transforms into liquid gold that envelops each piece of chicken in sweetness.
- 1/3 cup soy sauce (low sodium recommended). Soy sauce provides that umami kick we crave in Asian cuisine! Low-sodium options allow us to control salt levels without sacrificing flavor; it’s all about balance here! This savory component blends harmoniously with our sweet elements while enhancing every bite’s overall richness.
- 2 cloves garlic (minced). Fresh garlic is non-negotiable; its aromatic quality elevates any dish from mundane to magical! When minced and cooked down slightly in our sauce, garlic releases its natural oils and flavor compounds, infusing everything with warmth and comfort.
- 1 tbsp rice vinegar. This tangy elixir brings brightness to our teriyaki sauce while cutting through some of the richness from sugar and oil—a culinary balancing act at its finest! Rice vinegar’s mild acidity adds dimension without overwhelming other flavors.
- 1/2 tbsp fresh ginger (minced). Ginger lends warmth and spice—an invigorating punch that wakes up our taste buds! Fresh ginger is ideal because dried ginger lacks some vibrancy; using fresh allows us to tap into those essential oils which add depth throughout our dish.
- 1 tbsp honey. Honey lends its floral sweetness alongside brown sugar within this beautiful marinade mixture—enhancing both texture and taste! Its stickiness helps create an irresistible glaze when grilled while imparting additional complexity to flavor profiles!
- 1/2 tsp sesame oil. Just a dash goes a long way—it adds nuttiness unparalleled by other oils! Sesame oil should be used sparingly since it’s potent yet impactful; its inclusion rounds off flavors nicely without overpowering them—this balance is key!
- 8 skewers. Wooden or metal skewers serve as vessels for grilling up our marinated chicken pieces beautifully! If using wooden ones like bamboo skewers (my personal favorite!), remember to soak them first before grilling—they’ll prevent burning during high heat!
- Sesame seed (for garnish). These tiny gems bring crunch alongside subtle nutty flavors—perfect finishing touches for visual appeal too! A sprinkle elevates presentation instantly—after all—we eat with our eyes first!
- Chopped green onion (for garnish). Fresh green onions add color contrast plus bright flavor notes without being too harsh—it’s like confetti for your skewers! Their crispness complements grilled chicken wonderfully while adding freshness every time!
Equipment You’ll Need:
Now that we’ve gathered our precious ingredients together let’s talk tools—the unsung heroes behind every great meal! Having the right equipment can make your cooking experience smoother and more enjoyable; think of them as trusty companions guiding you through every step.
- Mixing bowl – A medium-sized bowl is essential for combining those crucial ingredients effortlessly before simmering them down into our luscious teriyaki sauce—a sturdy mixing bowl will ensure you have enough space without making too much mess!
- Medium saucepan – An indispensable item when simmering sauces like ours—using one with tall sides prevents splatter while allowing flavors to meld perfectly over medium heat—keeping everything contained so you can focus entirely on achieving deliciousness!
- Whisk or spoon – Whether whisking together cornstarch slurry or stirring simmering sauces—you’ll want something sturdy yet gentle enough not to scratch your cookware surfaces—you can use any utensil handy—but having one dedicated tool makes life easier!
- Grill or grill pan – Cooking outdoors on an open flame adds unbeatable flavor—but if weather isn’t cooperating or you prefer indoor cooking options then utilizing stovetop grill pans works wonders too! Ensure whichever method chosen maintains consistent heat throughout grilling process; this creates those coveted char marks we all love!
With each ingredient carefully selected and every piece of equipment ready at hand—you’re well on your way toward preparing these delightful Teriyaki Chicken Skewers—now let’s get started on bringing everything together beautifully!
Step 1: Making The Irresistible Teriyaki Sauce
First things first—we need to whip up our incredible teriyaki sauce which forms the backbone for both marinating chicken AND basting later during grilling process! Start by taking out your medium saucepan where we’ll combine cornstarch along with water until smooth—this step ensures no lumps remain which would ruin texture later on down line! Once blended seamlessly add remaining ingredients: brown sugar for sweetness along with soy sauce providing depth—next follows garlic & ginger lending aromatic presence before finally drizzling rice vinegar & sesame oil completing picture perfectly balanced concoction ready for simmering action ahead!
Now turn heat onto medium level allowing mixture come alive slowly while stirring frequently—that gorgeous dark hue will begin transforming before eyes as sugars dissolve plus aromas fill kitchen inviting everyone nearby join effort—the transformation happening here is nothing short of alchemy preparing yourself ultimate treat ahead… Continue stirring until reaching simmer point where bubbles start forming around edges then reduce slightly so it gently simmers rather than boiling furiously—we’re looking for slight thickening here folks—not overly thick yet still coating back spoon nicely—that indicates readiness time remove from heat source entirely letting cool down either room temperature or fridge if you’re short on time…it won’t take long before magic happens inside pot leaving us awaiting next steps ahead!
Step 2: Marinating The Chicken
Once cooled completely now comes most exciting part-time marinate cubed chicken pieces generously within half portion prepared earlier—I recommend using large ziplock bag since allows easy coating process without fuss spilling everywhere—simply toss chunks inside followed by pouring marinade over top then seal securely after removing excess air trapping goodness within… Now gently shake bag ensuring each morsel gets lovingly coated equally throughout—it’s quite therapeutic honestly watching transformation unfold before eyes as meat absorbs flavorful essence surrounding it… Remember patience here—for optimal results allow resting period inside refrigerator lasting minimum thirty minutes though longer better still benefitting from deeper infusion flavors gained throughout process which leads us perfect outcome once grilled later…
Step 3: Preparing For Grilling
While waiting patiently let’s move onto prepping grill itself—we want ensure temperature reaches medium-high setting beforehand ensuring optimal sear marks result once skewering takes place… If using outdoor grill preheat accordingly making sure grates oiled lightly preventing stickage issue later down line—a good rule is ideally cleaning prior usage helps maintain hygiene standards while creating better surface contact between food & metal structure ensuring ideal char results achieved effortlessly… For those opting indoors consider heating non-stick skillet instead following same principles regarding oil application maximizing ease upon placing ingredients down during final stages preparation—we’re nearly there folks—the anticipation builds…
Step 4: Grilling Your Skewers
After marinating has taken effect pulling out soaked wooden skewers carefully threading each piece through chosen sticks until filled adequately filling each side evenly spaced apart allowing proper airflow creating perfect cook throughout entire process… Place lovingly arranged items onto preheated grill carefully avoiding overcrowding situation arising causing uneven distribution heat leading problems later thus maintaining control crucial at this stage… Begin turning regularly approximately three-to-four minutes intervals keeping close watch till internal temperature registers around 165 degrees Fahrenheit indicating thorough doneness achieved—don’t forget last few moments brush remaining reserved teriyaki glaze generously upon surface intensifying sweet-savory notes further enticing those lucky enough partake once finished serving platters await nearby…
With each bite revealing tenderness alongside burst savory undertones intertwined sweetness coating every morsel offering satisfaction beyond measure—I promise you these will quickly transform ordinary occasions special moments worth celebrating…
Let’s keep going strong until we reach conclusion together—I know how rewarding journey becomes when shared amongst loved ones bringing joy through food created right within homes filled laughter warmth!
The Art of Grilling Teriyaki Chicken Skewers
Step 5: Assemble the Skewers with Love
Now that your chicken has soaked up all the delightful teriyaki flavors during its time in the fridge, it’s time to bring these skewers to life! Grab those eight skewers you’ve prepared—wooden or metal, it doesn’t matter much, but if you’re using wooden skewers, make sure they’ve been soaked in water for at least 30 minutes. This is crucial because soaking prevents them from burning on the grill and ensures that they hold everything together beautifully without any nasty charred bits.
Take a moment to visualize the assembly. You’ll want to thread those marinated chicken cubes onto the skewers with care, alternating between pieces to create an inviting texture and visual appeal. Imagine each piece as a treasure waiting to be discovered! If you like, toss in some vibrant bell peppers or onion chunks for added color and crunch—they grill up so nicely alongside the chicken. This step not only enhances the taste but also makes for a stunning presentation when you serve these skewers to your friends or family. Trust me when I say that this extra touch will have everyone reaching for seconds!
Step 6: Prepping Your Grill Like a Pro
With your skewers ready, it’s time to preheat your grill. Aim for medium heat—this is absolutely paramount because it ensures that your chicken cooks evenly while developing those beautiful char marks we all adore. If you’re using a charcoal grill, let those coals turn ashen gray before placing your skewers down; if you’re on a gas grill, allow it to heat up for about 10-15 minutes until it’s nicely heated through.
Once your grill is prepped and hot, lightly oil the grates using a paper towel dipped in vegetable oil held with tongs. This simple technique prevents sticking and helps achieve that perfect sear on your teriyaki chicken skewers. Don’t rush this step! If you skip it, you might end up with pieces of chicken clinging stubbornly to the grill—frustrating, isn’t it? So take this moment to prepare properly; it’ll pay off big time with flawless grilled pieces that slide right off when done.
Step 7: Mastering the Grill Technique
Now comes one of my favorite parts—the grilling! Gently place your skewers on the hot grill grates, making sure there’s enough space between each skewer so they can cook thoroughly without steaming each other. Set your timer for about 20-30 minutes and get ready to work some magic! Turn those skewers every 3-4 minutes; this not only helps cook them evenly but also gives you a chance to enjoy that intoxicating aroma wafting through the air as they sizzle.
As you flip them over, watch for those enticing grill marks forming on each side—it’s like nature’s signature saying “deliciousness ahead!” To ensure they’re cooked perfectly, use a meat thermometer; an internal temperature of 165°F is non-negotiable here. I promise you, taking this extra step will guarantee juicy, tender chicken rather than dry bites of disappointment. Also, during those last few turns, don’t forget to baste with the reserved teriyaki sauce—it caramelizes beautifully on the surface giving an utterly intoxicating glaze that makes these skewers shine!
Step 8: The Finishing Touches
Once those glorious teriyaki chicken skewers reach their ideal temperature and are adorned with charred perfection, it’s time for them to come off the grill! Place them on a platter and let them rest for about five minutes before serving—this resting period is vital as it allows juices to redistribute throughout the meat ensuring every bite remains succulent and flavorful. Think of it like allowing a fine wine to breathe; patience truly transforms good into extraordinary!
As you’re waiting impatiently (I know it’s hard!), gather your sesame seeds and chopped green onions because we’re almost there! After resting, sprinkle those fresh green onions over your skewers along with a generous dusting of sesame seeds; this final flourish adds not just flavor but also an appealing visual contrast that makes these teriyaki chicken skewers irresistible. When served alongside fluffy steamed rice or perhaps some crisp veggies, you’ll have created not just a meal but an experience filled with warmth and joy that I can guarantee everyone will remember fondly.
Conclusion:
As we come to the end of our delicious journey through the making of Teriyaki Chicken Skewers, I hope you feel inspired and excited to recreate this extraordinary dish in your own kitchen. There’s something profoundly satisfying about marinating those tender pieces of chicken and watching as they transform into tantalizing bites on the grill, all coated with that glossy teriyaki glaze. It’s not just food; it’s an experience filled with joy and flavor—a true celebration of cooking! Each savory bite bursts with sweet and salty notes that harmonize beautifully—a flavor combination that leaves everyone craving more.
This recipe isn’t merely about taste; it’s about creating connections around the dinner table. Whether it’s a weeknight meal or a festive gathering with friends and family, these Teriyaki Chicken Skewers shine brightly as a centerpiece dish that invites laughter and conversation. Picture yourself pulling those sizzling skewers off the grill on a warm summer evening—the smell wafting through the air, enticing everyone nearby—and watching your loved ones gather around enthusiastically. It’s moments like these that make cooking so rewarding!
For serving suggestions that elevate your meal further, imagine savoring one of these luscious skewers alongside perfectly steamed jasmine rice drizzled with extra teriyaki sauce—a match made in heaven! Or perhaps pair it with vibrant grilled vegetables like bell peppers and zucchini for an added crunch and color contrast on your plate. For an afternoon pick-me-up during those warmer months, why not serve it at a picnic alongside refreshing cucumber salad? The possibilities are endless!
Feeling adventurous? This recipe is wonderfully adaptable! Try swapping out chicken for succulent tofu or shrimp if you’re looking for something plant-based or seafood-centric—both options lend themselves beautifully to soaking up all those rich flavors from the marinade. You can even play around with different veggies on the skewer: think cherry tomatoes or mushrooms drizzled in teriyaki goodness! I encourage you to take this recipe as inspiration; make it your own and share your culinary experience with others. Trust me—once you try these Teriyaki Chicken Skewers, you’ll be eager to whip them up time and again!
Teriyaki Chicken Skewers

Savor tender Teriyaki Chicken Skewers marinated to perfection! Perfectly grilled and bursting with flavor—try this recipe today!
- Prep Time: 15 minutes
- Cook Time: 25 minutes
- Total Time: 40 minutes
- Yield: Serves approximately 6 people 1x
- Category: Dinner
- Method: Grilling
- Cuisine: Asian
Ingredients
- 2 lbs. chicken thighs (or breasts), cut into 1" cubes
- 2 tbsp cornstarch
- 1 cup water
- 1/3 cup brown sugar
- 1/3 cup low-sodium soy sauce
- 2 cloves garlic, minced
- 1 tbsp rice vinegar
- 1/2 tbsp fresh ginger, minced
- 1 tbsp honey
- 1/2 tsp sesame oil
- Sesame seeds and chopped green onion for garnish
- 8 skewers
Instructions
- In a medium saucepan, mix cornstarch with water until smooth. Add brown sugar, soy sauce, garlic, ginger, rice vinegar, honey, and sesame oil. Heat over medium heat until simmering and slightly thickened.
- Allow the sauce to cool before using half to marinate the chicken in a ziplock bag for at least 30 minutes.
- Preheat the grill to medium heat and oil the grates.
- Thread marinated chicken onto skewers.
- Grill skewers for about 20-30 minutes, turning every 3-4 minutes until fully cooked (internal temperature of 165°F). Baste occasionally with reserved teriyaki sauce during grilling.
- Let rest for five minutes before serving and garnish with sesame seeds and chopped green onions.
Nutrition
- Serving Size: 1 skewer (approximately 100g)
- Calories: 240
- Sugar: 7g
- Sodium: 550mg
- Fat: 10g
- Saturated Fat: 2g
- Unsaturated Fat: 8g
- Trans Fat: 0g
- Carbohydrates: 16g
- Fiber: 0g
- Protein: 25g
- Cholesterol: 70mg