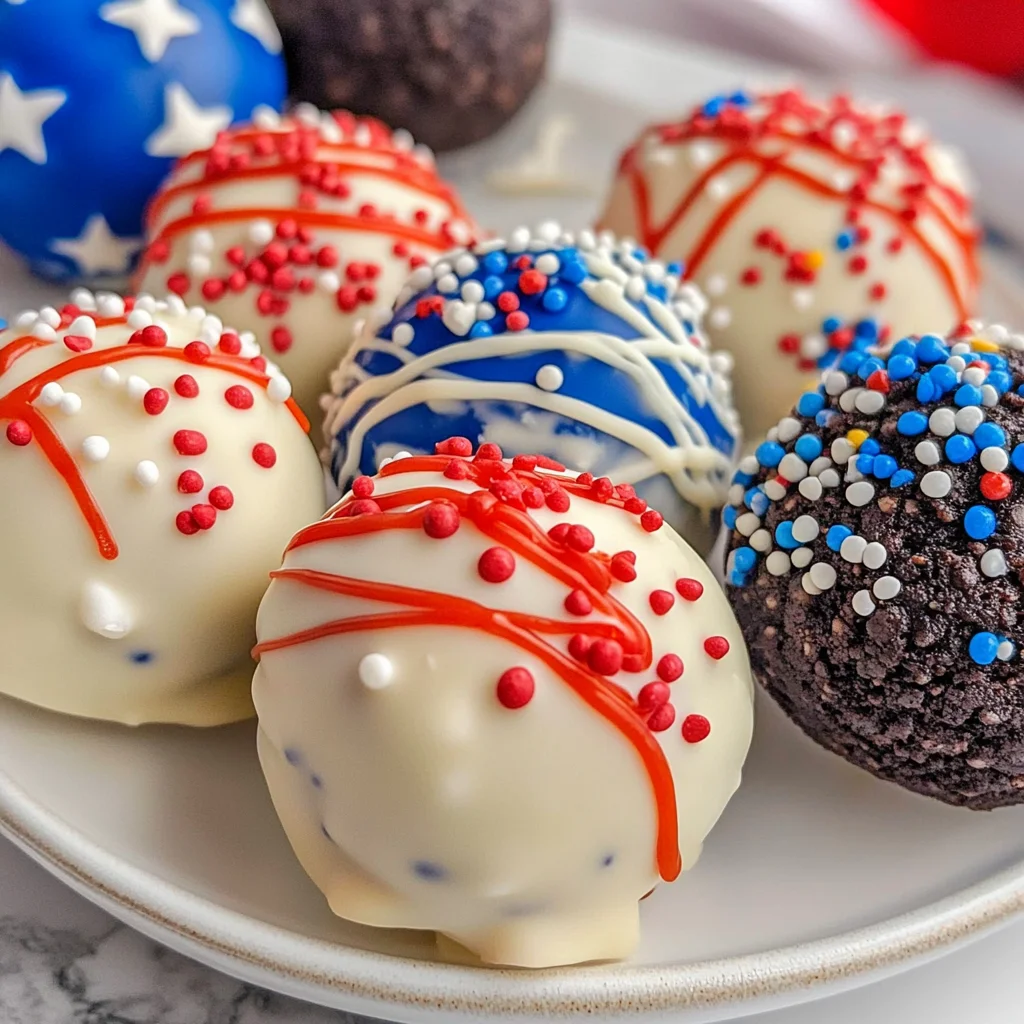
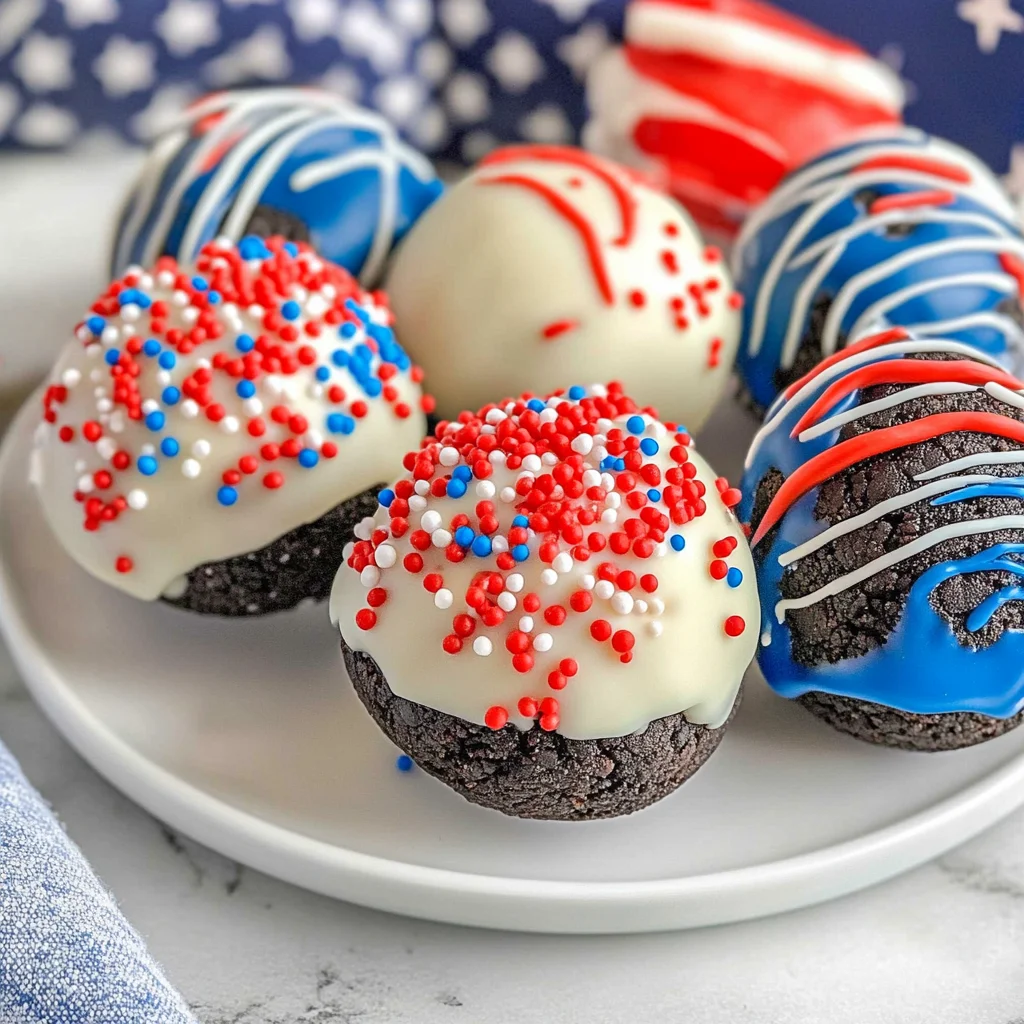
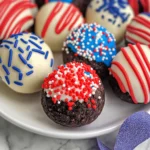
Red White and Blue Oreo Balls
There’s something genuinely magical about cooking and baking that transcends mere food; it’s about creating memories, sharing joy, and celebrating life’s special moments. As I think about these Red White and Blue Oreo Balls, I can’t help but feel a rush of nostalgia. These delightful, colorful treats are more than just dessert; they encapsulate the essence of festive gatherings—family barbecues, Fourth of July picnics, or any celebration that calls for a touch of sweetness and a splash of color. With each creamy bite, you’ll experience the symphony of flavors that comes from crushed Oreos mingling with rich cream cheese and enveloped in a luscious candy coating. Trust me when I say, once you taste these, you’ll be hooked!
What makes these delectable little bites so extraordinary is not only their vibrant appearance but also their simplicity and versatility. They’re quick to whip up—no baking required—which means you have more time to enjoy the company of your loved ones while they’re being devoured! The contrast of the crunchy outer shell against the smooth, creamy filling creates a profoundly satisfying texture that will leave everyone coming back for more. And let’s not forget how easy it is to customize them! Whether you choose to add sprinkles or drizzle extra colors on top, you can make each batch uniquely yours. So gather your ingredients and let’s embark on this colorful culinary adventure together.
Red White and Blue Oreo Balls: Festive Treats for Every Celebration
These Red White and Blue Oreo Balls are not just dessert; they’re an experience waiting to unfold at your next gathering. As we dive into this recipe, you’ll see how each step is designed to bring out the best flavors while keeping things fun and engaging. Are you ready to create some magic in your kitchen?
Ingredients:
As we gather our ingredients for this festive treat, each one plays a vital role in crafting those delightful Red White and Blue Oreo Balls that will become the star of your dessert table.
- 36 Oreo cookies (from 1 pound 3 ounce package). The backbone of our recipe! These chocolate sandwich cookies bring an irresistible crunch and rich cocoa flavor that perfectly complements the creamy filling. When selecting Oreos, look for freshness; expired cookies can lose their delightful texture and flavor. You can also experiment with different varieties like double-stuffed or even other flavors if you’re feeling adventurous—each will lend its unique twist to the filling.
- 8 ounces cream cheese (softened). This ingredient is absolutely paramount for achieving that luxuriously smooth filling we’re after! Softening the cream cheese ensures it blends seamlessly with the cookie crumbs, creating a cohesive mixture that’s easy to roll into balls. If you’re short on time, consider cutting the cream cheese into smaller chunks before letting it sit out; it will soften more quickly. And if you’re looking for a dairy-free option, vegan cream cheese works beautifully here too!
- 1 pound white almond bark. This silky-smooth coating gives our Oreo balls that gorgeous white finish while adding a layer of sweetness that contrasts beautifully with the rich cookie filling. When melting almond bark, remember to break it into small squares for even melting—this helps avoid any clumping or burning in the microwave. If almond bark isn’t available in your area, you could substitute with white chocolate chips; just be cautious as they may require additional stirring during melting due to higher fat content.
- 6 ounces red candy melts. These vibrant melts are what give our treats their patriotic flair! Aside from being visually striking, candy melts are formulated to melt smoothly and set up beautifully without requiring tempering like chocolate does. When heating them up in the microwave, watch closely; overcooking can lead to a thick paste instead of a pourable consistency!
- 6 ounces blue candy melts. Just like the red melts, these blue beauties add both color and flavor! Using these candy melts brings an element of fun into our dessert-making process—who wouldn’t love drizzling bright blue over those lovely white-coated balls? Ensure they’re melted properly before using; this helps achieve those pretty drizzles we all adore.
- Sprinkles. Lastly, we have sprinkles—the finishing touch! Not only do they add personality and color to your Oreo balls but they also contribute a bit of crunch that contrasts nicely with the smooth coating underneath. Choose your favorite type—classic jimmies or festive star-shaped sprinkles work wonderfully—and don’t be shy; use as many as your heart desires!
Equipment You’ll Need:
Now that we’ve gathered all our ingredients, let’s talk about some essential tools that will make this process smoother and more enjoyable! While they aren’t technically ingredients, having the right equipment at hand can elevate your experience dramatically.
- Parchment paper – A non-negotiable when it comes to easy cleanup! Lining your baking sheet with parchment prevents sticking and ensures your beautifully coated Oreo balls can be removed effortlessly once they’re set.
- Food processor (or resealable bag & rolling pin) – This handy appliance is invaluable for crushing those Oreos into fine crumbs without breaking a sweat! If you don’t have one on hand, simply place your Oreos in a resealable bag and crush them using a rolling pin until finely ground—easy peasy!
- Microwave-safe bowls – Perfect for melting both almond bark and candy melts without any fuss! Opt for glass or ceramic bowls as they withstand heat well; avoid plastic ones because they might warp under high temperatures.
- Small cookie scoop – This tool is fantastic for portioning out uniform balls of dough quickly! If you don’t have one available, don’t worry—a tablespoon works just as well; just keep an eye on making sure each ball is roughly equal in size for consistent results.
With all our tools lined up alongside our vibrant ingredients, we’re ready to dive into crafting these deliciously festive Red White and Blue Oreo Balls!
Step 1: Preparing Your Baking Sheet
First things first—you’ll want to line a baking sheet with parchment paper so those beautiful treats won’t stick later on. This step may seem simple but trust me when I say it’s crucial! Parchment paper acts as a protective barrier between your candies and the pan while also making cleanup effortless afterward—a win-win situation!
Step 2: Crushing Those Oreos
Now comes one of my favorite parts: crushing those Oreos until they’re transformed into fine crumbs! Whether you’re using a food processor or opting for good old-fashioned elbow grease with a rolling pin inside a resealable bag, take care not to leave large chunks behind because we want maximum flavor throughout each bite-sized ball. Aim for consistency here—it leads us toward achieving that perfect smooth texture when combined later on!
Step 3: Mixing Cream Cheese & Cookie Crumbs
Once you’ve got those glorious cookie crumbs ready—place them into a large mixing bowl along with softened cream cheese (don’t skip this step!). Now mix these two together until everything is fully incorporated—you’ll notice how easily they blend together into an indulgent concoction reminiscent of cheesecake batter! Take care not to rush through this stage either; ensuring complete mixing guarantees every single bite has ample richness from both components—absolutely divine!
Step 4: Shaping Into Balls
Using either your small cookie scoop or tablespoon now forms small portions from our delicious mixture into rounded shapes by rolling them gently between clean hands until smooth surfaces emerge! This shaping process allows us control over size—not only does uniformity look pleasing visually but ensures even cooling later too which results in better coating adhesion once dipped in melted goodness soon after chilling briefly—not rushing here pays off tremendously!
Stay tuned as we continue crafting these joyful treats filled with love at every turn—it’s all part of what makes cooking such an inviting adventure worth savoring together!
Step 5: Chill Out for the Best Texture
Ah, the magical moment when you finally get to chill those little dough balls! After shaping your Oreo mixture into perfectly smooth spheres, it’s time to give them a rest in the refrigerator. This step is absolute paramount; it allows the cream cheese and cookie mixture to firm up, making them easier to dip later in luscious chocolate. I can’t stress enough how crucial this chilling period is—it transforms your soft, pliable dough into a sturdy yet creamy treat that holds its shape beautifully. Aim for at least 30 minutes in the fridge, but if you find yourself distracted by a favorite show or a good book, don’t worry! You can leave them for up to an hour. Just imagine the anticipation as you peek into the fridge, knowing that each passing minute brings you closer to these delightful bites of heaven!
While they chill, take a moment to appreciate the wonderful aroma wafting from your kitchen—it’s like a warm hug from childhood memories. The chilling also allows the flavors to meld together more profoundly, creating a richer, more satisfying taste in every bite. So trust me on this one: don’t rush this step! It’s all about patience and letting those flavors develop so you can enjoy something truly extraordinary.
Step 6: Melting Magic – Preparing Your Chocolate Coating
Now comes one of my favorite parts—preparing that silky, smooth white almond bark that will envelop our Oreo balls like liquid gold! Begin by breaking your almond bark into manageable squares and placing them into a microwave-safe bowl. The key here is gentle heating; we want to coax out the best texture without burning it. Start by microwaving the bark for one full minute—you might think it’s too short a time, but trust me, patience is vital! After that initial heating, stir vigorously. You’ll notice that some pieces may still be solid; that’s okay! We’re aiming for even melting without any scorched bits ruining our beautiful coating.
Continue heating in 10-15 second intervals while stirring after each cycle until you see only a few stubborn lumps remaining. This technique ensures an even melt and prevents overheating—overcooked chocolate becomes thick and clumpy instead of velvety smooth. When everything is melted and glossy, it’s showtime! Your chocolate should have an almost dreamy consistency—thick enough to coat but not so thick that it overwhelms your truffle balls. If at any point you feel it’s getting too thick, a touch of vegetable oil can help loosen it up without compromising flavor.
Step 7: Dipping Delight – Coating Your Oreo Balls
With your creamy almond bark ready and waiting like an eager artist’s palette, it’s time for one of my favorite moments—the dipping! Take one of your chilled Oreo balls and gently lower it into the melted chocolate using a fork or even two forks for balance—this technique helps ensure an even coat while preventing any sticky fingers (though I won’t judge if you sneak a taste!). As you lift it out of the chocolate bath, let excess chocolate drip back into the bowl; this is key because too much chocolate will lead to clumpy finishes instead of that graceful shine we desire.
Place each beautifully coated ball back onto your parchment-lined baking sheet with care; I like to imagine I’m placing little jewels on display! If you’re feeling adventurous or just really want that extra layer of decadence (and who wouldn’t?), add a second layer of melted chocolate after the first has set slightly—just give it about 10-15 minutes before repeating this step. This will enhance their richness and make them look absolutely irresistible!
Step 8: Creative Color – Adding Red and Blue Candy Coatings
Now that our Oreo balls are elegantly cloaked in white chocolate goodness, it’s time to add some pizzazz with vibrant red and blue candy melts. This part is not only visually stunning but also incredibly fun—a chance for you to unleash your inner artist! Start by dividing your colored candy melts into two separate microwave-safe bowls just like we did with the almond bark earlier. Heat them in short bursts—beginning with 30 seconds followed by additional intervals of 10-20 seconds—stirring frequently until they’re completely melted.
Once melted and smooth (you should achieve that same luscious texture as before), transfer each color into separate squeeze bottles or piping bags for easy drizzling. My friends often ask why squeeze bottles are so great; well, they give you precision control over your drizzle patterns—it’s all about making these treats as festive as possible! Carefully drizzle alternating colors over each ball in playful patterns—don’t hold back; let those colors intertwine like fireworks bursting across the sky!
As soon as you’ve drizzled away, sprinkle liberally with festive sprinkles before the candy coating hardens—this adds texture and crunch that elevates each bite from simply good to utterly intoxicating. I promise you; this finishing touch will make these Red White and Blue Oreo Balls stand out at any gathering!
Final Touches: Storing Your Festive Treats
After all that hard work (and oh-so-much fun!), it’s important to store your Red White and Blue Oreo Balls properly so they stay fresh until you’re ready to dazzle your friends and family with their beauty—and deliciousness! Place them in an airtight container lined with parchment paper between layers to prevent sticking (nobody wants their beautiful creations ruined!). Store these gems in the refrigerator until you’re ready to serve them at your next barbecue or picnic under clear skies.
I can almost hear the cheers now as everyone takes their first bite—they’ll be met with creamy bliss followed by an explosion of flavors wrapped snugly in sweet chocolaty goodness! With every delightful morsel, these treats bring smiles and joy—perfectly embodying what makes celebrations special. Trust me when I say these Red White and Blue Oreo Balls aren’t just desserts—they’re memories waiting to happen!
So go ahead and whip up these delectable beauties—you won’t regret it! Whether it’s Independence Day festivities or simply adding some color to an ordinary day, you’ll find every excuse to share these delightful bites filled with love and joy. Enjoy every moment spent making them as much as savoring each delicious mouthful!
Storage and Enjoyment Tips for Your Red White and Blue Oreo Balls
Now that you’ve created these delightful Red White and Blue Oreo Balls, it’s time to revel in the joy of sharing them! But let’s be honest—sometimes, we can’t eat them all in one sitting, and that’s perfectly okay. These treats not only look festive but can also be stored beautifully to maintain their creamy texture and vibrant colors. You’ll want to keep them in an airtight container to ensure they stay fresh and delicious. Simply pop them in the fridge, where they will happily chill for up to a week, allowing you to enjoy that symphony of flavors over several days. And if you’re anything like me, each bite will remind you of those joyous moments spent crafting them!
Storing Leftover Red White and Blue Oreo Balls
When it comes to storing your leftover Red White and Blue Oreo Balls, the key is all about keeping them fresh while maintaining that delightful creamy filling. I recommend using an airtight container—like a glass or plastic one with a secure lid—to help preserve their texture. They can last in the fridge for up to a week, but trust me when I say they taste best within the first few days when they’re at their freshest. To maintain quality even longer, you could place a slice of bread inside the container; this little trick helps retain moisture without compromising the chocolate coating. After a few days in storage, the flavors meld together beautifully, making each bite even more profoundly satisfying than the last! When you’re ready to indulge again, simply take them out of the fridge and enjoy as is or let them come to room temperature for about 10 minutes; this will make every mouthful truly extraordinary.
Freezing for Later
If you find yourself with extras—or if you just want to prepare ahead for your next gathering—freezing these Red White and Blue Oreo Balls is an excellent option! To freeze them properly, place your coated truffle balls on a baking sheet lined with parchment paper, ensuring they aren’t touching one another. Once frozen solid (this usually takes about an hour), transfer them into a freezer-safe zip-top bag or an airtight container. They’ll keep well in the freezer for up to three months! When you’re ready to enjoy these festive delights again, simply let them thaw overnight in the fridge or at room temperature for about 30 minutes before serving. This convenience factor makes it easy to wow guests at any moment’s notice while giving you peace of mind knowing you have a sweet treat ready at hand.
Red White and Blue Oreo Balls
Discover how to make delightful Red White and Blue Oreo Balls—a tasty treat perfect for celebrations! Try this easy recipe today!
- Prep Time: 20 minutes
- Cook Time: 15 minutes
- Total Time: 35 minutes
- Yield: Approximately 24 servings 1x
- Category: Dessert
- Method: No-Bake
- Cuisine: American
Ingredients
- 36 Oreo cookies
- 8 ounces cream cheese (softened)
- 1 pound white almond bark
- 6 ounces red candy melts
- 6 ounces blue candy melts
- Sprinkles (optional)
Instructions
- Line a baking sheet with parchment paper.
- Crush the Oreo cookies into fine crumbs using a food processor or resealable bag with a rolling pin.
- In a large bowl, mix the crushed Oreos with softened cream cheese until well combined.
- Roll the mixture into small balls and place them on the prepared baking sheet.
- Chill in the refrigerator for at least 30 minutes to firm up.
- Melt the white almond bark in a microwave-safe bowl using short intervals, stirring frequently until smooth.
- Dip each chilled ball into the melted almond bark, allowing excess to drip off before placing back on the parchment paper.
- Melt the red and blue candy melts separately and drizzle over the coated Oreo balls.
- Add sprinkles while the coating is still wet and let set.
Nutrition
- Serving Size: 1 serving
- Calories: 140
- Sugar: 10g
- Sodium: 50mg
- Fat: 8g
- Saturated Fat: 4g
- Unsaturated Fat: 4g
- Trans Fat: 0g
- Carbohydrates: 16g
- Fiber: <1g
- Protein: 1g
- Cholesterol: 10mg