No Bake Summer Berry Lasagna
There’s something truly magical about desserts that bring together the vibrant colors and flavors of summer, and my No Bake Summer Berry Lasagna is a celebration of everything delightful about the season. Picture this: layers of luscious cream, sweet berries bursting with freshness, and a graham cracker crust that crumbles perfectly with each bite. This isn’t just a dessert; it’s an experience that tells the story of sunshine-filled picnics and backyard barbecues, where laughter dances in the air and every forkful evokes memories of warmth and joy. As you indulge in this refreshing treat, you’re not just satisfying your sweet tooth; you’re connecting with the essence of summer itself.
The beauty of this No Bake Summer Berry Lasagna lies in its simplicity, making it accessible for all levels of home cooks while still delivering an utterly intoxicating flavor profile. I promise you, the combination of rich cream cheese blended with tangy strawberries and blueberries will transport your taste buds to a sun-drenched day at a berry farm. Whether it’s Memorial Day or the 4th of July, this dessert becomes the centerpiece of any gathering—an invitation to savor life’s sweetest moments. So let’s dive into this culinary adventure together—grab your mixing bowls and let’s create something special!
No Bake Summer Berry Lasagna: A Symphony of Summer Flavors
This delightful recipe is not only simple but also incredibly rewarding. The No Bake Summer Berry Lasagna is perfect for those hot days when turning on the oven feels like an unnecessary chore. Instead, we’re layering up flavors that are as vibrant as they are refreshing—each bite is like a burst of sunshine! Gather your ingredients and get ready to impress friends and family with this stunning summer dessert.
Ingredients:
As we embark on this culinary journey together, each ingredient plays an essential role in crafting our delightful lasagna. Let me guide you through these components that come together beautifully.
- 1 and 2/3 cup heavy cream, chilled. The heavy cream serves as the backbone for our creamy layers, bringing richness and a luxurious texture to our dessert. When whipped properly—think fluffy clouds—it transforms into liquid gold that makes everything feel indulgent. Make sure it’s chilled; warm cream won’t whip up nicely, leading to disappointing results.
- About 1/3 cup powdered sugar (to taste). This sweetener balances out the tanginess from other ingredients while contributing to the luscious consistency we want in our cream layer. You can adjust it according to your preference for sweetness—just remember that a little goes a long way!
- 1 teaspoon vanilla. This simple extract adds depth to our creamy layer and enhances all those berry flavors we’re about to introduce. Use pure vanilla extract if possible; its aromatic quality elevates your dish from ordinary to extraordinary.
- 3 cups graham cracker crumbs. These crumbs are going to form the base—the sturdy yet crumbly foundation of our lasagna. They lend a subtly sweet flavor along with a delightful crunch that contrasts beautifully with our creamy filling.
- ¼ cup strawberry jam. Bringing in a touch of nostalgia, strawberry jam not only contributes sweetness but also enhances that fruitiness we adore in summer desserts! If you want to make it yourself or prefer homemade varieties without preservatives, go for it; nothing beats fresh flavors.
- ½ cup + 2 tablespoons unsalted butter, melted. Butter is what binds our graham cracker crust together; it creates that satisfying texture when combined with crumbs. Opt for unsalted butter so you can control the saltiness throughout the dessert.
- Red gel food coloring (optional). While purely optional, adding a few drops can enhance the visual appeal when mixed into certain layers—making them pop with color! Just be cautious; a little goes a long way!
- ½ cup unsalted butter, softened. Softened butter ensures easy mixing with cream cheese later on—it helps achieve that silky-smooth consistency we’re aiming for in our filling layer.
- 8 oz cream cheese, softened. Cream cheese brings richness to our dessert; when softened properly, it blends effortlessly into creamy perfection without clumps! Ensure it’s at room temperature before using—it makes all the difference!
- 1 cup powdered sugar (for filling). Just like earlier with whipped cream, powdered sugar here balances out tangy flavors while thickening our filling for stability as well as sweetness.
- 1 teaspoon vanilla (for filling). Yes! More vanilla is always better when it comes to desserts! It ties all those flavors together beautifully.
- 2/3 cup diced fresh strawberries. Fresh strawberries add both texture and flavor bursts throughout each layer—a true homage to summer fruits at their finest! Make sure they’re ripe for maximum sweetness!
- 1 cup whipped cream (for filling). Whipped cream adds lightness which helps balance out denser components like cream cheese while making everything feel airy! Trust me on this step—it’s absolutely paramount!
- 2 (3 oz pkg) berry blue Jello (or other flavor to your taste). Jello brings vibrancy and fun colors into play here! Feel free to experiment depending on what you have or prefer—this is YOUR creation after all!
- 1 and 1/4 cup boiling water. This step activates gelatin in Jello which gives structure once cooled down—it transforms from liquid magic into fruity bliss when layered!
- 2 cups blueberry pie filling. Blueberry pie filling adds an irresistible sweetness paired perfectly alongside strawberries—we’re creating layers upon layers of flavor here!
- 1 cup canned crushed pineapple-drained from juice (if using chunks). Pineapple adds tropical notes balancing out richness while giving another texture element—just make sure it’s well-drained so we don’t end up with excess liquid messing up our layers.
- 2 ½ cups whipped cream (for topping). The final flourish—a generous dollop atop everything else! It creates a beautiful finished look while offering more lightness at first bite!
- Fresh strawberries halved & Fresh blueberries. These gorgeous fruits serve as edible decorations showcasing all those lovely layers underneath! Plus—they’re delicious too!
- ¼ cup chocolate chips (optional). For those who enjoy contrast between sweet & slightly bitter notes—add chocolate chips on top for extra flair!
Equipment You’ll Need:
Having the right tools at your disposal makes creating this dessert not just easier but more enjoyable too! These pieces aren’t exactly ingredients but are essential partners in crafting something wonderful together.
- Mixing bowls – You’ll need various sizes for combining different elements; I recommend glass or stainless steel ones because they’re durable and easy to clean.
- Electric mixer – A hand mixer or stand mixer will be invaluable for whipping heavy cream and blending fillings smoothly without breaking a sweat! It saves time too—trust me when I say speed matters here!
- Measuring cups & spoons – Precision counts—a must-have set ensures accuracy throughout every step which ultimately leads us back toward success!
- Spatula – Ideal for folding in delicate whipped creams or spreading mixtures evenly between layers—look for silicone ones since they won’t scratch non-stick surfaces either.
Let’s get started on creating this fabulous No Bake Summer Berry Lasagna because I promise you won’t regret diving into this indulgent treat filled with sunshine-y goodness! With every step taken towards assembling these heavenly layers filled with love—you’ll find yourself lost within culinary bliss as memories unfold alongside each slice shared among friends or family gatherings alike…
Step 1: Prepare Your Graham Cracker Crust
To begin our journey toward deliciousness, let’s start by crafting that buttery graham cracker crust that serves as our foundation—the very first layer of flavor in this masterpiece! In a mixing bowl, combine those three cups of graham cracker crumbs with half a cup plus two tablespoons of melted unsalted butter until fully incorporated—the mixture should resemble damp sand that holds together when pressed between your fingers. Patience is key here; take your time ensuring each crumb gets coated evenly so every bite packs its full potential later on! Once combined thoroughly—take an 8×8 inch pan or similar size—and press down firmly using either your hands or bottom of measuring cup until flat across surface area—this step prevents any sogginess later due moisture seeping through from fillings above them during assembly time ahead…
Step 2: Create Your Creamy Filling
Now onto one of my favorite parts—the creamy filling which brings us such rich delight through velvety textures coupled alongside bright fruity notes bursting forth beneath every spoonful taken! Using an electric mixer fitted with beaters—or perhaps even whisking by hand if feeling ambitious—we’ll whip together eight ounces softened cream cheese along with one cup powdered sugar mixing until completely smooth eliminating any lumps while introducing airiness into mixture achieving fluffy goodness desired outcome achieved here… Next add in two-thirds diced fresh strawberries followed by one teaspoon pure vanilla extract bringing fragrant aromas wafting throughout kitchen space inviting everyone nearby wanting just ‘a taste’ already before even assembled completely…
Step 3: Whip Up That Whipped Cream
No dish would truly be complete without some light-as-a-cloud whipped cream layered generously atop everything else we’ve worked hard assembling thus far—so grab those chilled mixing bowls again because we’re diving straight back into action here folks! Pour one-and-two-thirds cups heavy cream directly into bowl along side added three tablespoons powdered sugar adjusting sweetness based personal preferences… Beat vigorously until soft peaks form noticing how mixture thickens beautifully transforming from liquid state resembling frothy milkshake-like consistency slowly morphing towards dreamy heights resembling fluffy pillows waiting patiently atop desserts awaiting their moment under spotlight shining brightly whilst enticing eyes around table yearning eagerly anticipating bites coming soon…
Step 4: Layer Your Lasagna!
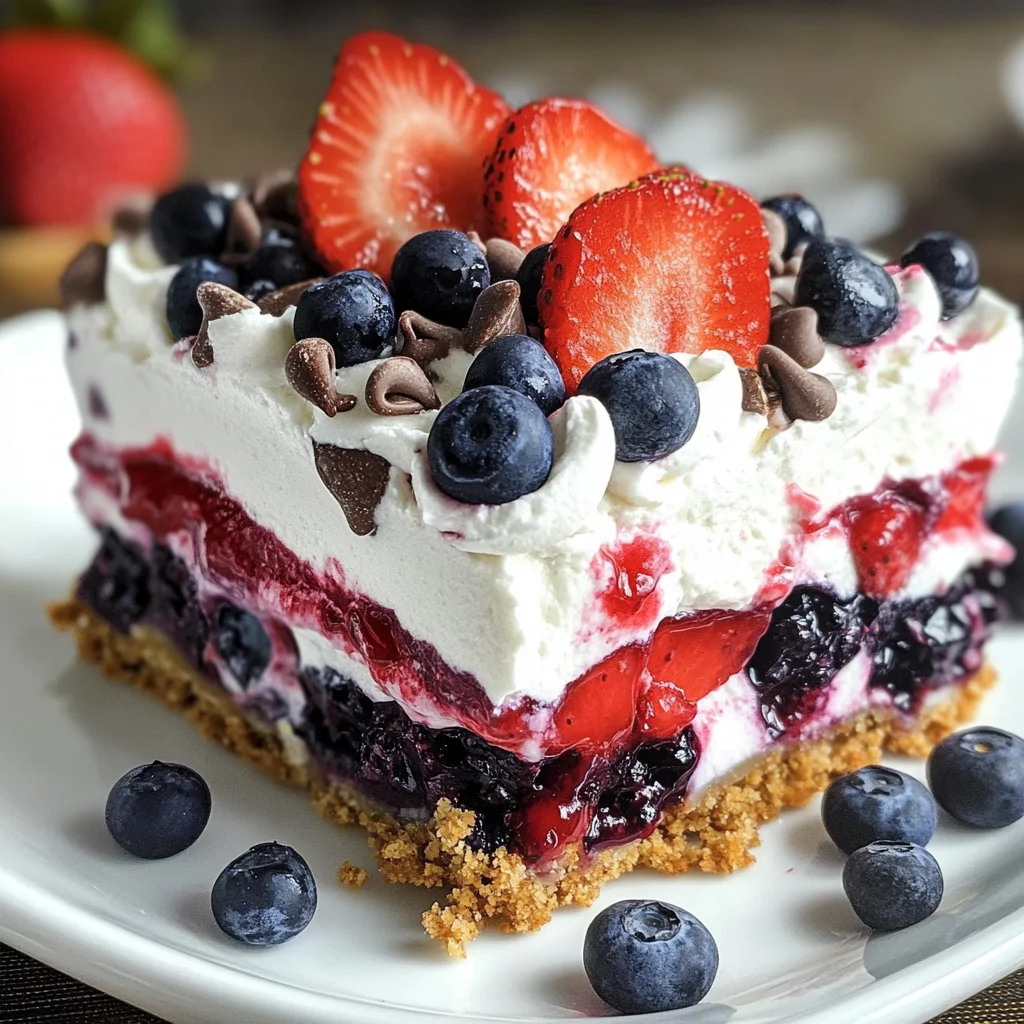
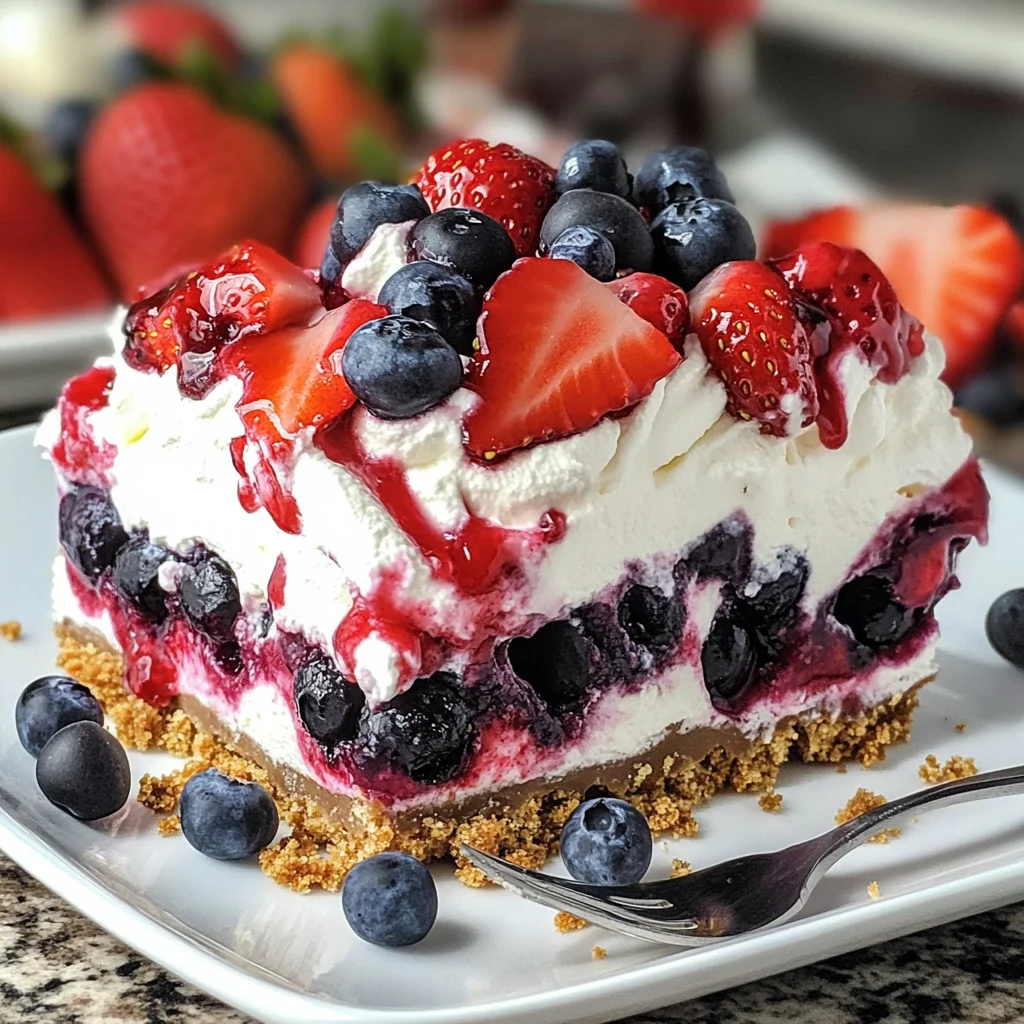
Now comes what makes this dessert truly shine—the layering process which showcases artistry behind its beauty leaving guests awe-inspired upon first glance at colorful creations made right before their eyes unfolding wondrously layer by layer… Start by spooning half creamy strawberry mixture over graham cracker crust evenly spreading across surface ensuring coverage extends edge-to-edge then follow suit placing dollops blueberry pie filling next lending vibrant hues cascading against previous layer below them creating contrasting colors playing off one another harmoniously resulting symphony flavors taking shape before finishing finale adding remaining strawberry mixture evenly distributed atop followed closely behind generous dollops infused whipped cream covering entire expanse finally garnishing show-stopping display freshly halved strawberries blueberries decorating outer perimeter looking oh-so-inviting showcasing bright colors appealing visually enhancing experience altogether making everyone eager dive-in immediately…
And there we have it—the fantastic No Bake Summer Berry Lasagna ready awaits chilling period prior serving letting flavors meld beautifully within fridge becoming even tastier over time allowing anticipation build excitement surrounding what awaits upon first slice dug deep revealing multiple tantalizing layers beneath—all worth effort spent creating something special remembered fondly far beyond summer days fading away…
Step 5: Creating the Creamy Layer of Dreaminess
Now that your crust is set, let’s dive into crafting that luscious cream cheese layer that will serve as the heart of our No Bake Summer Berry Lasagna. Start by taking 8 ounces of softened cream cheese and placing it into a large mixing bowl. You want this cream cheese to be soft enough to blend seamlessly, so if you forgot to take it out ahead of time, just pop it in the microwave for about 10 seconds—trust me, this step is crucial! Then, add in one cup of powdered sugar and one teaspoon of vanilla extract for that warm, aromatic sweetness that will elevate every bite. Using an electric mixer on medium speed, whip this mixture until it becomes light and fluffy—about 2 to 3 minutes. You’re looking for a texture that’s smooth but not overly airy; we want it creamy and dreamy to complement the berries perfectly.
Once your cream cheese layer is velvety smooth, it’s time to fold in two-thirds of a cup of diced fresh strawberries. This is where things get truly magical! The strawberries add not only amazing flavor but also vibrant color that makes your dessert look like a work of art. Gently fold them in with a spatula—don’t rush this step! Folding helps keep those beautiful strawberry pieces intact while ensuring they’re evenly distributed throughout the mixture. As you take a moment to appreciate the aroma wafting up from your bowl—a sweet and fruity symphony—know that this layer will bring a profound satisfaction when paired with the next elements.
Step 6: Whipping Up the Whipped Cream Wonder
Now let’s move on to making some whipped cream that will crown our dessert like a fluffy cloud! In another mixing bowl, pour in one and two-thirds cups of chilled heavy cream—make sure it’s cold because this helps create those soft peaks we’re aiming for. Add about one-third cup of powdered sugar (you can adjust this according to your taste) and one teaspoon of vanilla extract. With your electric mixer set on high speed, whip these ingredients together until you see soft peaks forming; this usually takes about 4 to 5 minutes. Soft peaks mean when you lift the beaters out of the mixture, it should hold its shape but still have a gentle bend at the tips.
Why is whipping cream such an important step? Well, not only does it add an incredible lightness and airiness to our lasagna, but it also balances out the richness from the cream cheese layer beautifully. Plus, there’s something utterly intoxicating about freshly whipped cream—it’s like capturing summer sunshine in a bowl! Once you reach that perfect consistency, take care not to overwhip! If you go too far, you’ll end up with grainy butter instead of luscious whipped cream—so watch closely! Now gently fold half of your whipped cream into the strawberry-cream cheese mixture until well combined; then fold in the remaining whipped cream. This two-step process ensures you maintain all that lovely airiness while achieving ultimate flavor fusion.
Step 7: Layering Like a Pro
Now comes my favorite part—the layering! Grab your prepared pan where we have our graham cracker crust waiting patiently for its companions. Start by spooning half of your creamy strawberry mixture onto the crust and spreading it evenly with a spatula. Make sure every inch is covered; this way, each slice has an equal amount of deliciousness! It’s essential to spread smoothly without damaging the crust underneath because we want everything to stay beautifully intact as we build our layers.
Next up is adding some excitement with our berry blue Jello mix—this colorful addition brings not only visual appeal but also delightful fruity flavor! Prepare two packages (3 ounces each) according to package instructions using 1¼ cups boiling water. Stir until fully dissolved; then allow it to cool slightly before pouring over the first layer in your pan. This step adds an extraordinary contrast both in taste and texture that truly sets this dessert apart from ordinary treats. Let’s not forget about patience here; allowing the Jello to cool prevents it from melting into your layers below! Drizzle it gently over your creamy layer and give it a little shake to ensure even distribution without disturbing what’s underneath.
Step 8: The Fruit Gala
After allowing those layers to settle beautifully for about 20 minutes or until slightly firmed up—this waiting period helps everything meld together—you can add another layer filled with fruit goodness! Spread blueberry pie filling generously over the Jello layer—the bold blueberries offer bursts of tartness against all that sweetness we’ve created thus far.
Next comes my favorite part: crushed pineapple! If you’re using canned crushed pineapple (which I highly recommend), ensure you’ve drained it well so you don’t introduce unnecessary moisture into your masterpiece; nobody wants soggy layers here! If you’re utilizing pineapple chunks instead, simply pulse them briefly in a food processor until finely crushed—and trust me when I say this adds an exquisite tropical note that’ll keep everyone guessing what secret ingredient makes this dessert sing!
Carefully spoon your crushed pineapple over the blueberry layer, creating yet another beautiful canvas for our final masterpiece. Just imagine cutting through all these vibrant layers—the colors alone are enough to make anyone swoon!
Conclusion:
As we wrap up our delightful journey through crafting this No Bake Summer Berry Lasagna, I can hardly contain my excitement about how truly special this dessert is! Each layer offers its own unique experience—the creamy filling melts in your mouth while the juicy berries provide that perfect pop of freshness. The graham cracker crust adds just enough crunch to balance everything out perfectly. I hope you’ve caught a glimpse of how these flavors intertwine so beautifully; each bite is an unforgettable celebration of summer’s bounty!
This recipe is an absolute must-try not only for its delicious taste but also for the sheer joy it brings during preparation. Imagine gathering your friends or family around as you whip up this charming dessert together—it’s an experience unto itself! Whether you’re serving it at a festive gathering like Memorial Day or simply enjoying it on a warm afternoon, each slice embodies pure happiness. And let’s be honest: there’s something incredibly satisfying about pulling such a vibrant dessert from your refrigerator and watching everyone’s eyes light up at its colorful beauty.
When it comes to serving suggestions, think beyond just enjoying it straight from the dish! Imagine savoring one slice with a dollop of extra whipped cream on top while sipping on some refreshing iced tea or lemonade—it’s blissful! For an afternoon pick-me-up, pair it with fresh mint tea; that combination will have you dreaming of gardens filled with sunshine and laughter. If you’re feeling adventurous, why not serve it alongside some chocolate-covered strawberries? The contrast between rich chocolate and bright berries will elevate your dessert experience beyond compare.
Feeling adventurous? This recipe is wonderfully adaptable—why not switch up the fruit according to what’s fresh and seasonal? You could try using peaches or raspberries instead of strawberries for completely new flavor profiles. If you’re looking for something even more indulgent, drizzle some caramel sauce over each slice before serving—it will transform this treat into an utterly luxurious experience. I invite you all to embrace your inner chef with this recipe; share your own variations and experiences because cooking should always be personal and full of love!
No Bake Summer Berry Lasagna
Indulge in the refreshing delight of No Bake Summer Berry Lasagna, a dessert that perfectly captures the essence of summer. This vibrant dish features layers of creamy goodness, luscious strawberries, and blueberries, all resting atop a buttery graham cracker crust. It’s an easy-to-make treat that doesn’t require baking, making it ideal for warm days filled with sunshine and laughter. With its colorful presentation and delightful flavors, this summer dessert is sure to impress at any gathering—be it a picnic, barbecue, or family celebration.
- Prep Time: 30 minutes
- Cook Time: None
- Total Time: 0 hours
- Yield: Serves approximately 9 people 1x
- Category: Dessert
- Method: No Bake
- Cuisine: American
Ingredients
- 1 and 2/3 cup heavy cream
- 1/3 cup powdered sugar
- 1 teaspoon vanilla extract
- 3 cups graham cracker crumbs
- ½ cup unsalted butter (melted)
- 8 oz cream cheese (softened)
- 1 cup powdered sugar (for filling)
- 2/3 cup diced fresh strawberries
- 1 cup blueberry pie filling
- 2 cups whipped cream (for topping)
- Fresh strawberries and blueberries for garnish
Instructions
- Prepare the graham cracker crust by mixing graham cracker crumbs with melted butter; press firmly into the bottom of an 8×8 inch pan.
- In a mixing bowl, whip heavy cream until soft peaks form; fold in powdered sugar and vanilla extract.
- In another bowl, beat softened cream cheese with powdered sugar until smooth; fold in diced strawberries and half of the whipped cream mixture.
- Spread half of the strawberry cream mixture over the crust, followed by blueberry pie filling, then add remaining strawberry cream mixture.
- Top with remaining whipped cream and garnish with fresh berries. Refrigerate for at least three hours before serving.
Nutrition
- Serving Size: 1 slice (100g)
- Calories: 320
- Sugar: 22g
- Sodium: 120mg
- Fat: 24g
- Saturated Fat: 14g
- Unsaturated Fat: 10g
- Trans Fat: 0g
- Carbohydrates: 27g
- Fiber: 1g
- Protein: 4g
- Cholesterol: 70mg