Mini Chocolate Chip Muffins
The aroma of freshly baked Mini Chocolate Chip Muffins wafts through the air, wrapping around you like a warm hug on a chilly morning. It’s incredible how something as simple as a muffin can evoke such joy, isn’t it? These delightful little treats are not just breakfast; they’re a celebration of flavor, comfort, and childhood nostalgia. As you bite into one of these tender morsels, you’ll experience a symphony of sweet chocolate mingling perfectly with the rich creaminess of Greek yogurt. Trust me, each muffin is like a tiny piece of happiness—perfect for breakfast, snack time, or even dessert!
I often find myself reflecting on the moments in my kitchen that bring people together. There’s something truly magical about creating food that invites others to gather around the table, share stories, and create memories. These Mini Chocolate Chip Muffins have become a staple in my home because they are not only easy to whip up but also incredibly versatile. Whether I’m hosting friends for brunch or simply whipping up a batch to enjoy with my morning coffee, they never fail to delight. So grab your mixing bowls and let’s dive into this delicious adventure together!
Mini Chocolate Chip Muffins: Sweet Bites of Joy
There’s something undeniably charming about mini muffins—they’re just the right size for those who want to indulge without overdoing it. Each bite is packed with flavor and feels special because they’re baked with love and care. This recipe calls for simple ingredients that come together beautifully to create moist and fluffy muffins that you’ll want to make again and again. Let’s embark on this delicious journey!

Ingredients:
As we gather our ingredients for these delightful Mini Chocolate Chip Muffins, remember that each component plays a vital role in crafting something truly extraordinary. With every scoop and stir, you’ll be building flavors and textures that dance together in perfect harmony.
- 1 cup plain full fat Greek yogurt. This ingredient is a game changer! It adds moisture and richness while contributing protein to our muffins. The tanginess from the yogurt balances out the sweetness from the chocolate chips perfectly. When selecting Greek yogurt, opt for full fat—its creaminess will yield muffins that are irresistibly tender rather than dry. If you’re looking for alternatives due to dietary preferences, plain coconut yogurt works wonders too!
- ¼ cup unsalted butter (melted and slightly cooled). Butter is our secret weapon here; it brings depth of flavor and contributes to that delightful crumb we all crave in baked goods. Melting the butter allows it to mix seamlessly with other wet ingredients, ensuring an even distribution throughout the batter. Let it cool slightly after melting—this step ensures we don’t cook our eggs when whisking everything together! Always look for high-quality unsalted butter; it’s non-negotiable if you want full control over your muffins’ flavor.
- 2 eggs. Eggs are essential for binding our ingredients together while also adding richness and structure to our muffins. They help create a tender crumb by providing moisture during baking. When using eggs, room temperature ones work best as they incorporate more easily into the batter; just take them out of the fridge about 30 minutes before you start mixing.
- 2 teaspoons vanilla extract. This is where things get aromatic! Vanilla extract elevates the flavor profile of your muffins—it enhances sweetness without being overpowering while weaving an intoxicating fragrance throughout your kitchen as they bake. Always use pure vanilla extract for the best quality; imitation varieties simply can’t compete.
- ¼ teaspoon salt. You might wonder why we need salt in a sweet recipe—think of it as enhancing the overall flavor! A touch of salt balances sweetness and accentuates all the other ingredients’ flavors, making each muffin taste more vibrant.
- 1 teaspoon baking powder & ½ teaspoon baking soda. These two leavening agents work in tandem to give our muffins lift and fluffiness! Baking powder provides an initial rise when mixed into wet ingredients, while baking soda kicks in during baking by reacting with acidic components like yogurt or maple syrup to create carbon dioxide bubbles—resulting in beautifully airy muffins.
- ½ cup maple syrup. Sweetening our muffins naturally is maple syrup’s job here! Not only does it provide moisture but its distinct flavor pairs perfectly with chocolate chips while keeping things wholesome without refined sugars. Look for pure maple syrup rather than pancake syrup; trust me when I say it’s worth it!
- 1 ½ cups all-purpose flour. This flour forms the backbone of our batter—the source of structure that holds everything together! We’ll be using all-purpose flour here since it strikes an ideal balance between softness and strength needed for these mini delights.
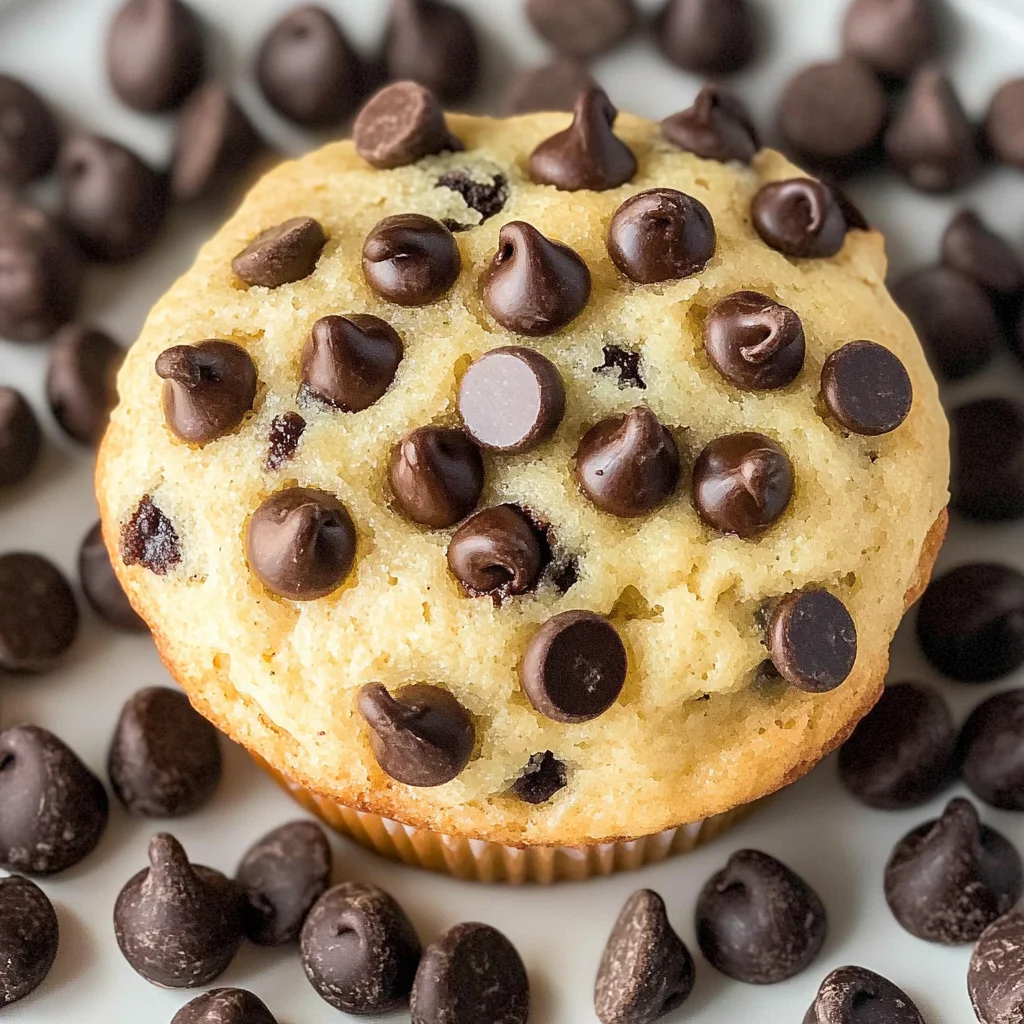
- 1 cup mini chocolate chips. Ahh, the pièce de résistance! The mini chocolate chips melt into gooey pockets of goodness within each muffin—making every bite feel like a treat! Go for high-quality semi-sweet or dark mini chocolate chips if possible; their creamy melt will elevate your muffins from good to utterly extraordinary.
Equipment You’ll Need:
Now that we’ve gathered our ingredients let’s talk about the tools you’ll need on this baking adventure! Having quality equipment can make all the difference when whipping up these Mini Chocolate Chip Muffins.
- Mixing bowls – A solid set of mixing bowls will be your best friends during this process! Choose varying sizes; a large one for combining dry ingredients and another medium-sized bowl for wet ingredients works wonderfully together.
- Whisk – A whisk is essential for combining dry ingredients thoroughly while also blending wet ones smoothly without lumps—a pivotal step towards achieving light and fluffy muffins!
- Rubber spatula – Consider this your gentle folding companion! A rubber spatula helps incorporate ingredients without deflating air bubbles formed during mixing—a crucial element in keeping our muffins tender.
- Mini muffin pan – This is where magic happens! A nonstick mini muffin pan makes removing those delectable bites much easier once they’re baked golden brown & puffed up beautifully!
- Nonstick spray or parchment paper liners – Coating your muffin pan with nonstick spray ensures easy release from the pan after baking; alternatively using parchment paper liners can add a lovely visual touch!
With all these delightful components ready at hand, let’s move forward into creating something truly delicious together!
Preparing the Mini Chocolate Chip Muffins
Step 1: Combining Dry Ingredients
Begin by whisking together your flour, salt, baking powder, and baking soda in a large mixing bowl until well combined—this process ensures even distribution throughout your batter later on! It’s essential not to rush this step; proper mixing prevents any clumping that could lead to unevenly risen muffins during baking time.
Step 2: Mixing Wet Ingredients
In another bowl, whisk together Greek yogurt, maple syrup, melted butter (make sure it’s slightly cooled!), vanilla extract until smooth—a creamy mixture should result from this combination which will contribute significantly towards moisture levels within our final product as well as enhancing flavor profile immensely!
Step 3: Bringing It All Together
Once you’ve achieved that velvety texture with your wet mixture (don’t worry if there are some small lumps—that’s normal!), gently pour it over your flour mixture before using your rubber spatula to fold everything until just combined—this means no visible flour streaks should remain visible but resist overmixing at all costs! Overworking gluten could lead us down an unfortunate path toward dense muffins instead of soft pillowy ones we desire so dearly.
Step 4: Chocolatey Additions
Now comes one of my favorite parts—folding in those mini chocolate chips into our batter carefully until evenly distributed throughout without losing much air from earlier steps taken (remember what I mentioned about keeping those bubbles intact!). If desired sprinkle extra mini chocolate chips on top before baking—they’ll melt beautifully creating alluring pockets of molten goodness awaiting discovery upon first bite!
As we proceed further into assembling these delightful bites bursting with chocolaty goodness & creamy texture… stay tuned as we’re almost ready for oven action that’ll transform simple mixtures into golden brown delights awaiting indulgence soon enough!
Stay tuned because we’ll continue exploring how long they take to bake perfectly next!
Step 5: Mixing the Batter to Create Magic
Now, it’s time to combine our two mixtures. I can’t stress enough how important this step is for achieving that perfect texture in your Mini Chocolate Chip Muffins. Take your dry ingredients—the flour, salt, baking soda, and baking powder—and gently pour them into the bowl of wet ingredients that you’ve whisked together so lovingly. Now, grab a rubber spatula and begin to stir. This part is crucial because overmixing can lead to dense muffins instead of the fluffy, tender bites we’re aiming for. So take your time, and don’t rush this step! You want to mix until everything is just combined; a few lumps are perfectly okay. It’s during this phase that the magic really begins—watch as the ingredients come together to form a beautiful batter that smells like heaven already!
The science behind not overmixing is all about gluten development. When you mix flour with liquid, gluten strands start to form, which gives baked goods their structure. If you mix too much, those gluten strands become tough and chewy rather than soft and airy—definitely not what we want for these delightful muffins! So remember: gentle folds and a light hand here will yield muffins that are moist and tender, each bite melting in your mouth like a warm hug.
Step 6: The Sweet Embrace of Chocolate
Once your batter is looking beautifully mixed but not overworked (yay!), it’s time for the pièce de résistance—folding in those mini chocolate chips! Using your rubber spatula again, gently incorporate the chocolate chips into the batter. I always find this moment utterly intoxicating; just imagining those little morsels of sweetness melting into every muffin makes my heart sing! Ensure that they’re evenly distributed throughout so that each muffin has pockets of gooey chocolate goodness waiting to be discovered.
This step is essential because it adds bursts of flavor and texture to every bite—you want that delightful contrast between the soft muffin and the melty chocolate. Plus, who doesn’t love finding surprise chocolate in their baked goods? Remember to be gentle as you fold in the chips; this isn’t a race! Taking care during this stage means you’ll keep your muffins light and fluffy while ensuring that each one has an equal share of chocolate bliss.
Step 7: Prepping Your Muffin Pan Like a Pro
Before we get baking, let’s talk about prepping our mini muffin pan. Grab some nonstick spray—it’s key for easy release later on—and give your pan a good spritz. Trust me when I say this step is non-negotiable; you want those muffins to pop out effortlessly once they’re baked! If you have silicone muffin pans, even better—they naturally release the muffins without any hassle at all.
Now comes the fun part: distributing the batter into your prepared muffin pan! I always use a small cookie scoop or even a spoon for this task—it helps ensure each muffin is uniform in size which leads to even baking. Fill each cup about three-quarters full; this allows enough room for them to puff up beautifully without overflowing. And if you’re feeling indulgent (I know I am), sprinkle a few extra mini chocolate chips on top of each filled cup before they head into the oven—because who wouldn’t want an extra burst of chocolatey goodness staring back at them?
Step 8: Baking Your Little Bundles of Joy
Now comes the moment we’ve been waiting for: popping these beauties into the oven! Preheat your oven to 350°F (that’s about 175°C for my international friends) if you haven’t done so already; getting that consistent heat is absolutely paramount for perfect baking results. Place your mini muffin pan on the center rack of the preheated oven and set your timer for 12–14 minutes—but don’t walk away just yet!
As they bake, fill your kitchen with anticipation as delightful aromas waft through the air—there’s something so profoundly satisfying about homemade baked goods filling your home with warmth and sweetness. To test for doneness, insert a toothpick into one of the muffins around the 12-minute mark; it should come out clean or with just a few crumbs clinging to it—the sign that they are perfectly baked! If there’s wet batter on it, trust me on this one—give them another minute or two but keep an eye on them; ovens can vary dramatically in temperature.
Once they’re done baking and golden brown on top with a slight dome shape (oh yes!), remove them from the oven and let them cool in the pan for about 2-3 minutes before transferring them onto a wire rack. This cooling process allows steam to escape while preventing sogginess—a crucial factor if you want those lovely little morsels to maintain their divine texture.
Next Major Phase – Final Touches
Step 9: Cooling Down Before Enjoying
After resting in their pan just long enough for their edges to firm up slightly, transfer those magnificent Mini Chocolate Chip Muffins onto a wire cooling rack where they can cool completely. This step might seem simple but think about it: giving these little gems space to breathe not only enhances their texture but also prevents them from steaming themselves into sogginess while still nestled in their warm pan. Patience here pays off tenfold!
While they cool (if you can resist), take this time to reflect on how far you’ve come—from mixing those ingredients together with love to creating something truly extraordinary! And trust me when I say—you’ll want these muffins fully cooled before taking that first bite because they’ll be easier to handle while still retaining all their moistness inside.
As you await their cooling blissfully, consider preparing some coffee or tea because these muffins pair beautifully with either beverage—a match made in heaven if there ever was one! When you’re finally ready for that first bite (and oh boy will it be worth it), savor every moment as you experience layers of flavor enveloping your taste buds—the light sweetness from maple syrup mingling with rich chocolate chips creates an unforgettable experience.
And just like that, you’ve created something magical—a batch of Mini Chocolate Chip Muffins bound to become a staple in your kitchen repertoire! Whether enjoyed warm straight from the oven or stored away for later indulgence (if they last long enough!), these little delights are sure to bring smiles all around whenever shared with family or friends. Happy baking!
Storage and Enjoyment Tips for Your Mini Chocolate Chip Muffins
Now that you’ve created these delightful little treasures, it’s time to talk about how to savor them even longer! Trust me when I say that these Mini Chocolate Chip Muffins are not just for immediate enjoyment; they can be stored and relished over several days, or even frozen for later indulgence. I can already imagine the warm, sweet aroma wafting through your kitchen as you take your first bite, but let’s ensure we keep that magic alive for as long as possible!
Storing Leftover Mini Chocolate Chip Muffins
To keep your lovely muffins fresh and flavorful, place them in an airtight container at room temperature. This is absolutely paramount because it prevents moisture loss while still allowing some breathability which is essential for baked goods. If you happen to have some leftover (which is rare, I know!), they’ll stay delicious for about 3-4 days. A little pro tip from my baking adventures: popping a slice of bread into the container can help maintain that moist texture! The muffins absorb the moisture from the bread, keeping them soft and delectable. After a day or two, they may lose a bit of their initial warmth and fluffiness, but a quick microwave reheat for about 10 seconds will revive their spongy goodness. Just imagine the joy of biting into one of these muffins again after a few days; it’s like a warm hug from an old friend!
Freezing Mini Chocolate Chip Muffins for Later
If you find yourself with an abundance of muffins (or just want to prepare ahead), freezing is an excellent option that seals in their flavor and freshness! To freeze them properly, allow your muffins to cool completely before placing them in a single layer on a baking sheet lined with parchment paper. Once they are frozen solid—usually about an hour—transfer them to a resealable freezer bag or airtight container. They can happily reside in your freezer for up to three months! When you’re ready to enjoy them again, simply pull out as many as you desire and either thaw them at room temperature or zap them in the microwave for about 20 seconds. The convenience factor here is incredible! You’ll always have homemade treats on hand for unexpected guests or cozy evenings curled up on the couch.
Mini Chocolate Chip Muffins

Indulge in the joy of baking with these delightful Mini Chocolate Chip Muffins. Perfectly sized for a sweet snack or breakfast treat, these muffins are light, fluffy, and filled with gooey chocolate chips that melt in your mouth. Made with wholesome ingredients like Greek yogurt and maple syrup, they offer a perfect balance of sweetness and richness without refined sugars or unnecessary additives. Whether enjoyed fresh out of the oven or stored for later, each bite is a little piece of happiness that brings warmth to any occasion—be it brunch with friends or a cozy afternoon snack. Dive into this easy recipe and create lasting memories around the table today!
- Prep Time: 15 minutes
- Cook Time: 14 minutes
- Total Time: 29 minutes
- Yield: Approximately 12 muffins 1x
- Category: Dessert
- Method: Baking
- Cuisine: American
Ingredients
- 1 cup plain full fat Greek yogurt
- ¼ cup unsalted butter (melted)
- 2 eggs
- 2 teaspoons vanilla extract
- ½ cup maple syrup
- 1 ½ cups all-purpose flour
- 1 cup mini chocolate chips
- ¼ teaspoon salt
- 1 teaspoon baking powder
- ½ teaspoon baking soda
Instructions
- Preheat your oven to 350°F (175°C) and prepare a mini muffin pan with nonstick spray.
- In a large bowl, whisk together the flour, salt, baking powder, and baking soda.
- In another bowl, mix the Greek yogurt, melted butter, maple syrup, eggs, and vanilla until smooth.
- Combine the wet ingredients into the dry ingredients using a rubber spatula until just mixed; avoid overmixing.
- Gently fold in the mini chocolate chips.
- Fill each muffin cup about three-quarters full with batter and sprinkle additional chocolate chips on top if desired.
- Bake for 12-14 minutes or until a toothpick comes out clean. Allow to cool before transferring to a wire rack.
Nutrition
- Serving Size: 1 muffin (32g)
- Calories: 130
- Sugar: 8g
- Sodium: 50mg
- Fat: 5g
- Saturated Fat: 3g
- Unsaturated Fat: 2g
- Trans Fat: 0g
- Carbohydrates: 19g
- Fiber: 1g
- Protein: 3g
- Cholesterol: 25mg