Mexican Deviled Eggs Recipe
There’s something profoundly magical about the experience of sharing food with loved ones; it transcends mere sustenance and becomes a tapestry of memories, flavors, and emotions. When I think of vibrant gatherings—friends laughing over a table adorned with colorful dishes—I can’t help but picture these Mexican deviled eggs nestled among the spread. Bold, creamy, and zesty, they are not just an appetizer; they are little bites of joy that bring a burst of Tex-Mex flair to any occasion. The rich avocado combined with the sharpness of lime and the kick from jalapeño creates a symphony of flavors that dances on your palate. Trust me when I say that this Mexican Deviled Eggs Recipe is destined to become a cherished favorite at your gatherings.
From potlucks to festive celebrations like Cinco de Mayo, these deviled eggs are more than just food—they are a bridge between traditional fare and innovative twists that make every bite feel special. The creamy mixture enveloping each egg white holds the essence of warmth and camaraderie, inviting everyone to dig in and share stories over the table. As you savor them, you might find yourself reminiscing about sun-drenched picnics or lively family dinners filled with laughter and love. This recipe encapsulates all those feelings in one delightful dish; it’s an experience that resonates deeply with anyone who enjoys good food made with heart.
Mexican Deviled Eggs Recipe: A Zesty Twist on a Classic
Welcome to my kitchen! Today, I’m thrilled to share my take on an all-time classic—deviled eggs—with a spirited Mexican twist. These Mexican deviled eggs are perfect for any gathering where you wish to impress without spending all day in the kitchen. They’re so easy to whip up yet pack such bold flavors that your friends will be asking for seconds—and maybe even thirds! With just a few simple ingredients, you’ll create something utterly extraordinary that showcases your culinary prowess.
Ingredients:
As we embark on this delicious culinary journey together, let’s talk about each ingredient that plays a crucial role in making these Mexican deviled eggs truly remarkable.
- 12 large eggs (hard-boiled and peeled). The foundation of our dish starts here! Using large eggs ensures that you have ample yolk for mixing into your creamy filling. Boiling them perfectly is key—overcooked eggs can lead to that unsightly green ring around the yolk, which is not only unappealing but can also impart a sulfuric taste. Aim for firm whites and fully set yolks by boiling them gently for about 12 minutes before plunging them into an ice bath to halt cooking immediately.
- 1 ripe avocado (mashed). Avocado adds a luxurious creaminess that’s hard to resist! When selecting your avocado, look for one that’s slightly soft but not mushy; it should yield gently when pressed. The combination of mashed avocado with egg yolks results in a richness that’s simply heavenly while contributing healthy fats to keep things nutritious. Plus, its subtle flavor beautifully complements the other ingredients without overwhelming them.
- 3 tbsp mayonnaise. Mayonnaise acts as the velvety binder in our filling—bringing everything together seamlessly while adding moisture and richness. Look for high-quality mayo because it makes all the difference; homemade would be fantastic if you have time! If you’re looking for alternatives, consider using vegan mayo for a lighter option or even Greek yogurt for extra protein.
- 2 tbsp Mexican crema (or substitute with sour cream or Greek yogurt). This tangy delight elevates our filling even further! Mexican crema has a smooth texture reminiscent of sour cream but is slightly milder and more luxurious in flavor. If you can’t find it at your local store, regular sour cream works well too—just make sure it’s fresh because this will enhance the overall taste of your deviled eggs significantly.
- 1 jalapeño pepper (finely diced). Ah, jalapeños—the spice factor in our dish! Finely dice one jalapeño (removing seeds for less heat) to add just the right amount of kick without being overwhelming unless you’re daring enough to keep some seeds in there! Their bright green color brings vibrancy while offering an invigorating crunch that contrasts beautifully against the creamy filling.
- 2 tbsp lime juice (freshly squeezed). Fresh lime juice is non-negotiable here! It brightens up all the flavors and cuts through the richness of avocado and mayo beautifully. I always prefer using freshly squeezed juice over bottled since it has more character and depth—plus, there’s nothing quite like that fragrant aroma wafting through your kitchen as you squeeze those limes!
- 2 tbsp fresh cilantro (chopped). Adding chopped cilantro brings freshness and herbal notes that are quintessentially Mexican! It’s essential to chop it finely so that its flavor distributes evenly throughout our filling without overwhelming each bite.
- 1 tsp ground cumin. Ground cumin lends earthiness with its warm notes—a common spice found in many Mexican dishes that deepens flavor complexity here as well! Just a small amount goes a long way in enhancing our filling’s overall profile.
- 0.5 tsp chili powder & 0.5 tsp garlic powder. Both spices contribute layers of flavor; chili powder offers warmth while garlic powder adds depth without requiring fresh garlic’s chopping effort—perfect for convenience!
- Salt and pepper (to taste) are essential seasonings that help balance out all these incredible flavors working together!
- Smoked paprika (for garnish) adds not only visual appeal but also provides subtle smokiness—a delightful final touch!
- Cilantro leaves, jalapeño slices, and lime wedges serve as garnishes—adding beauty while giving guests options to personalize their bites!
With these ingredients gathered, we’re ready to dive into creating something truly memorable!
Equipment You’ll Need:
Having the right tools at hand makes cooking not only smoother but also more enjoyable as we create magic together in the kitchen! Let’s gather what you’ll need before we start crafting these delicious deviled eggs:
- Medium saucepan – Essential for boiling our eggs evenly; choose one that’s large enough so they fit comfortably without crowding each other—this helps prevent cracking during boiling!
- Ice bath container – A basic bowl filled with ice water will halt cooking immediately once those precious eggs are done boiling; trust me—this step is crucial if you want perfectly cooked yolks without any greenish hue.
- Mixing bowl – You’ll need this for combining egg yolks with avocado and other ingredients until achieving creamy perfection!
- Fork or potato masher – Either tool works beautifully for mashing together egg yolks smoothly; if you’re feeling fancy or want extra fluffiness, use an electric hand mixer instead!
- Piping bag or spoon – For filling those egg whites effortlessly—piping bags offer precision while spoons get the job done too if you don’t have one handy.
- Garnishing tools – A small knife will do wonders when slicing garnishes like lime wedges or jalapeños; don’t forget some measuring spoons so we achieve perfect proportions throughout!
Now we’re fully equipped to jump into preparing our mouthwatering Mexican deviled eggs recipe!
Step 1: Boil Those Eggs Like a Pro
Let’s get started by bringing water to boil in your medium saucepan over medium-high heat—make sure there’s enough water so it covers all twelve large eggs by at least an inch or two! Once boiling merrily away, gently add each egg using tongs or a slotted spoon; dropping them too quickly could cause cracking due to sudden temperature changes—a little extra care here goes a long way toward beautiful results later on! Allow them to cook undisturbed for about twelve minutes before transferring them immediately into an ice bath filled with cold water mixed generously with ice cubes—it’s vital here because shocking those hot eggs prevents overcooking while making peeling later much easier too!
Step 2: Peel Perfectly
Once cooled sufficiently after sitting snugly within their icy embrace for about five minutes, carefully peel each egg under running water if possible—this helps loosen stubborn bits from sticking onto whites which could otherwise ruin their pristine appearance during presentation later on! Gently slice each boiled egg lengthwise down the middle using a sharp knife before popping out those luscious golden yolks into your mixing bowl—it feels rewarding watching how easily they separate from their whites when done properly!
Step 3: Create That Creamy Filling
Now comes one of my favorite parts: mashing everything together until smooth perfection emerges right beneath our fingertips! Grab your ripe avocado next—it should be soft enough yet still hold its shape firmly—then scoop it right into our bowl filled with those glorious yolks waiting patiently alongside it along with mayonnaise plus crema/sour cream options chosen earlier along with all those delightful seasonings we prepared beforehand: diced jalapeños adding some zing plus fresh cilantro delivering bursts of herbaceous goodness blended harmoniously together here too… Trust me when I say this mixture smells utterly intoxicating already! Use either fork or potato masher until reaching desired consistency—it doesn’t have to be completely smooth since tiny chunks lend great texture—but aim high because nobody wants chunky bites amidst velvety goodness present throughout every single mouthful enjoyed later on!
Step 4: Taste Test Time!
Before we fill those lovely whites back up again next … let’s conduct an important taste test first here just between us friends… Take spoonfuls straight from mixing bowl tasting diligently adjusting seasoning levels accordingly based upon personal preferences ensuring everything balances out nicely together ensuring no single note overwhelms others present within mixture by adding pinch more salt/pepper/lime juice needed balancing flavors cohesively! This step may sound simple but trust me—it matters significantly regarding achieving ultimate satisfaction whenever indulging upon finalized creations thus far…
And there you have it—the first few steps toward making these spectacular Mexican deviled eggs come alive beautifully within kitchens everywhere… Each step builds anticipation leading towards final assembly awaiting soonest arrival upon tables shared amongst friends family alike…
Stay tuned as we continue preparing these delectable bites worthy celebrating alongside loved ones soon thereafter…
Step 5: Adjusting the Seasoning – The Heart of Flavor
Now that you’ve mashed the yolks with the creamy avocado and incorporated that lovely Mexican crema, it’s time for one of the most vital steps in creating your Mexican deviled eggs: adjusting the seasoning. This step is absolutely paramount because it allows all those vibrant flavors to meld beautifully and ensures that every bite is a taste sensation. As you mix in the mayonnaise, lime juice, ground cumin, chili powder, garlic powder, salt, and pepper, take a moment to really embrace each ingredient’s role in this dish. The lime juice adds brightness and acidity that cuts through the richness of the avocado and mayo, while cumin and chili powder bring that signature Tex-Mex warmth.
As you’re mixing these components together, don’t just stir mindlessly; instead, engage your senses! Notice how everything starts to blend into a luscious mixture that’s both creamy and zesty. This is your opportunity to taste and adjust—don’t be afraid to add a touch more lime juice or another pinch of salt until it dances on your palate just right. I promise you, this little bit of patience will pay off immensely when your guests take their first delightful bite. Remember that flavors often intensify as they sit together, so trust your instincts here; if something feels off, give it another tweak. You want this filling to be utterly intoxicating!
Step 6: Filling Those Egg Whites – A Creative Touch
Once you’ve achieved the perfect balance of flavors in your creamy mixture, it’s time for one of my favorite parts—filling those egg whites! Here’s where creativity shines through; you can either pipe or spoon the mixture into each half. If you’re using a piping bag (or even a zip-top bag with a corner snipped off), fill it with your luscious filling and squeeze gently from the top as you work downwards into each egg white half. The visual appeal is really something special; they look so inviting when piped neatly! If you’d prefer to spoon them in, make sure you’re generous—this filling is too delicious not to pile high.
Why is this step so crucial? Not only does it affect presentation (which we all know matters), but it also helps control portion sizes. Each egg half should be brimming with that zesty goodness—trust me when I say no one wants an underfilled deviled egg when they could have a burst of flavor instead! As you fill them up, be mindful not to overstuff so much that they spill over; a little mound on top is perfect for garnishing later on. Take your time with this step; it’s not just about completing tasks but elevating each egg into its own masterpiece!
Step 7: Garnishing – A Feast for the Eyes
Now comes the fun part—garnishing! This step is where we transform our already delectable Mexican deviled eggs into an eye-catching centerpiece for any gathering. Start by lightly sprinkling smoked paprika over each filled egg half. Not only does this add a beautiful pop of color against the creamy filling, but it also infuses a subtle smokiness that complements those spicy jalapeños perfectly. I can almost hear my friends ooh-ing and aah-ing at this stage!
For an added touch of freshness and crunch, sprinkle some finely chopped cilantro leaves atop each egg—it brings vibrancy and aroma that beckons everyone closer. And don’t forget about those jalapeño slices; if you want more heat or simply want to emphasize that Tex-Mex flair, placing one slice on each egg creates an inviting invitation for guests to dive right in! These finishing touches are essential because they enhance not only the aesthetics but also deepen flavor layers—your guests will appreciate how thoughtful these details are.
Step 8: Chilling – The Secret to Flavor Harmony
Lastly, we arrive at perhaps the most critical step in preparing your Mexican deviled eggs: chilling them before serving! While this might seem like just another waiting game, trust me—the payoff will be worth every minute. When these beauties chill out in the fridge for at least 30 minutes (but ideally up to two hours), something magical happens. The flavors meld together beautifully during this time; it’s as if they’re having their own little party in there! The coolness enhances their refreshing qualities while allowing all those robust spices to harmonize.
Why chill? Well, serving these eggs cold provides a delightful contrast to their rich filling and sets off those aromatic ingredients wonderfully. It also makes them easier to handle during serving since they firm up slightly as they cool down—an essential detail if you want them looking pristine on your platter! Be sure not to skip this step; I can’t stress enough how transformative chilling can be for flavor development and texture refinement. So go ahead—revel in this moment of anticipation as you await that first delicious bite!
Conclusion:
As we wrap up this culinary journey through my cherished Mexican deviled eggs recipe, I hope you’ve felt my excitement bubbling over like a pot on the stove! From the moment those hard-boiled eggs are transformed into creamy bites infused with vibrant flavors of avocado and zesty lime juice, this dish becomes more than just an appetizer; it becomes an experience that warms your heart and fills your home with laughter and joy. Each ingredient plays its part in creating a symphony of taste that is utterly captivating—the smoothness of avocado meets the delightful crunch of jalapeño while cilantro adds that freshness that dances on your palate. It’s truly extraordinary how something so simple can evoke such warmth and connection.
This recipe is an absolute must-try—not only because it’s delicious but because it’s an adventure waiting to unfold in your kitchen! Whether you’re hosting a festive gathering or simply wanting to spoil yourself during a cozy night in, these Mexican deviled eggs are perfect for any occasion. Just imagine pulling out that vibrant platter adorned with these beauties while friends gather around; their eyes will light up with anticipation as they dive into each delightful bite. It’s more than just food; it’s about creating memories over shared experiences.
Pair these deviled delights with anything from crispy tortilla chips for some added crunch to fresh vegetables like cucumbers or bell peppers for dipping—a burst of freshness complements their rich creaminess beautifully! For an afternoon pick-me-up with friends, serve these alongside refreshing margaritas or iced tea that cuts through the richness perfectly. And if you’re feeling particularly indulgent? Serve them alongside savory tacos bursting with seasoned veggies or grilled chicken for an unforgettable Tex-Mex feast.
Feeling adventurous? This recipe is wonderfully adaptable! You could swap out jalapeños for roasted red peppers if you’re looking for something milder yet still packed with flavor. Or why not add some smoked paprika directly into the filling for an even deeper smoky note? The possibilities are endless and allow your creativity to shine through—perhaps even sprinkle some crumbled queso fresco on top for added pizzazz! I invite you to try this recipe today; share your experiences and variations with me—I would love to hear how this dish finds its way into your heart as it has into mine!
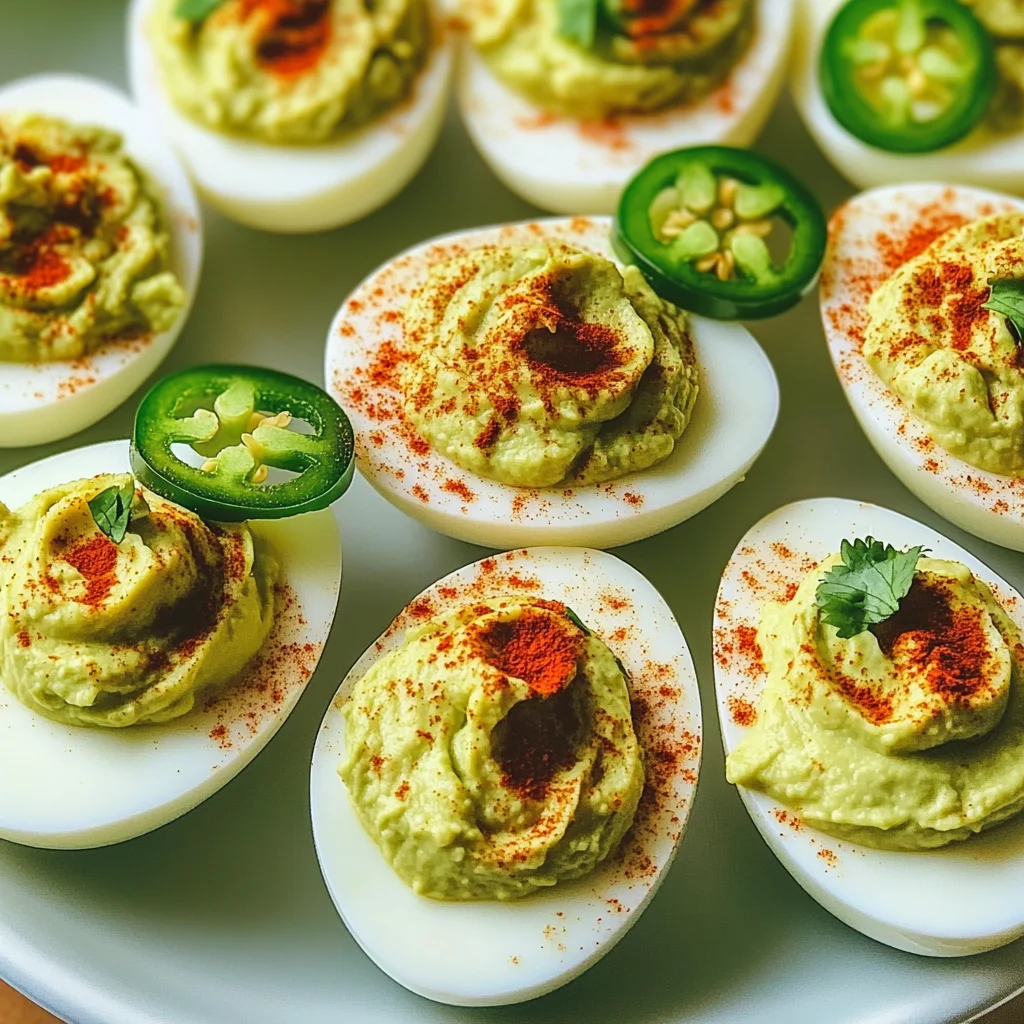
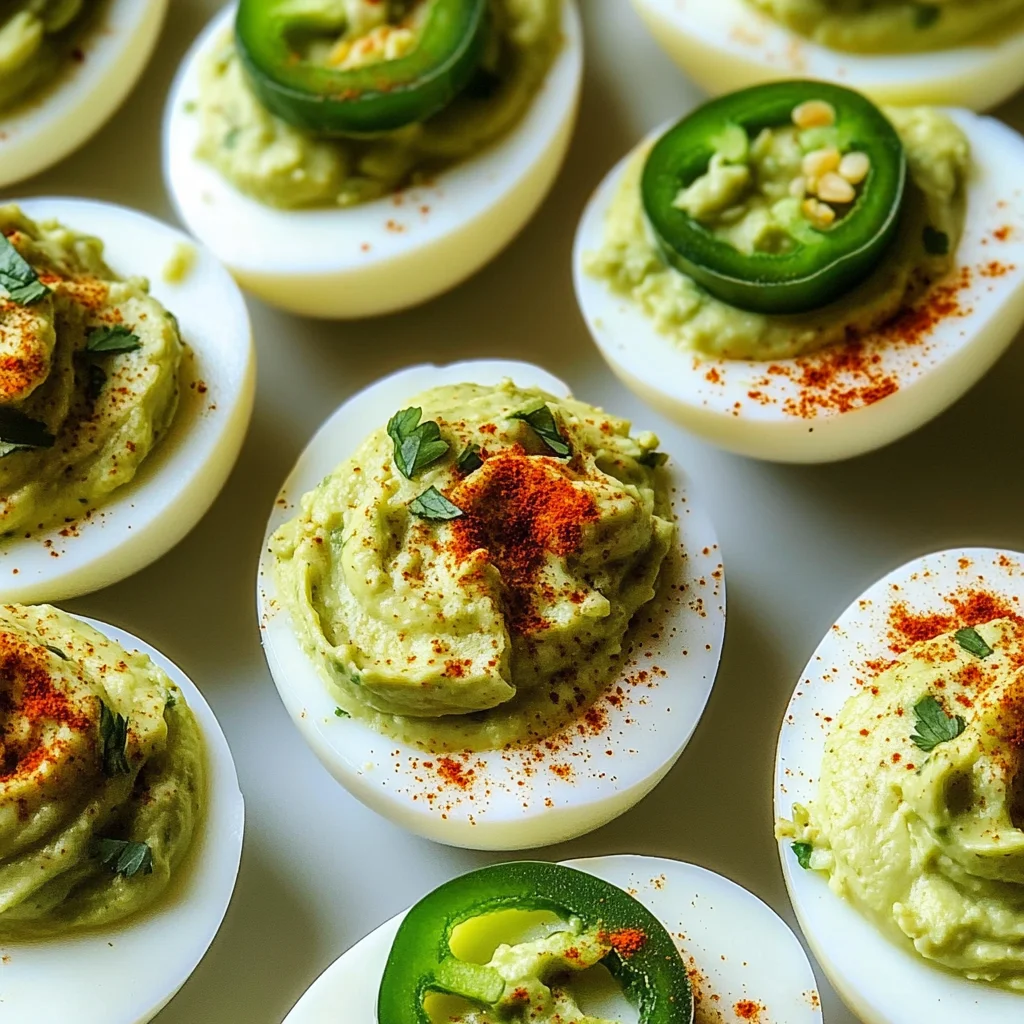
Mexican Deviled Eggs Recipe

Experience the joy of gatherings with our irresistible Mexican Deviled Eggs Recipe, a zesty twist on a classic that is sure to steal the show at your next event. These delightful bites combine creamy avocado and a kick of jalapeño, perfectly balanced with tangy lime juice for an explosion of flavor in every bite. Whether you’re hosting a summer barbecue or celebrating a festive occasion, these deviled eggs offer an easy yet impressive appetizer that will have guests clamoring for more. Perfect for potlucks or family get-togethers, they are not just food—they’re a celebration of flavors and memories!
- Prep Time: 15 minutes
- Cook Time: 12 minutes
- Total Time: 27 minutes
- Yield: 12 servings (24 halves) 1x
- Category: Appetizer
- Method: Boiling
- Cuisine: Mexican
Ingredients
- 12 large hard-boiled eggs
- 1 ripe avocado
- 3 tbsp mayonnaise
- 2 tbsp Mexican crema (or sour cream)
- 1 jalapeño pepper (finely diced)
- 2 tbsp fresh lime juice
- 2 tbsp fresh cilantro (chopped)
- 1 tsp ground cumin
- 0.5 tsp chili powder
- 0.5 tsp garlic powder
- Salt and pepper to taste
- Smoked paprika for garnish
Instructions
- Boil the eggs: Place eggs in a medium saucepan, cover with water, and bring to a boil. Boil for 12 minutes, then transfer to an ice bath for cooling.
- Peel the eggs: Once cooled, peel the eggs under running water and slice them in half lengthwise. Remove yolks and place them in a mixing bowl.
- Prepare the filling: Mash yolks with avocado until smooth. Stir in mayonnaise, Mexican crema, jalapeño, lime juice, cilantro, cumin, chili powder, garlic powder, salt, and pepper until well combined.
- Fill egg whites: Spoon or pipe the mixture into each egg white half.
- Garnish: Sprinkle smoked paprika on top and add extra cilantro or jalapeño slices if desired.
- Chill: Refrigerate for at least 30 minutes before serving to allow flavors to meld.
Nutrition
- Serving Size: 1 egg half (35g)
- Calories: 90
- Sugar: 0g
- Sodium: 95mg
- Fat: 7g
- Saturated Fat: 1g
- Unsaturated Fat: 6g
- Trans Fat: 0g
- Carbohydrates: 2g
- Fiber: <1g
- Protein: 6g
- Cholesterol: 120mg