Garlic Herb Dutch Oven Bread Recipe You’ll Love Today!
There’s something truly magical about the process of baking bread, isn’t there? It’s not just about combining ingredients; it’s a journey that transports you back to simpler times, where the aroma of freshly baked goods wafts through the air, filling your home with warmth and comfort. When I think of my Garlic Herb Dutch Oven Bread Recipe You’ll Love Today!, I can’t help but feel a deep connection to those moments—gathering around the table, sharing stories, and breaking bread together. This recipe is not merely food; it’s an experience, a heartfelt invitation to slow down and savor the little things in life. The combination of aromatic garlic and fresh herbs creates a symphony of flavors that dances on your palate while the crusty exterior gives way to an airy, tender crumb inside. I promise you, each bite will feel like a warm hug on a chilly evening.
This bread has a beautiful simplicity that resonates with so many people. It’s a perfect companion for any meal—whether you’re serving it alongside a hearty soup or enjoying it as a stand-alone delight with a drizzle of olive oil. What makes this Garlic Herb Dutch Oven Bread even more special is how forgiving it is! You don’t need to be an experienced baker; the long fermentation process allows for incredible flavor development without requiring complex techniques. Just imagine waking up in the morning to find your dough patiently waiting for you, ready to be transformed into something utterly intoxicating by dinnertime. This recipe embodies both tradition and innovation, making it suitable for family gatherings or simply for enjoying at home during quiet evenings.
Garlic Herb Dutch Oven Bread Recipe You’ll Love Today!: A Warm Embrace in Every Slice
I can’t wait for you to embark on this culinary adventure with me! Baking bread might seem daunting at first, but trust me when I say it’s one of life’s most rewarding experiences. This Garlic Herb Dutch Oven Bread is incredibly easy to make and requires minimal hands-on time—perfect for busy schedules or spontaneous cravings! You’ll soon discover that this isn’t just any bread; it’s bursting with flavor and crafted with love.
Ingredients:
As we set out on this delightful journey of creating our Garlic Herb Dutch Oven Bread Recipe You’ll Love Today!, let’s take a moment to appreciate each ingredient we’ll be using. Each one plays an integral role in bringing our vision to life.
- 3 cups all-purpose flour. Flour is the backbone of our bread—it provides structure and stability as we mix our ingredients together. When selecting flour, look for high-quality all-purpose varieties that have enough protein content (around 10-12%) to create gluten, which gives our bread its desirable chewiness. If you’re feeling adventurous, consider experimenting with whole wheat flour or even mixing in some spelt flour for added depth and nutrition. Remember, sifting your flour can also ensure lightness in your dough!
- 1 1/2 teaspoons salt. Salt is absolutely paramount in bread-making as it enhances flavor while controlling yeast activity during fermentation. It acts like a conductor in an orchestra—balancing all the other elements harmoniously together. Always opt for fine sea salt over table salt because it dissolves easily and integrates seamlessly into your dough. Don’t skip this step; too little salt can lead to bland bread, while too much can hinder yeast growth!
- 1/2 teaspoon instant yeast. Instant yeast is what brings our dough to life! It works quickly and doesn’t require proofing like active dry yeast does, which means we can dive right into mixing our ingredients without waiting around. For best results, store your yeast in an airtight container in the fridge or freezer if you don’t use it often; this keeps it fresh and potent so that every loaf rises beautifully.
- 1 1/2 cups warm water (about 100°F/38°C). Water is essential—not just as a binding agent but also as a means to activate our yeast! The warmth helps awaken those little granules from their slumber so they can work their magic during fermentation. Be careful not to use water that’s too hot; scorching temperatures can kill the yeast entirely—a true tragedy when all you want is golden-brown bliss.
- 4 cloves garlic, minced. Ahh, garlic—the aromatic star of our show! Its pungent aroma transforms into sweet nuttiness as it bakes within the dough, infusing each slice with an utterly intoxicating essence that’s simply irresistible. When mincing garlic, aim for small pieces so that its flavor distributes evenly throughout the loaf; larger chunks may burn during baking!
- 2 tablespoons fresh herbs (such as rosemary and thyme), chopped. Fresh herbs are like nature’s confetti—they bring vibrancy and brightness to our bread! Rosemary adds an earthy depth while thyme contributes warmth—a perfect marriage of flavors that elevates our humble loaf into something extraordinary. Feel free to experiment with other herbs based on what you have on hand; basil or oregano could also provide delightful surprises!
- 1 tablespoon olive oil. Finally, olive oil brings richness and moisture to our dough while enhancing its texture as well as flavor profile! Use extra virgin olive oil if possible; its robust taste adds complexity that’ll make your taste buds sing! Plus, adding oil helps create that glorious crust we all crave when breaking into freshly baked bread.
Equipment You’ll Need:
Before we dive headfirst into creating this lovely loaf of Garlic Herb Dutch Oven Bread Recipe You’ll Love Today!, let’s talk about some essential tools that will make your baking experience smoother and more enjoyable.
- A large mixing bowl – This is where the magic begins! A wide bowl allows enough space for mixing without spilling over—crucial when you’re incorporating water into dry ingredients. Choose one made from glass or stainless steel so that you can easily monitor your dough’s progress.
- Plastic wrap – An unsung hero in most kitchens! Covering the bowl with plastic wrap traps moisture within while allowing the dough to rise beautifully during fermentation overnight (or longer!). Make sure it’s tightly sealed against any drafts so your dough feels cozy as it rests.
- Dutch oven – The star player in this recipe! A heavy-duty cast iron Dutch oven retains heat exceptionally well and creates steam during baking—resulting in that coveted crusty exterior we all adore while keeping the inside soft and fluffy. If you don’t have one at hand yet—or if cooking multiple loaves at once—don’t worry; any oven-safe pot with a lid will do just fine!
- Parchment paper – This handy tool serves two purposes: preventing sticking when transferring dough into the hot pot and making cleanup a breeze afterward! Simply cut out a circle or strip large enough to line the bottom of your Dutch oven before placing your shaped loaf inside.
With these tools at your side, you’re ready to embark on this delightful baking escapade together! Now let’s get started on preparing our Garlic Herb Dutch Oven Bread!
Preparing the Garlic Herb Dutch Oven Bread Recipe You’ll Love Today!
Step 1: Mixing Our Dough
First things first—let’s combine those dry ingredients! In your large mixing bowl, whisk together 3 cups of all-purpose flour along with 1 1/2 teaspoons salt and 1/2 teaspoon instant yeast until everything is well integrated—a uniform base ensures proper fermentation later on! Afterward comes the exciting part: pour in 1 1/2 cups of warm water along with those fragrant additions: minced garlic and chopped fresh herbs like rosemary or thyme (don’t skimp here!). Using a sturdy spatula or wooden spoon, gently stir until no dry flour remains visible—a shaggy mass will form but fret not—it gets better from here!
Step 2: Letting It Rise
Now comes perhaps one of my favorite moments—the waiting game! Once everything is combined nicely (and trust me on this—you won’t be able to resist snatching tastes along the way), cover your bowl tightly with plastic wrap before placing it somewhere warm yet draft-free for anywhere between 12-18 hours at room temperature—yes really! This long fermentation allows flavors develop gradually while producing gluten strands needed for structure later on down the line; patience truly pays off here.
Step 3: Preheating Your Oven
After what feels like an eternity (though I promise it’s well worth it!), preheat your oven up to 450°F (230°C). While that’s heating up beautifully—and oh boy does anticipation build—take out your trusty Dutch oven from its cozy home inside there too; we’re about ready for action here soon enough! Just remember: safety first when handling hot pots so use thick oven mitts whenever necessary!
Step 4: Shaping Your Loaf
Once preheated perfectly (you’ll notice heat radiating when opening), carefully remove that sizzling pot from inside using those mitts—it should feel warm but manageable now—and add about 1 tablespoon olive oil right onto its bottom before swirling around gently until coated evenly across surface area—that’s crucial because nobody wants their stunning creation stuck come bake time later on!
Now lay out some flour onto clean countertop or board surface area before transferring dough from bowl onto floured surface gently—we’ll shape this beauty next into rounded ball form by folding edges inward toward center repeatedly until smooth surface forms nicely underneath fingers—that final touch elevates presentation significantly once baked later too!
Stay tuned—I’m excited to guide you through every step forward after such wonderful progress made already!
Final Touches – The Celebration of Your Garlic Herb Dutch Oven Bread Recipe You’ll Love Today!
Step 9: Cooling & Slicing – The Anticipation Builds
Ahh, here comes perhaps one of the most challenging steps—waiting for your glorious creation to cool down just enough before slicing into it! I know how tempting it can be; however, giving your bread time allows its structure to set properly. If you slice too soon, all those beautiful air pockets can collapse under pressure—what heartbreak! So I encourage you not to rush this step; let it rest on that wire rack for at least 30 minutes before reaching for your knife.
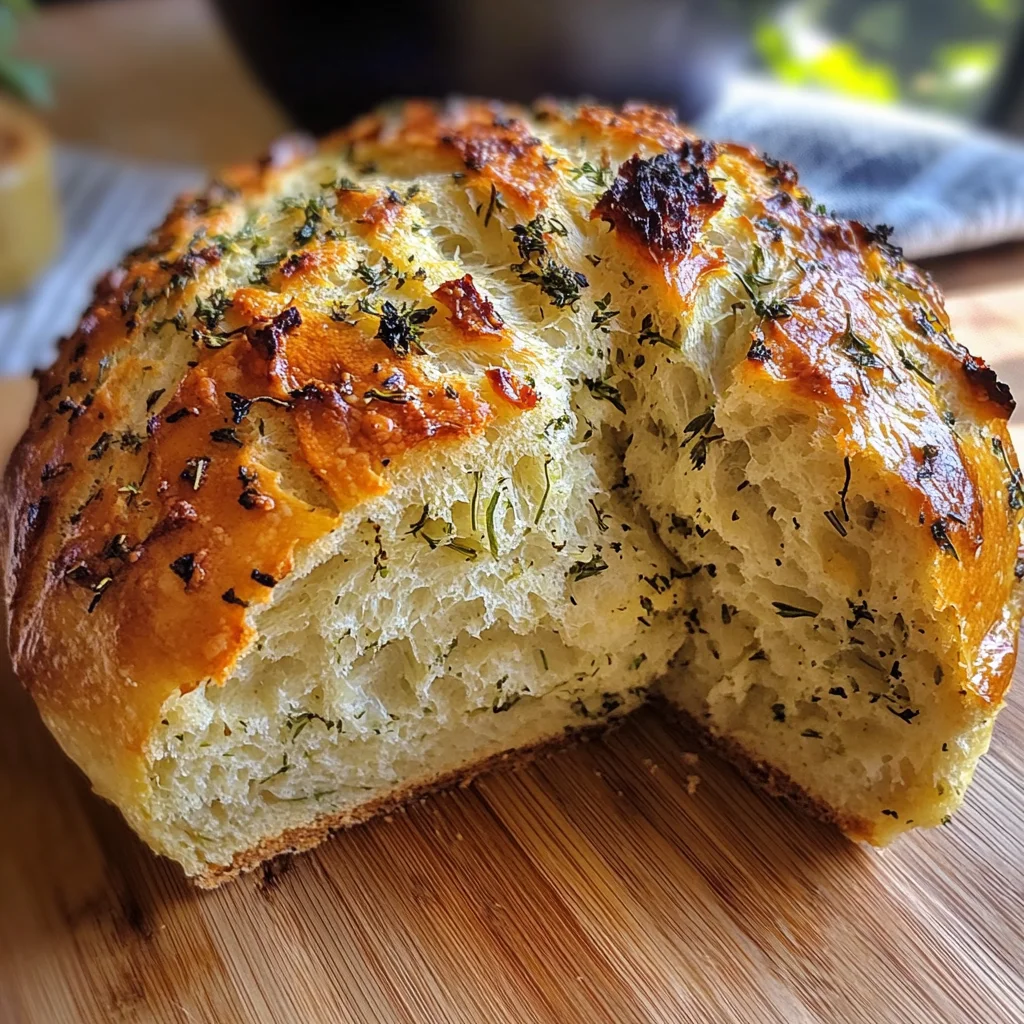
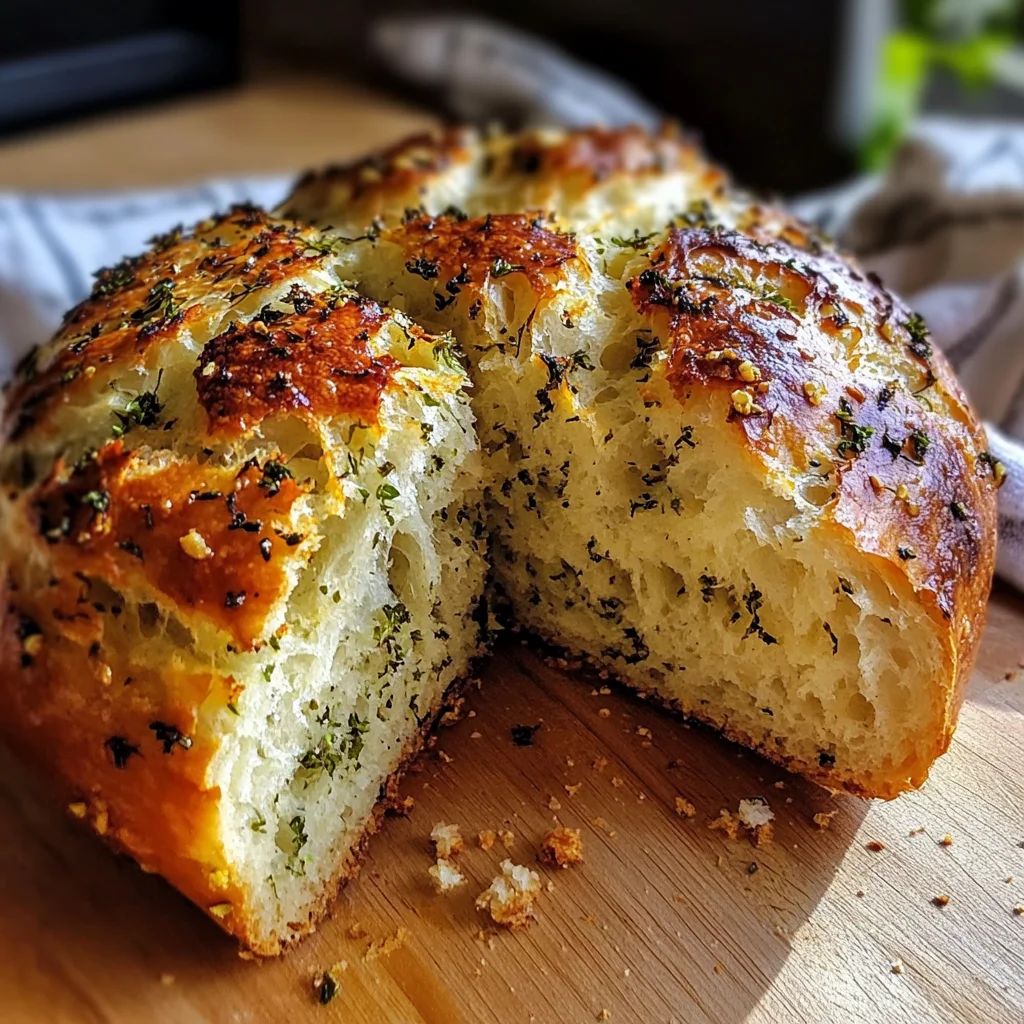
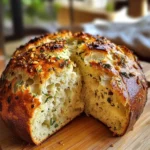
Once cooled slightly and ready for slicing—you’ll notice how easily your knife glides through its crusty exterior revealing tender insides dotted with bits of garlic and herbs throughout—a true testament to all those wonderful flavors mingling together during baking. Rejoice in each bite knowing you’ve crafted something simply divine from scratch right in your own kitchen!
As you enjoy this Garlic Herb Dutch Oven Bread Recipe You’ll Love Today!, consider spreading some whipped vegan butter or dipping pieces into olive oil infused with fresh herbs or balsamic vinegar—each option enhances those delightful garlic flavors even further.
So go ahead—and share slices with friends or family—or keep them all for yourself (I won’t judge!). This recipe isn’t just about making bread; it’s about savoring moments filled with warmth, laughter over shared meals, and joy discovered in each homemade bite!
Storage and Enjoyment Tips for Your Garlic Herb Dutch Oven Bread Recipe You’ll Love Today!
Now that you’ve crafted this tantalizing loaf of garlic herb goodness, I can almost hear the crispy crust crackling as you slice into it. The aroma wafting through your kitchen is simply irresistible, isn’t it? But what happens when you have leftovers—or want to savor that delightful flavor later? Let me assure you, storing your Garlic Herb Dutch Oven Bread doesn’t mean sacrificing its heartwarming essence. Proper storage will keep those flavors intact and allow you to enjoy your creation long after it’s out of the oven.
Storing Leftover Garlic Herb Dutch Oven Bread Recipe You’ll Love Today!
To maintain the integrity of this beautiful bread, I suggest wrapping it in a clean kitchen towel and placing it in an airtight container or a resealable plastic bag. This method allows the bread to breathe while keeping its moisture balanced, which is absolutely paramount for retaining that soft, fluffy interior while preventing it from becoming too hard or stale. You can expect your Garlic Herb Dutch Oven Bread to stay fresh for about 3-4 days at room temperature—trust me, it’ll be hard to resist finishing it sooner! If you’re worried about it losing its delightful texture over time, here’s a pro tip: slice your loaf before storing, and place a piece of bread (a simple sandwich loaf works great) in the container with it. This little trick keeps things moist and delicious! When you’re ready to enjoy another slice, a quick reheat in the oven at 350°F (175°C) for about 5-10 minutes will revive that enticing crust and warm aroma.
Freezing Garlic Herb Dutch Oven Bread for Later
If you find yourself with more than you can eat in one sitting—or if you simply want to plan ahead—freezing is an excellent option! To freeze your garlic herb masterpiece, ensure it’s completely cooled before wrapping it tightly in plastic wrap and then aluminum foil for extra protection against freezer burn. This method helps lock in all that lovely flavor while keeping your bread safe from the harsh cold. You can store it in the freezer for up to three months; just imagine pulling out a slice of homemade goodness on a chilly day! When you’re ready to use it, there’s no need for thawing—simply pop your frozen bread into a preheated oven at 375°F (190°C) until warmed through and crispy again. It’s such a convenient way to have freshly baked bread on hand whenever those carb cravings strike!
Garlic Herb Dutch Oven Bread Recipe You’ll Love Today!
Experience the joy of baking with this Garlic Herb Dutch Oven Bread, a rustic loaf that combines the fragrant notes of garlic and fresh herbs to create a comforting homemade treat. This easy-to-follow recipe is perfect for both novice bakers and seasoned pros, requiring minimal hands-on time while delivering a deliciously airy crumb and a crusty exterior. Imagine pulling a warm, golden loaf from your oven, its enticing aroma filling your kitchen, inviting you to slice into it and enjoy with olive oil or your favorite spread. Perfect as a side dish for hearty soups or as a delightful centerpiece at gatherings, this bread is sure to impress every time. Join me on this culinary adventure and savor the warmth of homemade goodness in each bite!
- Prep Time: 10 minutes
- Cook Time: 50 minutes
- Total Time: 1 hour
- Yield: Approximately 12 servings 1x
- Category: Bread
- Method: Baking
- Cuisine: American
Ingredients
- 3 cups all-purpose flour
- 1 1/2 teaspoons salt
- 1/2 teaspoon instant yeast
- 1 1/2 cups warm water (about 100°F/38°C)
- 4 cloves garlic, minced
- 2 tablespoons fresh herbs (such as rosemary and thyme), chopped
- 1 tablespoon olive oil
Instructions
- In a large mixing bowl, whisk together flour, salt, and instant yeast until well combined.
- Pour in warm water, minced garlic, and chopped herbs. Stir gently until no dry flour remains.
- Cover the bowl tightly with plastic wrap and let the dough rise in a warm place for 12-18 hours.
- Preheat your oven to 450°F (230°C) with the Dutch oven inside.
- Once preheated, carefully coat the bottom of the hot Dutch oven with olive oil.
- Transfer the dough onto a floured surface and shape it into a ball.
- Place the dough into the hot pot, cover it with the lid, and bake for 30 minutes.
- Remove the lid and bake for an additional 15-20 minutes until golden brown.
- Let cool on a wire rack before slicing.
Nutrition
- Serving Size: 1 slice (60g)
- Calories: 155
- Sugar: 0g
- Sodium: 290mg
- Fat: 3g
- Saturated Fat: 0.5g
- Unsaturated Fat: 2g
- Trans Fat: 0g
- Carbohydrates: 29g
- Fiber: 1g
- Protein: 5g
- Cholesterol: 0mg