Summer Solstice Sun Cookies with Lemon Curd
As the warm sun bathes everything in golden light and laughter fills the air, there’s something overwhelmingly magical about summer days that beckons us to celebrate. It’s a season of joy, a time for gathering with loved ones and sharing delightful treats that reflect the vibrancy around us. Enter my Summer Solstice Sun Cookies with Lemon Curd—a recipe that is so much more than just a sweet indulgence; it’s a heartfelt tribute to those sun-soaked afternoons where everything feels alive. Imagine biting into a buttery sugar cookie, perfectly crisp yet tender, encasing a bright, tangy lemon curd that dances on your taste buds like rays of sunshine. Every bite is an experience—an embrace of warmth and sweetness that transports you to carefree days spent outdoors.
Let me take you on a journey through this recipe, which is not just about baking but creating something extraordinary together. These cookies are perfect for any summertime gathering—be it a picnic in the park or a casual get-together with friends. They are delightfully simple yet stunningly beautiful, making them an ideal treat to share and savor. Each step is infused with love and intention, as we weave together ingredients that celebrate the essence of summer. I promise you, once you’ve made these Summer Solstice Sun Cookies with Lemon Curd, they will become your go-to recipe for every sunny occasion!
Summer Solstice Sun Cookies with Lemon Curd: A Taste of Summer Happiness
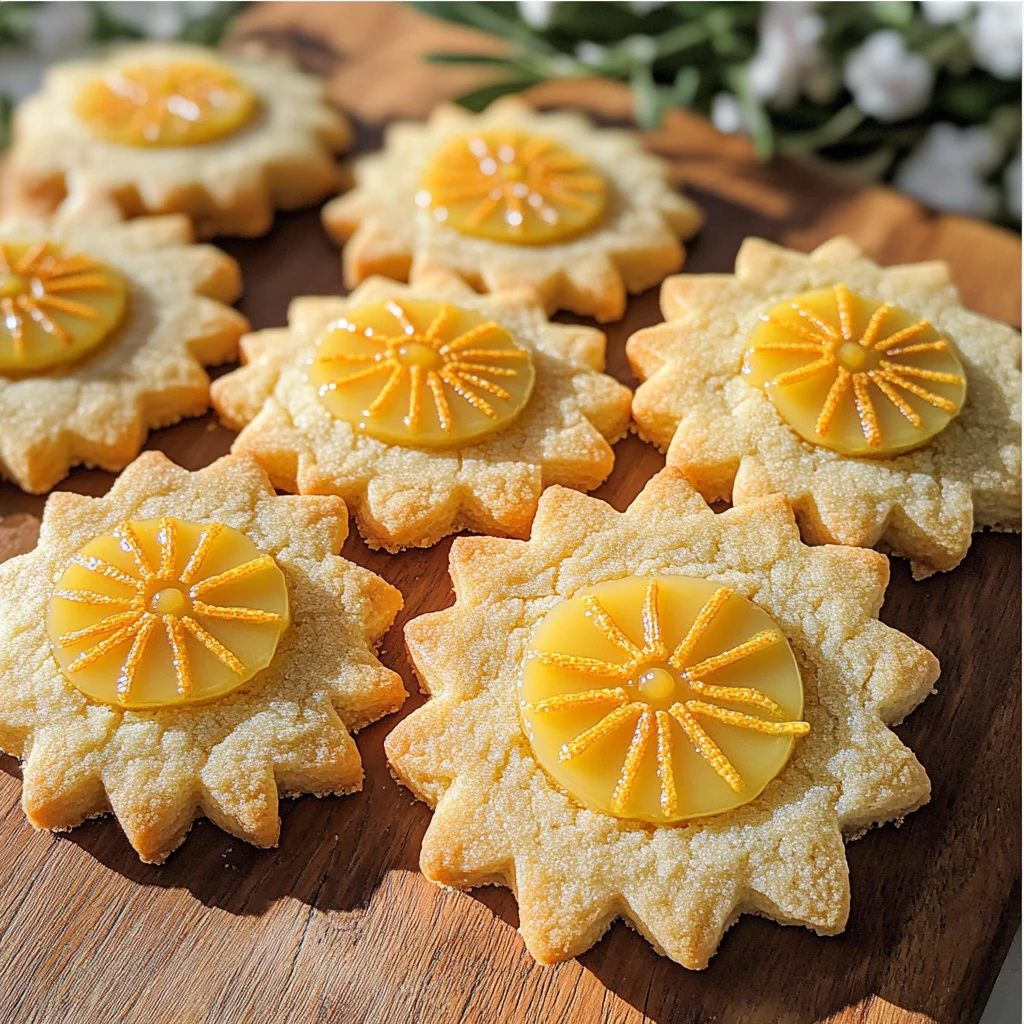
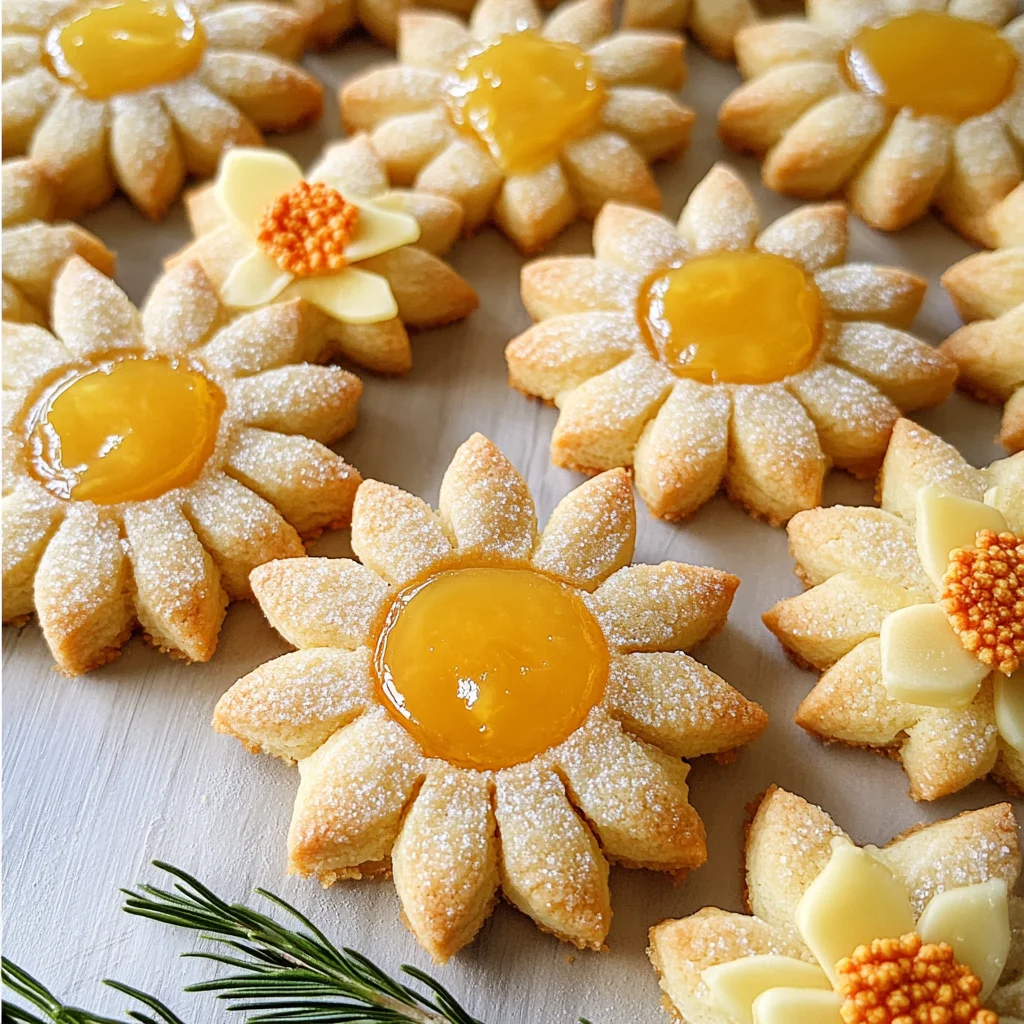
These cookies are like little rays of sunshine on your dessert table! With their cheerful golden color and zesty lemon filling, they embody everything wonderful about summer. Soft yet sturdy enough to hold their shape, these cookies bring together the classic charm of sugar cookies with an unexpected burst of refreshing flavor from homemade lemon curd. Let’s embark on this delightful culinary adventure together!
Ingredients:
Embarking on this culinary journey requires some thoughtful selections from your pantry. Each ingredient plays a vital role in bringing our Summer Solstice Sun Cookies to life, so let’s take a moment to appreciate them.
- 3 cups all-purpose flour: This staple ingredient serves as the foundation for our cookies. Flour provides structure and stability, helping our cookies maintain their form while still achieving that soft texture we crave. When choosing flour, opt for a high-quality all-purpose variety; it should feel smooth and fine to the touch. Sifting it before use helps aerate the flour and removes any lumps, ensuring even distribution in our dough.
- 1/2 teaspoon salt: While it may seem like such a small amount, salt is absolutely paramount in enhancing flavors throughout our cookies. It balances sweetness and brings out the natural flavors of other ingredients like butter and sugar. When selecting salt, I recommend fine sea salt or kosher salt for this recipe; both dissolve easily into the dough without leaving gritty bits behind.
- 1/2 teaspoon baking powder: This leavening agent adds essential lift to our cookies as they bake, ensuring they rise beautifully without becoming dense or flat. Baking powder works by releasing carbon dioxide when heated, creating those lovely air pockets in each cookie bite. Always check the expiration date on your baking powder; freshness guarantees optimal results.
- 1 cup (2 sticks or 226g) unsalted butter at room temperature: The star of our cookie dough! Creaming butter properly with sugar creates an airy texture that helps achieve those perfectly tender cookies we desire. It’s crucial that your butter is at room temperature—if it’s too cold, it won’t incorporate well; too warm can lead to spreading during baking. Look for high-quality butter; European-style varieties often contain more fat for richer flavor.
- 1 cup granulated sugar: Sugar isn’t just about sweetness; it also contributes to texture and moisture retention in baked goods. The graininess of granulated sugar helps create tiny air pockets when creamed with butter—this process leads to fluffy cookies! Choose organic cane sugar if possible for a more nuanced flavor profile that pairs beautifully with our lemon curd.
- 1 large egg: Eggs play multiple roles in our cookie dough—they bind ingredients together while adding moisture and richness to our final product. For best results, ensure your egg is at room temperature before incorporating it into the mixture; this allows it to blend seamlessly into the batter.
- 1 tablespoon vanilla extract: This liquid gold enhances every single flavor in our cookies while adding an aromatic depth that makes them utterly intoxicating! Opt for pure vanilla extract rather than imitation for its superior quality and taste—trust me on this one! You can even make your own vanilla extract by steeping vanilla beans in vodka (or another alcohol-free base) if you’re feeling adventurous!
- Lemon curd (about 6 oz): The crowning jewel of these cookies! This vibrant filling adds not only zestiness but also moisture that complements the sugary exterior beautifully. You can either purchase pre-made lemon curd from quality brands or make your own at home—it’s surprisingly easy! Just remember to adjust how much you dollop based on personal preference—the more you add, the more delightful citrus explosion awaits!
Equipment You’ll Need:
Having the right tools makes this baking experience smoother and more enjoyable! While these items may not be ingredients, they act as essential partners in crafting something truly wonderful.
- Mixing bowls: A good set of mixing bowls allows you to perform various tasks efficiently—from creaming butter and sugar to whisking eggs or combining dry ingredients. Opt for glass or stainless steel bowls as they’re easy to clean and won’t retain odors or stains.
- Stand mixer or hand mixer: Whether you choose a stand mixer or a handheld version depends on your preference—both will help achieve fluffy textures when creaming butter and sugar together effectively! If using a stand mixer, remember to scrape down the sides occasionally for even mixing.
- Rolling pin: This tool is essential for flattening out your cookie dough evenly; using one will give you perfectly shaped cookies every time! If you don’t have a traditional rolling pin handy, even a clean wine bottle can work in a pinch!
- Cookie cutter: A simple round cookie cutter will do wonders here! Feel free to choose any shape that resonates with your summer spirit—stars or suns would be particularly fitting!
- Parchment paper: Lining your baking sheets with parchment paper ensures easy removal after baking while preventing burnt bottoms—a non-negotiable step that makes clean-up effortless!
Now that we’ve gathered all our ingredients and tools together let’s dive into preparing these delightful Summer Solstice Sun Cookies with Lemon Curd!
Step 1: Preheat Your Oven – Setting The Stage
Preheating your oven is one of those steps we often overlook because it feels so simple yet sets up everything else beautifully! Start by preheating your oven to 375 degrees Fahrenheit—this temperature allows those sugars within our dough caramelize nicely while ensuring proper rising from the baking powder we’ve added earlier. While waiting for this magic number to be reached (and trust me—don’t rush!), take some time exploring scents wafting through your kitchen as other preparations unfold!
Step 2: Sift Together Dry Ingredients
Next up is sifting (or whisking) together the flour, salt, and baking powder—a step that’s absolutely critical in ensuring consistency throughout each cookie batch we create today! Place these dry ingredients into one bowl rather than mixing them directly into wet ones later; doing so promotes even distribution across every bite instead of clumps forming unexpectedly during baking later down the line! As you sift away any lumps—it might feel meditative & satisfying—you’ll find yourself enjoying this quiet moment before diving deeper into magic ahead.
Step 3: Cream Butter And Sugar – The Heart Of The Dough
Now comes one of my favorite parts—the creaming process where we combine softened butter with granulated sugar until light & fluffy! Using either stand mixer fitted paddle attachment (my go-to!) or handheld beaters makes quick work here—it should take around 3–5 minutes depending on speed settings chosen/used so don’t rush this step either please—it’s essential for aeration which leads perfectly textured end results once baked off properly later on!
Step 4: Whisk Egg And Vanilla Together
In another bowl (see how useful having multiple bowls was?), whisk together one large egg alongside delightful splash vanilla extract until well blended—that moment when those two come together feels joyous doesn’t it? Add this vibrant mix slowly into creamed butter/sugar mix mentioned earlier while continuing mixed gently until fully incorporated—as colors meld harmoniously—you’ll sense something extraordinary happening right before eyes…
Stay tuned because we’ve only just begun crafting these delicious cookies filled with sunshine and happiness!
Step 5: Combining the Elements for a Perfect Dough
Now that you have your fluffy butter and sugar mixture ready, it’s time to bring everything together in a delightful dance. Start by slowly incorporating the egg and vanilla mixture into the creamed butter and sugar—this step is absolutely crucial! Why, you ask? Well, the egg acts as a binding agent that helps create a cohesive dough while the vanilla infuses it with warmth and depth, transforming your cookies from simple sweets into little bites of happiness. I promise you, the aroma of vanilla wafting through your kitchen will make your heart sing!
As you gradually add in the dry flour mixture, do so about one cup at a time; this not only allows for even incorporation but also prevents any flour clouds from forming. Be sure to scrape down the sides of your mixing bowl every so often—this small act ensures that every bit of flour is whisked into your cookie dough. The texture should be soft yet slightly sticky, like a fresh cloud just waiting to be shaped into sunshine! If it feels too sticky, don’t fret; a light dusting of flour on your work surface will help when it comes to rolling out your dough. Remember, patience is key here; rushing can lead to uneven consistency and texture.
Step 6: Rolling Out Your Dough with Love
Once your delightful dough is ready, it’s time for the fun part—rolling it out! Gently divide the dough in half; this makes it much easier to work with and gives you more control over maintaining an even thickness. Using a lightly floured work surface (you don’t want to go overboard with flour as it can affect your cookie’s texture), roll out one portion of the dough until it reaches about 1/3 to 1/2 inch thick. This thickness is essential because it allows for both structure and softness once baked; too thin and they might become crispier than intended, while too thick could lead to an undercooked center.
If you find that your dough is sticking as you roll, don’t hesitate to place it between two pieces of parchment paper. This technique not only prevents sticking but also saves you from excessive flour on your rolling pin or surface. Trust me on this—it’s a game changer! As you’re rolling, visualize how each cookie will look once they’re baked; picture them glistening with their sunny lemon curd center peeking through. Once rolled out evenly, use your favorite cookie cutter to create those beautiful sun-shaped cookies—each one a little piece of summer waiting to shine!
Step 7: Preparing for Lemon Curd Magic
With all your sun-shaped cookies cut out and arranged neatly on a parchment-lined baking sheet (which is absolutely paramount for preventing those bottoms from over-browning!), it’s time to create that signature element—the luscious lemon curd center. Now, here’s where we get creative: using a measuring cup or spoon, gently press down into the middle of each cookie. You’re not looking to create a hole but rather a slight indentation that will cradle the lemon curd beautifully during baking.
This step may seem simple but trust me—it’s non-negotiable! The indentation allows the curd to sit snugly in each cookie rather than spilling over during baking. You want that perfect balance where each bite offers an explosion of tangy sweetness without compromising on texture. Once you’ve made those lovely little nests in each cookie, it’s time for the real star—the lemon curd! A dollop in each should suffice; think about how much sunshine you want in each bite! I recommend smoothing it out ever so lightly so that when these cookies bake, they hold their beautiful shape while inviting everyone who walks by with their intoxicating aroma.
Step 8: Baking Your Perfect Summer Solstice Sun Cookies
Now comes the moment we’ve all been waiting for—the baking! Preheat your oven to 375 degrees Fahrenheit if you haven’t already done so because getting this temperature right is vital for achieving those perfectly golden edges while keeping the centers soft and gooey with lemon goodness. Place your tray in the middle rack—this positioning aids even heat distribution which is crucial for uniform baking.
Set your timer for 10-11 minutes but keep an eye on them during those last few moments! You’ll know they’re ready when they appear slightly puffed up and just beginning to turn golden around the edges—a visual cue that signifies their transformation from raw dough into delightful cookies ready to be devoured. The smell wafting through your kitchen will be utterly intoxicating—like summer itself was baked right into those treats!
Once baked, remove them from the oven and immediately transfer them onto a cooling rack using a spatula; this step helps maintain their shape since cookies can continue cooking on the hot pan if left too long. Let them cool completely—yes, I know it’s tempting to dive in right away—but allowing at least 30 minutes will ensure that both flavor and texture reach their full potential. The cooling process solidifies everything beautifully while letting those flavors meld together harmoniously.
Conclusion:
As we wrap up this joyous journey through crafting your very own Summer Solstice Sun Cookies with Lemon Curd, I hope you’re feeling as exhilarated as I am! There’s something truly special about this recipe—the way the buttery sweetness of the cookie embraces that bright lemon curd creates an unforgettable symphony of flavors that captures the essence of summer sunshine. Each bite is not just about taste; it’s about relishing moments spent in warm company and celebrating life’s little pleasures. I promise you; these cookies are more than just dessert—they’re an experience filled with love and laughter.
This recipe is an absolute must-try because it invites everyone into the kitchen to create something beautiful together. Whether you’re preparing these delightful treats for a picnic under the sun or a cozy evening gathering with friends, they bring warmth and joy to every occasion. Imagine pulling them from the oven—the soft golden edges hugging that luscious lemon center—and watching faces light up as they take their first bite; it’s utterly intoxicating! Plus, they’re versatile enough to impress guests at a summer barbecue or make any afternoon feel extra special.
When it comes to serving suggestions, think about pairing these lovely cookies with a refreshing iced tea or lemonade on hot days—a match made in heaven! Alternatively, imagine savoring one alongside your favorite coffee for a delightful afternoon pick-me-up; it’s perfect for indulging during quiet moments spent leafing through a book. For those who truly want to elevate their experience further, consider drizzling some homemade coconut cream on top for an exquisite tropical twist that complements those sunny flavors beautifully.
Feeling adventurous? This recipe is wonderfully adaptable! If you’d like to experiment further, why not try swapping out the lemon curd for other fruity options like raspberry or passion fruit? You could even fold in some finely chopped nuts or zest from other citrus fruits into the dough itself—each variation brings its own unique charm while enhancing that sense of creativity and fun in baking. So go ahead—give this recipe a whirl and share your experiences! I can’t wait to hear how these cherished summer solstice cookies brighten your days.
Summer Solstice Sun Cookies with Lemon Curd

Brighten your summer days with delicious Summer Solstice Sun Cookies with Lemon Curd! Bake now and enjoy this sunny treat today!
- Prep Time: 20 minutes
- Cook Time: 11 minutes
- Total Time: 31 minutes
- Yield: Approximately 24 servings 1x
- Category: Dessert
- Method: Baking
- Cuisine: American
Ingredients
- 3 cups all-purpose flour
- 1/2 teaspoon salt
- 1/2 teaspoon baking powder
- 1 cup unsalted butter (at room temperature)
- 1 cup granulated sugar
- 1 large egg
- 1 tablespoon vanilla extract
- About 6 oz lemon curd
Instructions
- Preheat oven to 375°F (190°C).
- Sift together flour, salt, and baking powder in a bowl.
- In another bowl, cream together butter and sugar until light and fluffy.
- Whisk the egg and vanilla together; slowly incorporate into the butter mixture.
- Gradually mix in dry ingredients until combined.
- Roll out dough to about 1/3 inch thickness and cut into shapes.
- Place on parchment-lined baking sheets and create an indentation in the center of each cookie.
- Fill each indentation with lemon curd.
- Bake for 10-11 minutes until edges are golden.
- Cool on a wire rack before serving.
Nutrition
- Serving Size: 1 cookie (30g)
- Calories: 130
- Sugar: 8g
- Sodium: 50mg
- Fat: 7g
- Saturated Fat: 4g
- Unsaturated Fat: 2g
- Trans Fat: 0g
- Carbohydrates: 17g
- Fiber: <1g
- Protein: 2g
- Cholesterol: 15mg