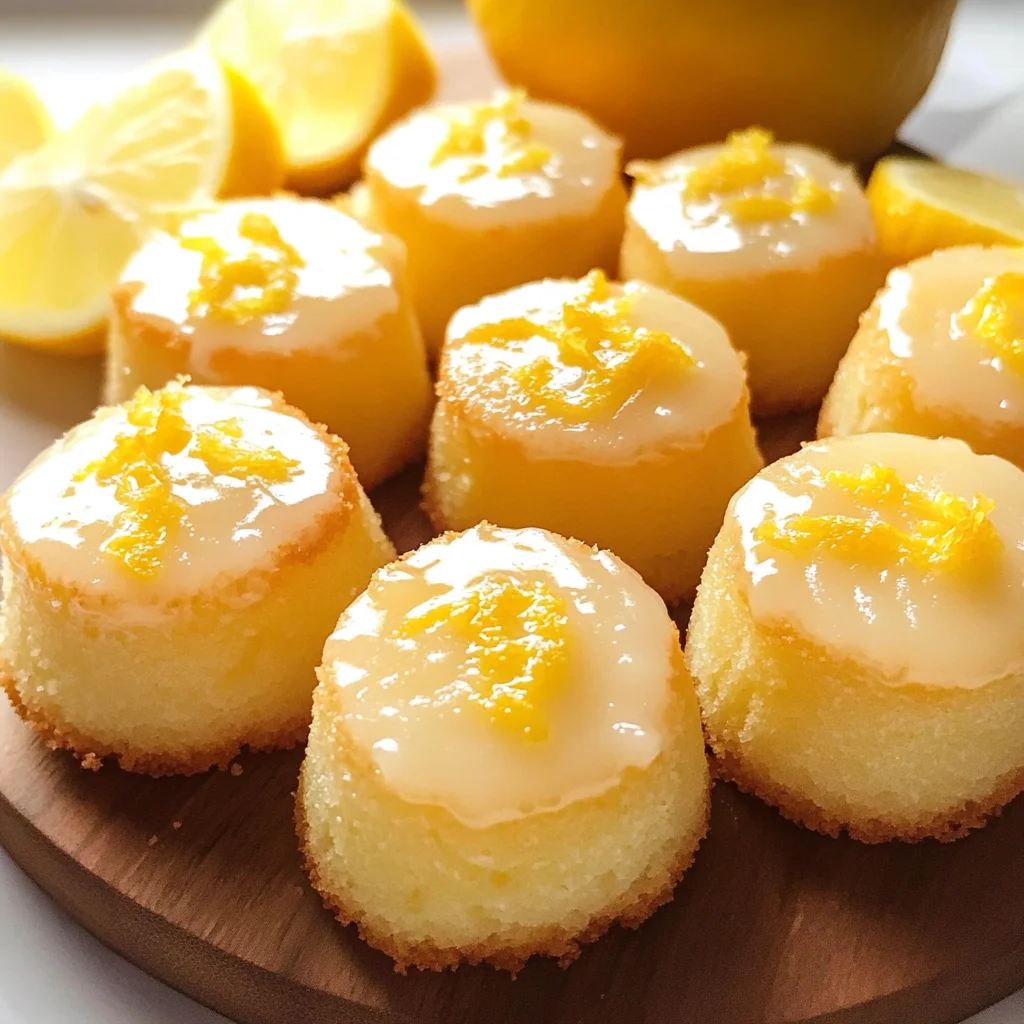
MINI LEMON DROP CAKES
I’m so thrilled you’re here, my friend! Today, we’re diving headfirst into a delightful adventure that will awaken your taste buds and fill your kitchen with the aromatic joy of lemons. Have you ever tasted something so bright and refreshing that it felt like sunshine on a rainy day? That’s exactly what our MINI LEMON DROP CAKES deliver—a burst of zesty flavor wrapped in a soft, tender crumb that melts in your mouth. These little gems are more than just desserts; they’re miniature moments of happiness, perfect for sharing with loved ones or indulging in all by yourself when you need a sweet pick-me-up.
As I whisk together the ingredients for these charming cakes, I can’t help but reminisce about the times spent in my grandmother’s kitchen. The air would be filled with her laughter and the unmistakable scent of fresh lemon zest. She believed that cooking was an expression of love, and I’ve carried that philosophy into every recipe I create. Trust me when I say, these MINI LEMON DROP CAKES are bound to become a cherished addition to your dessert repertoire. Whether you serve them at a gathering, give them as gifts, or simply enjoy them with a cup of tea on your porch, they radiate warmth and joy.
MINI LEMON DROP CAKES: Tiny Treats of Sunshine
If you’re craving something sweet yet refreshingly tangy, look no further! These mini lemon drop cakes are not just easy to make but also incredibly satisfying to eat. With their light texture and luscious glaze, they provide the perfect balance of sweetness and tartness—truly an irresistible combination for any lemon lover.
Ingredients:
As we embark on this culinary journey together, let’s gather our ingredients—each one plays a vital role in creating these delightful little cakes.
- 1 cup all-purpose flour. The backbone of our cake! All-purpose flour provides the right structure while keeping our mini treats light and fluffy. When selecting flour, look for one that feels soft to the touch and has a fine texture; this will ensure our cakes rise beautifully without being dense. If you want to experiment with gluten-free options later on, almond or oat flour could be fun alternatives!
- 1 cup sugar. This ingredient is absolutely paramount! Sugar not only sweetens our cakes but also helps create that lovely golden crust as it caramelizes during baking. While granulated sugar works perfectly here, feel free to explore coconut sugar if you’re looking for a more natural option—just know it may add a slight molasses flavor.
- ½ tsp salt. It might seem small, but don’t underestimate salt’s power! Salt enhances the sweetness and balances flavors in desserts. Without it, your cakes might taste flat or one-dimensional. Use fine sea salt for an even distribution throughout the batter.
- ½ tsp baking soda. This is our leavening agent; it’s responsible for making those mini cakes rise beautifully! When combined with acidic ingredients like sour cream or lemon juice in our recipe, it creates carbon dioxide bubbles that give our cakes their airy texture.
- ½ cup butter. Liquid gold! Butter is crucial for giving our MINI LEMON DROP CAKES their rich flavor and moist texture. Be sure to use unsalted butter so you can control the amount of salt in the recipe better. When melting it down in a saucepan, let its warm aroma fill your kitchen—it’s intoxicating!
- ½ cup water. This might seem like an unusual addition for a cake batter but trust me—you’ll love what it does! Adding hot water helps meld together all the ingredients smoothly and contributes to moisture without making the batter too heavy.
- ¼ cup sour cream. Ahh, sour cream adds just the right amount of tanginess while keeping our cakes incredibly moist! Its acidity also reacts with baking soda to create even more lift—so don’t skip this step if you want those airy textures!
- 1 egg. Eggs bind everything together while adding richness and stability to our cake structure as they bake up beautifully firm yet tender at the same time.
- 1 tbsp lemon zest. This ingredient is where magic happens—it’s like capturing sunshine in tiny flecks! Zest contains essential oils that provide an intense lemony aroma and flavor without adding extra liquid like juice does.
- 1 tbsp lemon juice. Freshly squeezed if possible! The acid sharpens all those flavors beautifully while enhancing the overall brightness of these mini treats.
Now let’s sweeten things up even more with our glaze!
- 1 ½ cups powdered sugar. This delicate sugar creates a smooth glaze that hardens perfectly over each cake while providing delightful sweetness without overwhelming flavors.
- 2 tbsp lemon juice. Just like before—this little splash adds zingy freshness that complements every bite beautifully!
- 2 tbsp milk. Milk helps achieve just the right consistency for dipping; feel free to adjust based on how thick or thin you’d like your glaze!
- 1 tsp lemon zest (again!). Because we can never have too much lemon flavor—this gives us vibrant bursts in every lick!
- 1 tbsp butter, melted—and yes again! A bit added into our glaze brings richness along with that beautiful sheen we all adore when looking at freshly glazed treats.
Equipment You’ll Need:
Before we dive into baking bliss, let’s talk about some essential tools that will make this process smoother than melted butter! Having the right equipment can transform cooking from a chore into an enjoyable experience filled with creativity and fun!
- Mini muffin tin – This tool is crucial because it shapes our tiny cakes perfectly! Each individual cavity ensures even baking while allowing for easy removal once they’re done cooling down—a chef’s best friend!
- Mixing bowls (various sizes) – You’ll need different bowls for combining dry ingredients separately from wet ones before bringing them together harmoniously later on—the foundation of successful baking lies in good mixing techniques!
- Electric mixer or whisk – While some enjoy using elbow grease with manual whisks (and I commend their dedication!), having an electric mixer makes quick work out of blending ingredients until smooth—a time-saver everyone appreciates!
- Spatula – To scrape down sides of bowls effortlessly while ensuring nothing goes waste—it’s vital for achieving even incorporation throughout all mixtures; plus they come in handy when transferring batters into muffin tins too.
Now we’re ready to create something truly extraordinary—the process awaits us next!
Preparing the MINI LEMON DROP CAKES
Step 1: Preheat Your Oven – Setting Up For Success
Let’s kick off this flavorful journey by preheating your oven to 325°F (163°C). This step sets everything into motion and ensures proper baking temperatures right from start to finish—trust me on this one! While we prepare our batter later on, allowing time for preheating guarantees those mini cakes rise uniformly without any surprises halfway through their transformation into golden perfection.
Step 2: Mixing Dry Ingredients – Creating Harmony
In a large mixing bowl (or stand mixer), combine your dry ingredients: 1 cup all-purpose flour, 1 cup sugar, ½ tsp salt, and ½ tsp baking soda using either whisk or spatula until well incorporated—about 30 seconds should suffice here! This process not only blends them evenly but also aerates flour which is crucial for lightness later down line during baking; consider it laying groundwork before introducing wet elements into mix!
Step 3: Melting Butter – Liquid Gold Awaits
Now grab that saucepan—we’re going to melt half a cup of butter over medium heat until bubbling gently away on stovetop; stir occasionally so nothing sticks or burns (nobody likes scorched bits!). Once fully melted (liquid gold!), add half-cup water directly then bring mixture back up temperature until boiling vigorously—that moment signifies readiness when poured over dry ingredients shortly after mixing phase complete!
Step 4: Bringing It All Together – Whisk Away Your Worries
Once bubbly goodness has erupted from pot onto dry mixture waiting patiently nearby? Time whip up magic using electric mixer set low speed first until blended just about combined nicely—don’t rush this step though because lumps may appear otherwise ruining consistency desired later on! Once everything looks homogenous enough? Increase speed gradually beating until smooth creamy batter emerges before adding remaining wet components: sour cream (¼ cup), one egg cracked open gently followed by zesty bursts from both tablespoons fresh juice + zest combined earlier too… ohhh heavenly smells wafting through kitchen already—can’t resist licking spoon now can we?
Now it’s time to prepare our muffin tin and get ready to bake these beauties… Stay tuned as we continue crafting delicious moments together!
Baking Your Perfect MINI LEMON DROP CAKES
Step 5: Whisk It All Together
Now that you’ve added the buttery mixture to your dry ingredients, it’s time to bring these flavors together in a harmonious blend. This step is all about mixing, and I can’t stress enough how crucial it is to do this gently! Using an electric mixer, start on low speed until everything is just combined. You want to avoid overmixing at this stage because that can lead to tough cakes instead of the tender, fluffy bites we’re aiming for. The heat from the melted butter aids in activating the baking soda, creating a lovely rise in your cakes. As you mix, watch as the batter transforms into a smooth, slightly glossy texture—this indicates that you’re on the right track. Once you reach this consistency, it’s time to add the rest of your wet ingredients.
Step 6: Brightening Up with Zest and Citrus
In this delightful moment, you’ll be incorporating sour cream, egg, lemon zest, and lemon juice into your batter. Each of these components plays a vital role in ensuring your mini lemon drop cakes are bursting with flavor and moisture. The sour cream adds a lovely richness that keeps your cakes tender while also enhancing their taste profile with its mild tanginess. When you crack the egg in, it’s not just about binding; it brings life and structure to your cakes. Then comes the star of our show—the lemon! The zest acts like tiny flavor bombs that explode with citrusy goodness as they bake, while the juice adds a refreshing tartness that balances out the sweetness perfectly. Beat this mixture until it’s completely smooth; you should feel a wave of excitement as you think about how utterly intoxicating these cakes will be once they’re baked!
Step 7: Prepping for Perfection
Next up is preparing your mini muffin tin—a small but essential step that ensures each cake bakes evenly and releases easily when it’s time to indulge. Generously grease each cavity with cooking spray or melted butter; trust me on this—it’s non-negotiable! If you skip this part, you might find yourself wrestling with stubborn little cakes that refuse to budge from their cozy muffin homes. Now comes the fun part: scoop the batter into each tin. I love using an ice cream scoop for this—it makes portioning so easy and ensures uniformity for each bite-sized treat. Fill them about two-thirds full; if you overfill them, you’ll end up with mini muffin tops that spill over—delicious but messy! Bake these in your preheated oven for about 10-15 minutes. Keep an eye on them towards the end; when they’re ready, a toothpick inserted into the center should come out clean or with just a few moist crumbs clinging to it.
Step 8: Cooling Off Before Glazing
Once those adorable little cakes are golden brown and calling your name, carefully remove them from the oven and let them cool in the pan for about five minutes before transferring them to a cooling rack. This resting period allows them to set properly without falling apart when they’re removed from their tins—trust me; no one wants crumbling cake on their hands! As they cool, you’ll notice they develop an even richer aroma—a warm citrus scent wafting through your kitchen is one of life’s simple pleasures! After their initial cooldown in the tin, gently transfer each cake to the rack where they’ll continue cooling until they reach room temperature. This step is important because glazing warm cakes can cause the glaze to melt away instead of creating that glossy finish we all adore.
Final Touches
Step 9: The Glorious Glaze
While those mini lemon drop cakes are cooling off beautifully, it’s time to prepare our glaze—a finishing touch that will elevate these little delights from great to truly extraordinary! In a mixing bowl, combine powdered sugar, lemon juice, lemon zest, milk, and melted butter. This mixture should be smooth yet thick enough to cling lovingly to each cake’s surface—think liquid gold! Pop it in the microwave for just 10-15 seconds if it feels too thick; you want it pourable but not too runny. Dipping each mini cake into this glaze is where things get exciting! Holding them upside down—yes really—dip only the bottom side into this sweet citrus concoction and let any excess drip off before placing them back onto the rack. This method ensures every bite has that delightful glaze without overwhelming sweetness—what a balance!
Step 10: The Wait (I Promise It’s Worth It!)
After dipping all your mini lemon drop cakes in glaze, now comes perhaps one of the hardest parts: waiting for that beautiful glaze to harden before serving. It might take around 20-30 minutes at room temperature but trust me on this—it’s absolutely worth it! As they sit there soaking up all those flavors and transforming into perfect little bites of bliss, take a moment to appreciate what you’ve created. The anticipation builds as you imagine taking that first bite; soft cake meets luscious glaze in an explosion of zesty delight! I promise you it’ll be worth every second spent waiting.
And there you have it—the magic of creating MINI LEMON DROP CAKES unfolds beautifully through patience and passion! With each step thoughtfully explained and immersed in love for cooking, I hope you’re feeling as excited as I am about indulging in these sweet treasures. Enjoy every mouthful knowing you’ve crafted something special from scratch just for yourself or those lucky enough to share them with you!
Storage and Enjoyment Tips for Your MINI LEMON DROP CAKES
Now that you’ve crafted these delightful mini lemon drop cakes, it’s time to embrace the joy of savoring them! The sweet, zesty aroma wafting through your kitchen is just a hint of the pleasure that awaits. These little bundles of sunshine are as perfect for an afternoon treat as they are for special occasions, and I can’t wait for you to share them with friends and family. But what happens if you have some delicious leftovers? Fear not, because I’ve got you covered with some fantastic storage tips to make sure every bite remains as delightful as the first!
Storing Leftover MINI LEMON DROP CAKES
To keep your mini lemon drop cakes in tip-top shape, you’ll want to store them in an airtight container. This prevents moisture loss and keeps those lovely cakes from drying out. If you’re like me and find it hard to resist a little sweetness at any hour, you’ll be relieved to know these treats can last up to a week when stored properly at room temperature. For those who wish to maintain their soft texture and scrumptious flavor over time, consider placing a slice of bread in the container with the cakes—this little trick helps retain moisture! Trust me; the cakes will still taste fresh and delightful even after a few days. When you’re ready to enjoy them again, simply let them sit at room temperature or pop them in the microwave for a few seconds for that warm, comforting experience.
Freezing MINI LEMON DROP CAKES for Later
If you find yourself with an abundance of these luscious treats—or just want to plan ahead—freezing is absolutely an option worth considering! To freeze your mini lemon drop cakes properly, ensure they’re completely cooled before wrapping each one individually in plastic wrap or placing them in a freezer-safe container. They’ll keep wonderfully frozen for about three months. When that inevitable craving strikes, simply pull one (or several) from the freezer and let them thaw at room temperature or warm them gently in the microwave. This makes having a sweet snack on hand so convenient! Plus, knowing you have this little treasure trove waiting for you adds an extra layer of excitement whenever you open your freezer door.
Isn’t it lovely how these storage methods allow you to enjoy these delightful treats at your leisure? Whether it’s sharing with loved ones right away or saving some for later indulgence, your mini lemon drop cakes are ready to bring joy whenever you need it!
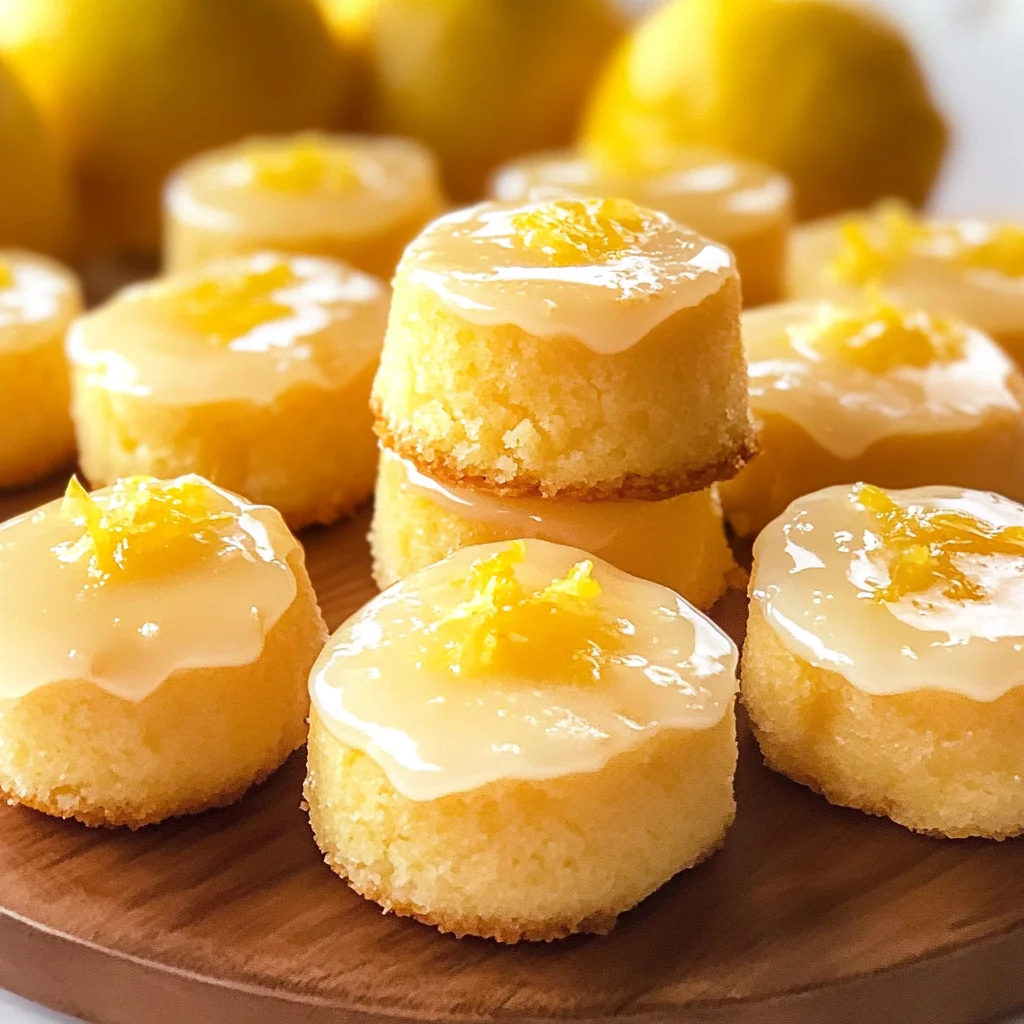
MINI LEMON DROP CAKES

Experience a burst of sunshine with our delightful MINI LEMON DROP CAKES, perfect for any occasion! These charming little treats are light, fluffy, and packed with zesty lemon flavor. Whether you’re hosting a gathering or simply indulging yourself, these cakes are sure to brighten your day. With a luscious glaze that adds just the right amount of sweetness and a hint of tang, every bite is a celebration. Easy to make and even easier to enjoy, these mini lemon delights will become a staple in your dessert repertoire. Grab your apron, and let’s get baking!
- Prep Time: 15 minutes
- Cook Time: 12 minutes
- Total Time: 27 minutes
- Yield: Approximately 12 mini cakes 1x
- Category: Dessert
- Method: Baking
- Cuisine: American
Ingredients
- 1 cup all-purpose flour
- 1 cup sugar
- ½ tsp salt
- ½ tsp baking soda
- ½ cup unsalted butter
- ½ cup water
- ¼ cup sour cream
- 1 egg
- 1 tbsp lemon zest
- 1 tbsp lemon juice
- 1 ½ cups powdered sugar
- 2 tbsp lemon juice (for glaze)
- 2 tbsp milk
- 1 tsp lemon zest (for glaze)
- 1 tbsp butter, melted (for glaze)
Instructions
- 1. Preheat oven to 325°F (163°C).
- 2. In a large bowl, whisk together flour, sugar, salt, and baking soda.
- 3. Melt butter in a saucepan over medium heat; add water and bring to a boil.
- 4. Pour melted mixture over dry ingredients and mix gently until combined.
- 5. Add sour cream, egg, lemon zest, and lemon juice; mix until smooth.
- 6. Grease mini muffin tin and fill each cavity two-thirds full with batter.
- 7. Bake for 10-15 minutes until a toothpick comes out clean.
- 8. Cool cakes in the pan for 5 minutes before transferring to a wire rack.
- 9. Prepare glaze by mixing powdered sugar, 2 tbsp lemon juice, milk, 1 tsp lemon zest, and melted butter until smooth.
- 10. Dip the bottom of each cooled cake into the glaze and let excess drip off.
Nutrition
- Serving Size: 1 cake (40g)
- Calories: 150
- Sugar: 12g
- Sodium: 75mg
- Fat: 6g
- Saturated Fat: 4g
- Unsaturated Fat: 2g
- Trans Fat: 0g
- Carbohydrates: 22g
- Fiber: <1g
- Protein: 2g
- Cholesterol: 25mg