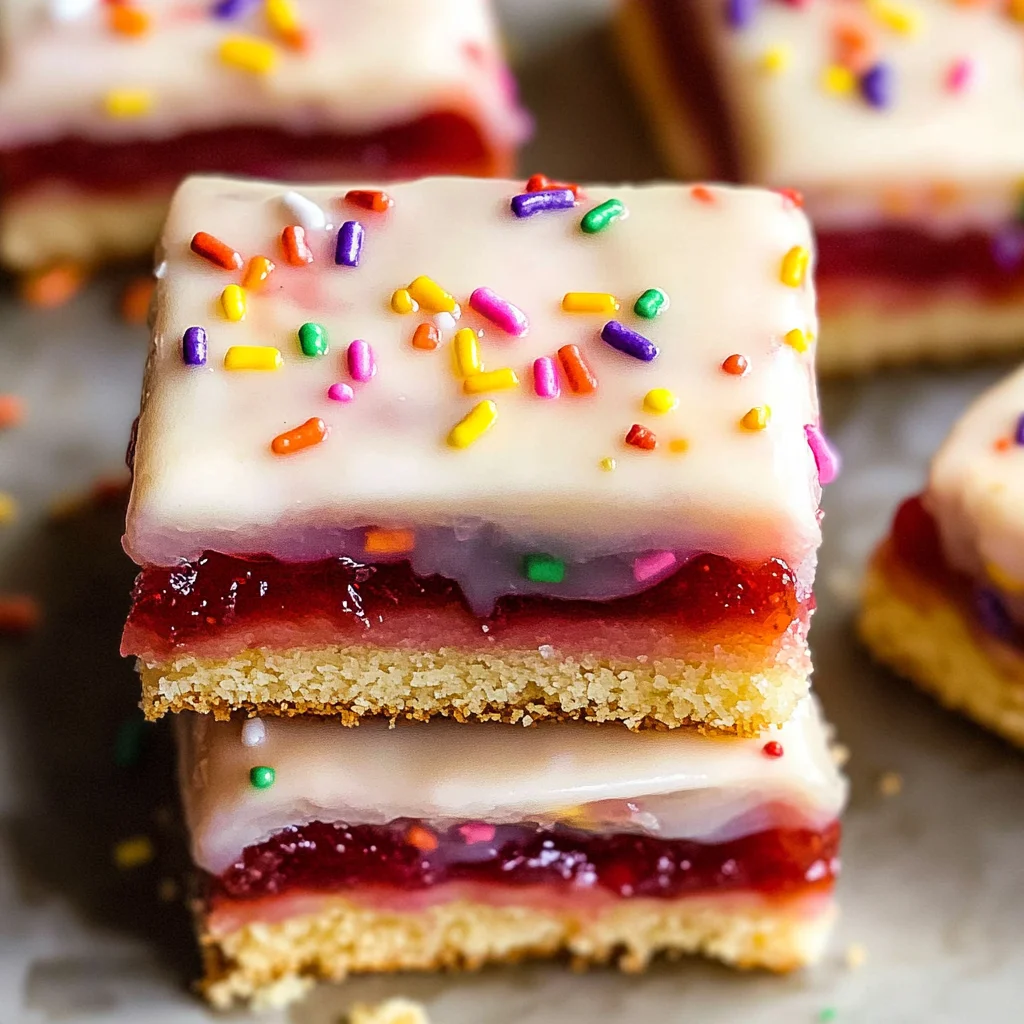
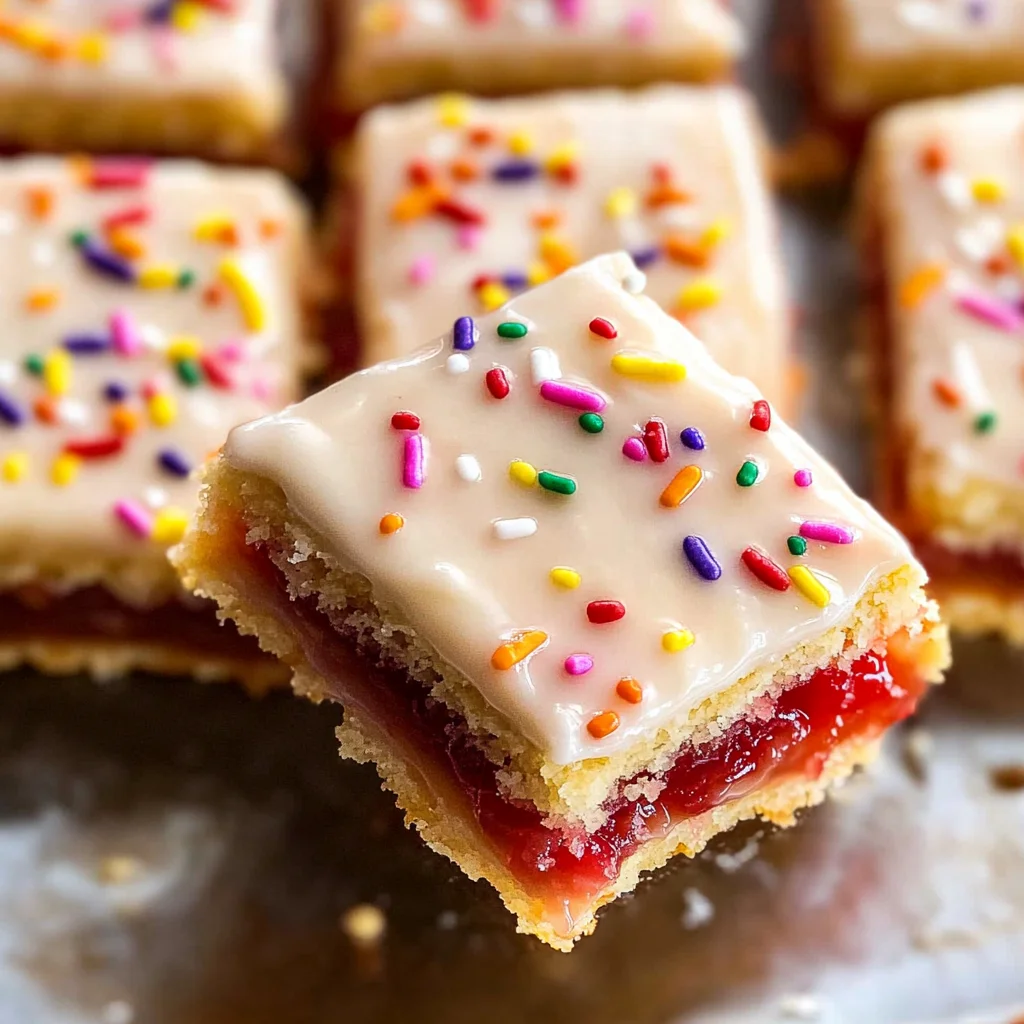
Poptart Cookie Bars
There’s something profoundly magical about baking that transcends mere sustenance. It’s an experience that envelopes you in warmth, igniting memories and creating new ones with each delightful aroma that wafts through the air. When I think of Poptart Cookie Bars, I’m transported back to my childhood—those blissful afternoons spent in the kitchen with flour dust dancing in the sunbeams and the sweet, buttery scent twirling around us like a familiar hug. These cookie bars aren’t just a treat; they’re a bridge between the nostalgic charm of pop tarts and the comforting embrace of freshly baked cookies. Each bite is a chewy, strawberry-filled explosion of joy that brings smiles and laughter to any gathering. Trust me when I say that once you’ve indulged in these bars, you’ll find it hard to resist sharing them with your loved ones.
What makes these Poptart Cookie Bars so special? Well, let’s dive into their essence! They embody the excitement of a playful dessert while maintaining the heartwarming tradition of home-baked goodness. The layers of soft, sugary cookie enveloping luscious strawberry preserves create a symphony of flavors that dance on your palate. It’s a delightful twist on a classic that elevates simple ingredients into something truly extraordinary. Perfect for potlucks, birthday parties, or just because—you’ll find that these bars are versatile enough to be enjoyed on any occasion. So grab your apron and let’s embark on this delicious journey together; I promise you won’t regret it!
Poptart Cookie Bars: A Chewy Delight That Will Bring You Joy
Let’s get right into it! The beauty of these Poptart Cookie Bars lies not only in their delectable taste but also in how simple they are to make at home. Whether you’re a seasoned baker or a novice looking to impress at your next gathering, this recipe is designed to guide you every step of the way. You might want to prepare for some serious cravings because once you catch a whiff of those baking cookie bars, you’ll be counting down the minutes until they’re ready!
Ingredients:
As we set off on this culinary adventure together, let’s take a moment to appreciate each ingredient that plays its role in crafting our Poptart Cookie Bars. Every element has its purpose and contributes to the harmony of flavors and textures we’re aiming for.
- ½ cup (1 stick or 113g) unsalted butter, softened to room temperature. This is crucial for achieving that light, fluffy texture we desire in our cookie bars. When butter is at room temperature, it creams with sugar beautifully, creating air pockets that help lift our cookies as they bake. Look for high-quality butter; European-style varieties often have higher fat content which translates into richer flavor and better results.
- 1 cup (200g) granulated sugar. Sugar does more than just sweeten our bars; it contributes to their structure and texture as well. During baking, sugar caramelizes slightly which adds depth to the flavor profile while also helping create those beautifully golden edges we all love so much. Make sure it’s fresh—old sugar can clump together and affect your bake.
- 2 large eggs (room temperature). These little powerhouses bring moisture and richness while also acting as binding agents for our dough. Using room-temperature eggs ensures they blend seamlessly into the mixture without cooling down your melted butter—a crucial detail if we want those delightful cookie bars to rise properly.
- 1 teaspoon vanilla extract or vanilla bean paste. Vanilla is like magic in baking—it enhances all other flavors present! Opt for pure vanilla extract if possible; artificial versions can leave an unpleasant aftertaste that overshadows our carefully curated ingredients.
- 2 ½ cups + 2 tablespoons all-purpose flour (spooned and leveled). Flour is undoubtedly one of our main building blocks here; it provides structure while allowing our cookie bars to maintain their chewy goodness rather than turning dry or crumbly. Be careful when measuring; spooning and leveling prevents using too much flour which could result in dense bars.
- ½ teaspoon fine sea salt. Salt might seem like an afterthought but it’s absolutely paramount! It balances sweetness and enhances flavors throughout our dish—trust me on this one! Always lean toward fine sea salt for its quick dissolving ability compared to coarse varieties.
- ½ teaspoon baking soda. This leavening agent gives our cookie bars that lovely lift we crave while also contributing slightly to browning during baking—resulting in perfectly crisp edges alongside soft centers.
- ⅔ cup strawberry preserves. Oh, the star ingredient! Strawberry preserves add bursts of fruity sweetness that capture summer’s essence within each bite—creating an irresistible contrast against the soft cookie layers surrounding them.
- 1 cup powdered sugar. This fine sugar will be used for our icing—a sweet finishing touch that complements rather than overpowers our decadent cookie base.
- 1 ½ – 2 tablespoons whole milk. Milk helps achieve the perfect consistency for our frosting; too little can lead to clumping while too much will leave us with runny icing!
- ½ teaspoon vanilla extract (for frosting). Just like before, this ingredient boosts flavor dramatically—an essential yet simple addition that ties everything together harmoniously.
- Rainbow sprinkles (for decorating)! While completely optional, who doesn’t love sprinkles? They add a visual charm making these cookie bars feel extra special—perfect for celebrations or simply brightening someone’s day!
Equipment You’ll Need:
Now that we’ve gathered all these wonderful ingredients, let’s talk about some essential tools you’ll need along the way! Having the right equipment makes your baking experience smoother and far more enjoyable—a true partner in crime when creating something delicious from scratch.
- 8×8 square metal baking pan – This size is ideal for creating thick cookie bars that bake evenly throughout without getting too dry or overcooked at the edges. Metal pans conduct heat better than glass or ceramic options ensuring optimal results every time!
- Parchment paper – A must-have companion when lining your pan! It prevents sticking and allows for easy removal once baked—you’ll thank yourself later when pulling out those gorgeous bars effortlessly!
- Stand mixer or hand mixer – While you can certainly mix by hand if you’re feeling adventurous (and have strong arms!), an electric mixer saves time while achieving better incorporation during creaming stages—allowing air pockets to form effectively within your dough.
- Mixing bowls – Having various sizes at hand helps keep things organized as you layer ingredients together before combining everything into one lovely mixture!
- Spatula – A flexible silicone spatula works wonders here—it’s perfect for scraping down bowl sides ensuring no precious batter goes unnoticed!
With these tools at your disposal, you’re well-equipped to dive headfirst into making these Poptart Cookie Bars! Now let’s start preparing them step-by-step so we can enjoy every delicious moment together…
Step 1: Prepping Your Baking Pan & Preheating
Begin by lining an 8×8 metal baking pan with parchment paper so it hangs over all sides—you’ll appreciate this later when removing those beautiful cookie bars! Make sure there are no gaps where batter could escape during baking! While working on this task, preheat your oven to 375°F (190°C); having a hot oven ready ensures even cooking right from the start—a crucial factor in achieving those golden brown tops we all desire!
Step 2: Creaming Butter & Sugar
In your stand mixer bowl fitted with a paddle attachment (or using a mixing bowl with a sturdy whisk), cream together softened butter and granulated sugar until light and fluffy—this should take about three minutes on medium speed! This process, known as creaming, incorporates air into your mixture creating volume which translates beautifully upon baking resulting in tender yet structured cookie bars! Scrape down any stubborn bits stuck around edges midway through—it ensures everything combines uniformly resulting in perfect flavor throughout every bite!
Step 3: Incorporating Eggs & Vanilla
Once you’ve achieved creamy perfection with butter-sugar blend perfection add room-temperature eggs one at a time followed by vanilla extract (or paste)—mix until just combined after each addition! The goal here isn’t complete incorporation but rather merging everything without overmixing; excess mixing could lead tough cookies due gluten development which we’re trying hard avoid preserving softness instead!
Step 4: Combining Dry Ingredients
Now comes time introduce flour mixture comprised solely dry ingredients—the all-purpose flour mixed with fine sea salt & baking soda beforehand will allow even distribution within dough preventing unwanted clumps later down line! Gently fold this mixture until just combined—it may look somewhat shaggy initially but don’t worry—that’s normal! At this stage avoid overworking dough since developing gluten would hinder ultimate chewiness—we want delicate crumb texture paired perfectly with gooey strawberry filling!
Crafting Your Delightful Poptart Cookie Bars
Step 5: Chill for Chewy Perfection
Now, here’s where patience truly pays off. Once you’ve mixed in the flour, salt, and baking soda, you’ll want to chill the dough in the fridge for about 20 minutes. This step is absolutely crucial because it allows the butter to firm up again after being creamed, which in turn helps your cookie bars maintain their shape while baking. When you skip this chilling phase, you might find yourself with a spread of melted goo rather than beautifully structured bars. Not quite what we’re aiming for!
While you wait, take a moment to breathe in the sweet, buttery aroma that’s wafting from your mixing bowl—it’s a gentle reminder of the deliciousness that’s soon to come. Plus, the little bit of downtime gives you a chance to get your baking pan ready! Trust me on this: By chilling the dough, you’re setting yourself up for success with cookie bars that are perfectly chewy on the inside and just slightly crisp on the edges.
Step 6: The First Layer – Building Your Foundation
With your dough now chilled and firm, it’s time to press half of it into your prepared 8×8 inch baking pan. You’ll want to measure out about 348 grams of dough—this is key for an even layer that bakes uniformly. Use your hands or a spatula to evenly distribute the dough across the bottom of the pan, making sure to press it down firmly so there are no air pockets hiding beneath. This isn’t just about aesthetics; a well-pressed base will help support the weight of our luscious strawberry preserves later on.
As you work through this step, don’t rush it! Make sure every corner is filled and that there’s an even thickness throughout—think of this as building a solid foundation for your dessert masterpiece. You want each bite to deliver that delightful combination of textures without any parts crumbling away from too much air or uneven baking. Once it’s pressed down nicely, lift one edge of the parchment paper carefully and pull out this first layer; it will go directly onto a baking sheet and into the freezer for now.
Step 7: The Second Layer – Reinforcing Flavor
Next up is perhaps one of the most satisfying steps: pressing down that glorious second layer of cookie dough right into your pan! After replacing the parchment strips (you want those sides still covered), take what remains of your cookie dough and spread it evenly over the top of where you’ve already laid down those scrumptious strawberry preserves. As you do this, make sure you’re using gentle yet firm pressure—this is where you want everything to meld together beautifully.
This layer not only seals in all that wonderful jam but also creates a harmonious balance between sweetness and texture across every single bar. I can almost guarantee that when you bite into one later, you’ll be met with an explosion of flavors that dance together in perfect harmony—the sweet yet tart strawberry filling against that buttery cookie base is simply divine! Just ensure there are no gaps peeking through; otherwise, we run the risk of losing some delicious filling during baking.
Step 8: Baking Your Perfect Poptart Cookie Bars
Now comes one of my favorite moments—the actual baking! Preheat your oven to a cozy 375°F (190°C), ensuring it’s nice and hot before you slide in your creation. Bake these beauties for about 25-28 minutes until they achieve that glorious golden-brown color on top; keep an eye on them because ovens can vary quite a bit! You want to see a light browning occurring around the edges while maintaining just a slight softness in the center—that’s when you’ll know they’re done.
The smell wafting through your kitchen as they bake will be utterly intoxicating; imagine buttery cookies mingling with sweet strawberries—it’s like a warm hug from grandma! To test if they are truly ready without cutting into them prematurely (which we definitely don’t want), gently poke at one corner with a toothpick; if it comes out clean or with just a few crumbs clinging to it, you’re all set! Once baked to perfection, let them cool completely on a wire cooling rack—this cooling time is essential as it allows those flavors to deepen even further while giving them enough structure so they cut beautifully later on.
Conclusion:
As we wrap up this journey through creating your very own Poptart Cookie Bars, I can’t help but feel an overwhelming sense of excitement at what you’ve just accomplished! Each step of this recipe has been infused with love and care—transforming simple ingredients into something truly extraordinary that brings joy not just through taste but also through nostalgia. The combination of buttery cookie dough with luscious strawberry preserves is nothing short of a symphony of flavors that dances on your palate, making it impossible not to indulge again and again!
This recipe is an absolute must-try—not only because it satisfies those sweet cravings but also because it invites creativity into your kitchen! Picture yourself pulling these gorgeous bars from the oven; their golden tops glisten with promise as the aroma fills your home like a warm hug. These cookie bars shine during family gatherings, birthday parties, or even cozy movie nights—wherever there’s laughter and love shared around the table. Each bite encapsulates comfort, reminiscent of childhood treats yet sophisticated enough for any adult palate.
And let’s talk about serving suggestions! Imagine savoring one alongside a hot cup of coffee on a lazy Sunday morning; there’s something almost magical about that pairing. For an afternoon pick-me-up while catching up with friends over tea, these cookie bars would fit right in alongside other delightful snacks. And if you’re feeling indulgent? Try warming one slightly before topping it with a scoop of vanilla or dairy-free ice cream—it’s an experience that’s bound to make hearts flutter!
Feeling adventurous? This recipe is wonderfully adaptable! You can swap out strawberry preserves for raspberry or blueberry—imagine those vibrant colors peeking through each layer! Or perhaps add chocolate chips into the dough for an extra decadent twist; why not have fun experimenting? Each variation brings its unique charm while still capturing that beloved essence we’ve created together today. I encourage you to dive into this delightful baking adventure, share your creations with loved ones, and connect over delicious bites filled with warmth and happiness!
Poptart Cookie Bars
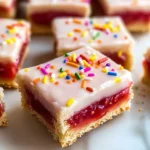
Poptart Cookie Bars are the ultimate treat that brings together the nostalgia of childhood pop tarts and the warm comfort of freshly baked cookies. These delightful bars are filled with luscious strawberry preserves, creating a chewy, sweet explosion in every bite. Perfect for any occasion—whether it’s a birthday party, potluck, or simply a cozy night at home—these bars are sure to bring smiles and joy to everyone who tries them. With simple ingredients and an easy-to-follow recipe, you’ll find that baking these cookie bars is as much fun as enjoying them. Get ready to create delicious memories with Poptart Cookie Bars that will leave everyone craving more!
- Prep Time: 20 minutes
- Cook Time: 28 minutes
- Total Time: 48 minutes
- Yield: Approximately 15 servings 1x
- Category: Dessert
- Method: Baking
- Cuisine: American
Ingredients
- ½ cup unsalted butter, softened to room temperature
- 1 cup granulated sugar
- 2 large eggs, room temperature
- 1 teaspoon vanilla extract
- 2 ½ cups + 2 tablespoons all-purpose flour, spooned and leveled
- ½ teaspoon fine sea salt
- ½ teaspoon baking soda
- ⅔ cup strawberry preserves
- 1 cup powdered sugar
- 1 ½ – 2 tablespoons whole milk
- ½ teaspoon vanilla extract (for frosting)
- Rainbow sprinkles (optional)
Instructions
- Preheat oven to 375°F (190°C) and line an 8×8 metal baking pan with parchment paper.
- In a mixing bowl, cream softened butter and granulated sugar until light and fluffy.
- Add eggs one at a time, mixing well after each addition, followed by vanilla extract.
- In a separate bowl, combine flour, salt, and baking soda; gradually incorporate into the wet mixture until just combined.
- Chill the dough in the refrigerator for 20 minutes.
- Press half of the dough into the prepared pan; spread strawberry preserves evenly on top.
- Roll out and layer remaining dough over preserves, sealing edges.
- Bake for 25-28 minutes until golden brown; cool completely.
- Whisk powdered sugar with milk and vanilla for icing; drizzle over cooled bars and sprinkle with rainbow sprinkles if desired.
Nutrition
- Serving Size: 1 bar (40g)
- Calories: 150
- Sugar: 10g
- Sodium: 85mg
- Fat: 6g
- Saturated Fat: 4g
- Unsaturated Fat: 1g
- Trans Fat: 0g
- Carbohydrates: 23g
- Fiber: 1g
- Protein: 2g
- Cholesterol: 35mg