Chicken Shawarma
There’s something utterly enchanting about the aromas that waft through your kitchen when you’re preparing Chicken Shawarma. As the spices mingle—a delightful blend of warm cumin, smoky paprika, and fragrant turmeric—you can’t help but feel as though you’ve been transported to a bustling marketplace in the heart of the Mediterranean. This dish is not just a meal; it’s an experience that evokes feelings of comfort and joy. With every bite, you’re savoring a symphony of flavors that dances across your palate, from the tender chicken thighs marinated in zesty lemon juice and garlic to the rich creaminess of the accompanying sauce. Truly, Chicken Shawarma is a celebration of culinary artistry that brings people together, whether it’s for a casual weeknight dinner or a gathering with friends.
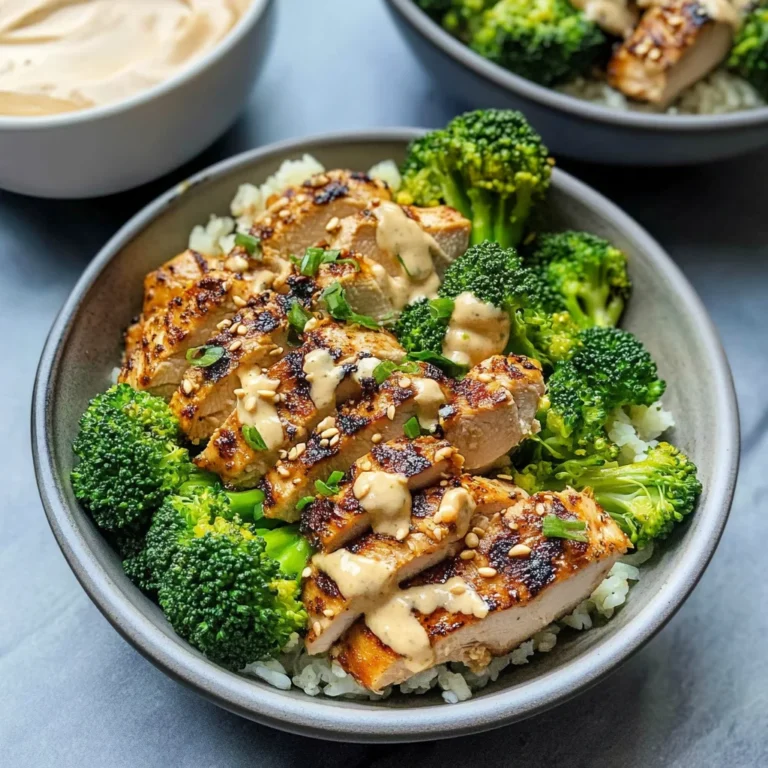
I have always been captivated by recipes that tell a story, and Chicken Shawarma is no exception. This dish has roots steeped in tradition, originating from the Middle East but beloved worldwide for its versatility and robustness. Imagine enjoying this vibrant dish as part of a warm gathering—perhaps served on fluffy pita bread with fresh veggies or over a bed of fragrant rice. It’s perfect for sharing because it invites everyone to come together around the table, creating memories that linger long after the last bite. Trust me on this: once you’ve mastered this recipe, it will become one of those cherished meals you return to time and again, especially when you want to impress your loved ones without spending hours in the kitchen.
Chicken Shawarma: A Flavorful Journey Awaits
Welcome to my kitchen! Today, I’m thrilled to share my super easy Chicken Shawarma recipe with you. This Mediterranean-inspired dish is not only loaded with tons of spices but is also baked until golden brown and deliciously aromatic. I promise you; it’s going to be your new favorite weeknight dinner!
Ingredients:
As we embark on this culinary journey together, let’s take a moment to appreciate each ingredient that contributes to our Chicken Shawarma masterpiece. Each one plays a vital role in creating those deep flavors and textures we all crave.
- 1 1/2 pounds boneless skinless chicken thighs. Choosing chicken thighs instead of breasts is key here because they are juicier and more flavorful due to their higher fat content. When roasted at high temperatures, they become beautifully caramelized while remaining tender inside—this contrast between crispy exterior and succulent interior is what makes shawarma so irresistible. Look for thighs that are plump and have a nice sheen; freshness matters immensely!
- 4 tablespoons lemon juice. The bright acidity of lemon juice balances out the richness of the chicken beautifully while also serving as a fantastic tenderizer. It helps break down proteins in the meat, making every bite juicy and flavorful. Freshly squeezed lemon juice is non-negotiable here; bottled varieties simply can’t compete with that vibrant flavor.
- 4 tablespoons extra virgin olive oil. This liquid gold brings depth and richness to our marinade while also helping ensure our chicken stays moist during cooking. The high-quality olive oil enhances the overall flavor profile with its fruity notes and adds an unctuous texture that’s absolutely divine. Always choose extra virgin olive oil when possible; it’s worth investing in quality oils for your dishes.
- 4 cloves garlic (minced). Garlic infuses our chicken with an intoxicating aroma as it cooks—trust me, your neighbors will be wondering what deliciousness is happening in your kitchen! Freshly minced garlic releases essential oils that provide robust flavor as well as health benefits; it’s truly a powerhouse ingredient that elevates any dish.
- 2 teaspoons ground cumin. Known for its warm, earthy flavor profile, cumin is essential for giving our shawarma its characteristic taste. It’s like adding sunshine to our dish! When choosing spices like cumin, opt for whole seeds if possible; grinding them just before use will unleash their full potential.
- 2 teaspoons paprika. Paprika adds both color and depth, enhancing our chicken’s visual appeal while imparting its mild sweetness. There are various types available (smoked or sweet), so pick one according to your preference—it’ll make all the difference!
- 1 teaspoon turmeric. This golden spice not only adds beautiful color but also carries numerous health benefits! Its slightly bitter flavor complements other spices harmoniously while providing anti-inflammatory properties—a winning combination!
- 1/2 teaspoon ground cinnamon. Ahh, cinnamon—such an unexpected yet delightful addition! A whisper of cinnamon rounds out the spices beautifully; it creates warmth in flavor while enhancing sweetness without overwhelming other elements.
- 1 teaspoon salt & 1 teaspoon pepper. These staples are crucial for enhancing every other flavor present within our dish! Salt draws out moisture from ingredients which intensifies their natural flavors while pepper provides just enough kick—don’t skimp on these essentials!
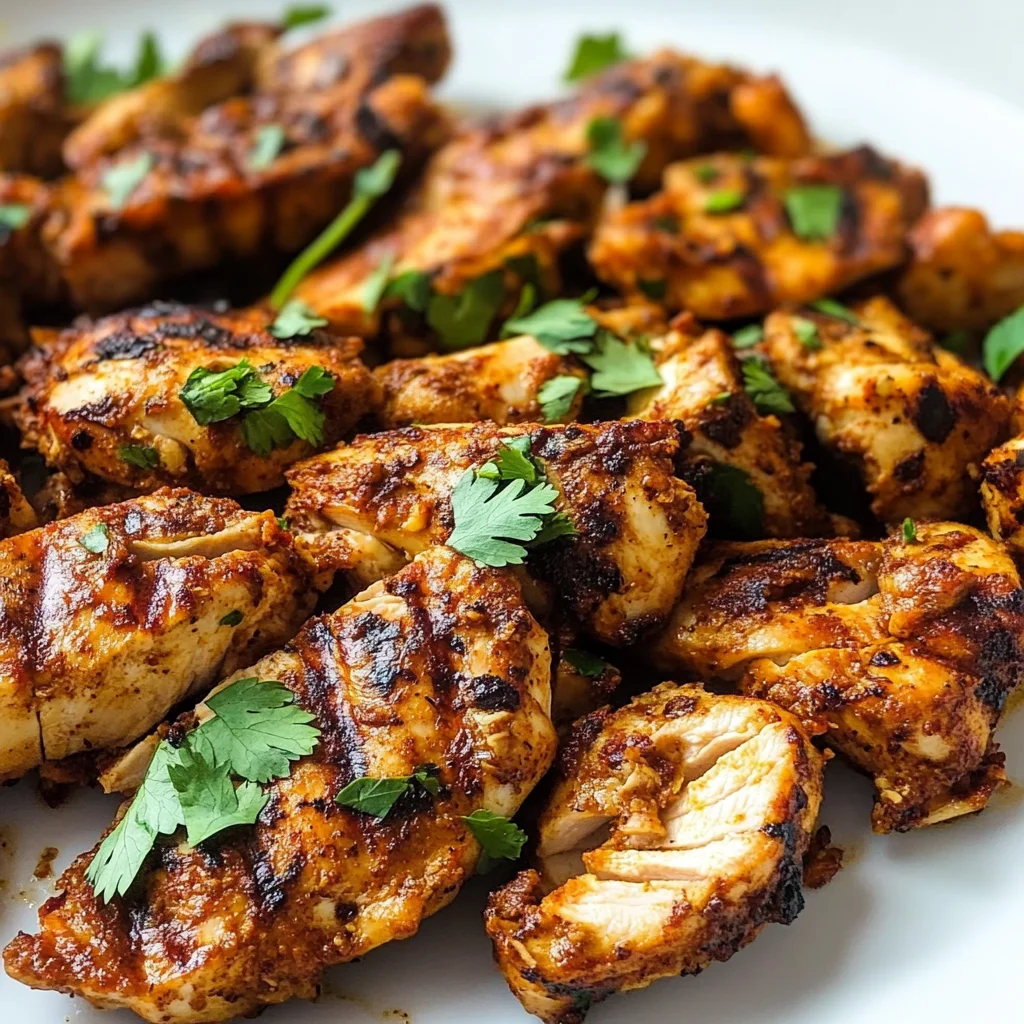
- Chopped fresh parsley for serving (if desired). Fresh herbs add brightness and freshness at serving time! Parsley not only looks gorgeous sprinkled atop your finished shawarma but also provides nutritional benefits—it’s like adding an edible confetti!
- 4 cloves garlic (minced) again? Yes! We have another layer of garlicky goodness here because who doesn’t want more garlic? It will be mixed into our creamy sauce that accompanies this meal.
- 1/4 cup mayonnaise & 1/4 cup full-fat Greek yogurt create an incredibly creamy sauce with tanginess that balances perfectly against our spiced chicken! The yogurt brings live cultures beneficial for digestion while mayonnaise lends richness—all leading back towards comfort food territory!
- 1 tbsp lemon juice, again! Just like before—the bright acidity helps cut through richness delivering balanced flavor profiles right when we need them most!
Equipment You’ll Need:
Before we dive into preparing our Chicken Shawarma, let’s talk about some essential tools you’ll need along this culinary adventure! Having the right equipment at hand can make all the difference in ensuring everything runs smoothly—from prep work to cooking.
- Large ziplock bag – This handy tool allows us to marinate our chicken effectively by sealing in all those wonderful flavors as they meld together over time; it’s an absolute must-have for marinating meats!
- Baking dish – A good baking dish ensures even cooking throughout because we want every piece of chicken evenly golden brown without any undercooked spots lurking around! Opt for glass or ceramic dishes since they distribute heat evenly compared with metal pans.
- Garlic press or knife – For mincing garlic efficiently—this little tool saves time chopping away at each clove individually though using sharp knives works too if you prefer traditional methods!
- Meat thermometer (optional) – While not strictly necessary if you know how long certain pieces take to cook based on thickness/size variations… having one gives peace-of-mind knowing exactly when internal temperatures reach safe levels ensuring juicy results every time!
With these ingredients set out before us and tools gathered nearby—we’re ready now more than ever—to create something truly extraordinary: Our very own Chicken Shawarma!
Preparing the Chicken Shawarma
Step 1: Marinate Your Chicken
Let’s kick things off by marinating our chicken—it’s such an important step that can’t be rushed! Begin by placing your boneless skinless chicken thighs into that large ziplock bag we talked about earlier—a perfect home for those delicious spices and flavors waiting eagerly to embrace each piece of meat! Pour in all ingredients except garnishes: freshly squeezed lemon juice, extra virgin olive oil infused with aromatic garlic cloves minced finely alongside spices such as ground cumin and paprika—all mingling together like old friends catching up after years apart! Now seal up that bag tightly before giving it gentle shakes back-and-forth until everything is coated evenly—trust me on this part; it’s crucial because we want maximum flavor infusion into every nook & cranny possible within those lovely thighs! Once done massaging them lovingly through plastic layers… place them carefully into refrigerator allowing them rest there anywhere from 1 hour up until overnight if you have time… longer marination means more pronounced tastes throughout so make sure not skip this step—your future self will thank you later when biting into succulent juicy goodness straight from oven later on!
Step 2: Preheat Your Oven
When you’re ready—and I mean really ready—to cook up some magic preheat your oven up to 425°F (220°C) like setting stage lights before show begins! This high temperature guarantees crisp edges developing beautifully around each piece once placed inside greased baking dish awaiting transformation… It’s almost like watching art come alive before eyes—so mesmerizing seeing colors deepen across surfaces turning golden brown while aromas fill air around us invoking excitement within hearts eager anticipation rising steadily alongside delicious scents permeating space around us reminding everyone nearby dinner was happening soon enough…
Step 3: Bake Until Perfectly Golden Brown
Now comes one my favorite parts—the actual baking process itself where transformation takes place right before eyes! Carefully arrange marinated chicken thighs evenly spaced within greased baking dish ensuring they aren’t overcrowded… Giving enough room allows crispiness develop fully keeping moisture intact preventing drying out which nobody wants—not today anyway! Pop them into preheated oven setting timer down low at first waiting roughly about 15 minutes should do trick depending thickness variation among pieces being cooked… Just keep an eye peeled watching closely until golden edges start appearing lovingly inviting everyone nearby who couldn’t resist peeking inside oven door tempted by mouth-watering fragrances wafting through space tantalizing senses making stomachs rumble louder than thunderstorm brewing outside…
Step 4: Broil for That Perfect Finish
As time ticks away nearing end mark check back peeking inside oven returning quickly closing door behind us avoiding loss heat escaping too much before flipping switch over onto “Broil” setting allowing intense heat blast targeted directly towards topside pieces chasing after crispy perfection just moments away… Stay vigilant here though folks as broiling can go fast turning lovely golden tones potentially burnt if left unattended even second too long so don’t wander off far during final countdown waiting patiently knowing results await just beyond reach… One minute might suffice depending how close proximity sits beneath heating element—but trust instincts gauging readiness based off sight/smell combined intuition guiding actions forward safely without risking disaster looming nearby…
Stay tuned as we continue exploring how best slice serve garnishing options topping off plate presentation creating visual feast pleasing eyes tastebuds alike celebrating life good times shared amongst family friendships enjoyed round tables filled laughter love warmth surrounding all present enjoying bites taken together unified unity breaking bread shared moments forever treasured memories created lasting impact beyond single meal shared…
Super Easy Chicken Shawarma: A Journey Through Flavor
Ah, Chicken Shawarma! Just saying it evokes memories of bustling street markets, tantalizing aromas wafting through the air, and that first bite of tender, spiced meat enveloped in a warm pita. I’ve always been captivated by this Mediterranean delight, and I promise you, after you try this recipe, it will become a cherished part of your culinary repertoire. It’s not just about preparing a meal; it’s about creating an experience that brings people together around the table. So, let’s dive deep into the world of flavors and textures to make this extraordinary dish!
Step 5: Marinating for Maximum Flavor
Once you’ve whisked together all those vibrant ingredients—lemon juice, olive oil, minced garlic, and an array of spices—it’s time to introduce your chicken thighs into the mix. Place the 1½ pounds of boneless skinless chicken thighs into a large ziplock bag or a bowl. Pour the marinade over them, ensuring each piece is lovingly coated in that symphony of flavors. This step is crucial because marinating allows the chicken to absorb all those essential spices and zestiness from the lemon juice. The longer you let it sit—ideally overnight—the more pronounced and tantalizing those flavors will become. If you’re short on time, even an hour will work, but trust me when I say patience here pays off immensely! As the chicken bathes in this flavorful mixture in your fridge, it’s infusing moisture and depth into every bite you’ll take later.
When you’re ready to cook, you’ll notice how much more aromatic your kitchen becomes as those spices mingle with the chicken. This is where the magic begins! Remember to press out as much air as possible if using a ziplock bag; it helps ensure even marination. And don’t forget: every minute matters here! The acids in lemon juice help tenderize the meat while also enhancing its natural flavor profile—a little science that makes a big difference.
Step 6: Prepping for Perfection – Preheat Your Oven
Now that our chicken has marinated beautifully (and your kitchen smells divine!), it’s time to get your oven ready for action. Preheat your oven to 425°F (about 220°C). This temperature is absolutely paramount because we want that perfect balance between cooking through and achieving a glorious golden-brown exterior. While it heats up, prepare a greased baking dish where your chicken will soon bask in radiant warmth.
When placing the marinated chicken thighs into this baking vessel, arrange them in a single layer; don’t overcrowd them! This ensures each piece gets ample exposure to that toasty heat which leads us to our next key point: even cooking! Imagine biting into perfectly succulent chicken with crisp edges—that’s what we’re aiming for here! You may need to adjust cooking times based on how thick or thin your pieces are; thinner cuts might only require around 15 minutes while thicker ones could take longer. Keep an eye on them as they bake—this step is about developing that richly roasted flavor while ensuring juiciness remains intact.
Step 7: Broiling for an Irresistible Finish
As you approach the final moments of baking—typically around 12-15 minutes—you’ll want to switch things up by turning on the broiler for just 1-2 minutes at the end. This step is what transforms our Chicken Shawarma from delicious to utterly intoxicating! When broiling, keep a watchful eye; things can go from beautifully charred to burnt quite quickly under high heat. What we’re aiming for here is a stunning caramelization on top—a rich color that signals depth of flavor and texture.
The reason this step is so important goes beyond aesthetics; it creates a contrast between crispy edges and juicy interiors. Think about how satisfying it feels when you bite into something with both texture and tenderness—it’s truly extraordinary! Once done broiling, remove that gorgeous dish from the oven and allow those heavenly aromas to fill your home for just a couple of minutes before slicing. Trust me; letting it rest is non-negotiable—it allows juices to redistribute throughout the meat so every slice remains moist and flavorful.
Step 8: Slicing with Precision
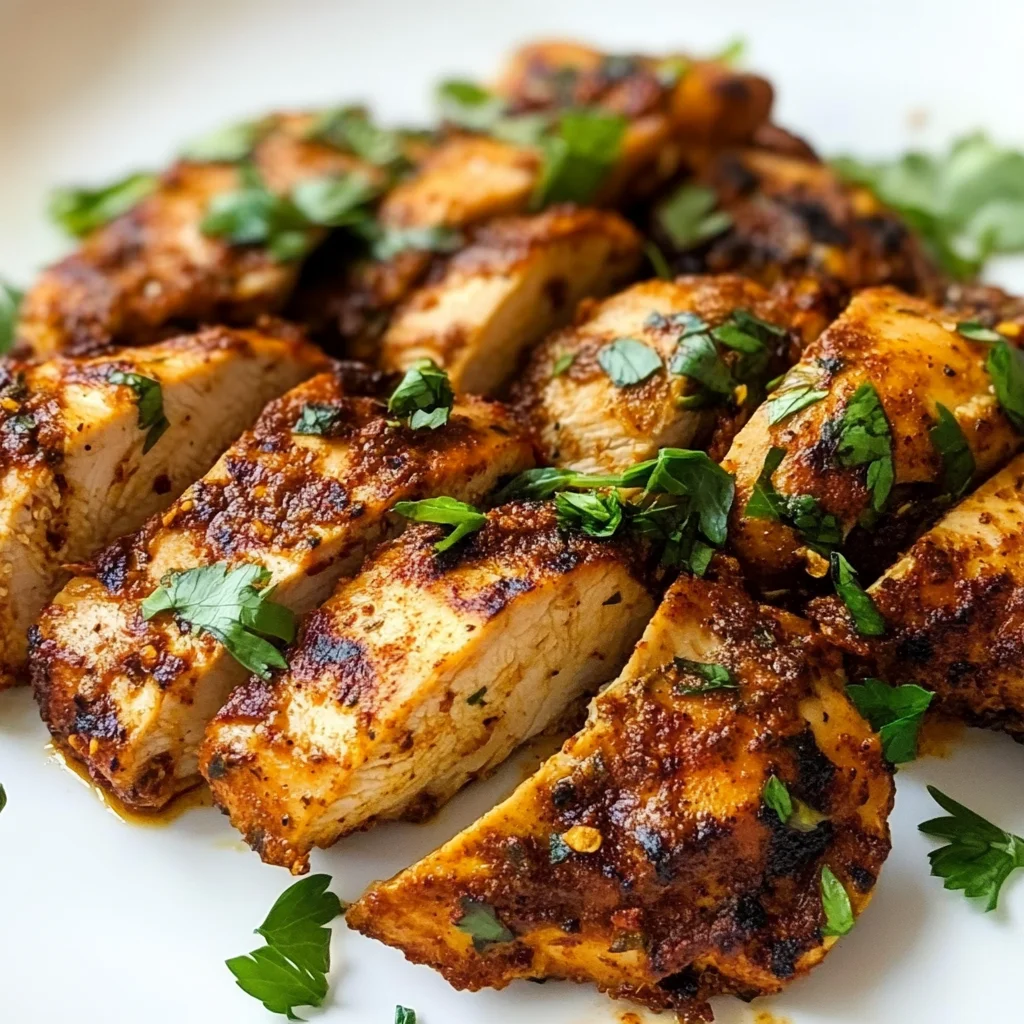
Now comes one of my favorite parts—slicing up that beautifully roasted Chicken Shawarma! After letting it rest for about five minutes (a short period but oh-so-important), grab your sharp knife and start cutting against the grain for optimal tenderness. What does “against the grain” mean? Simply put, look closely at the fibers running through each piece of chicken; slicing perpendicular to these fibers will give you tender bites rather than chewy ones—which nobody wants!
As you cut into that succulent meat, marvel at how perfectly cooked it looks inside—a beautiful warm hue with juices glistening like liquid gold! You could serve this right away or store any leftovers in an airtight container—I promise they won’t last long because everyone will want seconds! The beauty of this Chicken Shawarma lies not only in its taste but also in its versatility; whether served over rice, nestled within pita bread alongside fresh veggies or atop a colorful salad adorned with chopped parsley for freshness—each presentation brings something special.
Final Touches: Serving Up Your Delicious Creation
Step 9: Dressing It Up & Enjoying Your Creation
To elevate your Chicken Shawarma experience further—and trust me when I say it’s worth every bit—you’ll want to whip up a quick sauce made from mayonnaise mixed with Greek yogurt and another squeeze of lemon juice. This creamy dressing adds richness while balancing out all those spices we’ve layered throughout our dish. Simply combine these ingredients until smooth—it’s incredibly simple yet profoundly satisfying.
Now comes perhaps one of my favorite moments: serving up this culinary masterpiece! Picture yourself arranging slices of warm shawarma atop fluffy rice or nestled inside soft pita bread alongside crisp lettuce, tomatoes, cucumbers—the possibilities are endless! Drizzle generously with your homemade sauce over everything—it enhances every bite with creaminess while complementing all those vibrant flavors already present.
I encourage you not only to indulge but also share this dish with loved ones—there’s something magical about gathering around good food that nourishes both body and soul. So there you have it—a truly unforgettable Chicken Shawarma recipe made easy enough for any weeknight dinner yet special enough for gatherings with friends or family. Enjoy every mouthful knowing you’ve created something beautiful—and remember: cooking is as much about love as it is about food itself!
Storage and Enjoyment Tips for Your Chicken Shawarma
Now that you’ve basked in the glorious aroma of your freshly baked Chicken Shawarma, it’s time to think about how you can savor every last bite! This dish is not just a momentary delight; it’s a treasure trove of flavors waiting to be enjoyed even after the first feast. If you happen to have any leftovers (though I doubt it!), rest assured that storing them properly will keep your shawarma just as scrumptious for days to come.
Storing Leftover Chicken Shawarma
When it comes to storing your leftover Chicken Shawarma, opt for an airtight container—this is absolutely paramount to preserving those enchanting flavors! Place your chicken in the fridge where it will keep well for up to four days. For the best quality, make sure to separate any accompaniments like pita or rice from the chicken itself; this prevents everything from becoming soggy. A little pro tip: placing a slice of bread in the container with your chicken can absorb excess moisture, keeping it perfectly tender and delicious! And trust me, when you reheat this beauty, you’ll find it still bursting with flavor, though I recommend gently warming it in a skillet or microwave rather than a direct heat source. Just give it a few moments to warm through, and you’ll be ready to enjoy another round of this utterly intoxicating meal!
Freezing Chicken Shawarma for Later
If you’re looking to savor that Chicken Shawarma experience beyond just a few days, freezing is a fabulous option! Simply place your cooked chicken in a freezer-safe bag or container—removing as much air as possible is crucial here—to protect against freezer burn. It can stay frozen for up to three months without losing its delightful charm. When you’re ready for another taste sensation, simply thaw it overnight in the fridge and reheat as described earlier. This makes weeknight dinners or last-minute meal prep so convenient! Imagine how wonderful it feels to pull out homemade Chicken Shawarma from the freezer on a busy day—it’s like finding a little gift waiting just for you!
Chicken Shawarma
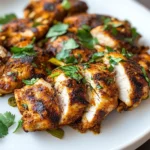
Experience the vibrant flavors of Chicken Shawarma, a delightful Mediterranean dish that transforms your kitchen into a culinary haven. With tender chicken thighs marinated in zesty lemon juice and fragrant spices, this recipe promises a mouthwatering meal that brings people together. The warm aromas of cumin, paprika, and turmeric will fill your home as you prepare this easy-to-make shawarma, perfect for weeknight dinners or special gatherings. Whether served on fluffy pita bread or atop fragrant rice, each bite is a celebration of flavor and texture. Don’t miss out on mastering this beloved dish that’s sure to become a favorite in your household!
- Prep Time: 15 minutes
- Cook Time: 20 minutes
- Total Time: 35 minutes
- Yield: Serves 4
- Category: Dinner
- Method: Baking
- Cuisine: Mediterranean
Ingredients
- 1 1/2 pounds boneless skinless chicken thighs
- 4 tablespoons lemon juice
- 4 tablespoons extra virgin olive oil
- 4 cloves garlic (minced)
- 2 teaspoons ground cumin
- 2 teaspoons paprika
- 1 teaspoon turmeric
- 1/2 teaspoon ground cinnamon
- Salt and pepper to taste
- For the sauce: 1/4 cup mayonnaise
- 1/4 cup full-fat Greek yogurt
- 1 tablespoon lemon juice
Instructions
- Marinate the chicken: In a large ziplock bag, combine chicken thighs with lemon juice, olive oil, minced garlic, cumin, paprika, turmeric, cinnamon, salt, and pepper. Seal the bag and massage until evenly coated. Refrigerate for at least one hour or overnight.
- Preheat your oven to 425°F (220°C).
- Arrange the marinated chicken in a greased baking dish in a single layer.
- Bake for about 15 minutes until golden brown.
- For crispy edges, switch to broil for an additional 1-2 minutes—watch carefully!
- Let the chicken rest for five minutes before slicing against the grain.
- For the sauce: Mix mayonnaise, Greek yogurt, and lemon juice until smooth.
- Serve slices of Chicken Shawarma with fresh veggies and drizzled sauce.
Nutrition
- Serving Size: Approximately 5 ounces (140g)
- Calories: 350
- Sugar: 2g
- Sodium: 550mg
- Fat: 24g
- Saturated Fat: 4g
- Unsaturated Fat: 18g
- Trans Fat: 0g
- Carbohydrates: 8g
- Fiber: 0g
- Protein: 30g
- Cholesterol: 115mg