Juicy Orange Chocolate Christmas Truffles
There’s something truly magical about the holiday season that brings people together, and for me, that magic often manifests in the kitchen. The aroma of spices wafting through the air, the gleeful laughter echoing from family gatherings, and the sheer joy of creating something delectable are experiences I cherish more than anything. And when it comes to sweet treats during this festive time, my heart swells at the thought of making Juicy Orange Chocolate Christmas Truffles. These little bites of bliss embody everything I love about cooking: they’re rich, they’re indulgent, and with a zesty twist of orange, they are an absolute revelation. As you take that first bite, you’ll be met with a symphony of flavors—dark chocolate melting away to reveal a silky orange-infused center, each moment intensifying your anticipation for another.
Why do we adore these truffles so much? Well, it’s not just about the taste; it’s about the experience they create. Each truffle is a delightful contrast between the bitter notes of dark chocolate and the bright zestiness of orange peel—a marriage made in culinary heaven! Perfect for gifting or simply indulging yourself after a long day—these truffles are truly extraordinary. Whether you’re cozying up on a winter evening or entertaining friends and family during festive gatherings, these treats add that touch of warmth and sweetness we all crave. Trust me when I say that once you make these Juicy Orange Chocolate Christmas Truffles, they will become a beloved tradition that you’ll look forward to every holiday season.
Juicy Orange Chocolate Christmas Truffles: A Festive Delight
These truffles are not just desserts; they’re an embodiment of holiday spirit wrapped in chocolatey goodness. Allow your imagination to run wild as you craft these treats! With minimal effort and a few quality ingredients, you can create something that feels luxurious yet remains incredibly approachable. Let’s dive into this joyous culinary adventure together!
Ingredients:
As we embark on this delicious journey together, let’s take a closer look at what makes each ingredient shine in our Juicy Orange Chocolate Christmas Truffles.
- 90 ml (around 1/3 cup plus 2 teaspoons) heavy cream. This luscious liquid is essential for creating a creamy ganache that forms the heart of our truffles. Heavy cream has a high-fat content which contributes to that smooth texture we’re aiming for—think velvety richness melting on your tongue! It’s crucial to avoid using low-fat alternatives here because they simply won’t give us the same delightful mouthfeel or depth of flavor. When heating cream for our ganache, be gentle; bringing it just to a simmer allows it to blend beautifully with the chocolate without scorching.
- 200 g (7 oz) dark cooking chocolate (40% cocoa), finely chopped. The chocolate is undoubtedly the star player in this recipe! Using dark chocolate with around 40% cocoa strikes that perfect balance between sweetness and rich depth without being overpowering. When shopping for chocolate, look for quality brands—this will elevate your truffles from good to mind-blowingly great! Finely chopping your chocolate ensures it melts evenly when combined with hot cream; larger chunks can lead to uneven melting which might ruin our silky texture.
- 1 teaspoon finely grated orange peel. Ah, orange peel—the secret ingredient that transforms these truffles into something truly special! The zest packs an aromatic punch that’s both refreshing and invigorating while also adding complexity to our flavors. When grating your orange peel, make sure you’re only getting the bright outer layer—avoid any bitter white pith underneath! This small detail might seem insignificant but trust me—it’s absolutely paramount in achieving that burst of citrusy brightness we desire.
- 1/3 cup chocolate sprinkles. While our truffle centers are pure indulgence, we need an exterior that’s equally appealing! Chocolate sprinkles not only add visual charm but also provide a delightful contrast in texture against the smooth ganache inside. Choose high-quality sprinkles; those tiny pieces should have a rich cocoa flavor rather than tasting overly sweet or artificial. Rolling your chilled truffles in sprinkles adds an element of fun—each one becomes like a little present waiting to be unwrapped!
Equipment You’ll Need:
Before we dive into making these delightful truffles, let’s gather some essential tools that will help streamline our process and ensure success. Having the right equipment makes everything easier—and trust me; you’ll thank yourself later!
- Heatproof bowl – This will be where we combine our heavy cream and chocolate to create our ganache. It’s important for this bowl to be heatproof so we can safely pour hot cream over our chopped chocolate without worrying about damage or mixing issues.
- Whisk or spatula – A whisk is your best friend when it comes to blending melted chocolate with cream into an ultra-smooth ganache. If you want something more gentle when folding ingredients together or scraping down sides, a spatula works beautifully too!
- Baking sheet lined with parchment paper – This serves as the perfect surface for cooling your formed truffles before rolling them in sprinkles. Parchment paper prevents sticking and makes clean-up effortless—a win-win!
- Small cookie scoop or melon baller – While not strictly necessary, having one of these tools makes portioning out your truffle mixture so much neater and more consistent! You want each bite-sized treat to be similar in size; it enhances both presentation and eating experience.
Now that we’ve gathered all our equipment and ingredients together let’s roll up our sleeves and start crafting those mouthwatering Juicy Orange Chocolate Christmas Truffles!
Step 1: Infusing Flavor with Cream
To begin this enchanting process, grab your heatproof bowl and pour in the heavy cream. Place it over a saucepan filled with simmering water—a technique known as double boiling—that helps gently heat without direct contact which could scorch our precious cream. Allow it to warm until it’s steaming but not boiling—this step is crucial because overheated cream can negatively affect how well it melds with our chocolate later on.
Step 2: Melting Chocolate
While your cream is warming up nicely, finely chop your dark cooking chocolate into small pieces if you haven’t done so already—this will help facilitate even melting later on! Once your cream reaches that perfect temperature (steaming but not bubbling), carefully pour it over the chopped chocolate in your bowl. Allow this mixture to sit undisturbed for about five minutes; during this time, those lovely heat molecules will work their magic by softening the chocolate perfectly.
Step 3: Creating Ganache
After five minutes have passed—a true test of patience—grab your whisk or spatula and start gently stirring until you achieve an ultra-smooth ganache without any lumps remaining. Watching those glossy ribbons come together is utterly intoxicating! This step is vital because properly emulsified ganache ensures each bite delivers equal parts creamy richness mixed with bright orange vibrance throughout.
Step 4: Adding Zest
With our luscious ganache ready, it’s time to incorporate that finely grated orange peel we prepared earlier! Gently fold it into the mixture using either your whisk or spatula until it’s evenly distributed—you want every single truffle bursting with citrus flavor while still retaining its deep cocoa essence! At this point, allow your ganache to cool slightly before chilling it in the fridge for at least an hour—it needs time to firm up before shaping into perfect little spheres.
Stay tuned as we continue crafting these delightful treats next!
Step 5: Whipping Up the Creamy Base
Now that we have our ingredients ready, let’s dive into the heart of our Juicy Orange Chocolate Christmas Truffles. The first step involves heating the heavy cream—this is where your truffle’s rich, velvety texture begins to take shape. Pour 90 ml of heavy cream into a small saucepan and place it over medium heat. Keep a watchful eye on it because we want to bring the cream just to a gentle simmer; you’re looking for those little bubbles forming around the edges of the pan but not a full boil. This step is absolutely vital as simmering the cream helps to infuse it with flavor and ensures it blends beautifully with the chocolate later on.
As the cream heats, you’ll start to notice that intoxicating aroma wafting through your kitchen—trust me when I say this is just a hint of what’s to come! Once you’re at that simmering point, remove it from heat immediately, allowing it to cool slightly while you prepare for the next phase. Remember, patience is key here. If you let it boil, it can change the consistency and flavor of your truffles in ways we definitely want to avoid!
Step 6: Creating Chocolate Bliss
With your cream gently simmered and resting, let’s transform that finely chopped dark cooking chocolate into something utterly divine. In a heat-proof bowl, add your 200 grams of finely chopped chocolate; I always recommend using quality chocolate because this will shine through in your finished truffles. Now, pour the warm cream directly over the chocolate without stirring just yet. Allow this mixture to sit undisturbed for about 2-3 minutes—this is crucial! What’s happening here is called emulsification, where the warm cream melts the chocolate and creates a silky ganache.
After those few moments of anticipation (I know it’s tough!), grab your whisk or spatula and gently stir until everything comes together in a glossy, smooth mixture. You should see that beautiful melding of flavors—the rich dark chocolate meeting that luscious cream, creating what I like to call liquid gold! If you notice any stubborn bits of unmelted chocolate, feel free to pop the bowl in the microwave for just a few seconds; remember, we want low heat so we don’t risk seizing up that precious chocolate. The goal here is a luxurious texture that will form the foundation of our truffle delight.
Step 7: Infusing Citrus Delight
Now for one of my favorite parts: adding the vibrant personality of orange! With your luscious ganache ready, it’s time to introduce that finely grated orange peel into the mix—just one teaspoon will do wonders here! The reason I emphasize using fresh orange zest rather than bottled extracts or juices is simple: freshness unlocks an entirely new world of flavor. As you fold in that zest with gentle care, take a moment to appreciate how it brightens up your ganache; the fragrance alone will make your heart sing! It’s those tiny bursts of citrus oil that will elevate our truffles from simply delicious to truly extraordinary.
Once you’ve mixed in that zesty goodness, cover your bowl with plastic wrap or a lid and let this decadent mixture cool down at room temperature for about 30 minutes before chilling it further in the fridge for another hour. Yes, I know waiting can be hard when all you want is a taste of this dreaminess! But trust me on this one: allowing time for chilling enhances not only its firmness but also allows those flavors to meld beautifully together—a culinary symphony if you will!
Step 8: Shaping Your Truffles
After an hour has passed (and I hope you’ve resisted every urge to sneak a spoonful), it’s finally time for some hands-on fun! Retrieve your chilled ganache from the refrigerator; at this point, it should be firm enough yet still pliable—a perfect consistency for rolling into beautiful little spheres. To make things easier (and less messy), I recommend using a small cookie scoop or two teaspoons to portion out equal amounts of ganache—about one tablespoon per truffle works wonderfully. As you scoop out each piece, try not to be too precious about perfect shapes; after all, these are artisan treats meant to celebrate imperfection!
Once you’ve got your portions scooped out onto a parchment-lined baking sheet (this prevents sticking), it’s time to roll them into balls between your palms. Don’t rush through this step; take a moment and enjoy the tactile experience—the warm ganache might melt slightly against your hands which adds an extra layer of richness. A quick tip: if your hands become too sticky during this process, wash them with cold water briefly; cold hands help maintain their shape during rolling.
Next Major Phase – Final Touches
Step 9: Enrobing Your Truffles in Sprinkles
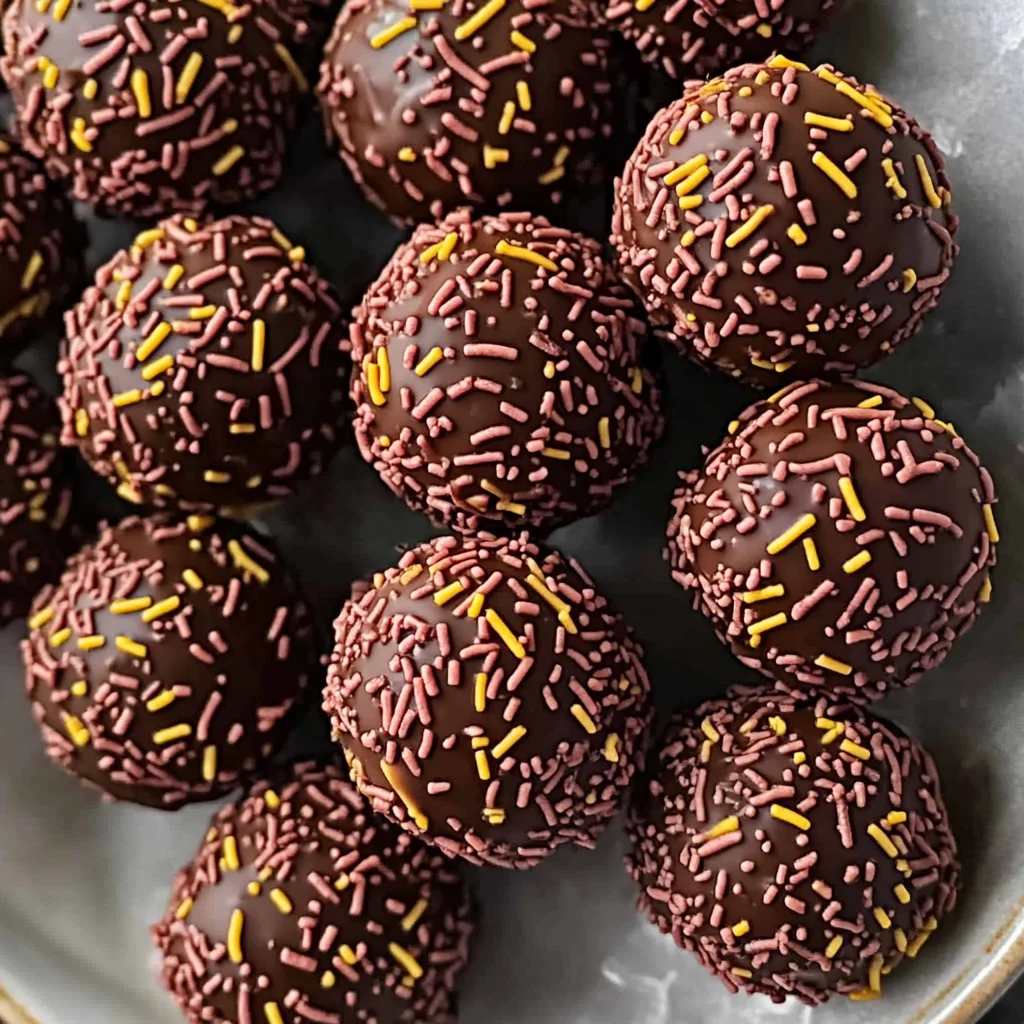
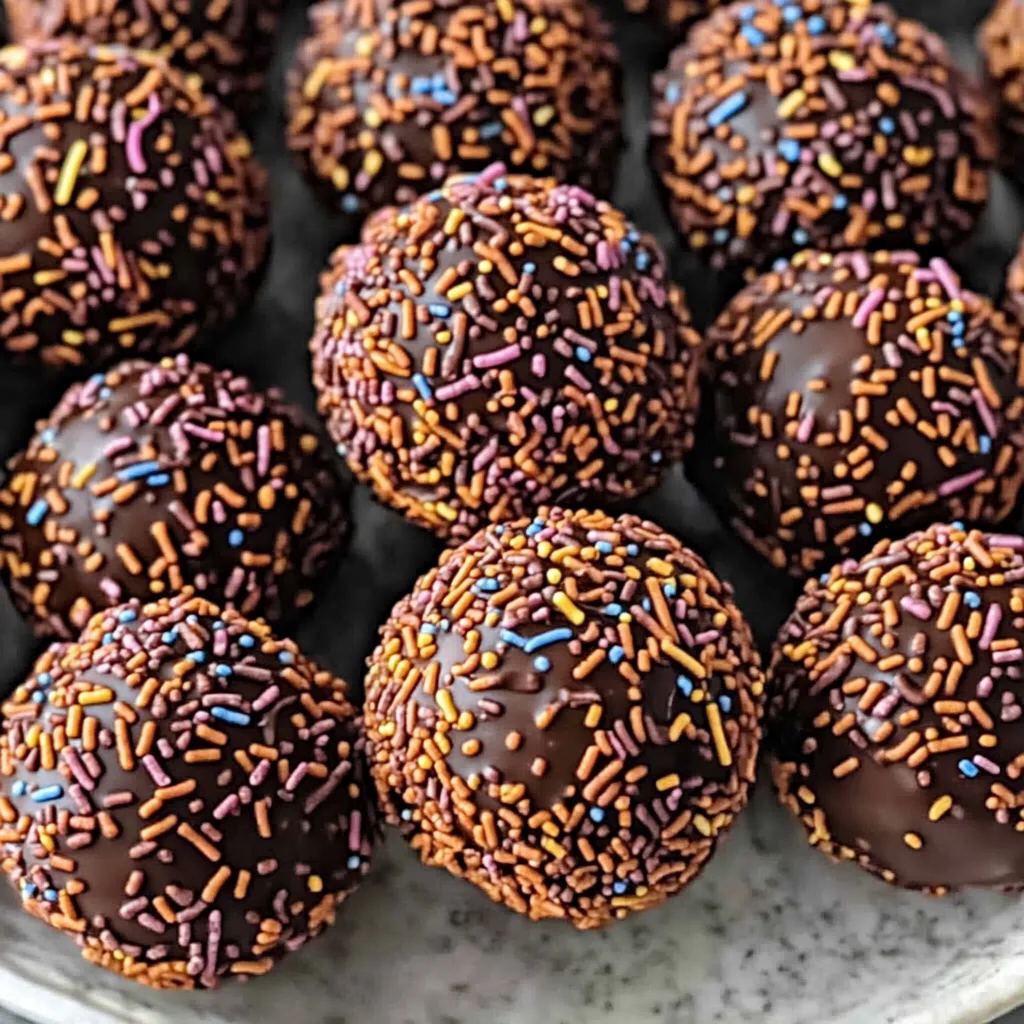
Now comes one of my absolute favorite parts—the final touch that brings everything together! Once all your truffles are rolled into delightful little spheres and placed back on that parchment-lined sheet, prepare yourself for enrobing them in chocolate sprinkles or whatever decorative coating you’ve chosen; I like using colorful sprinkles because they add an element of festivity to these treats!
Start by pouring about 1/3 cup of sprinkles into a shallow bowl or plate—this makes rolling them around super easy! When you’re ready, take each truffle and gently roll it around in those vibrant sprinkles until fully coated. This step isn’t just about aesthetics; those little sprinkles create an enticing crunch when you bite into each truffle contrasting beautifully with their rich center. As they sit on their platter awaiting devourment (that’s totally a word now!), they look almost too pretty to eat—but trust me when I say they won’t last long once shared with friends and family!
Finally, once all are coated and looking festive, store them in an airtight container in the refrigerator until you’re ready to share these Juicy Orange Chocolate Christmas Truffles with everyone who gathers around your table during this magical season! Letting them chill further allows all those incredible flavors you’ve crafted together time to deepen even more—a perfect holiday treat you’ll cherish year after year.
So there you have it—a truly delightful journey from creamy beginnings through zesty enhancements all leading toward delicious conclusions! Enjoy every moment as these truffles become part of cherished memories shared with loved ones—you deserve every sweet bite!
Storage and Enjoyment Tips for Your Juicy Orange Chocolate Christmas Truffles
Oh, the moment has finally arrived! Your Juicy Orange Chocolate Christmas Truffles are ready to be enjoyed, and trust me, each bite is like a hug from the inside. These little bites of joy are not only a treat to make but also a delight to share with loved ones. But what do you do if you find yourself with a few leftover truffles? Don’t worry; I’ve got your back!
Storing Leftover Juicy Orange Chocolate Christmas Truffles
To keep your truffles in tip-top shape, store them in an airtight container at room temperature, away from direct sunlight. Ideally, they’ll stay fresh for about 5 days—though I can almost guarantee they’ll be devoured long before that! If you want to maintain their luxurious texture and flavor, place a slice of bread in the container with them—this little trick helps keep moisture levels just right, ensuring your truffles remain soft and creamy. After a couple of days, while they won’t lose their deliciousness, those vibrant flavors will meld together even more beautifully, intensifying the orange notes that dance through each bite. When it’s time to enjoy them again, there’s no need to reheat—just pull them out and let them come to room temperature for that perfect melt-in-your-mouth experience.
Freezing Juicy Orange Chocolate Christmas Truffles for Later
Now, if by chance you have extra truffles (or you’re just planning ahead for those busy holiday times), freezing is an excellent option! To freeze your truffles properly, simply lay them out on a baking sheet lined with parchment paper until they’re solid—this prevents them from sticking together. Once frozen, transfer them into a freezer-safe bag or container; they’ll keep well for up to three months. The convenience factor here is absolutely paramount because when the mood strikes for something sweet and indulgent, all you have to do is take out as many as you need and let them thaw at room temperature for about half an hour. This option not only saves you time but also allows you to savor the taste of these delightful truffles anytime your cravings hit!
Juicy Orange Chocolate Christmas Truffles
Indulge in Juicy Orange Chocolate Christmas Truffles – delightful bites filled with rich chocolate and zesty orange flavors. Try this easy recipe today!
- Prep Time: 20 minutes
- Cook Time: 10 minutes
- Total Time: 30 minutes
- Yield: Approximately 12 truffles 1x
- Category: Dessert
- Method: No Bake
- Cuisine: American
Ingredients
- 90 ml heavy cream
- 200 g dark cooking chocolate (40% cocoa), finely chopped
- 1 teaspoon finely grated orange peel
- 1/3 cup chocolate sprinkles
Instructions
- Heat the heavy cream in a saucepan over medium heat until it just simmers. Remove from heat.
- Pour the hot cream over the finely chopped chocolate in a heatproof bowl. Let sit for 5 minutes without stirring.
- Stir the mixture gently until smooth to create ganache.
- Fold in the grated orange peel until evenly distributed.
- Chill the ganache in the refrigerator for about an hour until firm enough to handle.
- Scoop out portions of ganache and roll into balls between your palms.
- Roll each truffle in chocolate sprinkles until fully coated.
- Place on a parchment-lined baking sheet and refrigerate until ready to serve.
Nutrition
- Serving Size: 1 truffle
- Calories: 70
- Sugar: 5g
- Sodium: 5mg
- Fat: 5g
- Saturated Fat: 3g
- Unsaturated Fat: 2g
- Trans Fat: 0g
- Carbohydrates: 7g
- Fiber: 1g
- Protein: 1g
- Cholesterol: 10mg