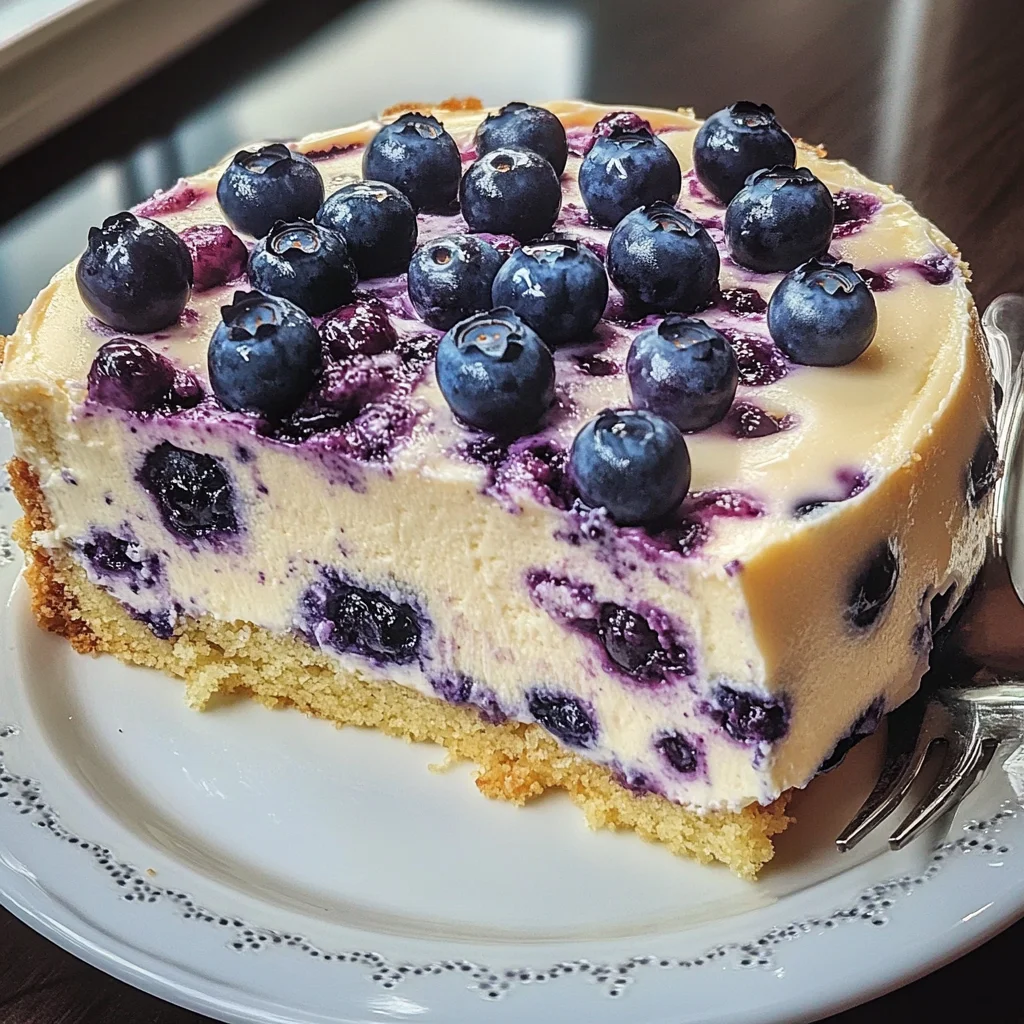
Nova Scotia Blueberry Cream Cake: A Delicious and Beginner-Friendly Dessert
Sometimes, the simplest desserts are the most satisfying. The Nova Scotia Blueberry Cream Cake is the perfect example of a treat that combines a few basic ingredients into something truly special. With a buttery crust, a creamy filling, and juicy blueberries throughout, it’s a dessert that’s sure to impress—and it’s surprisingly easy to make! If you’re new to baking or just looking for something that doesn’t require hours of prep, this cake is the one for you.
Imagine walking into your kitchen, where the aroma of fresh blueberries mingles with the comforting scent of vanilla and butter, wrapping you in a cozy embrace. This isn’t just a blueberry cake; it’s a symphony of flavors that tells stories of sun-kissed summer days and laughter-filled gatherings. Each slice is like a little piece of joy, evoking memories of carefree afternoons spent sharing delicious treats with loved ones. I promise you, making this Nova Scotia Blueberry Cream Cake: A Delicious and Beginner-Friendly Dessert will become one of those cherished moments in your culinary journey.
Nova Scotia Blueberry Cream Cake: A Delicious and Beginner-Friendly Dessert: A Slice of Joy
This cake brings together the tartness of fresh blueberries and the creaminess of sour cream to create an utterly intoxicating dessert that feels like a warm hug. Best part? You don’t need to be a baking expert to pull it off; it’s designed to be approachable yet impressive. Gather your ingredients, roll up your sleeves, and let’s dive into this delightful adventure!
Ingredients:
As we embark on this culinary journey together, let’s take a moment to appreciate each ingredient’s role in creating our masterpiece. Each element contributes not just flavor but also texture and balance—this is what makes baking such an art form.
- 1 ½ cups all-purpose flour: Flour acts as the backbone of our cake, providing structure and stability. When selecting flour, look for unbleached all-purpose flour which has a higher protein content; this will lend more strength to our cake while keeping it tender. Remember that too much flour can lead to a dry texture—measuring accurately is key here! You might even want to spoon the flour into your measuring cup rather than scooping directly from the bag; this prevents packing it down too much.
- ½ cup sugar: Sugar is not just about sweetness; it plays multiple roles in our recipe! It helps retain moisture and creates that beautiful golden crust we all love. For this recipe, granulated white sugar works wonders, but if you’re feeling adventurous, consider using coconut sugar for a deeper flavor profile that complements those blueberries beautifully.
- 1 ½ tsp baking powder: This leavening agent is absolutely paramount in giving our cake its lightness. Baking powder works by producing carbon dioxide gas when mixed with wet ingredients, causing our batter to rise as it bakes. Make sure your baking powder is fresh—if you’re unsure how old yours is, test it by mixing some with water; if it bubbles vigorously, it’s still good!
- ½ cup butter (cut into small cubes): Butter brings richness and flavor that’s simply irreplaceable in baking. Using cold butter helps create those lovely flaky layers in our cake’s crust while also contributing to its overall tenderness once baked. If you prefer a dairy-free option or are out of butter, feel free to use vegan butter or coconut oil instead—just ensure they are solid when cutting them into cubes!
- 1 egg: Eggs bind everything together while providing moisture and richness—a fundamental component in any cake recipe! For best results, use large eggs at room temperature; they incorporate better into your batter compared to cold eggs straight from the fridge.
- 4 cups fresh blueberries (or frozen): These little jewels are what make this cake shine with their vibrant color and burst of sweetness! Fresh blueberries are ideal because they add juicy pops throughout every bite. However, if you can’t find them or they’re out of season, frozen blueberries work perfectly fine—just toss them in a bit of flour before adding them to prevent them from sinking in the batter.
- 2 cups sour cream: Sour cream adds moisture as well as tanginess which balances out the sweetness beautifully. It’s crucial for achieving that creamy filling texture we’re aiming for! If you’re looking for alternatives due to dietary preferences or allergies, plain Greek yogurt would work wonderfully as well.
- ½ cup white sugar: This additional sugar enhances the sweetness level in our creamy filling while helping achieve those luscious flavors from both the sour cream and blueberries. Again, feel free to experiment with other sugars if you’d like an interesting twist!
- 2 egg yolks: These yolks add richness and depth—essentially taking our filling from good to extraordinary! Be gentle when separating them from the whites; we want only the yolks here since their fat content contributes significantly to creaminess without making things too fluffy.
- 1 tsp vanilla extract: Vanilla extract infuses warmth and enhances all other flavors present in your dessert. Use pure vanilla extract whenever possible for an authentic taste experience; synthetic versions often lack depth.
Equipment You’ll Need:
Before we dive into creating this delightful cake together, let’s talk about some essential tools you’ll need on hand. Having the right equipment makes your baking experience smoother and ensures success at every step!
- Mixing bowls – A good set of mixing bowls is indispensable for any baker. I recommend having various sizes on hand so you can mix dry ingredients separately before incorporating wet ones without spilling over! Glass bowls also allow you to see your mixtures’ consistency easily.
- Measuring cups & spoons – Precision is key in baking! Invest in sturdy measuring cups (both liquid and dry) along with measuring spoons for accurate ingredient amounts—not only does it help yield consistent results but also allows us to replicate this recipe time after time.
- Electric mixer or whisk – While I have fond memories whisking batter by hand as a child (and trust me—it builds character!), using an electric mixer speeds things up significantly here! Whether you’re creaming butter or whipping egg whites into stiff peaks, this tool makes life easier.
- Rubber spatula – Don’t underestimate this humble tool! A rubber spatula allows you to fold delicate mixtures gently without deflating them—crucial when combining ingredients like whipped cream or egg whites into batters.
With all these wonderful ingredients and tools ready at hand, let’s jump right into preparing our Nova Scotia Blueberry Cream Cake!
Step 1: Prepping Your Pans
Before anything else happens in this magical journey towards blueberry bliss, let’s prepare our pan with care. Preheat your oven to 350°F (175°C) because we want it nice and hot when our batter arrives there—the heat will help activate everything beautifully once baked! Grease an 8-inch round cake pan generously with either non-stick spray or softened butter (don’t forget those edges!), then line the bottom with parchment paper for extra insurance against sticking later on.
Step 2: Mixing Dry Ingredients
Now onto mixing dry ingredients—let’s combine our flour, sugar (the half cup portion), baking powder together until evenly distributed! This process ensures every bite has consistent flavor throughout rather than clumps forming during blending later on. Whisking these dry components thoroughly also adds air which aids rising later during baking; don’t rush through this step—it will pay off big time when slicing through that fluffy goodness!
Step 3: Creaming Butter & Sugar
In another bowl (preferably larger), combine cubed cold butter along with remaining sugar using an electric mixer fitted with paddle attachment until light & fluffy—about 3 minutes should do nicely here! This process known as creaming incorporates air pockets within fat molecules resulting ultimately yielding tender cakes rather than dense ones post-baking—goal achieved!
Step 4: Incorporating Egg & Flour Mixture
Once you’ve reached peak fluffiness with your butter-sugar mixture (trust me; you’ll notice!), now it’s time gently introduce eggs one at-a-time followed by alternating addition between dry mixture from earlier AND sour cream until fully combined—it should resemble thick pancake batter consistency at end point!
I hope you’re feeling excited about how simple yet rewarding each step has been thus far; hang tight because incredible blueberry cream awaits us shortly…
Step 5: Creating the Cake Base with Love
Now, let’s dive into that buttery crust that will cradle our blueberries and creamy filling like a warm embrace. Start by preheating your oven to 350°F (175°C). This step is absolutely paramount because a properly heated oven ensures even baking, preventing that dreaded sogginess in your crust. In a large mixing bowl, combine 1 ½ cups of all-purpose flour, ½ cup of sugar, and 1 ½ teaspoons of baking powder. The baking powder is your secret weapon here, working tirelessly to create the tender crumb we all adore. Whisk these dry ingredients together until they’re well-blended—this not only incorporates air but also ensures that the leavening agent is evenly distributed.
Next comes the fun part: adding the butter! Toss in the cubed butter and use your fingertips or a pastry cutter to work it into the flour mixture. You want to achieve a texture reminiscent of coarse crumbs; think of it as creating tiny pockets of flavor that will melt into a rich base. This technique is known as “cutting in” fat, and it’s crucial because it helps create layers—those lovely flaky textures we crave in desserts. Once you’ve achieved this crumbly consistency, add in your egg and stir gently until everything comes together into a cohesive dough. Don’t rush this step; take your time to mix until just combined; overmixing can lead to a tough crust, and we want nothing less than perfection here.
Step 6: Pressing Perfection
With your dough ready, it’s time to transform it into a beautiful cake base ready for its berry companions! Lightly grease your baking dish—an 8-inch square or round works wonderfully—and then press the dough evenly into the bottom of the prepared pan. Use your fingers or the bottom of a measuring cup to achieve an even layer with slightly raised edges. This forms a barrier for our juicy blueberries and creamy filling, ensuring everything stays perfectly nestled inside during baking. When you’ve pressed the crust down firmly but gently, pop it into that preheated oven for about 15 minutes, or until it starts turning a light golden brown—a sure sign that it’s developing flavor.
This initial bake is essential because it sets up a sturdy foundation for your cake while preventing any moisture from seeping into the crust later on. You’ll want to keep an eye on it as ovens can vary; if you see any browning happening too quickly, feel free to cover it loosely with foil. The goal here is not just to bake but also to coax out every bit of flavor from those simple ingredients—trust me when I say you’ll notice the difference once you take that first bite.
Step 7: The Berry Bliss
Now comes one of my favorite parts—bringing those gorgeous blueberries into play! While your crust is baking away beautifully in the oven, wash and prepare 4 cups of fresh blueberries. If fresh ones aren’t available (though I truly hope they are!), frozen blueberries will do just fine; just remember not to thaw them beforehand as they can get mushy. Place those beautiful berries in a bowl and sprinkle them lightly with sugar—about ½ cup should do nicely. Gently toss them until they’re coated; this helps draw out their natural juices and intensifies their flavor as they bake.
This step is not merely about sweetening; it’s about enhancing! As those blueberries sit with their sugary coat, they will release some juice which will meld beautifully with our sour cream filling later on—think of it as creating little bursts of flavor throughout each slice! Now let’s set these aside while we prepare our creamy topping.
Step 8: Crafting Your Creamy Filling
In another mixing bowl, let’s whip up that utterly intoxicating sour cream filling that brings everything together harmoniously. Combine 2 cups of sour cream with another ½ cup of white sugar (yes, more sweetness!). Add in two egg yolks—be careful not to include those whites just yet—and one teaspoon of vanilla extract for that aromatic touch we all adore. Using a whisk or an electric mixer on low speed, blend these ingredients until smooth and creamy; this should take about two minutes at most.
What makes this step so special? The sour cream provides both creaminess and tang—a perfect contrast to the sweetness of our blueberries—and since we’re using egg yolks instead of whole eggs in this mixture, we’re enriching the filling without making it too airy or light. The result? A dense yet luscious filling that clings beautifully to each berry as they bake together in perfect harmony! Trust me on this—it’s going to be profoundly satisfying once baked!
Step 9: Assembling Your Masterpiece
Now comes the moment we’ve all been waiting for—the assembly! Take your baked crust out from the oven; let it cool slightly before layering on half of your blueberry mixture evenly across its surface. Then dollop on half of that creamy sour cream mixture over those luscious berries, spreading gently but evenly so every bite has both blueberry juiciness and creamy goodness intertwined within its embrace. Repeat this process by layering remaining blueberries followed by another layer of sour cream mixture until every last bit has been used up.
This layering technique isn’t just about aesthetics—it plays a crucial role in ensuring each slice offers that perfect balance between flavors and textures. As you pour each layer carefully, notice how invitingly beautiful this dessert becomes! It’s like watching a masterpiece come alive before your eyes—a true testament to how simple ingredients can turn into something extraordinary when treated with love.
Step 10: Baking Your Perfect Nova Scotia Blueberry Cream Cake
Finally, it’s time for our creation to meet some heat again! Carefully place your assembled cake back into the oven and bake at 350°F (175°C) for about 45-50 minutes or until the top appears set but still slightly jiggly—that’s normal! You’ll know it’s done when a toothpick inserted into the center comes out clean or with just a few moist crumbs attached (but no wet batter). This gentle jiggle means there’s still some delightful creaminess hiding beneath!
As tempting as it may be to dive right in after pulling out this beauty from the oven, patience is key here! Allowing it to cool completely before slicing will help set those layers beautifully—you don’t want all that deliciousness spilling out upon cutting! Letting this cake chill also allows flavors to meld further for an even more profound taste experience when finally served.
Conclusion:
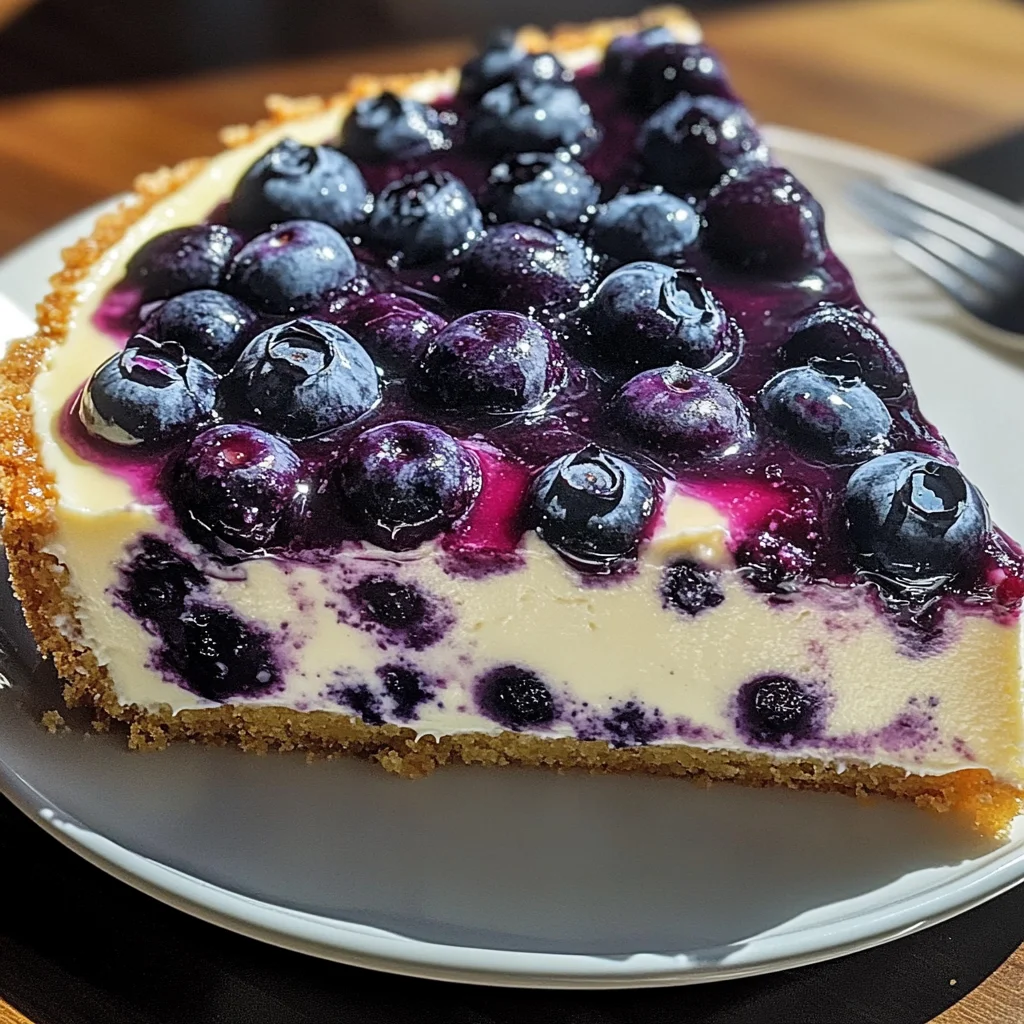
As we wrap up this journey through crafting your own Nova Scotia Blueberry Cream Cake, I hope my enthusiasm has been as contagious as the aroma wafting from your oven! This isn’t just any dessert; it’s a celebration of simplicity elevated to extraordinary heights. The combination of buttery crust and creamy filling layered with juicy blueberries creates a symphony of flavors that dances on your palate. Each bite brings joy—a delightfully sweet escape that feels like home.
This recipe is truly a must-try because it’s not only accessible but also incredibly rewarding to make. Whether it’s for family gatherings, casual weeknight dinners, or simply because you deserve something sweet after a long day, this cake shines brightly on any occasion. Picture pulling it from the oven—the golden crust glistening under inviting blueberry juices—and sharing slices with loved ones as laughter fills the room. It’s moments like these that make cooking so profoundly satisfying.
Imagine savoring one of these delectable slices alongside a hot cup of coffee for an afternoon pick-me-up or pairing it with whipped coconut cream for a truly decadent experience. For those warm summer evenings, serve chilled slices topped with fresh mint leaves—a vibrant touch that complements both flavor and presentation perfectly! Each pairing enhances the cake’s essence while creating new memories around your dining table.
Feeling adventurous? This recipe is wonderfully adaptable! You could swap out blueberries for raspberries or blackberries depending on what’s in season or even mix different fruits together for an exciting twist! Craving something extra? A sprinkle of cinnamon or nutmeg can add depth, transforming this classic into something uniquely yours. So gather your ingredients, embrace the process, and don’t forget to share your creations with friends—I can’t wait to hear about your experiences!
Nova Scotia Blueberry Cream Cake: A Delicious and Beginner-Friendly Dessert
Discover the joy of baking with our Nova Scotia Blueberry Cream Cake, a delightful dessert perfect for all skill levels! This cake combines a buttery crust, creamy sour cream filling, and fresh blueberries, creating a harmonious blend of flavors that will impress your family and friends. Whether you’re hosting a gathering or simply treating yourself, this easy recipe is designed to be approachable yet visually stunning. The aroma of vanilla and fresh berries wafting through your kitchen will evoke memories of carefree summer days spent with loved ones. With each slice, you’ll experience the sweet tartness of blueberries enveloped in a luscious creamy layer—it’s truly a slice of joy!
- Prep Time: 20 minutes
- Cook Time: 65 minutes
- Total Time: 1 hour 25 minutes
- Yield: Serves approximately 12 1x
- Category: Dessert
- Method: Baking
- Cuisine: Canadian
Ingredients
- 1 ½ cups all-purpose flour
- ½ cup granulated sugar (plus an additional ½ cup for blueberries)
- 1 ½ tsp baking powder
- ½ cup butter (cubed)
- 1 large egg
- 4 cups fresh blueberries
- 2 cups sour cream
- 2 egg yolks
- 1 tsp vanilla extract
Instructions
- Preheat the oven to 350°F (175°C) and grease an 8-inch round cake pan.
- In a mixing bowl, combine flour, ½ cup sugar, and baking powder. Mix well.
- Cut in cold butter until the mixture resembles coarse crumbs. Stir in egg until combined.
- Press dough into the prepared pan and bake for about 15 minutes until golden brown.
- While cooling, prepare blueberries by tossing them with an additional ½ cup sugar.
- In another bowl, mix sour cream, egg yolks, and vanilla until smooth.
- Layer half the blueberries over the crust, followed by half the sour cream mixture. Repeat layers.
- Bake for an additional 45-50 minutes until set but slightly jiggly in the center.
- Allow to cool completely before refrigerating for at least two hours before serving.
Nutrition
- Serving Size: 1 slice (100g)
- Calories: 230
- Sugar: 15g
- Sodium: 150mg
- Fat: 10g
- Saturated Fat: 5g
- Unsaturated Fat: 4g
- Trans Fat: 0g
- Carbohydrates: 34g
- Fiber: 1g
- Protein: 4g
- Cholesterol: 40mg