4th of July cupcakes
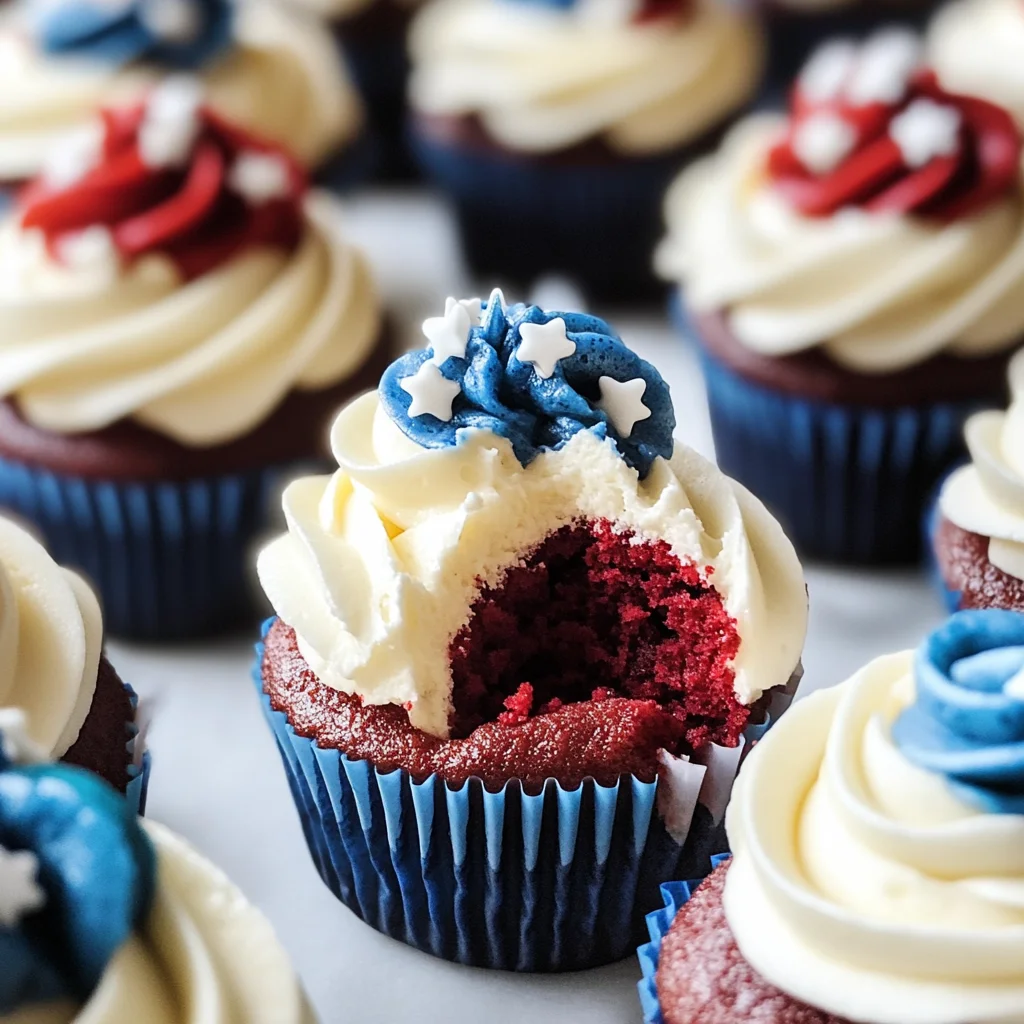
There’s something truly magical about baking cupcakes, especially when they’re infused with the spirit of a celebration like the 4th of July. As you swirl together vibrant red and blue batters, you’re not just creating a dessert; you’re crafting a visual masterpiece that beckons to be shared with friends and family. Picture this: as the golden summer sun shines down, you present these delightful little cakes topped with fluffy vanilla buttercream, each one a perfect representation of liberty and joy. With every bite, you experience the tender texture and rich cocoa flavor that dances on your palate, making the experience profoundly satisfying. These 4th of July cupcakes are more than just food; they symbolize togetherness, festivity, and the simple joy of sharing delicious moments.
The beauty of these cupcakes lies in their marbled appearance, which creates an eye-catching display fit for any gathering. But let’s not forget the taste! The moistness from the buttermilk combined with the delightful richness from butter ensures that each cupcake is a symphony of flavors that will have everyone reaching for seconds. I promise you—once you’ve taken that first bite, you’ll understand why these cupcakes are destined to become a cherished tradition at your summer gatherings. So grab your apron and let’s dive into this exciting baking adventure!
4th of July Cupcakes: A Festive Delight for Your Celebration
These festive 4th of July cupcakes are not only stunning but also incredibly delicious! With their cocoa-rich swirls of red velvet and blue velvet cake topped with luscious vanilla buttercream, they’re perfect for sparking joy at any Independence Day celebration. Trust me when I say that both kids and adults alike will be clamoring for these beauties at your next summer picnic or BBQ.
Ingredients:
Embarking on this culinary journey means gathering together some essential ingredients, each playing a vital role in crafting our unforgettable 4th of July cupcakes. Let’s explore what you’ll need:
- 1 1/2 cups all-purpose flour (spooned and leveled). Flour is the backbone of any great cupcake; it provides structure while still allowing that tender crumb we all crave. When measuring flour, it’s crucial to spoon it into your measuring cup and level it off with a knife—this prevents packing too much flour into your cup, which can lead to dense cupcakes rather than light and airy ones.
- 1 tsp fine salt. This is absolutely paramount in enhancing all those sweet flavors in our batter! Salt acts like a flavor amplifier; it balances sweetness and rounds out the overall taste profile. Just make sure you use fine salt here for even distribution throughout the batter.
- 1 tsp baking powder. Baking powder is our leavening agent that helps create those puffy tops we adore in cupcakes! It works by releasing carbon dioxide when mixed with wet ingredients, allowing our batter to rise beautifully in the oven. If you’re running low on baking powder, remember that it’s not an ingredient to skimp on if you want success!
- 1/4 tsp baking soda. Similar to baking powder but used in different contexts, baking soda requires an acidic component (like buttermilk) to activate its leavening properties. It also helps to enhance browning in our cupcakes as they bake.
- 8 tbsp unsalted butter, softened. The quality of butter makes all the difference here! We want it softened so it can easily cream together with sugar to create an airy texture that’s essential for those light cupcakes we love so much. Unsalted butter allows us better control over the saltiness in our recipe—always a good choice!
- 3/4 cup sugar. Sugar doesn’t just sweeten; it also contributes moisture and aids in creating that beautifully tender crumb we desire in baked goods. When creaming together sugar with butter, you’re developing air pockets which help keep your cupcakes light—they’re like little clouds waiting to be devoured!
- 2 large eggs, room temperature. Eggs contribute structure as well as moisture to our batter; they act as binding agents holding everything together while also enriching flavor. Bringing them to room temperature ensures they incorporate more evenly into your mixture—don’t skip this step!
- 2 tbsp sour cream, room temperature. Sour cream adds moisture without making our batter overly heavy. Plus, its slight acidity enhances flavor while helping create that rich texture we adore! If you don’t have sour cream on hand, plain yogurt can be an excellent substitute.
- 2 tsp vanilla extract. This fragrant liquid gold brings warmth and depth to our batter; it enhances all other flavors present in your recipe beautifully! Always opt for pure vanilla extract over imitation if possible—it makes such a profound difference.
- 2/3 cup buttermilk plus 2 tbsp, divided, at room temperature. Buttermilk adds tanginess while also keeping our cupcakes incredibly moist! The acids in buttermilk react with baking soda for leavening while providing that subtle complexity that elevates our cakes beyond ordinary.
- 3 tbsp cocoa powder. Cocoa powder gives us those lovely chocolatey swirls we’re after! Choose high-quality Dutch-process cocoa for richer flavor if you can—it really does make a difference in achieving deep chocolate notes without overwhelming sweetness.
- 1 1/2 cups (350 g) salted butter, cubed and softened (for frosting). For frosting perfection, it’s key we use softened butter again here so we can whip it up until fluffy—this is how we achieve that smooth texture everyone loves atop their cupcakes! If you’re concerned about saltiness or prefer less sodium intake, feel free to substitute unsalted butter here instead.
- 6 cups (700 g) powdered sugar, sifted. Powdered sugar lends sweetness along with an ultra-smooth finish to our frosting—it’s essential for achieving that dreamy consistency we want spreading easily over our cupcakes! Sifting helps eliminate lumps so your frosting comes out perfectly silky every time.
- 1 tsp vanilla extract (for frosting). Just like before with our batter ingredients—vanilla plays an equally important role here by adding warmth and enhancing sweetness within our frosting!
- 1 tsp boiling water. This may seem odd at first glance but trust me—it’s non-negotiable for ensuring our frosting is aerated properly while creating that ideal fluffy texture!
Equipment You’ll Need:
Having the right tools makes all the difference when baking these stunning 4th of July cupcakes! While they might not be ingredients themselves, each piece of equipment serves as an essential partner in bringing this festive treat to life.
- Mixing bowls (various sizes) – A good set of mixing bowls allows you complete flexibility when combining ingredients or preparing multiple components simultaneously; having several options on hand can streamline your process significantly!
- Stand mixer or hand mixer – Whether you opt for a stand mixer or hand mixer depends on personal preference—but either option will make whipping up both batter and frosting much easier than doing it by hand (trust me!). A stand mixer frees up your hands while allowing consistent mixing speed—you’ll achieve lighter textures effortlessly!
- Cupcake/muffin tin – This sturdy pan is critical for shaping those perfect little cakes! Make sure yours has at least 12 wells so you can bake them all at once—no one likes waiting around unnecessarily when there’s deliciousness involved!
- Parchment paper liners – These charming liners not only add visual appeal but also help prevent sticking while making cleanup effortless afterward—it’s like giving your treats their own cozy home before they head off into bellies everywhere!
Preparing the 4th of July Cupcakes
Step 1: Creaming Butter and Sugar
To begin this delightful journey toward cupcake perfection, start by creaming together your softened unsalted butter and granulated sugar until light and fluffy—a process known as creaming! In a large mixing bowl (or using your stand mixer), combine both ingredients using medium speed until they transform into a pale yellow mixture full of airy bubbles—it should take about three minutes or so depending on how powerful your appliance is! This step is crucial because it incorporates air into the mixture; without it, you’d end up with dense little cakes instead of soft heavenly bites bursting with flavor.
Step 2: Adding Eggs
Once you’ve achieved that beautiful creamy consistency from Step 1, it’s time to add those two large eggs one at a time—allowing each addition ample time to blend fully before introducing its sibling into the mix! Eggs bring moisture as well as bind everything together nicely—so don’t rush through this part since proper incorporation leads directly back towards achieving cupcake greatness down the line!
Step 3: Incorporating Sour Cream & Vanilla
Now comes another layer of richness—we’ll gently fold in two tablespoons of room-temperature sour cream along with two teaspoons vanilla extract next! Doing so adds additional moisture while elevating overall flavor profiles beyond average expectations thanks largely due its slight tartness—the result? An utterly intoxicating base ready-to-be transformed into something truly extraordinary once baked!
Step 4: Mixing Dry Ingredients
In another bowl altogether (preferably one that’s medium-sized), whisk together those dry ingredients: flour mixed harmoniously alongside fine salt along with both baking powder plus baking soda until evenly distributed throughout—this ensures maximum effectiveness later during final blending stages ahead when combined alongside wet elements within batter itself later on down path towards lusciousness achieved post-baking phase ahead…
Stay tuned as we continue crafting these beautiful creations filled with festive cheer—a few more steps await before indulging fully into blissful bites come Independence Day celebrations soon enough ahead…
Step 5: Creating the Perfect Swirl
Now that we have our batter ready, it’s time to create the beautiful marbled effect that makes these 4th of July cupcakes so visually stunning. Begin by dividing your prepared batter evenly into two separate bowls. To one bowl, gently fold in three tablespoons of cocoa powder, which will give you that rich, chocolatey flavor we all adore. This step is crucial because the cocoa not only adds depth to our cupcakes but creates a lovely contrast against the vibrant red and blue colors we’ll achieve later. Remember, you want to be tender with your folding; overmixing will deflate those precious air bubbles we’ve worked so hard to create.
Next comes the fun part—layering the batters! Grab your cupcake liners, and fill each one halfway with the red velvet batter. Then, using a spoon or piping bag (if you feel fancy), drop in dollops of the blue velvet batter on top of the red. Don’t worry about being perfect here; the beauty lies in spontaneity! Once you’ve added both batters, take a toothpick or skewer and gently swirl through the batter a few times. You’re aiming for a delightful marbled look without completely blending them together. Trust me on this: each swirl will yield uniquely gorgeous cupcakes that are as delicious as they are festive.
Step 6: The Baking Process
With our beautiful swirled batters ready, it’s time to pop them into the oven! Preheat your oven to 350°F (175°C) if you haven’t already—it’s absolutely vital for even baking. Place your filled cupcake liners into a muffin tin; this not only gives support but ensures they hold their shape as they rise majestically in the oven. Bake them for about 18-20 minutes or until a toothpick inserted in the center comes out clean or with just a few moist crumbs clinging to it.
While they’re baking, let yourself get lost in that heavenly aroma wafting through your kitchen—it’s utterly intoxicating! This step is more than just cooking; it’s about creating an experience that fills your home with warmth and excitement. You might be tempted to open that oven door too soon—don’t do it! Each time you peek inside, you risk lowering the temperature and interrupting their rise. Instead, set a timer and resist that urge until at least 18 minutes have passed. When you finally pull them out of the oven, allow those lovely cupcakes to cool in their pan for about five minutes before transferring them to a wire rack; this gentle cooling helps prevent soggy bottoms while allowing steam to escape.
Step 7: Whipping Up Vanilla Buttercream
Now onto one of my favorite parts—the frosting! A good vanilla buttercream can elevate any dessert from ordinary to extraordinary, and I promise this recipe will have everyone asking for seconds (or thirds!). Start by placing 1½ cups of softened salted butter in a large mixing bowl. If you’re like me and love creamy textures, you’ll want to beat that butter until it’s light and fluffy—this usually takes about 3-5 minutes on medium speed. The airiness created during this process is non-negotiable for achieving that smooth, spreadable consistency we all crave on our cupcakes.
Once your butter is beautifully whipped, gradually add in six cups of sifted powdered sugar—yes, six cups! It sounds daunting, but trust me on this one: it’s going to be worth it when you taste that silky sweetness enveloping each bite of cake. Mix on low speed at first to avoid creating a cloud of sugar dust—no one wants a messy kitchen! As you blend everything together, add one teaspoon of vanilla extract for flavor heaven and two tablespoons of room-temperature buttermilk for that luscious creaminess we’re after. If at any point your frosting feels too thick (which can happen), don’t hesitate to add an extra splash of buttermilk until you’ve reached your desired consistency. Taste along the way—you want it perfectly balanced between sweet and buttery!
Step 8: Frosting Your Masterpieces
You’ve made it through baking and making frosting—now comes what I consider one of the most fulfilling steps: frosting those gorgeous 4th of July cupcakes! Once your cupcakes have cooled completely on the wire rack (and please wait until they’re fully cool; icing warm cupcakes will melt your hard work away), grab a piping bag fitted with your favorite star tip or even just a simple round tip if that’s what you’ve got at hand.
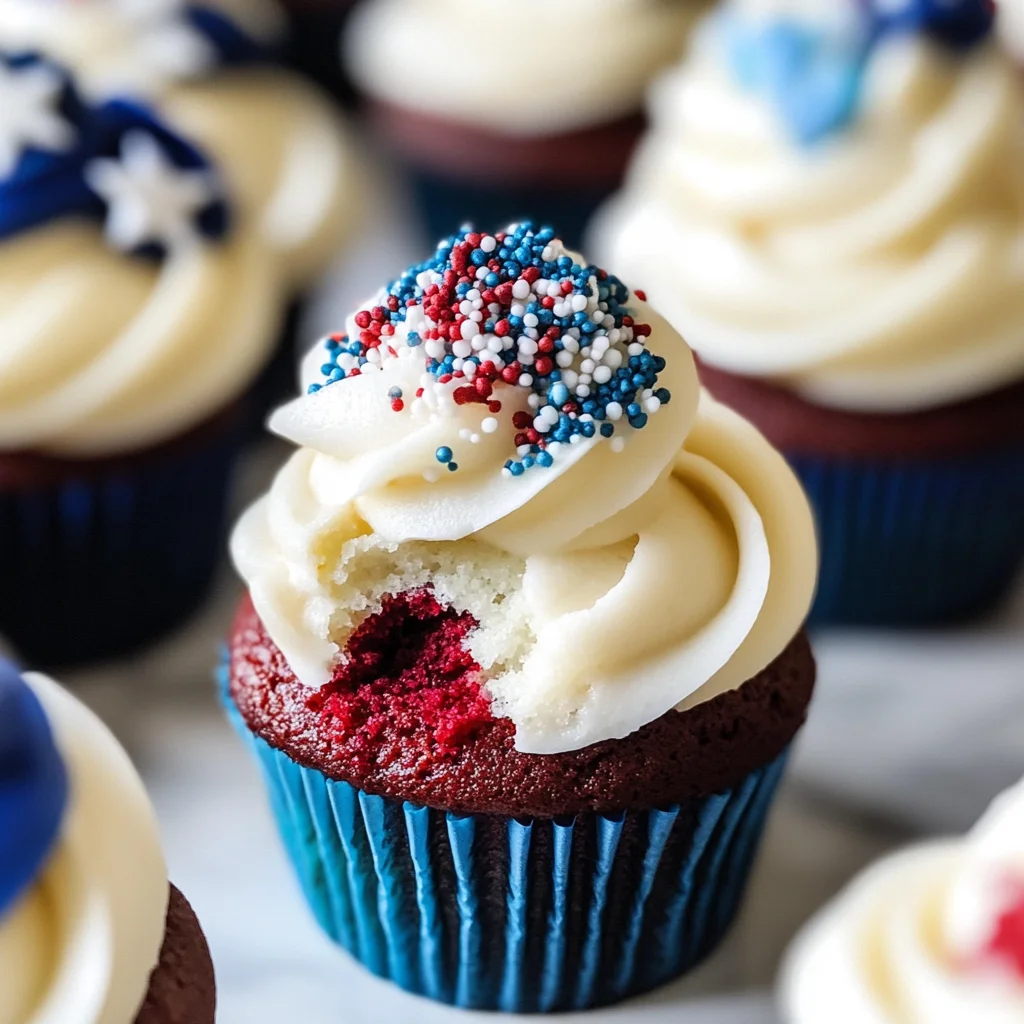
The key here is patience—take your time as you pipe swirls or rosettes onto each cupcake. Start from the outer edge and work inward towards the center; this technique not only looks professional but also ensures an ample amount of frosting on every bite. If you’re feeling adventurous (and why wouldn’t you?), consider adding some fun patriotic sprinkles atop your frosted masterpieces! Not only do they add texture but also bring that joyful burst of color reminiscent of fireworks lighting up the night sky on Independence Day.
As you finish frosting each cupcake, stand back and admire your handiwork—each treat is not just food but an expression of love and celebration meant to be shared with friends and family during those cherished summer gatherings.
Next Major Phase – Final Touches
With all these delightful elements coming together beautifully, let’s talk about presentation—the cherry on top of all our hard work! After decorating each cupcake with sprinkles or even fresh berries for an extra touch (think blueberries or strawberries!), arrange them on a festive platter or cake stand. The visual appeal is truly important because we eat first with our eyes, right?
And there you have it—your stunning 4th of July cupcakes are ready to shine at any summer gathering! Whether you’re hosting friends for fireworks or simply enjoying a quiet evening with loved ones under twinkling stars, these treats will surely evoke smiles and compliments around every table. So gather everyone around as you share these scrumptious creations; trust me when I say there will be laughter—and maybe even some moments where people pause mid-bite just to savor how exceptional they taste! Enjoy every step of sharing these delights because nothing beats food made with heart!
Storage and Enjoyment Tips for Your 4th of July cupcakes
Now that you’ve created these stunning 4th of July cupcakes, it’s time to revel in the joy of sharing your delicious creation with family and friends. Imagine gathering around a summer picnic table, laughter filling the air, and everyone reaching for one of these vibrant, festive treats. But what if you have leftovers? No worries! I’ve got you covered with some fantastic storage tips to ensure your cupcakes stay as delightful as they were when they first came out of the oven.
Storing Leftover 4th of July cupcakes
To keep your beautiful cupcakes fresh and moist, it’s essential to store them correctly. Place them in an airtight container at room temperature, ensuring they are completely cooled before sealing them away—this prevents any unwanted condensation from ruining their texture. Your cupcakes will remain delicious for about three days this way, but trust me; they might not last that long because of how irresistibly good they are! For those moments when you want to keep them a bit longer, consider adding a slice of bread into the container; it’s a little trick I swear by that helps maintain moisture. They’ll taste just as scrumptious after storage, with that rich cocoa flavor still shining through! When serving leftovers, simply enjoy them at room temperature or pop them in the microwave for about 10 seconds for a warm treat that feels just baked!
Freezing Cupcakes for Later
Now, if you want to take it a step further and prepare ahead of time, freezing these delightful cupcakes is an excellent option! First, make sure they’re completely cooled. Then, wrap each cupcake individually in plastic wrap and place them in a freezer-safe bag or container. This method keeps them protected from freezer burn while locking in all those wonderful flavors. You can freeze them for up to three months without sacrificing taste or texture! When you’re ready to indulge again, simply move them from the freezer to the fridge overnight or let them sit at room temperature for about an hour before enjoying. The convenience factor here is fantastic—imagine having a batch of these gorgeous 4th of July cupcakes ready whenever a craving strikes or when guests drop by unexpectedly!
4th of July Cupcakes
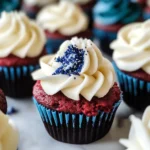
Get ready to celebrate with these vibrant 4th of July cupcakes! Bursting with patriotic colors and flavors, these delightful treats are sure to be the highlight of your summer gatherings. Each cupcake features a moist base of red velvet and blue velvet cake, swirled together for an eye-catching appearance. Topped off with a creamy vanilla buttercream frosting, they offer a perfect balance of sweetness and richness. Whether you’re hosting a picnic or enjoying a backyard BBQ, these cupcakes embody festive joy and are guaranteed to leave everyone reaching for seconds.
- Prep Time: 30 minutes
- Cook Time: 20 minutes
- Total Time: 50 minutes
- Yield: Makes approximately 12 cupcakes 1x
- Category: Dessert
- Method: Baking
- Cuisine: American
Ingredients
- 1 1/2 cups all-purpose flour
- 1 tsp fine salt
- 1 tsp baking powder
- 1/4 tsp baking soda
- 8 tbsp unsalted butter, softened
- 3/4 cup sugar
- 2 large eggs
- 2 tbsp sour cream
- 2 tsp vanilla extract
- 2/3 cup buttermilk plus 2 tbsp, divided
- 3 tbsp cocoa powder
Instructions
- Preheat oven to 350°F (175°C). Line a muffin tin with cupcake liners.
- In one bowl, whisk together flour, salt, baking powder, and baking soda. In another bowl, cream together softened butter and sugar until light and fluffy.
- Add eggs, one at a time, followed by sour cream and vanilla extract—mix until well combined.
- Gradually add dry ingredients alternately with buttermilk until just combined.
- Divide batter into two bowls; mix cocoa powder into one bowl. Layer red velvet batter in cupcake liners followed by blue velvet batter.
- Gently swirl the batters with a toothpick for a marbled effect.
- Bake for about 18-20 minutes or until a toothpick comes out clean.
Nutrition
- Serving Size: 1 cupcake (70g)
- Calories: 300
- Sugar: 24g
- Sodium: 220mg
- Fat: 12g
- Saturated Fat: 7g
- Unsaturated Fat: 4g
- Trans Fat: 0g
- Carbohydrates: 42g
- Fiber: 1g
- Protein: 3g
- Cholesterol: 45mg