Zesty Radish Relish
There’s something truly magical about cooking with fresh ingredients, isn’t there? The way the aromas dance in the air, the vibrant colors that leap from the cutting board to your plate, and the sheer joy of creating something delicious from scratch—it’s an experience that nourishes not just our bodies but our souls. Today, I’m so excited to share with you my beloved recipe for Zesty Radish Relish. This isn’t just a condiment; it’s a celebration of bright flavors and a wonderful way to use those extra radishes from your garden or local farmers market. I promise you, once you taste this relish, you’ll wonder how you ever lived without it!
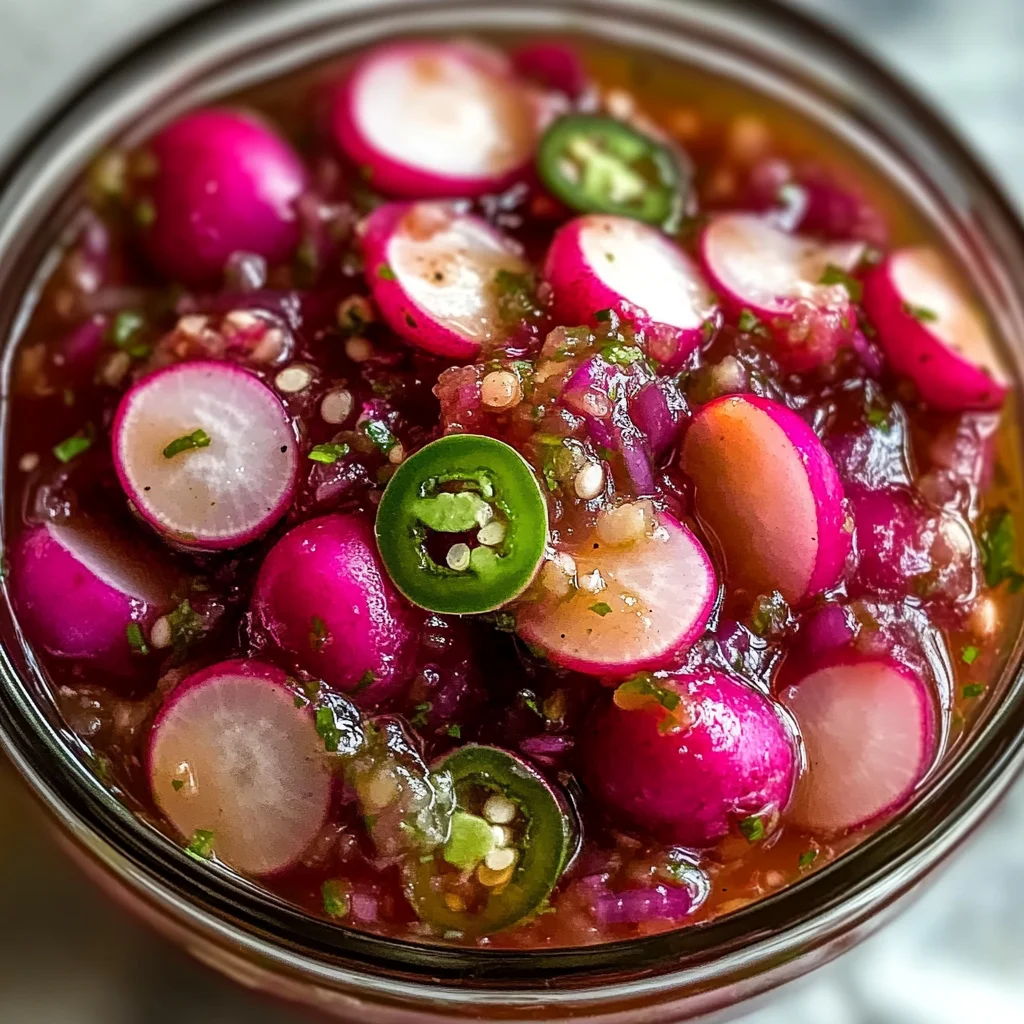
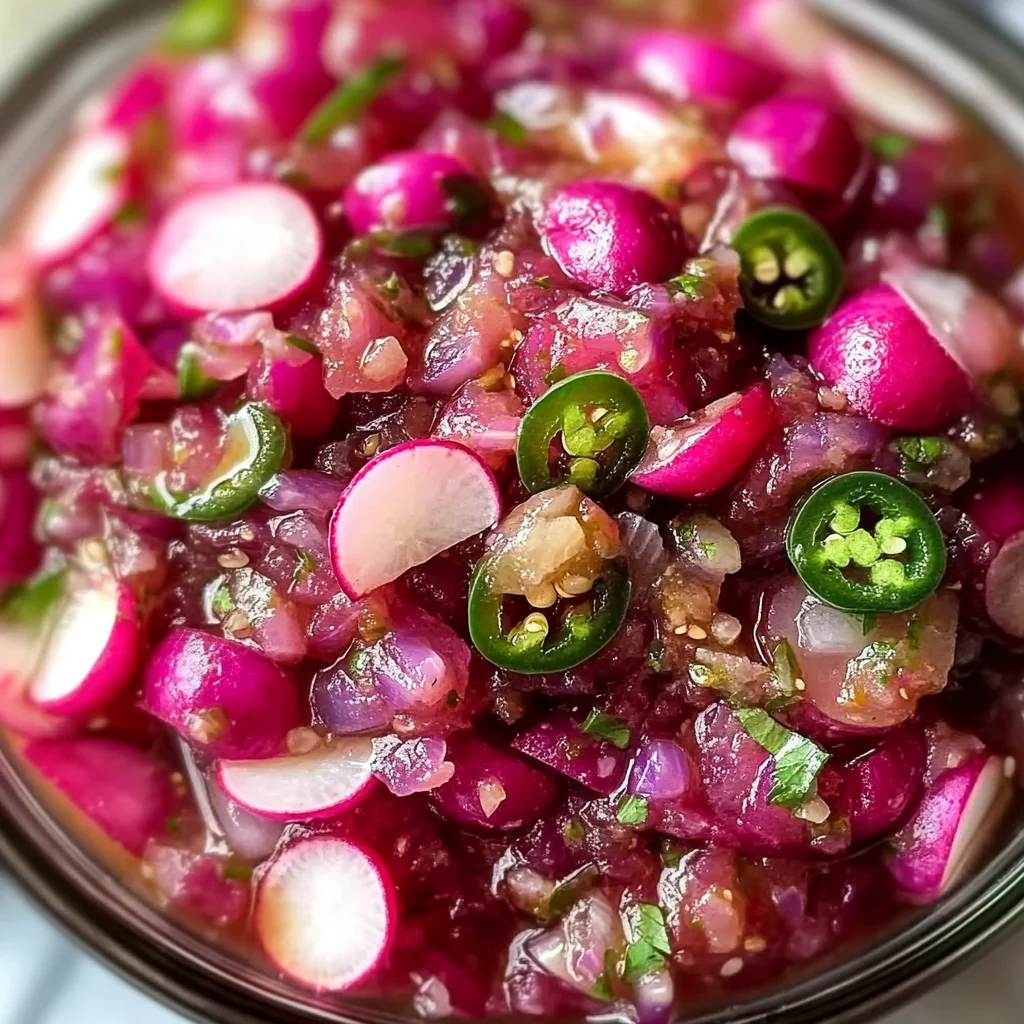
The beauty of this Zesty Radish Relish lies in its fascinating interplay of flavors and textures. The crisp snap of fresh radishes plays beautifully against the sweet backdrop of sugar and vinegar; add in the tangy kick from pickled jalapeños and the aromatic essence of garlic, and you’ve got an utterly intoxicating combination! Perfect as a topping for grilled vegetables or a zesty addition to your favorite sandwich, this relish is versatile enough for any occasion. It brings a burst of flavor that can elevate even the simplest meals into something truly extraordinary.
Zesty Radish Relish: A Tangy Twist on Tradition
This relish is not just another recipe; it’s a delightful adventure into the world of preservation and flavor enhancement. You might be surprised at how simply combining these ingredients can create such depth and character. Plus, it’s incredibly easy to make! In just about 20 minutes, you can whip up a batch that will have everyone asking for seconds (and thirds!). So let’s roll up our sleeves and dive into this culinary journey together!
Ingredients:
As we embark on this flavorful adventure, let me tell you why each ingredient is essential in crafting your Zesty Radish Relish.
- 3 cups sliced radishes, cleaned and stemmed. These little gems are more than just crunchy bites; they bring a beautiful peppery flavor that’s refreshing and unique. When selecting radishes, look for ones that are firm to the touch with vibrant colors—this indicates freshness! Feel free to mix varieties if you’d like; red, white, or even black radishes can add interesting notes to your relish.
- 1 red onion, cut into quarters. Sweet yet slightly sharp, red onions are perfect for adding depth to our relish. Their vibrant color not only enhances visual appeal but also contributes sweetness when cooked gently. Make sure to slice them evenly; this will ensure they soften uniformly during cooking.
- 2 tablespoons seeded pickled jalapeños. These little spicy wonders will bring a delightful zing without overwhelming heat since we’re using them seeded. The acidity from pickling complements the other ingredients beautifully while providing that necessary kick! If you’re looking for a milder flavor profile, feel free to adjust the amount or omit them altogether.
- 1 cup apple cider vinegar or white grape juice vinegar. This liquid gold is crucial for balancing flavors—its tartness cuts through the sweetness of sugar while enhancing all other ingredients’ natural aromas. Apple cider vinegar adds a hint of fruitiness, while white grape juice vinegar offers a lighter touch; both work wonderfully in this recipe!
- 1/2 cup granulated sugar. At first glance, sugar seems simple enough—but it plays an absolutely paramount role here! It balances acidity with sweetness and helps preserve our relish without need for artificial preservatives. Use organic cane sugar if you can find it—it offers richer flavor notes compared to regular white sugar.
- 2 cloves garlic. Fresh garlic adds an aromatic punch that elevates this relish beyond mere condiments. Be sure to mince it finely so it disperses evenly throughout the mixture—trust me on this step; nobody wants large chunks interrupting their flavorful experience!
- 2 teaspoons kosher salt. Salt is an essential ingredient in any dish—it enhances flavors and brings everything together harmoniously. Kosher salt is preferred for its flaky texture which dissolves easily during cooking without being overly salty.
- 2 tablespoons yellow mustard seeds. These tiny seeds pack quite a flavor punch! They provide both texture and a subtle tanginess that rounds out our relish perfectly. Plus, seeing those little specks throughout add visual interest—a lovely touch!
- 1 teaspoon celery seeds. Often overlooked but highly effective in imparting earthy undertones reminiscent of fresh celery stalks! These seeds complement radishes beautifully—don’t skip them!
- 1/2 teaspoon dried dill. This herb introduces a hint of floral brightness that pairs wonderfully with our zesty combination. Dried dill works well here as we want its concentrated flavor rather than fresh which could overpower other elements.
Now that we’ve gathered all these wonderful ingredients bursting with potential flavors let’s prepare ourselves for some delightful cooking magic!
Equipment You’ll Need:
Having the right tools is absolutely essential when embarking on any culinary adventure—it makes everything smoother and more enjoyable! Here’s what you’ll need for your Zesty Radish Relish:
- Cutting board: A sturdy cutting board is paramount for safely slicing all those vibrant ingredients—and trust me when I say you’ll appreciate having ample space as you chop away!
- Sharp knife: A good quality chef’s knife will make quick work of chopping onions and slicing radishes with precision—no one wants dull blades ruining their kitchen experience!
- Large saucepan: This equipment is non-negotiable as we’ll be combining everything over heat shortly—look for one with good heat distribution so nothing burns during cooking.
- Measuring cups/spoons: Accurate measurements are crucial when dealing with such flavorful ingredients—you’ll want each element to shine through perfectly balanced!
- Wooden spoon: For gentle stirring without scratching up your beautiful pan—plus there’s something satisfying about using wood in cooking!
With everything ready at hand let’s move forward into preparing our fabulous Zesty Radish Relish!
Step 1: Slice Those Colors
Start by washing your radishes under cool water until they’re squeaky clean—there’s nothing like fresh produce! Once dried thoroughly (you don’t want excess moisture diluting flavors), slice them thinly—aiming for uniform pieces ensures even cooking later on when we combine them all together in harmony.
Step 2: Chop Your Onions
Next up is quartering your red onion before slicing thinly into crescent moons—it creates delicate strands full of sweetness waiting to mingle with our zesty concoction! Remember: take your time here—the goal isn’t speed but achieving beautiful slices that will enhance every bite later down the line.
Step 3: Bring It All Together
In your large saucepan over medium heat (not too high!), combine those glorious radishes along with sliced onions—allow them to sweat gently while stirring occasionally until softened slightly (about 4–5 minutes). This process known as “sweating” helps release moisture while developing deeper flavors within each ingredient; don’t rush this step!
Step 4: Add Spice & Sweetness
Once those veggies have softened beautifully—add minced garlic followed by seeded pickled jalapeños along with all remaining ingredients: apple cider vinegar (or whatever variety tickles your fancy), granulated sugar, kosher salt mustard seeds celery seeds dried dill—the combination should create an utterly intoxicating aroma already filling up your kitchen!
Now let’s simmer gently until bubbling softly (around 10 minutes)—just enough time for flavors meld together beautifully while getting acquainted—it’s like bringing friends together at dinner parties where everyone walks away feeling satisfied!
Stay tuned as we continue crafting this delightful relish—I promise you won’t regret sticking around!
Step 5: The Magic of Marination Begins
Now that we’ve got everything beautifully combined in our mixing bowl, it’s time for the marinating magic to unfold. Gently stir all the ingredients together until they are well-incorporated, ensuring each slice of radish and onion is enveloped in that glorious mixture. This step is crucial because we want the flavors to meld and deepen, creating an utterly intoxicating symphony of tastes that will dance on your palate. Once mixed, transfer this vibrant medley into a clean glass jar or an airtight container. It’s important to choose a non-reactive container, as metals can alter the flavor of your relish over time.
Now comes the hard part—patience! You’ll want to let this sit at room temperature for about 30 minutes before transferring it to the fridge. Why? Well, during this time, the radishes will begin to release their natural juices, which will mix with the vinegar and sugar to create a tantalizing brine. Trust me on this one; giving them time to mingle and soak up that zesty goodness is absolutely paramount for achieving that profound flavor explosion when you finally taste it.
Step 6: Refrigeration – A Flavorful Transformation
After allowing your zesty concoction to rest at room temperature, it’s time to chill out—literally! Pop your jar into the refrigerator and let it sit for at least one hour, but if you can resist temptation, I recommend letting it marinate overnight. This resting period allows the radishes to absorb the briny goodness fully and mellow out any harshness from the raw onions and garlic.
As it chills, those bright colors will intensify, transforming your relish into a visually stunning addition to any dish. You might notice some bubbling as gases escape from the veggies—this is completely normal! It’s a sign that fermentation is beginning to take place, which will enhance those complex flavors even further. Remember, good things come to those who wait; so don’t rush this step! The longer you allow these ingredients to mingle in their cozy cold environment, the more harmonious their flavors will become.
Step 7: The Taste Test – A Moment of Joy
Once your Zesty Radish Relish has had ample time in its chilly haven, it’s finally time for my favorite part—the taste test! Use a clean spoon (we don’t want any contaminants ruining our precious creation) and take a small sample of your relish straight from the jar. As you savor those first crunchy bites, pay attention to how each ingredient plays its role; the crispness of the radishes complemented by the sweet tanginess of apple cider vinegar and bright notes from garlic and jalapeños—it’s truly extraordinary!
If you find that it needs a little more sweetness or acidity according to your personal taste buds, feel free to adjust with an additional teaspoon of sugar or a splash more vinegar. This recipe is incredibly forgiving; it’s all about what makes you happy. Keep in mind that flavors may continue developing even after you’ve tasted it today; so if something feels just shy of perfect now, give it another day or two in the fridge—and I promise you’ll be rewarded with even deeper flavor profiles!
Step 8: Serving Your Masterpiece
With your Zesty Radish Relish ready for prime-time consumption, let’s talk about serving suggestions! This relish is not just an accompaniment; it’s a versatile star player that can elevate countless dishes! Picture this: dolloping spoonfuls atop grilled chicken or fish for a refreshing kick; adding zingy brightness over tacos or burritos; or even pairing with creamy avocado toast for an unexpected twist—oh my goodness!
When serving your relish, be sure to give it a gentle stir before spooning it out because some separation may occur while chilling — this is completely normal! Just remember not to skip this step; mixing ensures every bite bursts with flavor rather than having concentrated brine at the bottom of your jar. Each spoonful should be packed with juicy radishes and zingy onions along with that piquant brine—a true explosion of freshness!
Don’t forget; when making this delightful Zesty Radish Relish ahead of time as part of meal prep or entertaining friends, always keep some reserved in smaller jars as gifts! Sharing homemade goodies straight from your kitchen adds such warmth and love—my friends have raved about how special receiving these little jars feels.
Final Touches: Enjoying Every Bite
As we wrap up our culinary adventure together creating this Zesty Radish Relish, I hope you’re feeling inspired and excited about bringing such freshness into your meals. Remember that cooking isn’t just about feeding ourselves; it’s also about connecting with our loved ones through shared experiences around food.
So go ahead—spread joy with every bite by using this relish liberally on whatever delicious creation you whip up next! Whether it’s enhancing weeknight dinners or spicing up casual gatherings with friends, I promise you’ll find endless ways to enjoy this delightful recipe while also celebrating those lovely garden-fresh radishes. Happy cooking!
Storage and Enjoyment Tips for Your Zesty Radish Relish
Now that you’ve created this vibrant, zesty concoction, the excitement doesn’t have to end here! This Zesty Radish Relish is not just a delightful addition to your meals; it’s a condiment that keeps giving. Imagine the burst of flavor every time you dip into that jar, making each bite an experience to savor. But let’s talk about how to make the most of your relish once you’ve crafted it, ensuring it stays fresh and delicious for as long as possible.
Storing Leftover Zesty Radish Relish
To store your leftover Zesty Radish Relish, it’s best to choose an airtight container—think glass jars or BPA-free plastic containers. These options will help lock in all that incredible flavor while keeping unwanted odors at bay. You can pop it in the fridge where it’ll happily chill out for up to two weeks. Pro tip: if you find yourself with leftovers, consider placing a slice of bread inside the container; it absorbs excess moisture and helps keep that delightful crunch intact! Over time, you’ll notice that the flavors meld together beautifully, creating a more profound, tangy delight that’s even better than when you first made it! When you’re ready to enjoy more, simply give it a good stir and dive right in—no reheating necessary!
Freezing Zesty Radish Relish for Later
If you’re looking to extend your relish adventure even further, freezing is an excellent option! To freeze your Zesty Radish Relish properly, scoop it into freezer-safe bags or containers, leaving some room at the top since liquids expand when frozen. When done right, this method allows your relish to maintain its fabulous flavor for up to three months in the freezer. When you’re ready to use it again, simply thaw overnight in the fridge or let it sit at room temperature for about an hour before serving. The beauty of freezing is the convenience—it’s like having a little burst of summer waiting for you on those chilly days! Trust me; having this relish at your fingertips makes weeknight meals feel extra special.
Zesty Radish Relish

Indulge in the vibrant flavors of Zesty Radish Relish, a delightful condiment that transforms everyday meals into extraordinary culinary experiences. This relish combines the crispness of fresh radishes with the sweet tanginess of apple cider vinegar and a hint of spiciness from pickled jalapeños. Perfect as a topping for grilled chicken, tacos, or even avocado toast, this relish is versatile enough to elevate any dish. With its refreshing taste and beautiful colors, it’s an ideal addition to summer barbecues or casual weeknight dinners. Best of all, it’s quick and simple to make—ready in just about 20 minutes! Dive into this culinary adventure and discover how a few fresh ingredients can create magic in your kitchen.
- Prep Time: 10 minutes
- Cook Time: 10 minutes
- Total Time: 20 minutes
- Yield: Approximately 12 servings 1x
- Category: Condiment
- Method: Cooking
- Cuisine: American
Ingredients
- 3 cups sliced radishes
- 1 red onion
- 2 tablespoons seeded pickled jalapeños
- 1 cup apple cider vinegar or white grape juice vinegar
- 1/2 cup granulated sugar
- 2 cloves garlic
- 2 teaspoons kosher salt
- 2 tablespoons yellow mustard seeds
- 1 teaspoon celery seeds
- 1/2 teaspoon dried dill
Instructions
- Clean and slice the radishes thinly.
- Quarter and slice the red onion into crescent moons.
- In a large saucepan over medium heat, combine the radishes and onions, cooking until slightly softened (about 4–5 minutes).
- Add minced garlic, pickled jalapeños, apple cider vinegar (or your choice), sugar, salt, mustard seeds, celery seeds, and dried dill. Stir well.
- Simmer on low for about 10 minutes until bubbling softly.
- Allow to cool at room temperature for 30 minutes before transferring to an airtight container and refrigerating for at least one hour before serving.
Nutrition
- Serving Size: 30g
- Calories: 25
- Sugar: 5g
- Sodium: 150mg
- Fat: 0g
- Saturated Fat: 0g
- Unsaturated Fat: 0g
- Trans Fat: 0g
- Carbohydrates: 6g
- Fiber: 1g
- Protein: <1g
- Cholesterol: 0mg