Spicy Aioli
I’m absolutely thrilled to share one of my all-time favorite quick recipes with you – Spicy Aioli! This isn’t just a condiment; it’s a beautiful marriage of creamy richness and zesty excitement that has the power to elevate any meal. Imagine slathering this luscious sauce on a perfectly grilled chicken sandwich or using it as a dip for crispy fries, and your taste buds will dance with joy! It’s like a little burst of sunshine in a bowl, ready to bring life to any dish it graces. I promise you, once you whip this up, you’ll find yourself reaching for it time and again.
What makes this Spicy Aioli truly special is its simplicity and versatility. With just five ingredients, it can be crafted in mere minutes, yet the flavor is nothing short of extraordinary. The combination of garlic, lemon juice, and cayenne pepper creates an exhilarating flavor profile that transforms everyday meals into something memorable. Whether you’re hosting friends for dinner or just enjoying a relaxed night at home, this aioli is the perfect companion. You’ll feel like a culinary magician every time you serve it!
The Irresistible Allure of Flavorful Condiments
Condiments have an incredible ability to bridge cultures and bring people together around the table. Just think about how many meals have been transformed by a dollop of something delightful! This Spicy Aioli draws inspiration from Mediterranean cuisine, where bold flavors reign supreme. It’s not only about adding taste; it’s about enhancing the experience of eating itself. With its rich history and modern flair, this aioli captures the essence of what makes food an adventure. Every bite invites you to savor the moment and make memories, whether it’s at a summer barbecue or during cozy family dinners.
Now that we’ve set the stage for this culinary journey, let’s dive into making our Spicy Aioli!
Spicy Aioli: A Creamy Kick for Every Bite
This recipe is all about bringing excitement to your meals without spending hours in the kitchen. Trust me on this one—once you see how easy it is to make your own aioli, you’ll never want to go back to store-bought versions again!
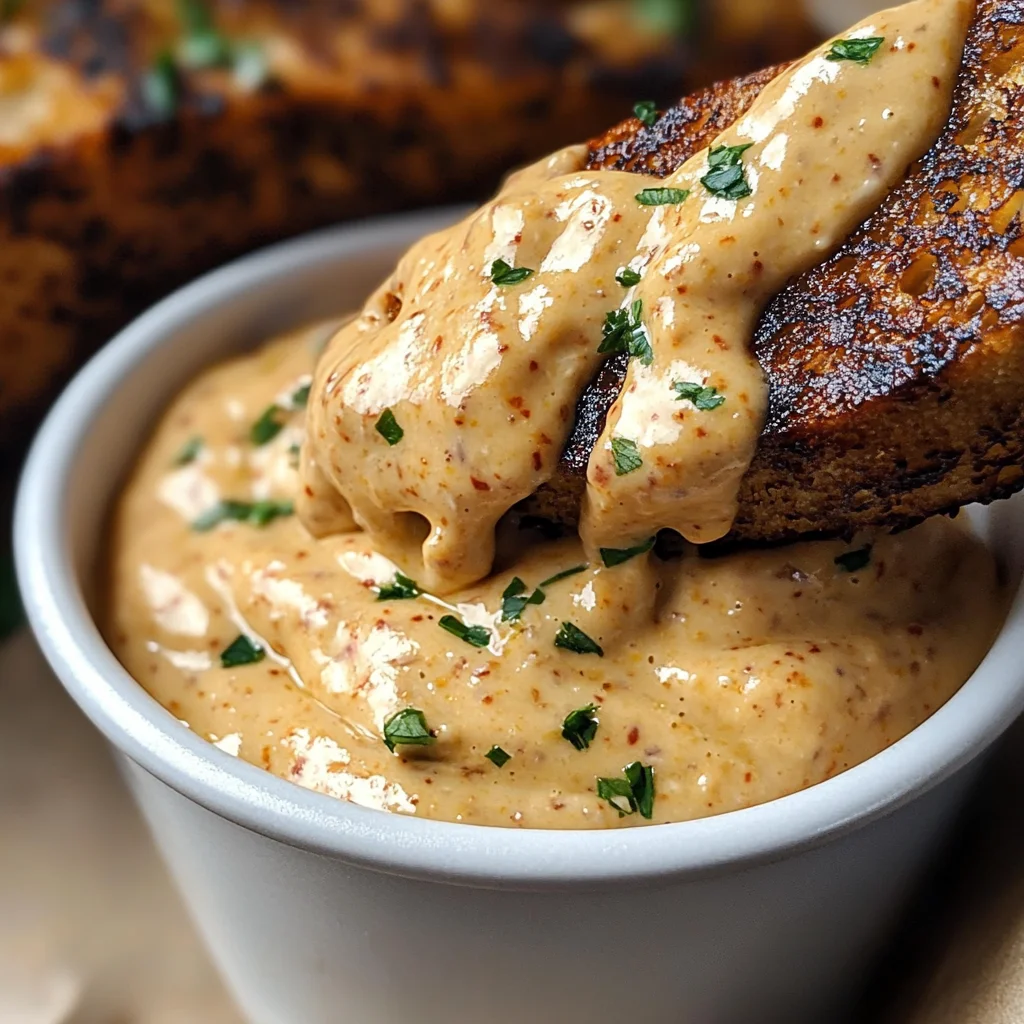
Ingredients:
As we embark on this flavorful adventure together, let’s gather our ingredients! Each component plays an essential role in creating that deliciously creamy and spicy symphony that defines our Spicy Aioli.
- 1 cup mayonnaise. Mayonnaise serves as the creamy base for our aioli, providing that luscious texture we crave. It’s important to choose a high-quality mayonnaise made with simple ingredients; look for brands that use egg yolks and oil without any artificial additives or preservatives. If you’re feeling adventurous, homemade mayonnaise can take your aioli to another level! The richness of the mayo perfectly balances out the kick from our spices while giving us that indulgent mouthfeel we love.
- 2 cloves garlic (minced). Garlic is the star player here! Its pungent aroma infuses the aioli with depth and warmth that’s simply irresistible. When minced finely, garlic releases its oils and flavors into the mixture—this step is non-negotiable if you want that bold garlic punch in every bite! For those who adore garlic as much as I do, feel free to add more if you’re looking for an even stronger flavor profile. Fresh garlic truly shines here; if you can avoid garlic powder in favor of freshly minced cloves, do so!
- 1 tablespoon lemon juice. Fresh lemon juice adds brightness and acidity that cuts through the richness of mayonnaise beautifully. It’s like a refreshing breeze on a warm day—it lifts everything up! Using freshly squeezed lemon juice instead of bottled ensures you get all those vibrant flavors packed into each spoonful. Don’t skip this ingredient; it’s absolutely paramount for balancing out the creaminess with zesty goodness.
- 1 teaspoon cayenne pepper (adjust to taste). Here comes the magic touch—the cayenne pepper brings heat and complexity that takes our aioli from ordinary to extraordinary! You can adjust this spice according to your palate; if you’re feeling bold, don’t hesitate to add more! However, if you’re sensitive to spice, start with less and gradually increase until you find your perfect balance.
- 1/4 teaspoon salt & 1/4 teaspoon pepper. Simple yet crucial seasoning—salt enhances all flavors while freshly cracked black pepper adds subtle warmth. These two ingredients are like best friends in cooking; they work together harmoniously to elevate every component in our aioli.
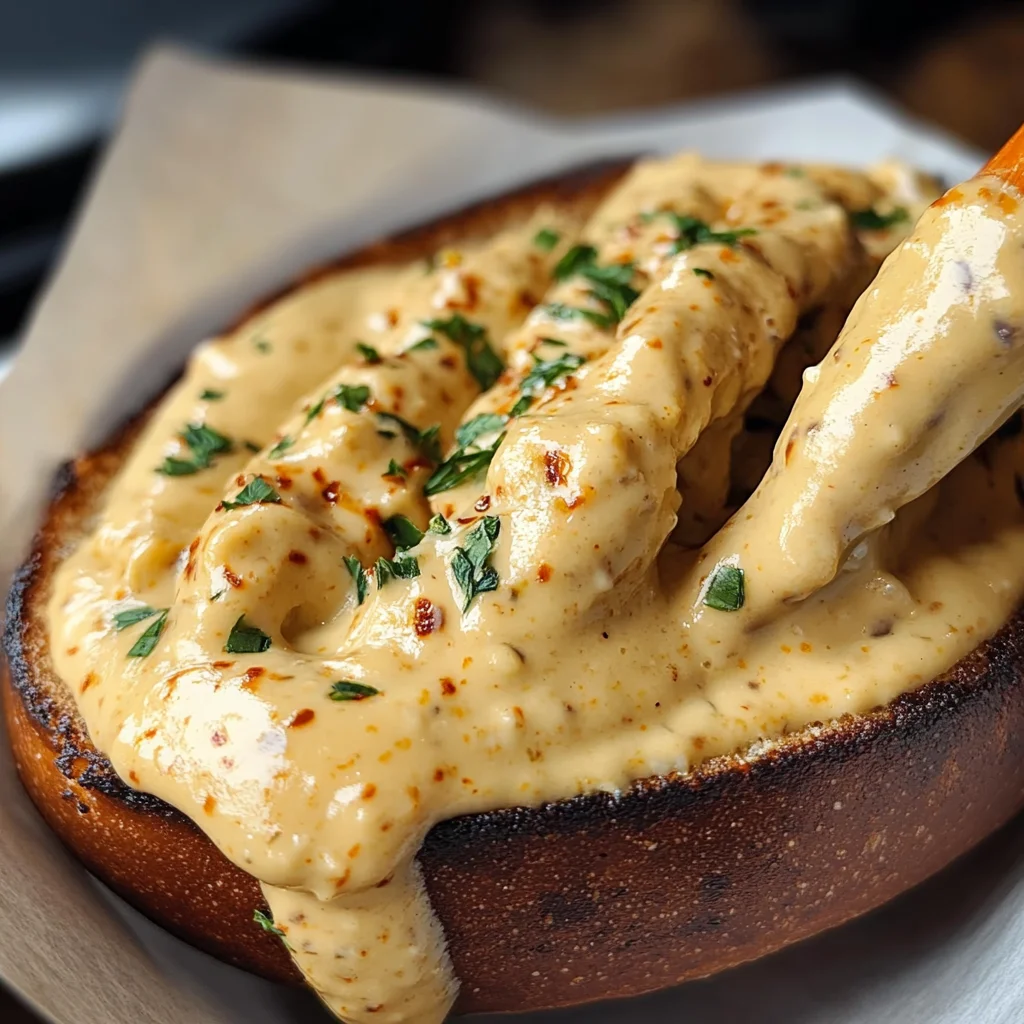
Equipment You’ll Need:
Before we jump into making our spicy creation, let’s talk about some essential tools you’ll need along the way! Having these items on hand will make your cooking experience smooth and enjoyable.
- Mixing bowl – A good-sized mixing bowl is essential for combining all our ingredients without making a mess! Look for one made from glass or stainless steel since these materials are sturdy and easy to clean afterward.
- Whisk – This simple tool is key for blending our mayo with other ingredients into a silky-smooth consistency. A whisk helps incorporate air into your aioli while emulsifying everything beautifully—a step you definitely don’t want to rush!
- Measuring spoons – Precision is important when crafting delicious condiments like aioli; measuring spoons ensure you’re adding just the right amount of each ingredient without guesswork.
- Airtight container – Once you’ve created your masterpiece, transferring it into an airtight container allows you to store leftovers (if there are any!) safely in the fridge while keeping them fresh for future enjoyment.
Now that we have everything prepped let’s dive right into making our Spicy Aioli!
Step 1: Combine Your Ingredients
In a mixing bowl large enough to give yourself some space (you’ll appreciate this later), combine 1 cup of mayonnaise with 2 finely minced cloves of garlic, 1 tablespoon of freshly squeezed lemon juice, 1 teaspoon of cayenne pepper (feel free to adjust according to your spice preference), 1/4 teaspoon salt, and 1/4 teaspoon freshly cracked black pepper. As you add each ingredient into the bowl, take a moment to appreciate their unique aromas—garlic’s pungency blended with zesty lemon creates such anticipation! Use your whisk gently at first so nothing splatters around before diving in more energetically until everything comes together smoothly.
Step 2: Whisk Until Smooth
Once all ingredients are combined in your mixing bowl, it’s time for some whisking magic! Put some elbow grease behind it as you whisk vigorously until everything is well blended into one beautiful mixture without lumps—that silky texture we’re aiming for should be coming through nicely now! As you engage in this rhythmic movement—think about how important emulsification is here; it’s what gives us that creamy consistency we love so dearly when indulging in spreads like aioli.
Step 3: Let It Chill
Now comes an essential part: covering your bowl with plastic wrap or transferring your delightful concoction into an airtight container before refrigerating it for at least 30 minutes—or longer if possible—to allow those flavors time to mingle lovingly together! Why chill? This resting period allows each ingredient’s personality traits—like garlic’s sharpness or lemon’s tang—to deepen while softening against mayo’s richness seamlessly—it’s simply divine!
Step 4: Serve & Enjoy!
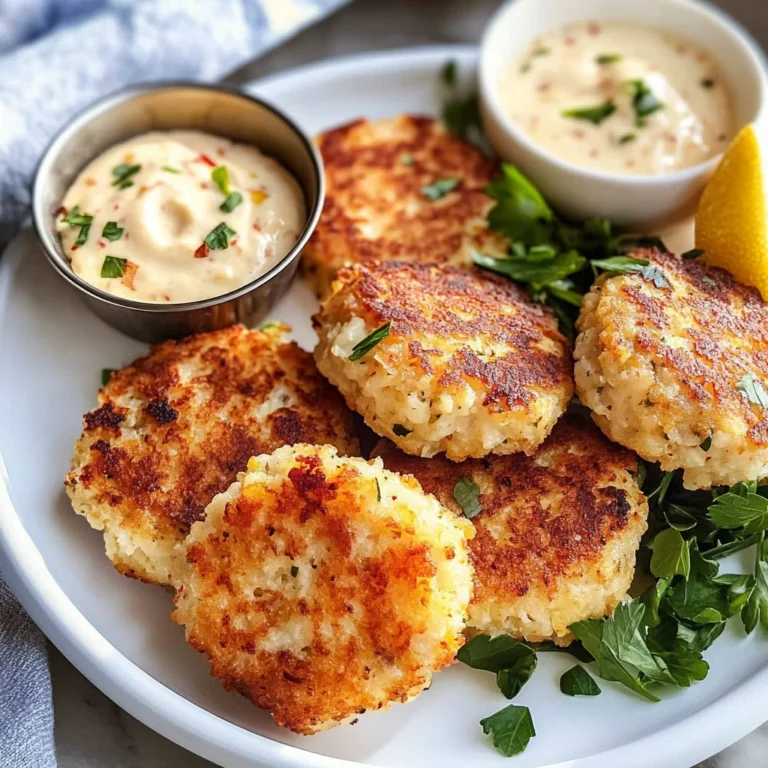
After patiently waiting (I know it’s hard!), pull out your chilled Spicy Aioli from its cozy spot in the fridge—you’ll notice how beautiful its color has become while retaining all its luscious creaminess—and prepare yourself for some serious flavor explosions ahead! Serve it up generously as an exquisite spread on sandwiches or burgers or use it as an irresistible dip paired alongside crispy fries or chicken tenders—the possibilities are endless!
There you have it—a quick yet utterly intoxicating recipe that’s sure not just satisfies but sparks joy every time you indulge! Remember: cooking should always be fun—so don’t hesitate exploring variations by adding herbs like parsley or dill if you’re feeling adventurous! Enjoy creating unforgettable moments around food—you’ve earned them!
Crafting Your Irresistible Spicy Aioli
Step 5: Whisking It All Together – The Art of Emulsification
Now that you have everything beautifully laid out, it’s time for the magic to happen. Take your mixing bowl filled with the mayonnaise, minced garlic, lemon juice, cayenne pepper, salt, and pepper, and grab a whisk. This step is absolutely paramount—what you’re doing here is emulsifying your ingredients. By whisking them together vigorously, you’re creating a creamy and cohesive blend that forms the base of your Spicy Aioli. Imagine how satisfying it is to see those separate ingredients come together into a smooth, luscious sauce; it’s like watching a symphony where all the instruments finally harmonize!
Whisk away for about 30 seconds to a minute until you achieve that silky texture. You want it to be free of lumps—just imagine dipping a crisp fry into this creamy delight without any interruptions from rogue garlic pieces or unyielding spices. If you notice any stubborn clumps as you whisk, don’t fret; just keep going until everything is fully incorporated. This initial blending is the key to ensuring your aioli has that wonderfully velvety mouthfeel that will elevate every bite.
Step 6: The Magic of Chilling – Why Patience Pays Off
Now comes an essential step that might test your patience but trust me on this—it’s worth every second! Once your Spicy Aioli is mixed to perfection, cover the bowl tightly with plastic wrap or transfer it to an airtight container. Pop it in the refrigerator and let it chill for at least 30 minutes. I know waiting can feel torturous when you’re excited about your creation, but this resting period allows all those flavors to meld beautifully.
As the aioli chills, the garlic will infuse its pungent essence into the creamy base while the lemon juice softens its tangy brightness. This transformation deepens the flavor profile, turning what was already delicious into something truly extraordinary and complex. So don’t rush this step! You’ll be rewarded with an aioli that has layers upon layers of taste—each bite will feel like a celebration of flavor on your palate.
Step 7: Serving Suggestions – Make It Your Own
Once your Spicy Aioli has chilled and developed those remarkable flavors, it’s time for the fun part: serving! This versatile condiment can take center stage in so many ways—think of it as your secret weapon in the kitchen! Spread it generously on sandwiches for that extra kick; picture biting into a turkey club where each layer bursts with flavor thanks to your homemade aioli. Or perhaps you’re grilling up some juicy burgers? A dollop of this zesty sauce will elevate each bite to heavenly heights.
And let’s not forget about using it as a dip! Whether you’re serving crispy fries or tender chicken tenders at a gathering—or even just for yourself on a cozy night in—this aioli will transform ordinary snacks into something utterly intoxicating. For an added twist, consider garnishing with freshly chopped herbs like parsley or dill before serving; this not only enhances the visual appeal but introduces an additional layer of freshness that complements the spices beautifully.
Step 8: Final Flourishes – Presentation Matters
As we approach the final touches of our Spicy Aioli journey, let’s talk presentation because we eat with our eyes first! When you’re ready to serve this delightful condiment, consider placing it in a small bowl or ramekin rather than just slapping it onto a plate. A beautiful serving dish elevates even simple meals and shows care in preparation—this is especially important when hosting friends or family.
You might also want to sprinkle a pinch more cayenne pepper or paprika on top right before serving for an alluring visual cue that hints at the spicy magic within. Not only does this add color but also sets expectations for that wonderful kick waiting just beneath the surface. Pairing your aioli with colorful veggies or alongside vibrant salads can create an inviting spread that beckons everyone to dig in!
Concluding Your Flavor Adventure
And there you have it—the ultimate guide to crafting your own Spicy Aioli! In just five minutes (plus chilling time), you’ve created a creamy, zesty condiment that’s bound to become a staple in your culinary repertoire. This recipe embodies simplicity while delivering profound satisfaction and unforgettable flavors.
I promise you; once you’ve tasted this homemade version compared to store-bought alternatives, there’s no going back! It’s simply not just about adding spice; it’s about transforming everyday meals into memorable experiences filled with love and joy. So go ahead—share this recipe with friends or keep it as your little secret delight; either way, you’ll be savoring every delicious moment!
Storage and Enjoyment Tips for Your Spicy Aioli
Now that your Spicy Aioli is ready to tantalize your taste buds, let’s talk about how you can savor every last dollop of this creamy goodness! What’s truly wonderful about this condiment is its versatility not just in meals but also in preserving it for future enjoyment. You’ll find that it’s incredibly easy to store, ensuring you have a delightful companion for your culinary adventures whenever you need it. Imagine pulling out a jar of this liquid gold from your fridge, ready to elevate your sandwiches, dips, or fries with its zesty kick!
Storing Leftover Spicy Aioli
To keep your Spicy Aioli fresh and flavorful, transfer any leftovers into an airtight container. Glass jars work wonderfully because they don’t retain odors the way plastic can. Store it in the refrigerator where it will stay delicious for up to a week. Trust me, the key to maintaining its creamy texture and robust flavor lies in how you store it; I’ve found that placing a slice of bread on top of the aioli can help absorb excess moisture and prevent browning. After a few days, this aioli will still deliver that same profoundly satisfying taste, though its flavors may deepen and meld beautifully over time. When you’re ready to enjoy it again, there’s no need to reheat—just give it a quick stir and serve chilled as a fantastic addition to any meal.
Freezing Spicy Aioli for Later
If you find yourself with an abundance of this delectable condiment (which is often the case because who can resist?), freezing is a fantastic option! To do so properly, spoon the aioli into ice cube trays or small freezer-safe bags. Once frozen solid, transfer those cubes into a labeled freezer bag; they can last up to three months in the freezer without losing their delightful essence. The beauty of this method lies in its convenience—when you’re craving that spicy kick, simply pop out a cube or two and let them thaw in the fridge or at room temperature. This approach not only prolongs the life of your aioli but also makes portion control effortless. Just think about how easy it’ll be to whip up an impromptu gathering or casual meal with these frozen treasures waiting to elevate your dishes!
Spicy Aioli

Dive into the world of flavor with this quick and easy Spicy Aioli, a creamy condiment that transforms your meals into culinary delights. This zesty dip combines a rich mayonnaise base with pungent garlic, bright lemon juice, and a kick of cayenne pepper, making it an irresistible addition to sandwiches, burgers, and fries. In just minutes, you can whip up this versatile sauce that not only elevates your everyday dishes but also adds excitement to gatherings and casual dinners alike. Once you’ve tasted homemade Spicy Aioli, you’ll find yourself reaching for it time and again.
- Prep Time: 5 minutes
- Cook Time: None
- Total Time: 0 hours
- Yield: About 8 servings (approximately 240g total) 1x
- Category: Condiment
- Method: Mixing
- Cuisine: Mediterranean
Ingredients
- 1 cup mayonnaise
- 2 cloves garlic (minced)
- 1 tablespoon lemon juice (freshly squeezed)
- 1 teaspoon cayenne pepper (adjust to taste)
- 1/4 teaspoon salt
- 1/4 teaspoon pepper
Instructions
- In a mixing bowl, combine the mayonnaise, minced garlic, lemon juice, cayenne pepper, salt, and pepper.
- Whisk vigorously until all ingredients are well blended and the mixture is smooth.
- Cover the bowl or transfer the aioli to an airtight container and refrigerate for at least 30 minutes to let flavors meld.
- Serve chilled as a dip or spread.
Nutrition
- Serving Size: 30g
- Calories: 120
- Sugar: 0g
- Sodium: 150mg
- Fat: 13g
- Saturated Fat: 2g
- Unsaturated Fat: 10g
- Trans Fat: 0g
- Carbohydrates: 1g
- Fiber: 0g
- Protein: 0g
- Cholesterol: 5mg