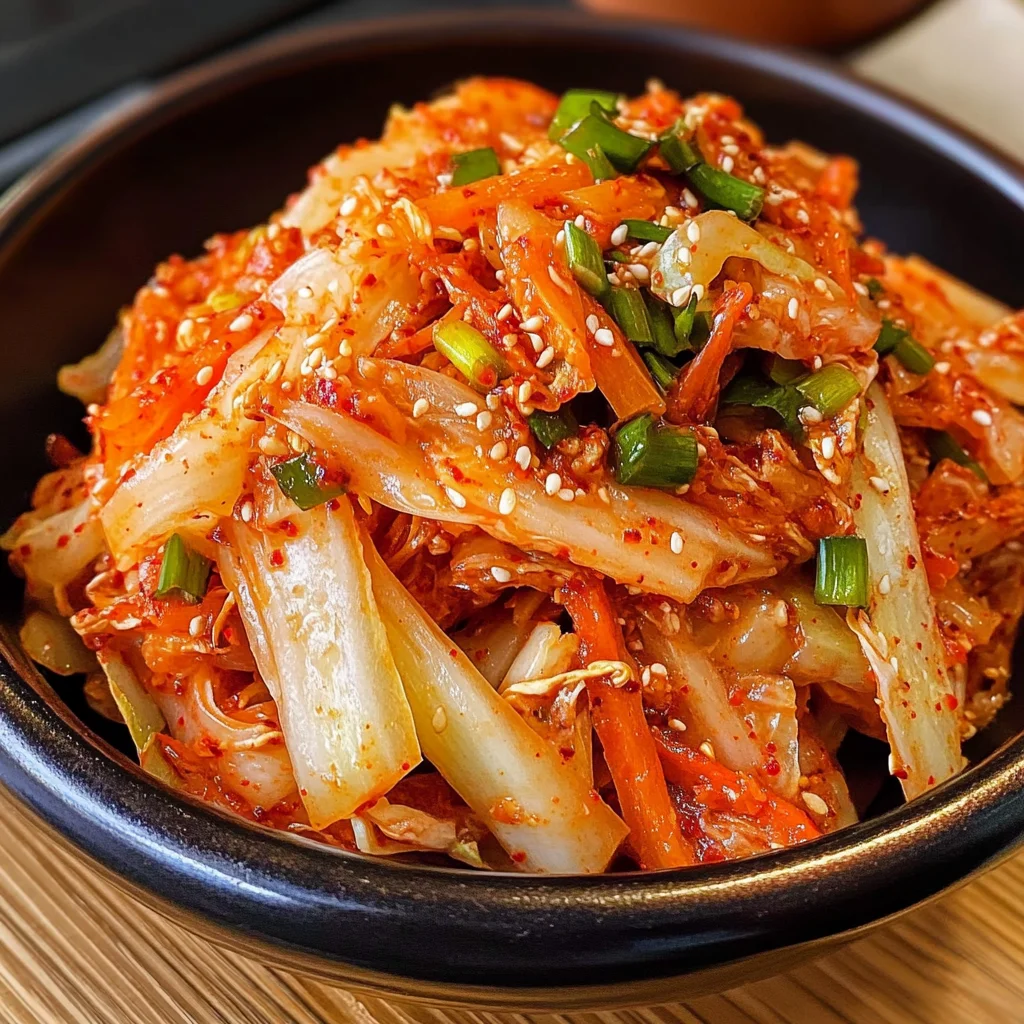
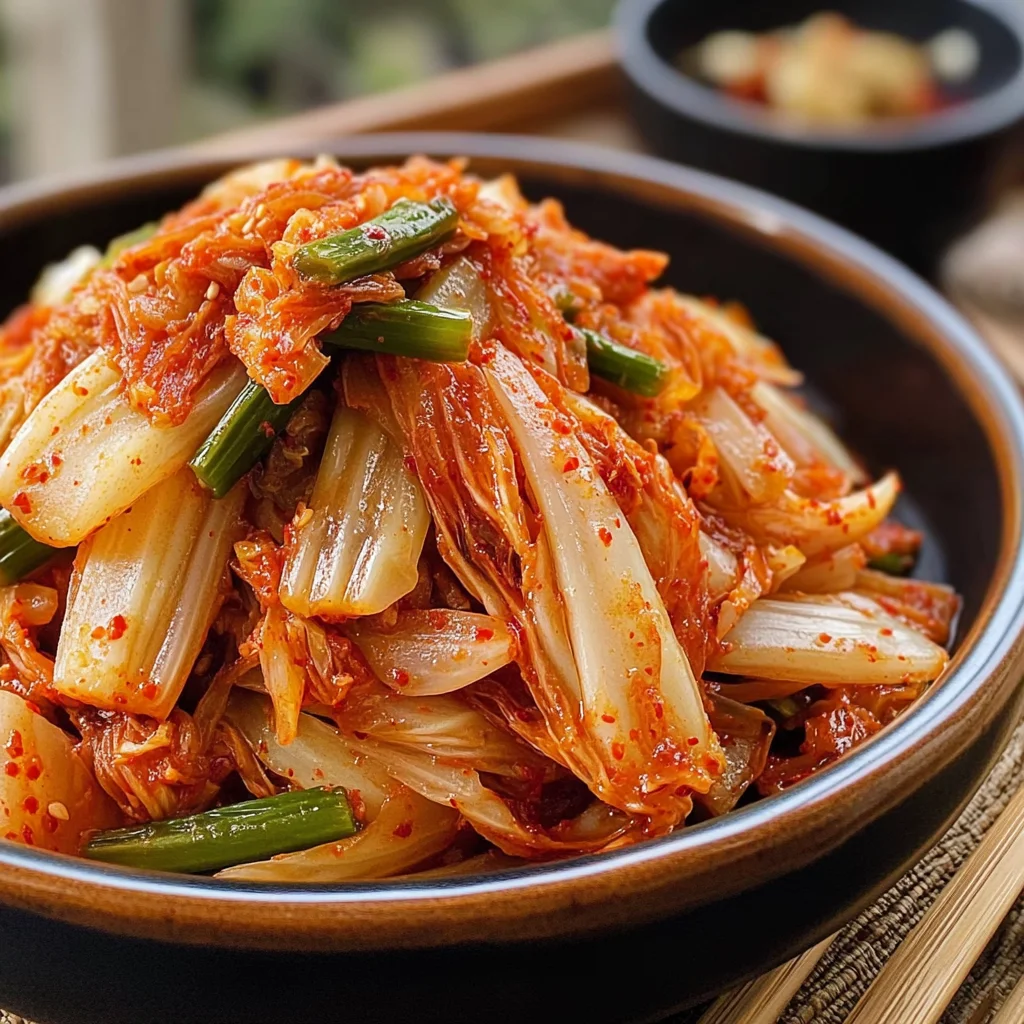
Kimchi Recipe
There’s something so captivating about the art of fermentation, isn’t there? It’s a dance of flavors, a celebration of patience, and a bridge between ancient traditions and modern kitchens. When you make Kimchi, you’re not just following a recipe; you’re engaging in a time-honored practice that has nourished and delighted generations. The vibrant colors of the vegetables, the intoxicating aroma of garlic and ginger mingling together, and the anticipation of that first tangy bite—each step is filled with excitement. This Kimchi Recipe is more than just food; it’s an experience that transforms humble ingredients into a symphony of flavors that can elevate any meal. Trust me when I say that once you’ve tasted your homemade Kimchi, you’ll find it difficult to go back to store-bought versions.
In Korean culture, Kimchi is much more than just a side dish; it’s a symbol of health and community. Families often come together to prepare large batches during the fall harvest, sharing stories and laughter as they create this beloved staple. The beauty of this recipe lies in its versatility; you can adjust the spice levels or even experiment with different vegetables to suit your taste. Plus, it’s packed with probiotics, making it not only delicious but also beneficial for your gut health. So whether you’re planning an elaborate dinner or simply want to add some zing to your weeknight meals, this Kimchi Recipe will become an essential part of your culinary repertoire.
Kimchi Recipe: A Tangy Delight for Every Plate
Let’s embark on this flavorful journey together! Making Kimchi is not only rewarding but also surprisingly straightforward once you know the steps. As we dive into the ingredients, I promise you’ll start to appreciate how each component contributes to that signature zing and crunch we all love.
Ingredients:
As we gather our ingredients for this culinary adventure, remember that each one plays a pivotal role in creating that perfect balance of flavors and textures in our Kimchi. From vibrant vegetables to aromatic seasonings, every element adds its unique touch.
- 1 large napa cabbage (Chinese cabbage). This beautiful vegetable is the heart and soul of our Kimchi recipe. Napa cabbage has broad leaves that are tender yet crunchy—perfect for absorbing all those flavorful spices and brine during fermentation. When selecting your cabbage, look for ones that feel heavy for their size with crisp leaves that aren’t wilted or blemished. If napa cabbage isn’t available, savoy or regular green cabbage can be used as substitutes without losing too much character.
- 3 carrots. Adding bright orange carrots not only enhances the visual appeal but also brings a natural sweetness to the mix. Their crunchiness balances wonderfully against the softness of fermented cabbage while providing an extra layer of texture. For best results, choose firm carrots without cracks or soft spots; they should snap easily if bent slightly.
- 1 small daikon radish. This root vegetable gives our Kimchi an extra layer of depth and complexity with its mild peppery flavor—a little kick that complements the other ingredients beautifully. Daikon radishes are typically white and can be found in most grocery stores or Asian markets. If you can’t find daikon, feel free to substitute with regular radishes or even jicama for some crunch.
- 1 bunch of green onions. Green onions bring freshness and brightness to our dish, cutting through the richness of fermented flavors while adding color and aroma. The green tops offer a milder taste compared to regular onions but pack a punch nonetheless—definitely use both parts! When shopping, seek out green onions with firm bulbs and vibrant green tops.
- 4 tablespoons of salt. This ingredient is absolutely paramount in our recipe as it helps draw moisture from the vegetables—creating that delicious brine essential for fermentation—and enhances flavor dramatically. It’s crucial to use non-iodized salt like kosher salt or sea salt here since iodine can inhibit fermentation processes.
- 1 small chunk of ginger (peeled). Ginger adds warmth and spice—its pungent aroma will awaken your senses as you blend it into our mixture! Fresh ginger root is remarkably potent; even a small piece goes a long way in contributing to the overall flavor profile while providing health benefits as well.
- 3 cloves of garlic. Ahh, garlic—the fragrant jewel in our crown! Its robust flavor melds seamlessly with other ingredients while imparting its own unique essence to our Kimchi recipe. Use fresh garlic cloves instead of pre-minced varieties for maximum potency; look for firm heads without sprouting shoots.
- 1 apple (peeled). Here’s where things get interesting! Adding apple introduces subtle sweetness that balances out the heat from red pepper flakes beautifully—it’s like nature’s magic touch! Choose a firm variety such as Fuji or Honeycrisp; their crisp texture holds up well against fermentation.
- 2 tablespoons of Korean coarse red pepper (gochugaru). This vibrant red spice gives our Kimchi its signature color and heat level—think smoky sweetness rather than pure heat! If you can’t find Korean gochugaru locally, you might substitute with crushed red pepper flakes but bear in mind they will alter both flavor profile and appearance slightly.
- 1 tablespoon fish sauce (optional). Traditionally used for depth-of-flavor enhancement in many Asian dishes—including famous Thai curries—this umami-rich sauce adds complexity without overpowering other ingredients! If you wish to keep it plant-based-friendly though—or simply don’t have any on hand—you could replace fish sauce with soy sauce or tamari instead!
Equipment You’ll Need:
Having the right tools at your fingertips makes cooking so much more enjoyable—and trust me when I say these essential pieces will serve as invaluable partners during our kimchi-making journey!
- Glass mixing bowl – Using glass ensures no unwanted reactions occur between acidic ingredients like kimchi brine and certain metals commonly found in bowls! Plus, being able to see those colorful veggies come together makes everything feel festive!
- Sharp knife – A good-quality knife is key when slicing up those fresh veggies into delicate strips (julienne style); this technique enhances their surface area allowing them better absorb flavors while fermenting later on!
- Cutting board – A sturdy cutting board provides stability when chopping veggies evenly; consider using separate boards if dealing with raw proteins elsewhere simultaneously (like chicken).
- Food processor or blender – Either device helps achieve smooth consistency when pureeing ginger-garlic mixture effortlessly! If needed alternatives exist such as mortar & pestle—but I promise convenience wins here every time!
- Glass jars with tight-fitting lids – These are crucial for storing fermented kimchi safely after fermentation completes—and ensure no air gets inside which could spoil all your hard work!
Now that we’ve gathered everything we need let’s roll up our sleeves and dive into preparing this delightful kimchi together!
Step 1: Preparing Your Cabbage
First things first: let’s get our napa cabbage ready because it’s going to take center stage here! Begin by sterilizing your glass mixing bowl either by pouring boiling water over it or washing thoroughly with warm soapy water—this ensures we’re starting clean since proper hygiene is vital throughout fermentation processes! Once you’ve done that, rinse off your napa cabbage under cool running water before cutting it into long thin strips (julienne style)—think elegant ribbons dancing around each other as they mingle inside their new home—the bowl!
Next comes my favorite part: massage time! Sprinkle four tablespoons worth-of-salt over those freshly chopped leaves then gently work it into them using your hands—this step may seem simple but trust me: massaging helps release moisture from within so they soften nicely while infusing saltiness throughout each leaf creating layers upon layers flavors later down line during fermentation process itself! You’ll know you’ve done enough once they begin wilting slightly after just two minutes—you want them pliable yet still holding shape rather than mushy!
Step 2: Adding Veggies
Now it’s time to introduce our colorful companions—the carrots, daikon radish, and green onions—all equally important players elevating taste sensations within each bite taken later on down road! Start by slicing those lovely carrots into long thin strips just like before—we’re looking for consistency here so don’t rush through this step; take care cutting them evenly ensuring uniformity across board enhances overall aesthetic presentation come serving time too!
Once done chopping carrots set aside momentarily whilst moving onto daikon radish next—again repeat julienne technique making sure all pieces resemble previous cuts made earlier—it’s crucial everyone plays nicely together when mixed later on allowing flavors meld beautifully during fermentation process ahead! Finally finish off adding diced green onion tops last; these lend freshness alongside crunchy texture contrasting deeper notes coming from other veggies already included thus balancing out entire dish perfectly!
Step 3: Pureeing Aromatics
With all lovely vegetables now assembled inside mixing bowl let’s turn attention towards fragrant puree blending magic awaits ahead! Grab either food processor or blender depending what suits lifestyle best then toss-in peeled chunk ginger alongside three cloves garlic plus peeled apple slices followed by two tablespoons Korean coarse red pepper along lastly finishing touch adding tablespoon fish sauce if chosen option preferred today—it may seem intimidating at first glance watching them whirl about until smooth consistency achieved—but hang tight there my friend because soon enough aromas wafting around kitchen transform whole atmosphere instantly uplifting spirits surrounding us while cooking along way homeward bound connecting past traditions present moments shared memories created new families formed too!
Hit pulse button until everything blends harmoniously creating silky goodness ready mingle alongside salted veggie mixture awaiting patiently inside glass bowl awaiting transformation time ahead—I promise you won’t regret giving this step special attention since marrying these flavors means blissfully divine results await upon completion ahead too!
Step 4: Marrying Flavors Together
Now comes perhaps most gratifying moment yet—we get combine everything lovely prepared thus far bringing forth marriage wonderful tastes embraced tightly within jars destined become iconic dishes enjoyed family gatherings future celebrations alike ahead hopefully someday soon shared laughter & memories created around dining tables everywhere worldwide—all thanks efforts put forth today right here right now my dear friend!
Start carefully pouring blended puree over salted vegetables ensuring every piece coated evenly letting juices flow through crevices filling gaps left open earlier inviting harmony amongst diverse flavors all joining forces together forming deeper connections amongst comrades fighting against blandness forevermore banishing mediocrity far away indeed! Gently fold ingredients using hands until harmony established visually appealing sight greets eyes revealing beautiful colors shining vibrantly expressing joy contained within those walls waiting excitedly reveal themselves days ahead upon opening jars revealing treasures discovered eventually shared loved ones—with love always woven intricately throughout process involved creating such masterpieces deserving recognition always remembered fondly cherished dearly years pass fleeting moments captured forever etched hearts souls intertwined through food experiences shared across generations passed down lovingly carried forward…
And there you have it! We’ve begun crafting something truly extraordinary—a labor intensive yet rewarding undertaking transforming simple components into complex layers bursting life flavor—all leading us one step closer towards enjoying homemade kimchi entirely own creation nestled safely within jars waiting patiently fermenting slowly developing deeper nuances tantalizing taste buds…
The Art of Kimchi: A Flavorful Journey
Step 5: The Harmonious Blend of Flavors
Now that you’ve lovingly massaged your vegetables, it’s time to create the glorious kimchi paste that will bring everything together. Using either a food processor or a blender, combine the small chunk of peeled ginger, three cloves of garlic, and one peeled apple with the two tablespoons of Korean coarse red pepper. The apple not only adds a subtle sweetness to balance the heat from the pepper but also acts as a natural source of sugars that aid in fermentation. Blend these ingredients until you achieve a smooth, vibrant mixture—think of it as liquid gold, bursting with flavors just waiting to mingle with your crisp vegetables.
This step is crucial because the garlic and ginger not only contribute their own unique flavors but are also packed with health benefits. Garlic is known for its immune-boosting properties while ginger aids digestion; together they create that unforgettable umami taste we all crave in our favorite dishes. Once blended, taste your mixture—it should be an invigorating blend of spicy, sweet, and aromatic notes that will elevate your kimchi beyond ordinary. If you feel adventurous, consider adjusting the amount of red pepper based on your spice preference; remember, you can always add more heat later but you can’t take it away once it’s in!
Step 6: Marrying the Mixture
With your flavorful paste ready, it’s time to unite it with your beautifully salted vegetables. Pour this vibrant mixture over the cabbage and other veggies in your mixing bowl. Now comes another important technique: mix everything together thoroughly using clean hands (the best tools you have!). The warmth of your hands helps to soften the vegetables even further while ensuring every piece is evenly coated with that intoxicating paste. Don’t rush this step; take your time to ensure each morsel gets its fair share of flavor.
As you mix, you’ll notice how the salt has worked its magic—your cabbage should feel softer and more pliable by now. This is essential because it allows for better absorption of flavors while also promoting a more efficient fermentation process. Plus, getting those hands in there connects you with the food in a wonderfully tactile way! Keep an eye on how vibrant everything looks; when mixed well, you’ll see bright colors dancing together—a beautiful sight indeed!
Step 7: Packing It Up
Now that everything is harmoniously combined, it’s time to pack this gorgeous concoction into sterilized glass jars. Using a clean spoon or your hands (make sure they’re washed!), begin transferring the vegetable mixture into jars—don’t be shy! Press down firmly after each scoop to eliminate any air pockets; this ensures that all those beautiful veggies stay submerged below the brine throughout fermentation.
This step is absolutely paramount because exposure to air can lead to unwanted spoilage instead of the delightful tanginess we desire from our kimchi. Fill each jar until they’re about three-quarters full—this gives room for expansion as fermentation occurs. You might notice some liquid forming at this stage—that’s completely normal and signifies that your veggies are releasing their natural juices! If there isn’t enough brine to cover all the vegetables completely after packing them in tightly, simply mix up a bit more salt water (about one teaspoon per cup of water) and pour it over until fully submerged.
Step 8: The Waiting Game
Once your jars are filled and sealed (but not too tightly!), it’s time for one of my favorite parts—the waiting game! Place them in a cool area away from direct sunlight; ideally, this should be around room temperature—not too hot or cold—so keep an eye on where you set them. For the next one to two weeks, allow these delightful jars to ferment peacefully as they work their magic.
During this time frame, check on them every few days; gently open each lid (to release any built-up gases) and give them a little taste test! You’ll start noticing changes as they transform from fresh vegetables into something truly extraordinary—tangy with layers upon layers of flavor developing beautifully over time. Remember though, patience is key here! The longer you let them ferment at room temperature, the stronger and more complex those flavors will become—but don’t fret if you’re not sure how long to leave them out; if they start tasting too strong for your liking at any point during those two weeks, simply pop them into the refrigerator early.
Final Touches: Enjoying Your Homemade Kimchi
Step 9: The Big Chill
After you’ve determined that perfect balance between tanginess and crunchiness has been achieved during fermentation—congratulations! It’s time for their final transformation in order to become an absolute staple in your kitchen: chilling! Carefully transfer each jar into your refrigerator where they will slow down in terms of fermentation activity but continue developing flavor nuances over days or even weeks.
Chilling serves multiple purposes; first and foremost, it halts further fermentation so that what you’ve created maintains its intended flavor profile without becoming overpoweringly sour or mushy. Secondly, cold temperatures help preserve texture—keeping that delightful crunch intact which makes kimchi so irresistible! When stored correctly in airtight containers within cooler temperatures like these, homemade kimchi can last several months (if it lasts that long!). Trust me on this—the first bite after chilling will send waves of joy through you as you savor those symphonies of flavors.
And there you have it—a labor of love transformed into an exquisite dish that’s not just good for your taste buds but also bursting with probiotics for gut health! Enjoy serving this alongside grilled veggies or rice bowls or simply on its own as a snack—whatever way you choose, I guarantee every bite will remind you why making homemade kimchi is not just cooking but rather an experience steeped in tradition and love.
So gather friends around for dinner parties where everyone marvels at what you’ve created together—or enjoy quiet moments savoring each bite solo—it’s all about celebrating life through food! Happy fermenting!
Storage and Enjoyment Tips for Your Kimchi Recipe
Now that your kimchi has had the chance to ferment, the real fun begins! The moment you crack open a jar, you’re greeted with a symphony of flavors and aromas that are simply intoxicating. Trust me, the tangy crunch of the cabbage mingled with the garlic and ginger is nothing short of remarkable. But let’s talk about how to preserve this treasure so you can relish it for weeks to come.
Storing Leftover Kimchi Recipe
When it comes to storing your leftover kimchi, using an airtight glass container is absolutely paramount. Not only does glass help maintain the crisp texture of the vegetables, but it also keeps unwanted odors at bay—because we wouldn’t want our delicious creation mingling with anything else in the fridge, would we? Ideally, you should keep your kimchi in the refrigerator where it can stay fresh for up to three months. However, I often find that it tastes even better after a week or two as the flavors deepen and mature. To maintain its quality, consider placing a slice of bread on top of your kimchi; this little trick absorbs excess moisture and helps prevent spoilage while imparting just a hint of bread flavor. And let me tell you, every time you dive into that jar, you’ll be met with a burst of flavor that transports you straight to Korea!
Freezing Kimchi for Later
If you find yourself with an abundance of this exquisite dish—and trust me, it’s hard not to—you’ll be thrilled to know that freezing kimchi is a fantastic option! To do this properly, make sure to portion out your kimchi into freezer-safe bags or containers. Remove as much air as possible before sealing them tight; this will help prevent freezer burn. When stored correctly, frozen kimchi can last up to six months without losing its vibrant taste or texture. The best part? You can simply toss it straight from the freezer into soups or stir-fries without thawing first for an instant flavor boost! Imagine pulling out a bag on a chilly evening and turning it into a warming stew—it’s convenience at its finest!
Kimchi Recipe
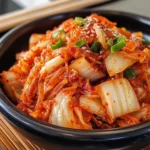
Kimchi is a delightful journey into the world of fermentation, transforming simple ingredients into a vibrant, tangy dish that enhances any meal. This easy Kimchi Recipe captures the essence of traditional Korean flavors while being packed with probiotics for gut health. It’s not just about following steps; it’s about creating an experience filled with bold tastes and textures. Whether you enjoy it as a side dish or incorporate it into other meals, this homemade kimchi brings excitement to your table.
- Prep Time: 30 minutes
- Cook Time: Fermentation Time varies (1 to 2 weeks)
- Total Time: 0 hours
- Yield: Approximately 4 servings (400g total) 1x
- Category: Side Dish
- Method: Fermentation
- Cuisine: Korean
Ingredients
- 1 large napa cabbage
- 3 carrots
- 1 small daikon radish
- 1 bunch green onions
- 4 tablespoons non-iodized salt
- 1 small chunk ginger (peeled)
- 3 cloves garlic
- 1 apple (peeled)
- 2 tablespoons Korean coarse red pepper (gochugaru)
- 1 tablespoon soy sauce or tamari (optional)
Instructions
- Cut the napa cabbage into thin strips and massage in salt to wilt.
- Prepare carrots, daikon radish, and green onions by slicing them into thin strips.
- Blend ginger, garlic, apple, and gochugaru until smooth.
- Combine the vegetable mixture with the blended paste in a large bowl and mix thoroughly.
- Pack tightly into sterilized glass jars, pressing down to eliminate air pockets.
- Seal loosely and let ferment at room temperature for 1 to 2 weeks.
- Once fermented to your liking, transfer jars to the refrigerator.
Nutrition
- Serving Size: 100g
- Calories: 35
- Sugar: 3g
- Sodium: 800mg
- Fat: 0g
- Saturated Fat: 0g
- Unsaturated Fat: 0g
- Trans Fat: 0g
- Carbohydrates: 8g
- Fiber: 2g
- Protein: 2g
- Cholesterol: 0mg