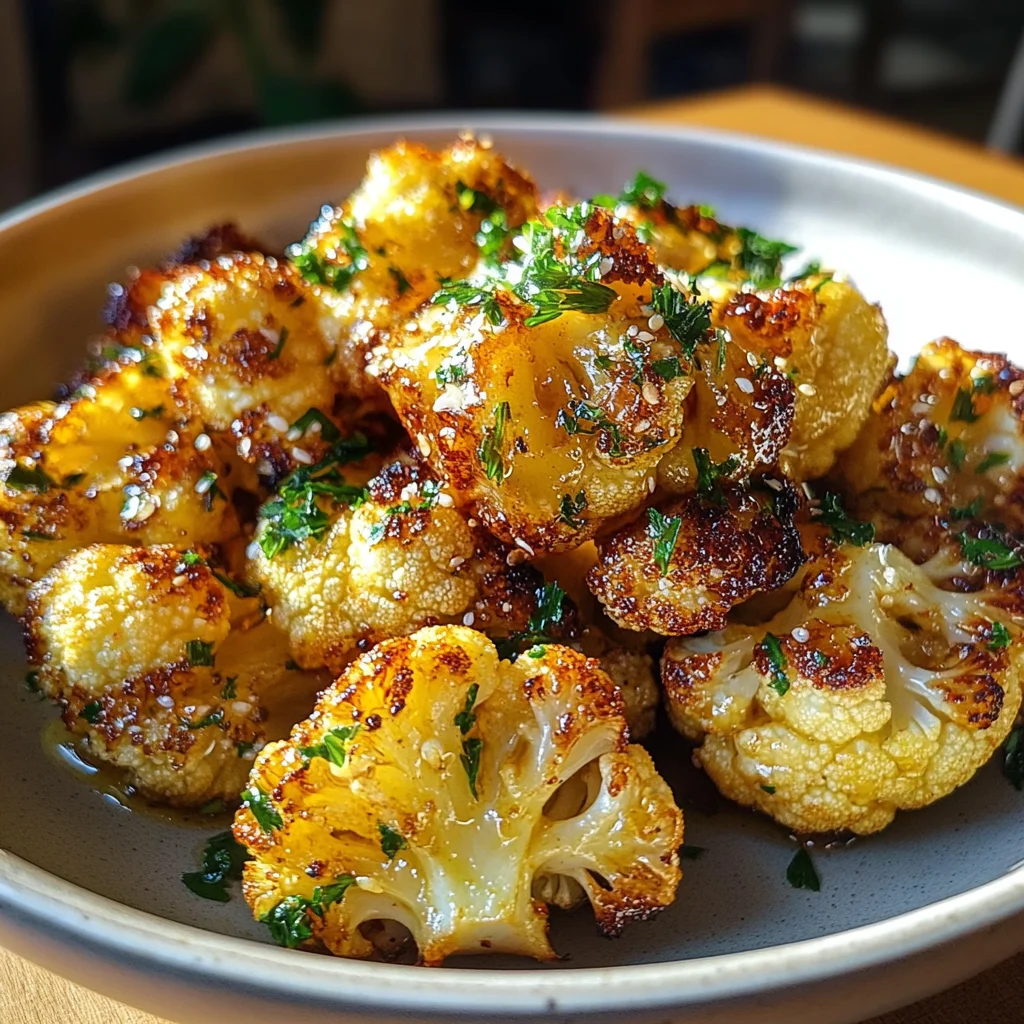
Garlic Butter Roasted Cauliflower: A Flavorful Delight!
I’m thrilled to share with you one of my absolute favorite side dishes: Garlic Butter Roasted Cauliflower! This dish is so much more than just a recipe; it’s a glorious celebration of flavor, a warm hug on a plate that invites you to gather around the table with those you love. The intoxicating aroma of garlic mingling with the rich essence of melted butter fills your kitchen, creating an atmosphere that beckons everyone inside. Each bite is a delightful experience as the cauliflower caramelizes beautifully in the oven, transforming from humble florets into golden nuggets of joy. Trust me when I say, this Garlic Butter Roasted Cauliflower is a flavorful delight that will capture your heart and become an instant favorite in your home.
As I dive into cooking this dish, I can’t help but reflect on how food has this incredible power to connect us—across generations, cultures, and experiences. From family gatherings to quiet dinners for one, the act of sharing food is an expression of love and care. This recipe perfectly encapsulates that sentiment; it’s simple enough for weeknight meals yet fancy enough to impress at holiday feasts. When you roast cauliflower until it’s tender and slightly crispy at the edges, you’re not just preparing food; you’re crafting memories that will linger long after the last bite has been savored.
Garlic Butter Roasted Cauliflower: A Flavorful Delight!
Let’s embark on this culinary journey together as we transform ordinary cauliflower into something extraordinary! The combination of garlic and butter creates a rich flavor profile that beautifully complements the natural sweetness of roasted cauliflower. Whether you’re serving it alongside grilled chicken or making it the star of your vegetarian spread, this dish promises to elevate any meal.
Ingredients:
As we gather our ingredients for this wonderful dish, remember that each component plays a crucial role in crafting that perfect symphony of flavors. Let’s explore what we need!
- 1 head of cauliflower, cut into florets. Choosing fresh cauliflower is vital because its crisp texture and subtle sweetness are what make this dish shine. When selecting your head of cauliflower, look for tightly packed florets without any browning or soft spots—this indicates freshness. The beauty of roasting lies in caramelization; when the natural sugars in the cauliflower are coaxed out through heat, they create a sweet and savory balance that makes every bite profoundly satisfying.
- 4 tablespoons unsalted butter, melted. Butter is truly liquid gold in this recipe—it brings richness and depth while allowing the garlic to shine through without overpowering it. Using unsalted butter gives you control over seasoning; plus, it creates that luscious coating around our roasted vegetables without adding extra salt right away. If you’re looking for alternatives due to dietary preferences, consider using high-quality olive oil for a deliciously different take that still provides incredible flavor.
- 4 cloves garlic, minced. Garlic is where magic happens! When minced and roasted, it becomes sweet and mellow rather than pungent—infusing our roasted cauliflower with an utterly intoxicating aroma. Don’t skimp on the garlic here; it’s what elevates this dish from good to absolutely extraordinary! Freshly minced garlic releases essential oils that enhance its flavor profile—just be sure not to let it brown too much during cooking or you’ll end up with bitterness instead of sweetness.
- Salt, to taste. Salt is more than just seasoning; it’s an enhancer that brings out all the natural flavors in our ingredients. I always recommend starting with a pinch and adjusting according to your taste preferences as you go along. Remember, every ingredient has its own personality—the salt helps them sing harmoniously together!
- Pepper, to taste. Freshly cracked black pepper adds warmth and depth to our Garlic Butter Roasted Cauliflower. It complements both the buttery richness and garlicky goodness beautifully while providing just enough contrast to keep things exciting on your palate.
- Fresh parsley, chopped (for garnish). Garnishing with fresh parsley introduces a bright pop of color along with herbal freshness that balances out the richness of our dish. It’s like a finishing touch—a lovely reminder that cooking should be both nourishing and visually appealing!
Equipment You’ll Need:
Before we dive into preparation, let’s ensure we have all our trusty tools ready at hand! Having the right equipment can make all the difference in creating something wonderful without unnecessary stress.
- Large mixing bowl – This will be your best friend for tossing those beautiful florets in buttery goodness! A spacious bowl allows for easy mixing without risking spills—a key element when you’re trying to coat every piece evenly.
- Baking sheet – A sturdy baking sheet (preferably rimmed) ensures even heat distribution while roasting your cauliflower to golden perfection without any sliding off onto the bottom of your oven—a mess no one wants! If you have parchment paper on hand for easy cleanup or if you’re concerned about sticking, feel free to line it before spreading out those florets.
- Spatula or wooden spoon – You’ll want something reliable for mixing everything together seamlessly. A sturdy spatula can help scrape down edges while ensuring no clumps remain—everything should be well coated for maximum flavor penetration!
Preparing the Garlic Butter Roasted Cauliflower: A Flavorful Delight!
Step 1: Preheat Your Oven
Before anything else happens in our culinary adventure together, let’s preheat our oven to 425°F (220°C). Preheating is absolutely paramount because it sets the stage for even roasting—ensuring we achieve those beautifully caramelized edges while keeping tender interiors intact. Imagine walking into a kitchen filled with warmth as aromas start dancing around once we begin roasting—it’s part of what makes cooking so special!
Step 2: Create Your Flavor Base
In a large mixing bowl, combine those four tablespoons of melted unsalted butter with minced garlic along with salt and pepper according to your taste preferences. This step creates our liquid gold mixture—the very essence that will envelop each floret in rich flavors! Stir gently so everything blends harmoniously; remember not to rush this process as it’s crucial for layering flavors later on.
Step 3: Coat Your Cauliflower
Now comes the fun part! Add those fresh cauliflower florets directly into your buttery mixture—don’t hold back here; embrace each piece as you toss them around until every floret shines with garlic butter goodness! Ensure they’re well coated but avoid overcrowding them which could lead steam instead of roast texture—we want crunchy edges after all!
Step 4: Arrange on Baking Sheet
Take care when spreading out your coated florets onto a lined baking sheet—it’s essential they have enough room between them so hot air circulates freely during roasting time! Make sure they’re arranged evenly across—this ensures consistent cooking throughout each piece without any soggy surprises waiting for us later!
With these steps carefully laid out before us—and vibrant aromas already wafting through my kitchen—I promise you’re going to adore how simple yet rewarding making Garlic Butter Roasted Cauliflower truly is! Just imagine serving this delightful dish at dinner tonight—you’ll be amazed at how quickly it disappears from plates and hearts alike!
Step 5: Tossing the Cauliflower – A Dance of Flavors
Now that you have your luscious garlic butter mixture ready, it’s time to introduce our star ingredient—the cauliflower florets! This step is all about marrying those beautiful florets with the rich, aromatic garlic butter. Imagine each floret as a little sponge, eagerly soaking up that golden liquid goodness. Pour the garlic butter over the cauliflower in your large bowl, and using a spatula or your hands, toss them together gently but thoroughly. The goal here is to ensure every single floret gets coated with that garlicky magic. Trust me on this—this coating is absolutely non-negotiable for achieving maximum flavor!
As you mix, take a moment to appreciate the transformation happening in your bowl. The vibrant white of the cauliflower will start glistening with melted butter and flecks of minced garlic, creating a visual feast before you even get to the oven. Make sure you’re not skipping on any florets; they all deserve their fair share of that delightful garlic butter symphony! This step is crucial because it sets the stage for what comes next: roasting. It’s during roasting that those flavors will deepen and intertwine, resulting in an utterly intoxicating aroma wafting through your kitchen. So be generous with your tossing and don’t rush this process—it’s where the magic truly begins.
Step 6: Spreading Evenly – Unlocking Those Roasting Secrets
Once you’ve generously tossed all your florets, it’s time to transfer them onto a baking sheet. This part might seem simple, but it carries its own importance—spacing the florets properly ensures even cooking and browning. You want to lay them out in a single layer without overcrowding; if they’re too close together, they’ll steam instead of roast, which can lead to a disappointing texture. Spread them across the sheet like you’re arranging a delightful garden of golden flowers!
As you arrange them, keep an eye on how they sit. Each piece should have its own space so that hot air can circulate freely around each floret during roasting. This circulation is key to achieving that coveted caramelization—the process where natural sugars in the cauliflower bloom into a sweet nuttiness while developing those lovely golden edges we all adore. You’ll know they’re ready when you can see minimal overlap and each piece gleams with buttery goodness, promising an incredible flavor experience ahead.
Step 7: Roasting – The Transformation Begins!
With your baking sheet prepared, slide it into that preheated oven at 425°F (220°C). Now comes one of my favorite parts: watching nature work its magic! As the cauliflower roasts for about 25-30 minutes, there’s something almost meditative about waiting for those beautiful transformations to unfold before your eyes. During this time, I encourage you to embrace patience; great things take time! While you wait, take a moment to revel in the seductive aroma wafting from your kitchen—it’s bound to draw everyone closer.
You’ll want to set a timer for 15 minutes into roasting because midway through is when you’ll give those florets a gentle stir or flip. This step is paramount—by turning them halfway through cooking, you’re ensuring they brown evenly on all sides and don’t stick to the pan. Look for that gorgeous golden hue starting to form; that’s when you know you’re on the right track! If you feel adventurous (and I hope you do!), consider adding some fresh herbs like thyme or rosemary at this stage for an extra layer of depth. Remember though: it’s crucial not to rush this step; good things come to those who wait!
Step 8: The Finishing Touch – Garnishing Your Creation
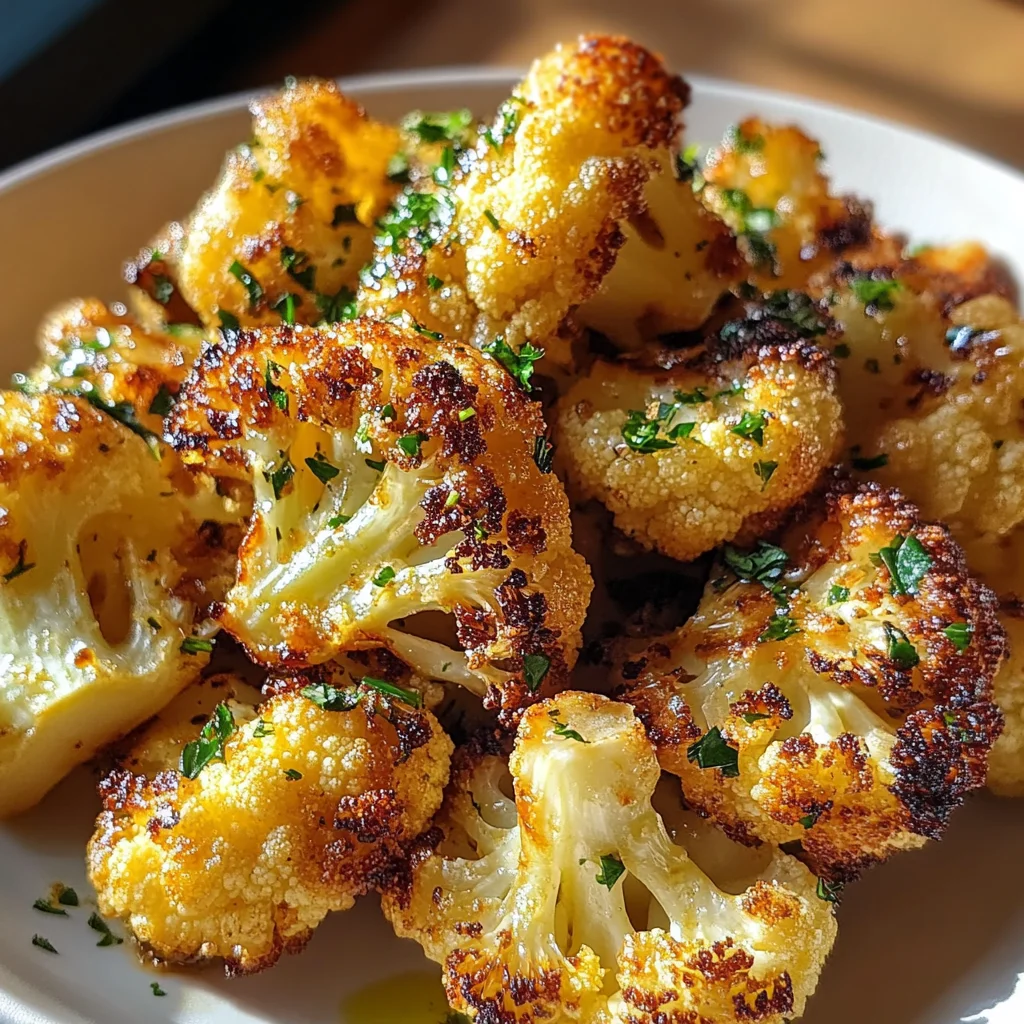
Once those 30 minutes are up and you’ve seen that beautiful transformation—golden brown edges with tender interiors—you’ll carefully pull out your baking sheet from the oven (don’t forget those oven mitts!). Here comes the grand finale: garnishing! While some may consider this just an aesthetic touch, I promise you it elevates both presentation and flavor dramatically. Sprinkle freshly chopped parsley over your roasted cauliflower while it’s still warm; not only does it add a vibrant color contrast against those golden florets, but it also imparts a fresh brightness that cuts through the richness of garlic butter.
Now imagine serving this stunning dish at dinner—a warm platter filled with perfectly roasted garlic butter cauliflower glistening under soft lighting while everyone gathers around with eager smiles on their faces. That feeling? It’s profoundly satisfying! To really bring out all those flavors in every bite, make sure everyone gets equal parts of both cauliflower and parsley garnish—the balance is exquisite! And just like that, you’ve created Garlic Butter Roasted Cauliflower: A Flavorful Delight! Serve it immediately alongside your favorite main courses or enjoy it as a standalone treat; either way, I guarantee it’s going to steal the show at any meal.
Final Thoughts
As we wrap up this culinary journey together, I hope you’re feeling inspired by this Garlic Butter Roasted Cauliflower recipe as much as I am every time I make it! There’s something magical about how such simple ingredients can come together to create something so truly extraordinary. Remember: cooking is not just about following steps; it’s about pouring love into what you create and sharing joy through food. So gather around your table tonight with friends or family—and don’t forget to savor every bite of your flavorful delight! Happy cooking!
Storage and Enjoyment Tips for Your Garlic Butter Roasted Cauliflower: A Flavorful Delight!
Now that you’ve lovingly roasted your Garlic Butter Roasted Cauliflower, it’s time to revel in the deliciousness! I can already imagine the aroma wafting through the kitchen, beckoning everyone to gather around the table. But what if there’s a little left over? No worries! This dish is not just a one-time wonder; it can be stored and enjoyed again. Let’s dive into how you can make this delightful cauliflower last while retaining its irresistible charm.
Storing Leftover Garlic Butter Roasted Cauliflower: A Flavorful Delight!
To store your leftover Garlic Butter Roasted Cauliflower, simply transfer it to an airtight container—this is essential to keep that luscious garlic-butter flavor intact. I recommend using glass containers because they not only preserve the taste but also allow you to see the beautiful golden florets inside, tempting you for another bite! If stored correctly in your refrigerator, it will stay fresh for about 3 to 5 days. A quick tip from my kitchen: placing a slice of bread in with your leftovers can help absorb moisture and keep your cauliflower crispier for longer, which is absolutely paramount if you want that delightful texture upon reheating. When you’re ready to enjoy it again, just pop it into the microwave or reheat in the oven until warmed through—trust me, it’ll taste almost as good as when it was freshly made!
Freezing Garlic Butter Roasted Cauliflower for Later
If you’re looking to extend the life of this flavorful delight even further, freezing is a fantastic option! To freeze your Garlic Butter Roasted Cauliflower properly, let it cool completely before transferring it to freezer-safe bags or containers. Be sure to remove as much air as possible to prevent freezer burn; this will help maintain both flavor and texture. When done right, your cauliflower will keep well for up to 3 months in the freezer. When you’re ready to use it from frozen, simply roast it straight from the freezer—no need to thaw! Just spread those beautiful florets on a baking sheet and give them a little extra roasting time. This method not only saves you time on busy weeknights but also ensures that delicious garlic butter goodness is always just a baking tray away!
Garlic Butter Roasted Cauliflower: A Flavorful Delight!

Indulge in the comforting embrace of Garlic Butter Roasted Cauliflower, a side dish that transforms humble cauliflower into an irresistible culinary masterpiece. This recipe perfectly balances the rich flavor of garlic and butter, creating a golden, caramelized exterior that gives way to tender florets. Ideal for family dinners or festive gatherings, this dish brings everyone together around the table, inviting joyful conversations and shared moments. Simple yet elegant, it elevates any meal while being easy enough for weeknight cooking.
- Prep Time: 10 minutes
- Cook Time: 30 minutes
- Total Time: 40 minutes
- Yield: Serves 4
- Category: Side Dish
- Method: Baking
- Cuisine: American
Ingredients
- 1 head of cauliflower, cut into florets
- 4 tablespoons unsalted butter, melted (or high-quality olive oil for a lighter option)
- 4 cloves garlic, minced
- Salt, to taste
- Pepper, to taste
- Fresh parsley, chopped (for garnish)
Instructions
- Preheat your oven to 425°F (220°C).
- In a large mixing bowl, combine melted butter with minced garlic, salt, and pepper. Mix well.
- Add cauliflower florets to the bowl and toss until evenly coated with the garlic butter mixture.
- Spread the florets in a single layer on a lined baking sheet.
- Roast in the preheated oven for 25-30 minutes or until golden brown and tender, stirring halfway through.
- Garnish with fresh parsley before serving.
Nutrition
- Serving Size: 1 cup (150g)
- Calories: 150
- Sugar: 2g
- Sodium: 180mg
- Fat: 10g
- Saturated Fat: 6g
- Unsaturated Fat: 3g
- Trans Fat: 0g
- Carbohydrates: 12g
- Fiber: 5g
- Protein: 5g
- Cholesterol: 15mg