Hot & Spicy Garlic Pickled Eggs Recipe
There’s something beautifully transformative about the process of pickling, isn’t there? When you take simple ingredients—like eggs, vinegar, and a sprinkle of spices—and combine them, you create a culinary experience that transcends the ordinary. These Hot & Spicy Garlic Pickled Eggs are not just a snack; they are a celebration of flavor, texture, and tradition. Envision yourself cracking open a jar after a long day; the aroma of garlic and spice wafts up, igniting your senses and transporting you to a vibrant summer picnic or a cozy gathering with friends. With each bite, you revel in the contrast of creamy yolk against the sharp tang of vinegar, all while savoring that irresistible kick of heat!
This recipe is particularly close to my heart because it embodies the spirit of sharing meals with loved ones. In my family, we’ve always believed that food has the power to bring people together—whether it’s at the dinner table or during festive occasions. Pickled eggs have long been a staple at our gatherings, often appearing alongside charcuterie boards or as delightful additions to salads. Their vivid colors and bold flavors spark curiosity and conversation. Plus, they’re incredibly easy to prepare and make for an excellent high-protein snack on their own! Trust me on this: once you try these Hot & Spicy Garlic Pickled Eggs, they will become a cherished recipe in your home.
Hot & Spicy Garlic Pickled Eggs Recipe: A Flavorful Snack That Packs a Punch
Welcome to your new favorite savory delight! This recipe for Hot & Spicy Garlic Pickled Eggs takes classic pickling techniques and infuses them with bold flavors that will leave your taste buds dancing. With just a handful of simple pantry ingredients, you’ll embark on an exciting culinary adventure that results in delectable snacks perfect for any occasion. Whether you’re preparing for game day or simply craving something unique to brighten up your meals, these pickled eggs will deliver every time!
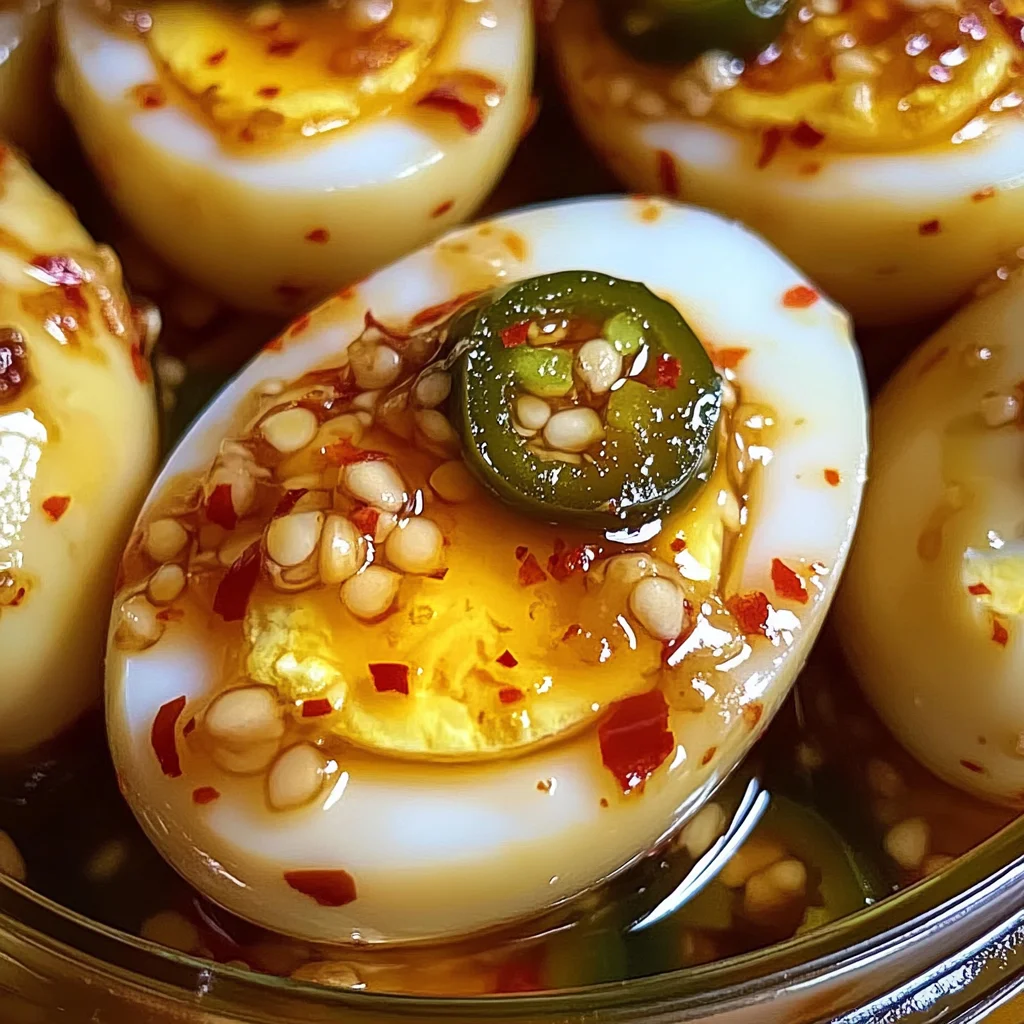
Ingredients:
As we dive into this recipe together, let’s explore each ingredient’s significance and how they contribute to creating that perfect balance of flavors we crave in our Hot & Spicy Garlic Pickled Eggs.
- 12 duck eggs. Duck eggs are an absolute gem in the world of pickling! They possess a richer flavor compared to chicken eggs and have larger yolks that create a creamier texture. When boiled properly, their shells can be slightly thicker than chicken eggs—this means they hold up beautifully during the pickling process without falling apart. If you can’t find duck eggs or prefer chicken eggs instead (or want to mix both!), feel free to adjust according to what you have on hand; just remember that cooking times may vary slightly.
- 8 chicken eggs. Adding chicken eggs provides a lovely contrast in size and flavor when mixed with duck eggs. They also add lightness to the overall texture of your pickled treat while ensuring everyone can enjoy these delightful bites! Look for farm-fresh options whenever possible; they tend to have more vibrant yolks and creamier whites that elevate your dish’s quality significantly.
- 3-4 garlic cloves, smashed. Ahh, garlic—the aromatic superstar! The moment those smashed cloves hit the brine, they release their intoxicating essence and mingle beautifully with other ingredients. Crushing them is crucial as it allows more flavor compounds to escape into the brine during pickling, resulting in intensely flavorful eggs when it’s time to dig in! Opt for fresh garlic for maximum potency; pre-minced varieties simply won’t do justice here.
- 1-2 tbsp crushed red pepper flakes. This is where things start getting exciting! Crushed red pepper flakes introduce not only heat but also depth and complexity to your pickling liquid. Adjusting this amount allows you to customize spice levels according to your taste preferences—so whether you’re seeking mild warmth or fiery intensity, you’ll find joy in crafting it just how you like it!
- 2-3 fresh jalapeños, sliced. Fresh jalapeños add another layer of zing while keeping things vibrant and colorful! Their crisp texture complements the softness of the eggs perfectly—and if you’re brave enough—feel free to toss in some seeds for an extra kick! Jalapeños are not only delicious but also offer health benefits like boosting metabolism; it’s like enjoying gourmet food while nourishing your body!
- 1 sweet red pepper, chopped. Sweet red peppers bring balance by providing slight sweetness against all those spicy notes we’ve introduced so far. Their bright color makes everything visually appealing too! I love using fresh peppers since they add crunchiness amidst creamy textures—a delightful contrast that enhances every bite.
- 2 cups white vinegar. Vinegar acts as our preserving agent here—the liquid gold that transforms ordinary ingredients into something extraordinary over time! White vinegar is preferred due its sharpness which cuts through richness wonderfully while allowing other flavors (like garlic) shine through beautifully without overpowering them.
- 2 cups water. Water helps dilute our brine solution just enough so it isn’t overwhelmingly sour but still preserves all those wonderful flavors we’ve built together! It’s key not only for taste but also ensures proper consistency throughout this delicate infusion process; too much vinegar could lead us down an overly acidic path—no thanks!
- 2 tbsp sugar. Sugar balances acidity brilliantly—it’s what takes our brine from merely tart to something truly harmonious! Using granulated sugar works well here since it dissolves quickly during boiling; however feel free experiment with alternatives if desired (honey or agave syrup could add interesting nuances).
- 1 tbsp salt. Salt is non-negotiable in any pickling endeavor—it’s responsible for enhancing flavors while aiding preservation by drawing moisture out from ingredients through osmosis (which ultimately leads us back toward shelf stability). Just ensure you’re using kosher salt (not table salt) as it yields better overall results without imparting unwanted metallic tastes.
- Optional: 1 tsp black peppercorns. While optional—they contribute subtle warmth alongside earthy characteristics enhancing depth across layers within our brine—these little gems pack quite punch when included!
- Optional: fresh herbs (dill or thyme). Adding fresh herbs injects greenery into jars offering both visual appeal plus fragrant aromatic notes elevating everything even further—we’re aiming for complexity after all!
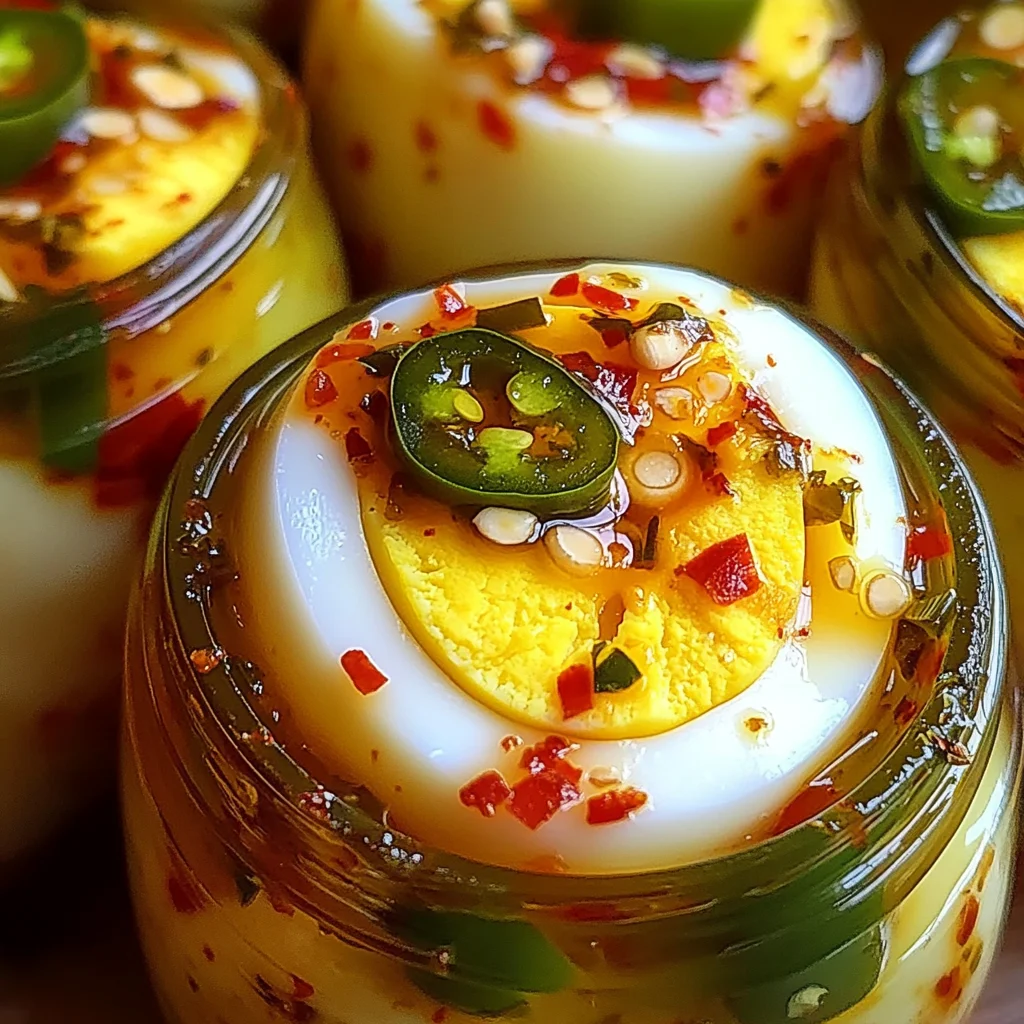
Equipment You’ll Need:
Cooking becomes such a joyful experience when equipped with the right tools! While these items aren’t technically ingredients themselves—they play an essential role in helping us craft those perfect Hot & Spicy Garlic Pickled Eggs with ease.
- Large pot – A sturdy large pot is necessary for boiling both duck and chicken eggs simultaneously without overcrowding them—which ensures even cooking throughout each egg’s surface area thus achieving perfect doneness every single time! Look for one with thick bases designed specifically for even heat distribution so nothing scorches along edges.
- Ice bath setup (large bowl filled with ice water) – Creating an ice bath immediately after boiling helps stop cooking processes swiftly while preserving optimal texture inside each egg—this step matters greatly as we want creamy yolks without chalky dryness creeping in unexpectedly later on once they’re peeled!
- Clean glass jars (quart-sized recommended) – Using clean glass jars allows visibility into what’s happening during pickling plus keeps everything contained nicely until enjoyed later down road—all while ensuring safety from unwanted contaminants entering our beloved creations too!
- Ladle or measuring cup – Having either tool handy simplifies pouring warm brine directly over those beautiful peeled eggs nestled snugly inside jars—I cannot stress enough how important this step is since ensuring proper coverage guarantees maximum flavor absorption throughout entire batch!
Preparing the Hot & Spicy Garlic Pickled Eggs Recipe
Step 1: Boiling Your Perfect Eggs
Let’s get started by boiling our duck and chicken eggs until they’re hard-cooked—a crucial first step that sets everything up beautifully! Begin by filling your large pot about three-quarters full with water; ensure there’s enough room left over so when we add those precious eggs later on they won’t crowd each other too tightly (or risk cracking!). Bring it gently to boil over medium-high heat before carefully lowering each egg in using either tongs or a slotted spoon—this way prevents potential splashes causing scalding water burns!
Once added into boiling water let them cook undisturbed between 9–12 minutes depending on personal preference regarding tenderness; I recommend sticking closer towards 10-minute mark which yields perfectly firm whites alongside creamy yolks—not overly dry nor undercooked either way…just right! After timer goes off promptly transfer them using same tongs/slotted spoon into prepared ice bath waiting nearby—this shockingly cold dip halts any further cooking instantly preserving desired textures while making peeling much easier down line too so don’t skip this step!
Step 2: Preparing Your Brine
While those lovely little gems chill out soaking up all icy goodness let’s shift gears towards creating our flavorful brine mixture—a symphony of tastes waiting eagerly ahead! In another saucepan combine two cups each white vinegar plus water along with two tablespoons sugar plus one tablespoon salt stirring well until dissolved completely before bringing everything up-to-boil again over medium heat—it’s essential here letting sugar fully melt away becomes paramount achieving balanced overall results later-on after everything gets jarred-up together post-pickling process itself begins soon thereafter too…
Once boiling point reached sprinkle optional black peppercorns inside too if desired adding even more layers upon layers worth savoring afterward once ready finally dive headfirst into tasting extravaganza ahead where high-protein snacks await delightfully awaiting discovery beyond mere appetizers alone—but remember patience plays key role when allowing sufficient cooling afterward before pouring warm solution atop carefully arranged goods below afterwards…trust me on this one folks!
Step 3: Layering Flavors Inside Glass Jars
Now comes my favorite part: assembling everything into clean glass jars where magic starts unfolding right before eyes glancing across colorful array within! Begin by placing those smashed garlic cloves followed closely behind by measured amounts crushed red pepper flakes alongside freshly sliced jalapeños plus chopped sweet red peppers carefully layering them evenly throughout bottom section first making sure none gets missed out altogether amongst rushes excitement occurring around kitchen area right now…
Next gently add those peeled hard-boiled duck/chicken egg beauties atop layered goodness below taking care not crush feelings between items already placed therein—we want preserve aesthetic qualities as much possible whilst crafting ultimate experiences awaiting further down journeys ahead together…but don’t worry if few cracks appear here/there—it happens sometimes especially if working fast-paced environment where multitasking reigns supreme throughout kitchen adventures alike today ahead…just keep calm carry-on knowing flavors still meld perfectly regardless outcome achieved visually speaking either way ultimately matters most anyway!
Step 4: Pouring Brine Over Everything
Finally we’ve reached crescendo point leading up towards grand finale moment arriving fast approaching ahead now—the time has come pour warm brine carefully over layered jar contents ensuring full submersion happens completely covering anything resting beneath surface level below…this final touch guarantees maximum flavor absorption occurs seamlessly across entire assembly collected thus far enabling guests indulge fully whenever ready enjoy products created moments earlier here today amongst friends/family gathered round tables celebrating life together happily sharing stories over meals made special via efforts put forth beforehand preparing delicious masterpieces like these awaiting arrival soon thereafter once allowed marinating sufficiently next few days passing by quietly away till then…
I hope you’re feeling excited about diving into this wonderful culinary journey together—we still have some waiting period involved before indulging fully but trust me once achieved gratification arrives worth every moment passed leading us forward along pathway crafted lovingly throughout entire process shared here today unveiling secrets behind success enabling creation happen effortlessly anytime desired thereafter moving forward onwards building memories lasting lifetime spent around tables bonding souls forevermore engaged warmly cozily enjoying simple pleasures brought forth within realms food shared alike…get ready prepare yourselves folks because these Hot & Spicy Garlic Pickled Eggs gonna change perceptions forever onward!!
Stay tuned as we continue this delightful adventure exploring more steps ahead unveiling additional secrets leading towards ultimate enjoyment awaited soon thereafter…
Step 5: Pouring the Brine – The Heart of Flavor
Now that you’ve prepared your colorful medley of garlic, spicy jalapeños, and sweet red peppers in those gleaming jars, it’s time to pour the warm brine over your eggs. This is where the magic happens! As you gently ladle the brine—made from the perfect balance of white vinegar, water, sugar, and salt—into each jar, you’ll notice how it envelops every inch of those beautifully peeled eggs. You want to ensure that the brine completely submerges them because this isn’t just a soak; it’s a transformative experience. This step is absolutely paramount because it allows the flavors to penetrate deeply into the eggs, creating that extraordinary taste profile we’re all after.
As you pour, watch for any bubbles escaping—it’s completely normal if they rise to the surface; they’re just trying to escape their cozy briny home! If you find that your jars aren’t quite full enough to cover all the eggs, feel free to whip up a little more brine using equal parts vinegar and water with a sprinkle more of sugar and salt. Trust me on this; ensuring each egg is fully covered will lead to a harmonious blend of spicy and garlicky goodness that seeps into every bite. Once your jars are filled to perfection, seal them tightly with their lids, as this will lock in all those flavors while they rest in the fridge.
Step 6: Sealing in Flavor – The Waiting Game
Now comes one of the hardest parts but also one of the most rewarding: sealing your jars and placing them in the refrigerator. I know, I know; waiting can be excruciating when you can practically taste those Hot & Spicy Garlic Pickled Eggs already! But trust me on this—it’s non-negotiable. Allowing these beauties to marinate in their vibrant brine for at least three days is crucial for developing that deep flavor profile we crave. While three days is the minimum requirement, I promise you that if you can hold off for a week or even longer, you’ll be rewarded with an utterly intoxicating experience!
During this resting period, not only do the flavors meld together like old friends sharing secrets over coffee, but the texture of the eggs also transforms beautifully. The acidity from the vinegar works its way into each egg white and yolk, giving them a tangy punch while keeping them tender yet firm—a truly extraordinary combination! So tuck these jars into your refrigerator and let them work their magic while you daydream about how amazing they’ll taste.
Step 7: The Big Reveal – Time to Enjoy!
Finally! After what feels like an eternity (but really has been just long enough), it’s time for the big reveal—your Hot & Spicy Garlic Pickled Eggs are ready! Open up that refrigerator door and take a moment to breathe in those tantalizing aromas wafting up from your jars. You should notice hints of garlic mingling with spice and sweetness—a symphony of flavors that promises an exciting culinary adventure ahead. As you reach for a jar and carefully unscrew the lid, prepare yourself for an enticing rush as those delectable scents fill your kitchen.
Now comes another important part: removing your pickled eggs from their flavorful bath. Use clean hands or tongs to gently lift out an egg or two (or three—I won’t judge!). As you place them on a plate or cutting board, admire their beautiful hues—the rich yellow yolks peeking through slightly translucent whites specked with bits of garlic and spices. Each egg represents not only a tasty snack but also hours spent allowing flavors to blossom beautifully together.
Step 8: Savoring Every Bite – Serving Suggestions
Before diving in (which I know is tempting!), let’s talk about how best to enjoy these delicious Hot & Spicy Garlic Pickled Eggs. They shine bright as stand-alone snacks or can elevate any dish they grace with their presence. Picture this: slicing one open reveals its vibrant yolk spilling forth slightly while adding a zesty kick atop salads or grain bowls. Or perhaps you’re hosting friends for game night—these pickled eggs make stunning appetizers when served alongside crackers, cheeses, or fresh veggies.
I encourage you not just to savor them solo but also experiment by adding chopped pickled eggs into potato salads or creamy deviled egg mixtures for an unexpected twist! Their bold flavor will surprise and delight anyone lucky enough to partake. And don’t forget—you have a wealth of options when it comes to garnishing; fresh herbs like dill or thyme sprinkled over before serving adds that final touch of freshness that ties everything together beautifully.
Next Major Phase – Storing Your Treasures
As you relish every bite of those incredible Hot & Spicy Garlic Pickled Eggs, let’s discuss how best to store any leftovers (if there are any!). These delightful morsels can last weeks—if not longer—in your fridge thanks to their preserved nature; however, it’s essential always to keep them submerged under brine throughout their storage life. If you notice they’ve started rising above it during use—simply top off with additional vinegar-water mixture until they’re fully covered again.
So there you have it—the complete guide on making Hot & Spicy Garlic Pickled Eggs at home! With patience comes reward; trust me when I say this recipe will become a cherished favorite among family gatherings or quiet evenings at home alike! Enjoy every luscious bite knowing you’ve crafted something truly special from simple ingredients—a testament that cooking can often create profound connections between us all!
Storage and Enjoyment Tips for Your Hot & Spicy Garlic Pickled Eggs Recipe
Now that you’ve crafted these beautiful Hot & Spicy Garlic Pickled Eggs, it’s time to dive into the delightful world of storage and enjoyment! I can already imagine the vibrant colors of those eggs nestled in jars, infused with the robust flavors of garlic and spice. Whether you’re planning to enjoy them immediately or savor them over the coming days (trust me, they only get better!), it’s essential to know how to preserve their freshness. So let’s talk about how to keep your culinary masterpiece at its absolute best!
Storing Leftover Hot & Spicy Garlic Pickled Eggs Recipe
When it comes to storing your newly pickled treasures, opt for clean, airtight glass jars. Glass is not just a beautiful way to showcase your eggs; it also keeps them safe from any unwanted odors or flavors that plastic containers might impart. Place the jars in the refrigerator where they can be kept for up to four weeks—though I promise you, they won’t last that long if you have friends over! For maintaining quality, consider slipping a slice of bread into the jar; this little trick helps absorb excess moisture and keeps your eggs perfectly crisp. As for taste, after a few days in their brine bath, these eggs develop an utterly intoxicating flavor profile that’s both bold and savory—think layers of garlic mingling with gentle heat from the peppers. When you’re ready to serve them, there’s no need for reheating; they shine as a chilled snack or appetizer straight from the fridge.
Freezing Hot & Spicy Garlic Pickled Eggs for Later
If you find yourself with more pickled eggs than you can eat in a month (which can happen when sharing these with friends), you might be wondering about freezing them. While pickled eggs don’t typically retain their remarkable texture after freezing, there’s still a way to extend their life in an inventive manner: freeze the brine! Just pour it into ice cube trays once it’s cool and freeze. These flavorful cubes can be added directly to dishes like stir-fries or soups later on, infusing them with that signature garlicky kick when you’re short on time but still want something deliciously satisfying. Just remember, frozen brine cubes will keep well for about six months—perfect for those busy days when you crave something homemade! Embracing this storage method not only minimizes waste but also gives you a quick burst of flavor whenever you need it.
Hot & Spicy Garlic Pickled Eggs
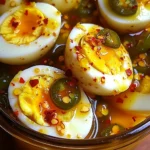
Hot & Spicy Garlic Pickled Eggs are a vibrant culinary creation that brings your taste buds to life! Infused with zesty garlic, spicy jalapeños, and sweet red peppers, these pickled eggs transform everyday ingredients into a flavorful high-protein snack. Perfect for game days, picnics, or as a delightful addition to salads and charcuterie boards, they are sure to impress at any gathering. The contrast of creamy yolks against the tangy brine creates an irresistible treat that you’ll want to enjoy time and again. With just a bit of preparation and patience, you can savor the extraordinary flavors of these homemade pickled eggs!
- Prep Time: 15 minutes
- Cook Time: 12 minutes
- Total Time: 27 minutes
- Yield: Makes approximately 20 servings 1x
- Category: Snack
- Method: Pickling
- Cuisine: American
Ingredients
- 12 duck eggs (or substitute with chicken eggs)
- 8 chicken eggs
- 3–4 garlic cloves, smashed
- 1–2 tbsp crushed red pepper flakes
- 2–3 fresh jalapeños, sliced
- 1 sweet red pepper, chopped
- 2 cups white vinegar
- 2 cups water
- 2 tbsp sugar
- 1 tbsp salt
Instructions
- Boil duck and chicken eggs in a large pot for 9–12 minutes until hard-cooked. Transfer to an ice bath immediately.
- In a saucepan, combine vinegar, water, sugar, and salt; bring to a boil until dissolved.
- Layer smashed garlic cloves, crushed red pepper flakes, jalapeños, and sweet red peppers in clean glass jars.
- Place peeled eggs on top of the layered ingredients in the jars.
- Pour warm brine over the contents until fully submerged.
- Seal jars tightly and refrigerate for at least three days (preferably one week) before enjoying.
Nutrition
- Serving Size: 1 egg (50g)
- Calories: 70
- Sugar: 0g
- Sodium: 210mg
- Fat: 5g
- Saturated Fat: 1g
- Unsaturated Fat: 4g
- Trans Fat: 0g
- Carbohydrates: 1g
- Fiber: 0g
- Protein: 6g
- Cholesterol: 186mg