Banana Oatmeal Bars
There’s something incredibly heartwarming about the aroma of baking that fills your kitchen, wrapping around you like a cozy hug on a chilly day. When I think of my Banana Oatmeal Bars, I’m reminded not only of their delightful taste but also of the memories they evoke—lazy Sunday mornings spent chatting with friends or quick breakfasts before heading out on a busy weekday. These bars are more than just a recipe; they’re a testament to the beauty of simplicity in cooking, a bridge between wholesome ingredients and comforting flavors. Made with pantry staples, these Banana Oatmeal Bars are not just easy to whip up but are also packed with nutrition that keeps you feeling full and satisfied. Imagine biting into a warm, chewy bar where the natural sweetness of ripe bananas mingles with the richness of nut butter and the indulgence of chocolate chips—it’s an experience that I promise will brighten your day!
As we embark on this culinary adventure together, let’s take a moment to appreciate what makes these Banana Oatmeal Bars so special. They’re perfect for breakfast, as an afternoon snack, or even a healthy dessert after dinner. What really captivates me about these bars is how they encapsulate both tradition and innovation—the timeless combination of oats and bananas meets modern convenience and health consciousness. Each bite speaks to comfort food while being nourishing at the same time. It’s amazing how such simple ingredients can come together to create something truly extraordinary; they offer you that profound satisfaction without any guilt involved! Trust me when I say that once you make this recipe, it will quickly become a cherished favorite in your household.
Banana Oatmeal Bars: A Wholesome Delight for Every Moment
I can’t wait to share this recipe with you! It’s as if each ingredient was chosen not just for its flavor but for the way it harmonizes with the others, creating a symphony of textures and tastes. So, let’s roll up our sleeves and gather our ingredients; we’re about to create something magical together!
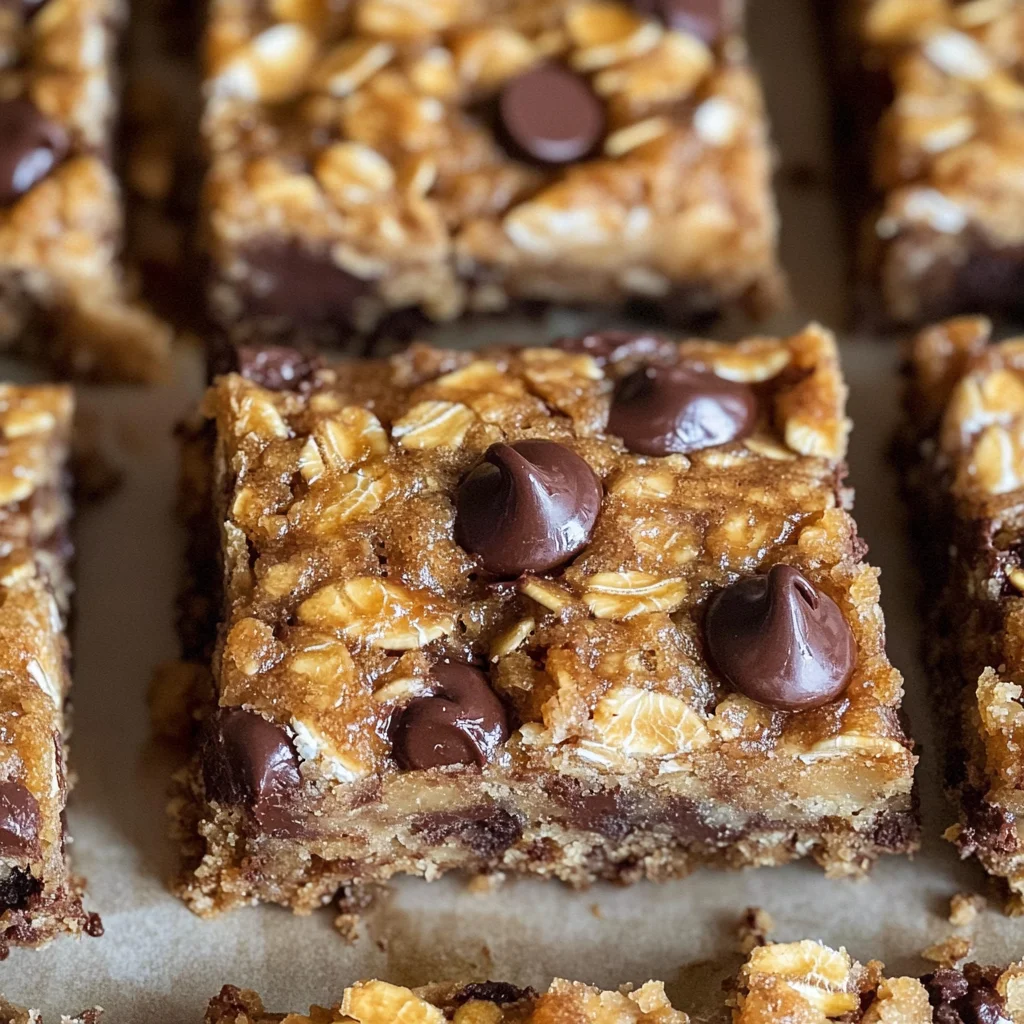
Ingredients:
Before we dive into the actual cooking, let’s talk about what you’ll need. Each ingredient plays an important role in building flavor and texture in our Banana Oatmeal Bars.
- 1½ cups mashed bananas (approx. 3 bananas). Bananas are the stars of this recipe—sweetening it naturally while providing moisture that binds everything together beautifully. When choosing bananas, look for those that are overripe; their speckled skin indicates peak sweetness and flavor which translates into delicious bars. If you’re short on fresh bananas, feel free to use frozen ones—just make sure they’re thawed properly before mashing! This is crucial because the natural sugars released from ripe bananas will enhance every bite.
- ½ cup nut butter. Whether you choose almond butter, peanut butter, or cashew butter, this ingredient adds richness and creaminess that is absolutely paramount to achieving that delightful chewy texture we’re aiming for in our bars. Nut butter is not just functional here—it also brings healthy fats and protein to keep you fuller for longer. If nut allergies are a concern, sunflower seed butter works wonderfully too! Just remember that each nut or seed butter has its unique flavor profile which can subtly influence the overall taste.
- 2 cups rolled oats. Rolled oats provide structure as well as heartiness to these bars; they serve as the backbone of our recipe! When selecting oats, opt for old-fashioned rolled oats rather than quick oats since they hold their shape better during baking and contribute to that lovely chewy texture we crave. Don’t rush this step; soaking your oats in liquid beforehand can give them even more tenderness when baked.
- 1 teaspoon cinnamon. Ahh, cinnamon—this spice is like a warm hug in powder form! Not only does it add warmth and depth to our bars, but it also enhances the flavors of our other ingredients beautifully—especially those sweet bananas! I always recommend using freshly ground cinnamon if possible because it delivers an utterly intoxicating aroma that’s simply unparalleled compared to pre-ground varieties.
- 1 teaspoon vanilla extract. This magical elixir elevates both sweet and savory dishes by adding complexity without overpowering other flavors—it acts like an enhancer! Always reach for pure vanilla extract over imitation when possible; it makes all the difference in quality—and trust me when I say it’s worth every drop!
- 3 tablespoons maple syrup. Here comes our natural sweetener! Maple syrup adds not only sweetness but also an earthy richness that complements the bananas perfectly—it’s like liquid gold flowing through our bars! If you’re looking for alternatives due to dietary preferences or availability issues, agave nectar or honey could work nicely too.
- 1 cup chocolate chips. Chocolate chips bring joy—in every sense of the word! They melt slightly during baking creating pockets of molten goodness throughout each bar—a true treat for any chocolate lover out there! Opt for dairy-free chocolate chips if you’re avoiding animal-derived products altogether; they’ll still bring that delightful sweetness without sacrificing taste.
- ½ teaspoon salt. Salt may seem minor but don’t underestimate its power—it brightens up flavors across all recipes by balancing sweetness beautifully! A small pinch can make your Banana Oatmeal Bars taste truly extraordinary by enhancing every other ingredient involved.
Equipment You’ll Need:
Having the right tools can make all the difference in your cooking experience; they’re essential partners in creating something wonderful from these humble ingredients. Let’s take a moment to gather what you’ll need!
- 9×9 baking pan: A sturdy pan is key here since it ensures even baking throughout your bars—trust me when I say there’s nothing worse than unevenly cooked treats! If you don’t have one on hand, feel free to use an 8×8 pan instead; just keep an eye on them as they may require slightly longer baking time.
- Parchment paper: This might seem like a small detail but lining your baking pan with parchment paper makes removing those beautiful bars effortless once they’re cooled down—the last thing you want is half your creation stuck stubbornly to the bottom!
- Mixing bowls: You’ll want at least one large mixing bowl for combining all those delightful ingredients together harmoniously—something deep enough so you won’t risk any spills on your countertop!
- Masher or fork: To transform those ripe bananas into creamy goodness effortlessly—you’ll find using either tool will get them nice and smooth without needing anything fancy!
- Measuring cups & spoons: Precision matters here; having accurate measurements ensures consistency in flavor across batches—and who doesn’t want every nibble perfect?
Preparing the Banana Oatmeal Bars
Step 1: Preheat Your Oven & Prepare Your Pan
First things first—let’s set ourselves up for success by preheating that oven to 350°F (175°C). This ensures everything bakes evenly right from start to finish while helping develop those lovely golden edges we all adore! While it’s warming up—which usually takes about 10 minutes—you’ll want to grab your trusty 9×9 baking pan and line it with parchment paper so nothing sticks later on when cutting out our glorious bars after baking.
Step 2: Mix All The Delicious Ingredients Together
In a large mixing bowl big enough to accommodate all ingredients comfortably (and allow some vigorous stirring), combine those mashed bananas with nut butter until they’re blended seamlessly—aiming for smoothness here helps create uniformity throughout each bar’s texture once baked! Next comes adding rolled oats followed by cinnamon; do give everything another good stir until well mixed since each element contributes significantly towards building flavor profiles within our final product—don’t rush this step because making sure everything gets integrated thoroughly leads directly towards achieving greatness!
Step 3: Sweeten Things Up
Now it’s time for sweetness magic—add vanilla extract alongside maple syrup—and won’t you be amazed at how aromatic this becomes? The fragrant notes mingle beautifully with banana scents wafting through your kitchen already while coaxing out hidden flavors waiting beneath surface levels too! Fold in chocolate chips now gently ensuring distribution remains even amongst dough-like batter we’ve created thus far—but don’t hesitate if you’d like adding extra ones atop before heading into oven next step!
Step 4: Bake Until Perfectly Golden
Transfer mixture into prepared pan pressing evenly downwards so no gaps remain visible between them either side-to-side nor top-to-bottom—and don’t forget about optional topping addition mentioned earlier regarding additional chocolate chips sprinkled atop if desired—that little detail will ensure extra indulgence factor later on too when serving guests (or yourself!). Slide into preheated oven letting bake away roughly between 18–20 minutes until edges begin turning golden brown plus center appears set rather than jiggly upon gentle shake test performed cautiously thereafter cooling phase begins post-bake completion awaiting slicing joy ahead shortly afterward…
And there we go—the first steps laid out clearly while sprinkling enthusiasm throughout each sentence crafted lovingly toward sharing joy found within kitchen adventures ahead together! Stay tuned as we continue exploring more steps soon…
Baking Your Perfect Banana Oatmeal Bars
Step 5: Mixing the Ingredients – Creating Your Flavor Base
Now that your oven is preheating and your baking pan is ready, it’s time to dive into the heart of this recipe: mixing the ingredients. In a large mixing bowl, combine 1½ cups of mashed bananas—which is about three medium-sized bananas—½ cup of nut butter, 2 cups of rolled oats, 1 teaspoon of cinnamon, 1 teaspoon of vanilla extract, 3 tablespoons of maple syrup, 1 cup of chocolate chips, and ½ teaspoon of salt. This step is essential because it brings all these delightful flavors together, forming a harmonious mixture that will become your banana oatmeal bars.
As you mix, allow yourself to get lost in the process. The smell of ripe bananas mingling with the warm spice of cinnamon and the nutty aroma from the nut butter is nothing short of intoxicating. Use a sturdy spatula or a wooden spoon to combine everything thoroughly; trust me, this is crucial! You want the oats to be well-coated with the banana mixture so they can absorb moisture as they bake. If you notice any dry oats lingering at the bottom, give them some extra love with your spatula until everything looks beautifully combined—a luscious batter that’s both thick and inviting.
Step 6: Transferring and Flattening – Patience is Key
Once you’ve ensured your mixture is perfectly blended, it’s time to transfer it into the prepared baking pan. Gently scoop your banana-oat mixture into the lined pan, using your spatula to spread it out evenly. This step may seem simple, but do take your time here; ensuring an even layer means consistent baking throughout. You want to flatten it down firmly—this not only helps them hold their shape but also prevents any bizarre cracking or crumbling when they’re done.
Picture this: as you press down on that mixture, it transforms into a cohesive mass that promises an utterly satisfying texture once baked. Don’t rush this step! Take a moment to really press down; it’s absolutely paramount for achieving those perfect bars that are easy to cut and won’t fall apart on you later. If you’re feeling indulgent (and who wouldn’t?), sprinkle some additional chocolate chips on top before popping them in the oven. This little touch not only adds more chocolatey goodness but gives those bars an appealing look as they bake!
Step 7: Baking – The Transformation Begins
With everything neatly arranged in your baking pan, carefully slide it into your preheated oven set at 350°F (approximately 175°C). Baking is where all that delicious anticipation comes to life—the aromas start wafting through your kitchen like an inviting hug! Set your timer for 18 to 20 minutes but don’t just walk away mindlessly; this part requires a bit of attention. As they bake, keep an eye on those edges—they should turn a lovely golden brown color, which signals that they’re getting close.
You might wonder what exactly happens during these critical moments in the oven. The heat causes the bananas to caramelize slightly and meld beautifully with the oats and nut butter, creating a symphony of flavors and textures—one bite will have you hooked! Around the 15-minute mark, gently open the oven door and peek inside. It’s perfectly normal for them to puff up slightly; when they start looking set (not jiggly), that’s your cue they’re almost ready. If you’d like extra assurance about doneness, insert a toothpick into the center—if it comes out clean or with just a few moist crumbs clinging to it, you’re good to go!
Step 8: Cooling – The Ultimate Test
Ahh, patience—often easier said than done! Once those bars are beautifully golden around the edges and set in the middle, carefully remove them from the oven and let them cool completely in the pan on a wire rack if you have one handy. This cooling period may feel torturous—you might be tempted to dig right in—but trust me on this one! Allowing them to cool completely (about 30 minutes) helps solidify their structure; cutting too soon could lead to messy bars that crumble instead of slice gracefully.
During this time, you might notice that as they cool, they’ll firm up even more—the magic of chemistry at work! This step not only enhances their texture but also allows those flavors to deepen further as they rest together post-baking. I encourage you not to rush this process; think about how rewarding it will feel when you finally cut into those bars knowing every bite will be deliciously intact!
Final Touches
Step 9: Cutting and Serving – The Delicious Reveal
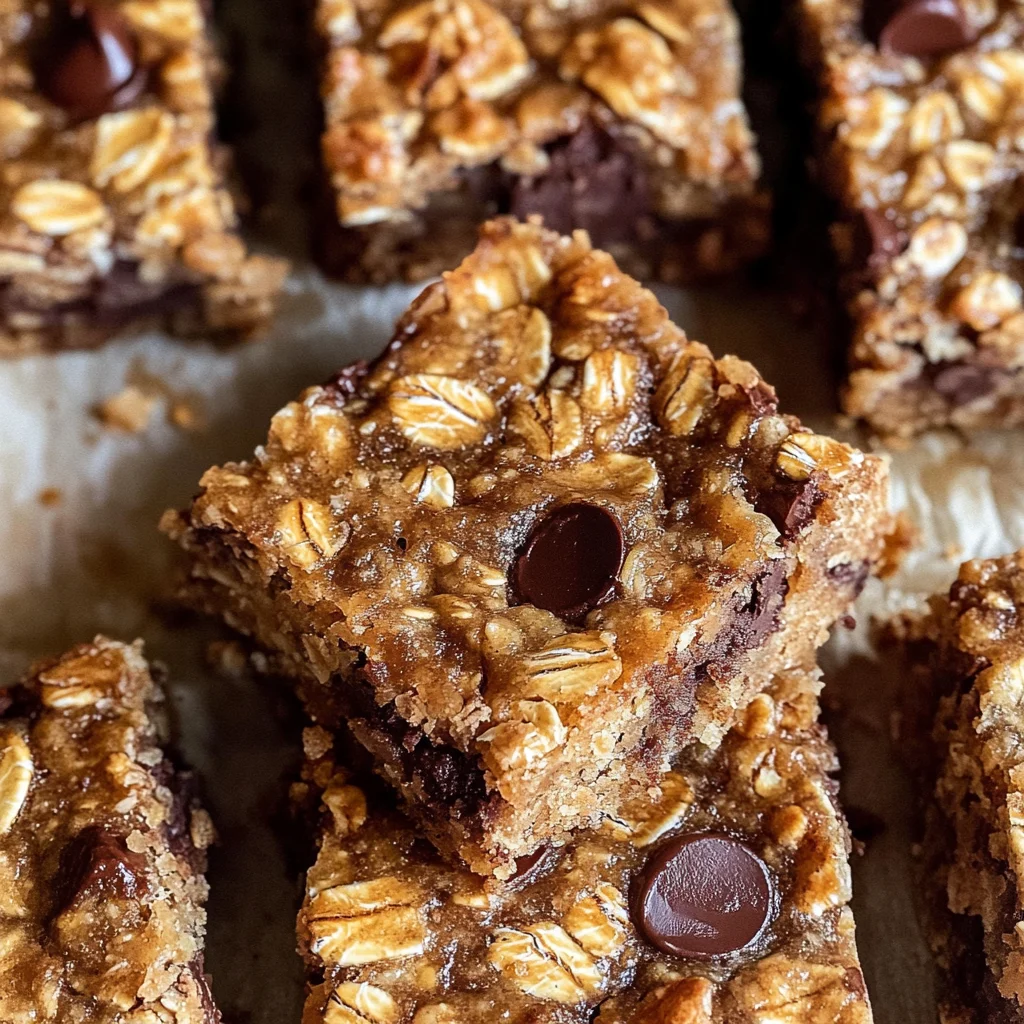
After what feels like an eternity but will ultimately reward you tenfold, it’s finally time for that exhilarating moment: cutting into your cooled banana oatmeal bars! Carefully lift them out using the parchment paper overhang—it’s like unveiling a masterpiece you’ve created from scratch! Using a sharp knife (perhaps warmed slightly under hot water for cleaner cuts), slice these beauties into generous squares or rectangles—sixteen pieces should do nicely if you’re aiming for sharing!
As you cut through each bar, take note of how perfectly they hold their shape; this speaks volumes about how well you executed each step leading up to this moment. Each bite oozes with rich banana flavor mingled with gooey pockets of chocolate—a combination that’s profoundly satisfying both in taste and nutrition. These banana oatmeal bars are not just snacks; they’re comforting bites filled with wholesome ingredients designed to fuel your day.
These bars can be enjoyed warm or at room temperature; I promise you’ll find joy in both experiences! Whether paired with coffee for breakfast or savored as an afternoon pick-me-up, these delightful treats are versatile enough for any occasion. And remember—they store beautifully in an airtight container at room temperature for up to five days (if they last that long!). You can also freeze any leftovers for future cravings—just wrap them individually in plastic wrap before placing them in a freezer bag.
So there you have it—the complete guide to creating heavenly Banana Oatmeal Bars filled with warmth and love from my kitchen to yours! Enjoy every bite, my friend!
Storage and Enjoyment Tips for Your Banana Oatmeal Bars
Now that you’ve whipped up a batch of these delectable Banana Oatmeal Bars, it’s time to relish in the deliciousness! But wait—before you devour them all in one sitting, let’s chat about how to store these little gems so you can savor their delightful flavors for days to come. With just a few simple steps, you can keep your bars fresh and ready for snacking or breakfast on the go. Trust me when I say that knowing how to store them properly will ensure that they maintain their moist, chewy texture, making each bite feel like a hug from the inside!
Storing Leftover Banana Oatmeal Bars
To keep your leftover Banana Oatmeal Bars as scrumptious as the day they were baked, I recommend placing them in an airtight container at room temperature if you plan on consuming them within the next couple of days. If you’re like me and prefer to stretch out the joy of these bars, moving them to the refrigerator is an excellent choice! They’ll last about a week stored this way. A little pro tip: if you want to keep your bars delightfully soft, consider adding a slice of bread to the container. This clever trick helps maintain moisture, preventing those beloved bars from drying out. After storage, they’re still wonderfully flavorful with that perfect balance between sweet bananas and rich chocolate that makes each bite utterly intoxicating! If you fancy a warm treat, simply pop one in the microwave for a few seconds—just enough to bring back that fresh-out-of-the-oven feel.
Freezing Banana Oatmeal Bars for Later
Want to be prepared for those unexpected cravings or spontaneous snack attacks? Freezing your Banana Oatmeal Bars is an absolute game changer! Cut them into individual squares before wrapping each bar tightly in plastic wrap and then placing them in a freezer-safe zip-top bag or container. This method ensures they hold onto their delightful taste and texture while frozen for up to three months. When you’re ready to indulge, just take one out and let it thaw at room temperature or microwave it for about 20 seconds; you’ll be greeted with a warm, comforting treat that’s just as satisfying as when you first baked them! This convenience factor makes these bars not just a delicious option but also a practical one—imagine pulling a homemade snack out of your freezer whenever hunger strikes!
Banana Oatmeal Bars
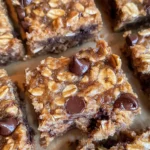
Enjoy deliciously moist Banana Oatmeal Bars made with wholesome ingredients! Perfect for breakfast or snacks—try this easy recipe today!
- Prep Time: 10 minutes
- Cook Time: 20 minutes
- Total Time: 30 minutes
- Yield: Approximately 16 servings 1x
- Category: Snack
- Method: Baking
- Cuisine: American
Ingredients
- 1½ cups mashed bananas (about 3 ripe bananas)
- ½ cup nut butter (almond, peanut, or sunflower seed)
- 2 cups rolled oats
- 1 teaspoon cinnamon
- 1 teaspoon vanilla extract
- 3 tablespoons maple syrup
- 1 cup chocolate chips (dairy-free if desired)
- ½ teaspoon salt
Instructions
- Preheat your oven to 350°F (175°C) and line a 9×9 baking pan with parchment paper.
- In a large mixing bowl, combine the mashed bananas and nut butter until smooth.
- Stir in the rolled oats, cinnamon, vanilla extract, maple syrup, chocolate chips, and salt until well mixed.
- Transfer the mixture to the prepared baking pan and press down evenly.
- Bake for 18-20 minutes until golden brown around the edges and set in the center.
- Allow to cool completely before cutting into bars.
Nutrition
- Serving Size: 1 serving
- Calories: 160
- Sugar: 8g
- Sodium: 105mg
- Fat: 7g
- Saturated Fat: 1g
- Unsaturated Fat: 6g
- Trans Fat: 0g
- Carbohydrates: 22g
- Fiber: 3g
- Protein: 4g
- Cholesterol: 0mg