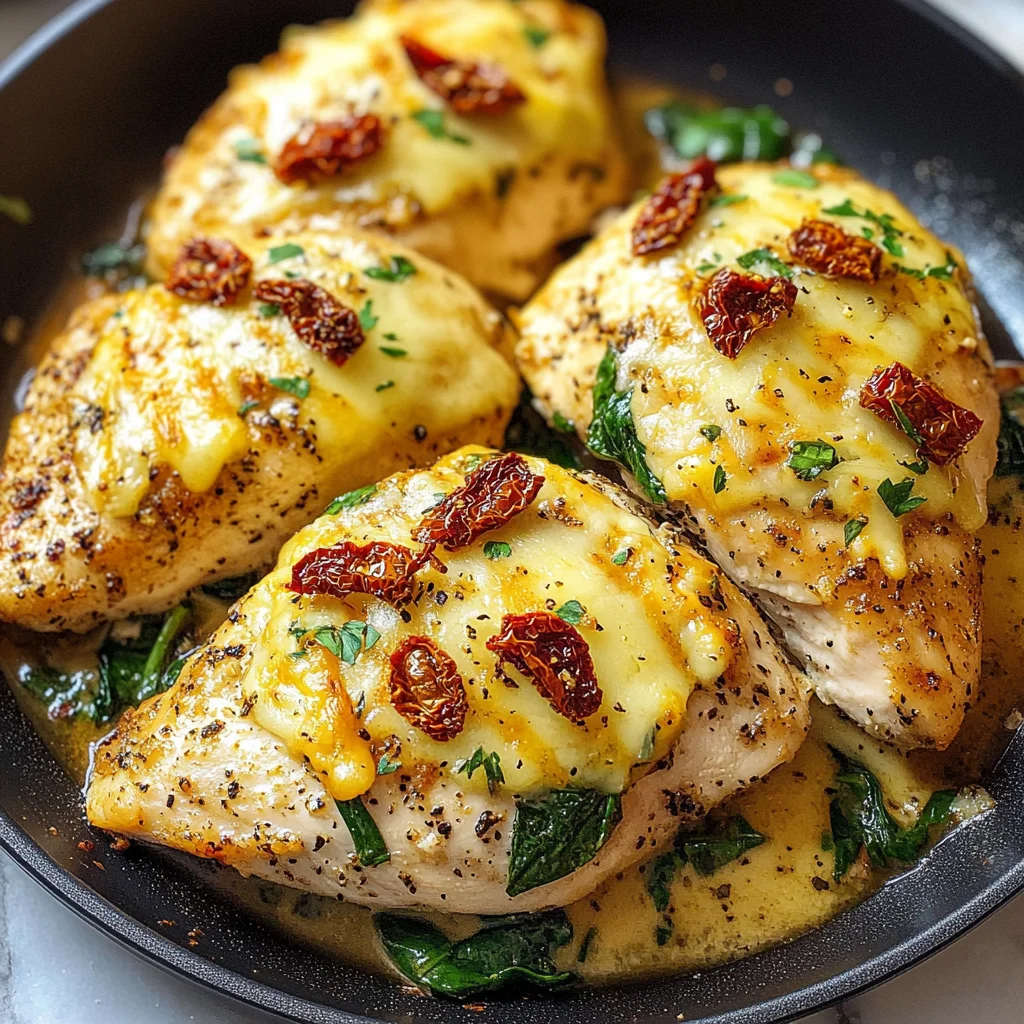
Oven Baked Chicken Breasts
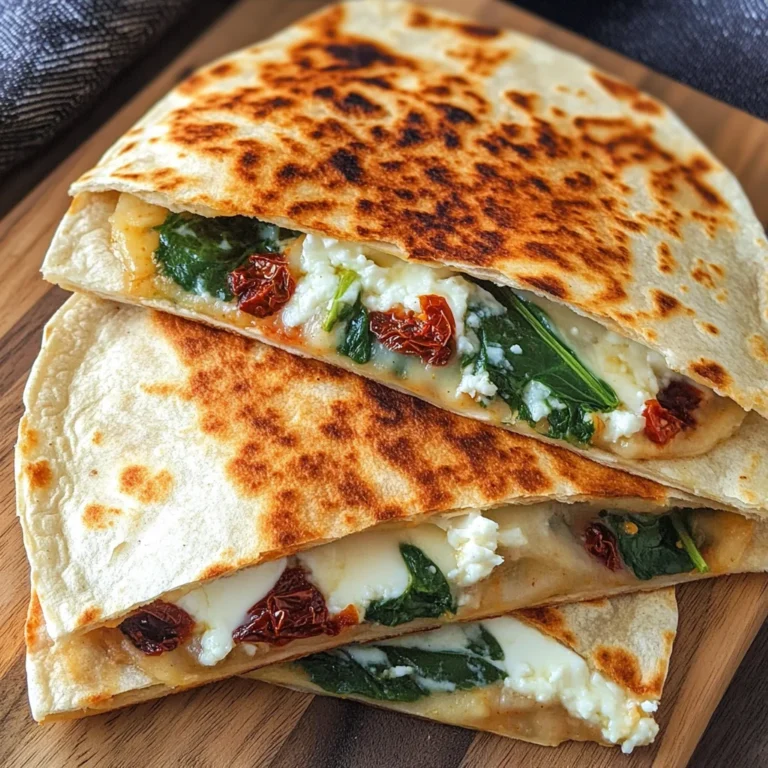
There’s something utterly enchanting about the aroma of chicken wafting through the kitchen, isn’t there? It’s a smell that comforts and excites all at once, wrapping you in a warm hug of familiarity. This isn’t just any chicken dish; this is a culinary experience that melds tradition with modern, healthy eating. Our Oven Baked Chicken Breasts are not just a meal; they are a celebration of flavors and textures, where juicy chicken meets a creamy, cheesy topping infused with vibrant spinach and sun-dried tomatoes. The moment you sink your fork into this dish, you’re greeted by a symphony of flavors that dance across your taste buds. I promise you, each bite is profoundly satisfying—a true testament to what home cooking can achieve.
What makes this recipe so special? Perhaps it’s the ease with which it comes together—perfect for a busy weeknight yet impressive enough to serve to guests. The marriage of cheesy goodness with the earthiness of spinach and the sweet tang of sun-dried tomatoes creates an irresistibly delicious topping that elevates simple chicken breasts into something extraordinary. Plus, it’s keto-friendly and low-carb, making it an ideal choice for those looking to savor their meals without compromising on health goals. Trust me when I say this dish will become your go-to for any occasion that calls for comfort food done right.
Equipment You’ll Need:
Before diving into cooking bliss, let’s gather some essential tools that will make this experience smooth sailing. Having the right equipment at hand not only enhances efficiency but also ensures consistent results every time you whip up this delightful dish.
- Baking tray lined with parchment paper: This is non-negotiable! Using parchment paper prevents sticking and makes cleanup a breeze after your meal. It also allows heat to circulate evenly around your chicken pieces, ensuring they cook uniformly without losing moisture.
- Skillet or frying pan: A good skillet is key for wilting down our spinach efficiently. Look for one with a heavy bottom that distributes heat evenly; this prevents hot spots from burning your delicate greens while cooking them down gently.
- Mixing bowl: You’ll need this trusty companion for combining our cheesy topping ingredients smoothly. Choose one large enough so you can mix everything thoroughly without worrying about spills—you want all those lovely flavors incorporated seamlessly!
- Microwave-safe bowl: For softening your cream cheese easily without any hassle—this will make mixing much simpler later on!
And there you have it—the recipe unfolds beautifully before us like pages from a cherished cookbook passed down generations filled with love—and yes—a sprinkle (or two) of culinary magic too! I cannot wait for you to try these oven-baked wonders—you truly deserve every bite of joy they bring.
Step 5: Bake to Perfection
Now that your chicken is beautifully prepared and topped, it’s time for the magic to happen in the oven. Preheat your oven to a sizzling 425°F (that’s about 220°C for my friends outside the U.S.). This high temperature is absolutely paramount; it ensures that your chicken breasts cook through quickly while still maintaining their juiciness. You see, when cooking chicken, the goal is to lock in moisture while achieving that lovely golden-brown exterior. Trust me on this: a well-preheated oven helps create a slightly crispy topping that contrasts so wonderfully with the tender chicken beneath.
As you slide your baking tray into the oven, set a timer for about 20 minutes. Now, here’s where it gets interesting—every oven can be a little quirky, so it’s important to keep an eye on your creation as it bakes. You want to look for that beautiful color on top of the cheese mixture; it should be bubbling and just beginning to turn golden brown. This isn’t just for aesthetics; the browning adds layers of flavor, turning your dish from simply good into something truly extraordinary. If you have a meat thermometer handy, the internal temperature of your chicken should reach at least 165°F (75°C) for safe consumption. So go ahead and check at around the 15-minute mark if you’re feeling adventurous—you’ll know it’s nearly done when you can see those juices running clear!
Step 6: The Resting Phase
Once your kitchen is filled with that utterly intoxicating aroma of baked chicken goodness, it’s crucial to resist the temptation to dive right in! I know, it’s hard—the tantalizing sight of that cheesy spinach and sun-dried tomato topping beckons you like a siren’s song. But let me tell you why resting your chicken is an essential step in this process. When you pull meats out of the oven, they experience a change in temperature which causes juices to move towards the center. If you cut into them immediately, all those flavorful juices will spill out onto your plate instead of being trapped inside the meat where they belong.
So allow those beautiful chicken breasts to rest for about 5 minutes once they’re out of the oven. During this time, cover them loosely with aluminum foil while they cool slightly—it helps retain warmth and keeps everything cozy until you’re ready to serve. That patience pays off big time! As they rest, those juices redistribute throughout each piece, leaving you with every bite being profoundly satisfying and bursting with flavor.
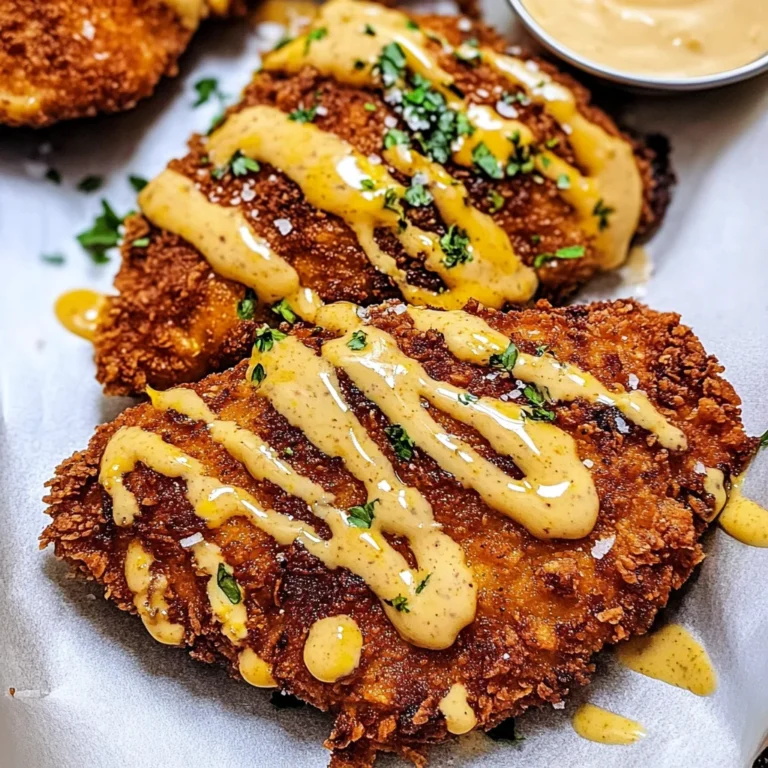
Step 7: Plating Your Masterpiece
Now comes one of my favorite parts—plating! While these Oven Baked Chicken Breasts are delicious enough to eat straight from the baking tray (I promise I won’t judge), taking a moment to present them nicely makes such a difference at dinner time. Start by laying down a bed of fresh greens or perhaps some roasted vegetables on each plate; this not only enhances visual appeal but also adds layers of texture and taste that perfectly complement our star ingredient.
Carefully transfer each chicken breast onto its bed of greens or veggies using tongs—this method is gentle and prevents any accidental splatters on your countertop (we’ve all been there!). Don’t forget to drizzle any remaining juices from the baking tray over the top; they’re like liquid gold! For an extra burst of flavor and color, consider garnishing with some fresh herbs like basil or parsley. The vibrant green against the golden cheesy topping is not just eye-catching but elevates every bite into something refreshingly aromatic.
Step 8: Serving Suggestions & Pairings
At last! It’s time for everyone to dig in and savor these Oven Baked Chicken Breasts together! To accompany this dish, I love serving it alongside a light salad or maybe some steamed broccoli drizzled with lemon juice—simple yet so effective in cutting through richness while balancing flavors beautifully. If you’re in the mood for something heartier, consider whipping up some cauliflower rice or zucchini noodles tossed lightly in olive oil and garlic; both options are low-carb delights that play perfectly into any healthy meal plan.
As you’re enjoying this dish with family or friends—just imagine their faces lighting up as they take their first bites! You can share stories about how easy it was to prepare while relishing in how much flavor packed into each morsel. Eating should always be an experience filled with joy, laughter, and connection—a true celebration around food! Remember: every recipe has its story; yours has now become part of yours as well!
By following these steps closely and embracing each phase with mindfulness and enthusiasm, I promise you’ll create something extraordinary that not only nourishes but brings people together at your table—a testament to how cooking can weave love into our lives through simple ingredients transformed into culinary wonders! Enjoy every moment.
Storage and Enjoyment Tips for Your Oven Baked Chicken Breasts
Now that your kitchen is filled with the intoxicating aroma of baked chicken, it’s time to indulge in this delightful dish. I can just imagine you pulling it out of the oven, the cheesy spinach and sun-dried tomato topping bubbling invitingly. It’s a moment of triumph, and trust me, your taste buds are in for an extraordinary experience! But what happens if you have leftovers? Let’s talk about how to keep that deliciousness alive!
Storing Leftover Oven Baked Chicken Breasts
To preserve those scrumptious oven baked chicken breasts for later enjoyment, you’ll want to store them properly. The best approach is to place your cooled chicken in an airtight container, ensuring no air can sneak in and dry them out. If you’re like me and love the little details, a glass container works wonders as it doesn’t retain odors like plastic might. When stored correctly in the fridge, your chicken will stay fresh for about three to four days. Here’s a little pro tip: placing a slice of bread inside the container can help keep your chicken moist—it’s an old trick I swear by! Even after storage, this dish tastes remarkably good; the flavors meld together beautifully, often making it even more delectable than when first baked. When you’re ready to enjoy those leftovers, simply reheat them gently in the oven or microwave until warmed through. You’ll find that each bite still sings with flavor!
Freezing Oven Baked Chicken Breasts for Later
If you want to take your meal prep game up a notch, freezing these oven baked chicken breasts is an excellent option! After they cool completely, wrap each piece individually in plastic wrap or aluminum foil before transferring them into a freezer-safe bag or container. This helps prevent freezer burn and keeps them tasting fresh for up to three months! One of the beauties of having these frozen gems on hand is their versatility—simply thaw them overnight in the fridge or pop them into the microwave for a quick defrost when you’re craving something savory yet effortless. Imagine coming home after a long day and knowing that a delicious meal awaits you without any fuss! This convenience is part of what makes this recipe so special—having wholesome food ready at your fingertips means more time enjoying life and less time worrying about dinner.
Oven Baked Chicken Breasts: A Cheesy Spinach Delight

Discover how to make irresistible Oven Baked Chicken Breasts topped with cheesy spinach & sun-dried tomatoes—your new favorite weeknight meal awaits!
- Prep Time: 15 minutes
- Cook Time: 20 minutes
- Total Time: 35 minutes
- Yield: Serves 2
- Category: Main
- Method: Baking
- Cuisine: American
Ingredients
- 2 boneless skinless chicken breasts (8 ounces each)
- 3/4 teaspoon table salt
- 3/4 teaspoon ground black pepper
- 2 cups chopped fresh spinach, stems removed
- 3 ounces cream cheese
- 1/4 cup shredded cheddar cheese
- 1/4 cup finely chopped sun-dried tomatoes
- 1/2 teaspoon garlic powder
Instructions
- Preheat the oven to 425°F (220°C).
- Slice each chicken breast in half horizontally for even cooking. Season both sides with salt and pepper.
- Place the chicken on a baking tray lined with parchment paper.
- In a skillet over medium heat, wilt the spinach for about 2 minutes. Remove from heat.
- In a mixing bowl, combine wilted spinach, softened cream cheese, shredded cheddar cheese, chopped sun-dried tomatoes, and garlic powder until well blended.
- Spoon the mixture evenly over each chicken piece.
- Bake uncovered for 20 minutes or until the internal temperature reaches 165°F (75°C). Let rest for 5 minutes before serving.
Nutrition
- Serving Size: 1 chicken breast (approximately 200g)
- Calories: 320
- Sugar: 2g
- Sodium: 540mg
- Fat: 18g
- Saturated Fat: 10g
- Unsaturated Fat: 8g
- Trans Fat: 0g
- Carbohydrates: 6g
- Fiber: 2g
- Protein: 36g
- Cholesterol: 120mg