Crispy Dill Chicken Sandwich Recipe
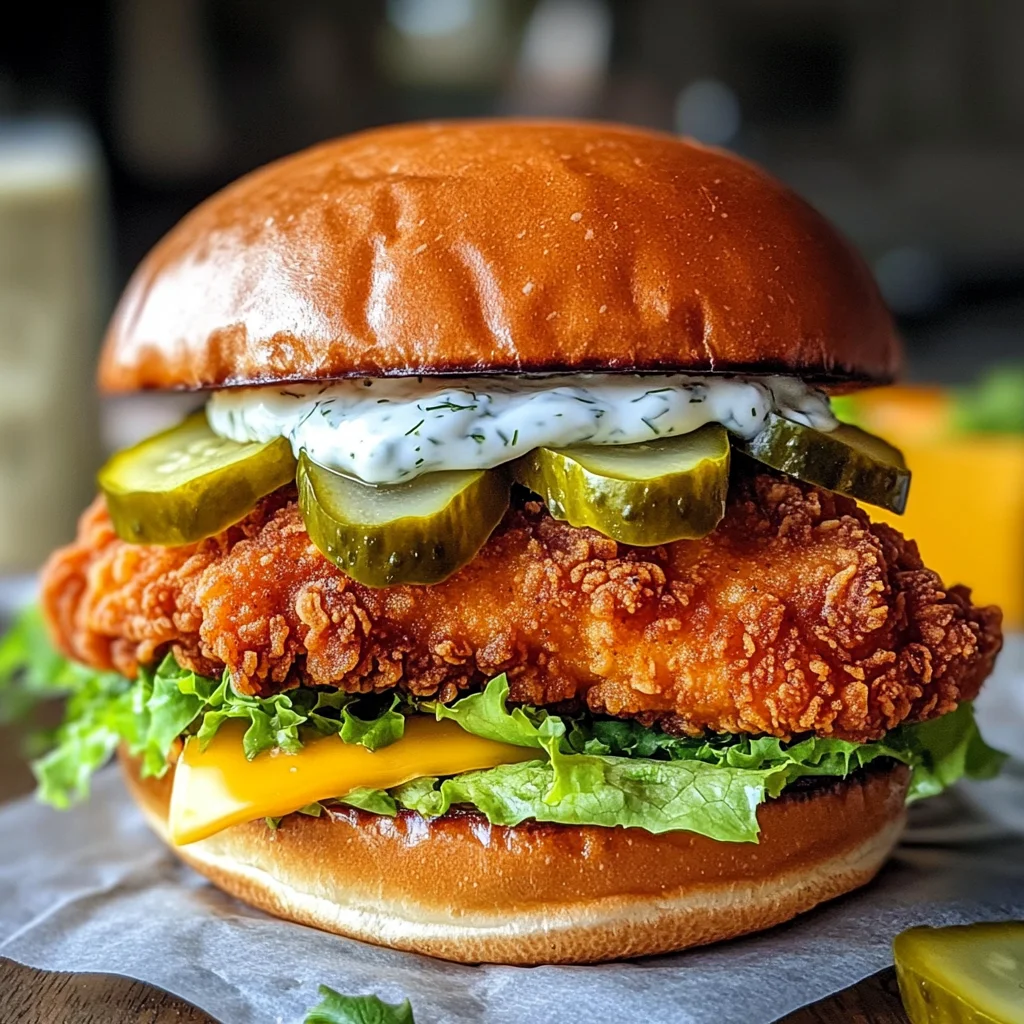
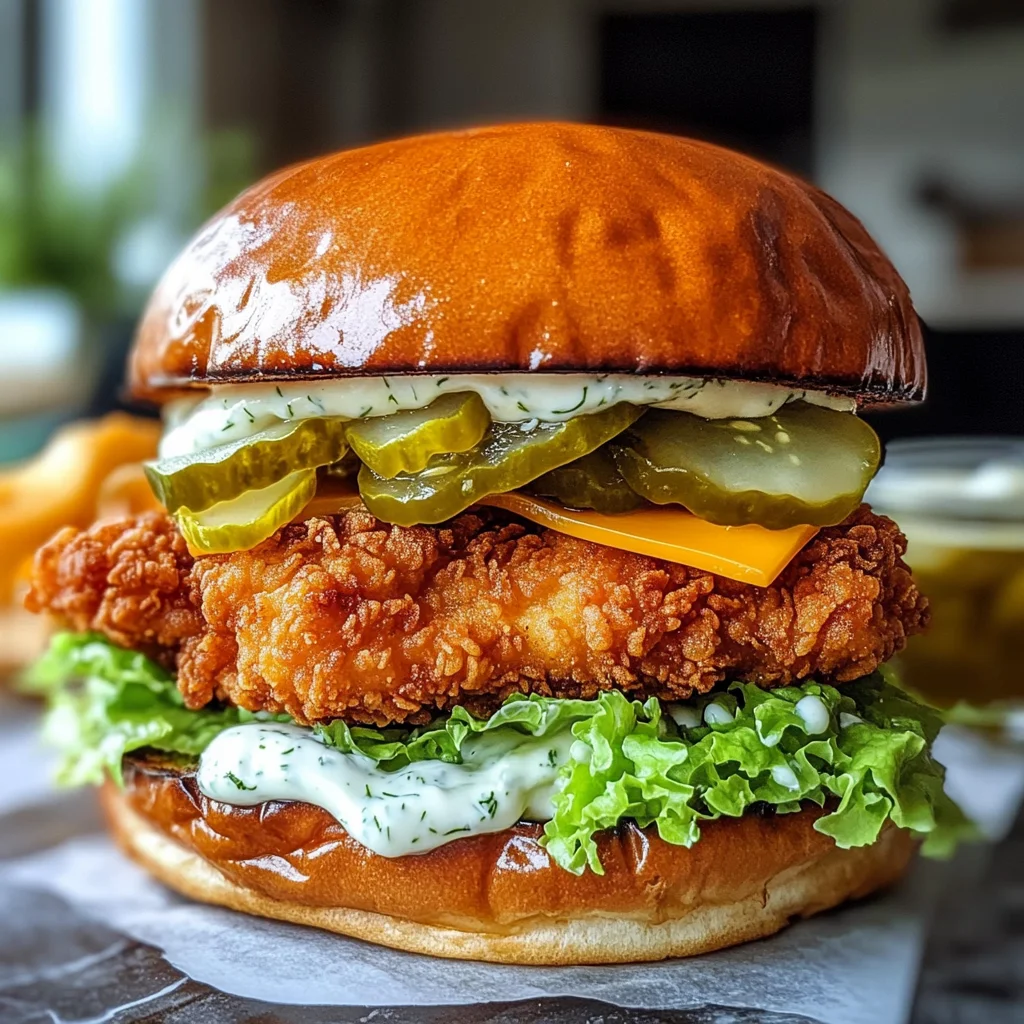
There’s something deeply magical about the food we create in our kitchens, isn’t there? It goes far beyond mere sustenance; it’s a tapestry woven from memories, flavors, and love. And this Crispy Dill Chicken Sandwich Recipe is no exception. Imagine biting into a warm, buttery brioche bun cradling a perfectly fried chicken breast that’s been lovingly marinated and coated in a zesty dill-infused crust. The crunch resonates like a symphony, while the fresh dill aioli and crisp lettuce add layers of flavor that dance on your palate. This sandwich is not just a meal; it’s an experience that bridges tradition with innovation, making it your new go-to comfort food.
When I first created this recipe, I was inspired by those summer picnics where flavors are bright and vibrant, and every bite feels like a celebration. This Crispy Dill Chicken Sandwich embodies that essence; it’s perfect for family gatherings, casual lunches with friends, or even a cozy weeknight dinner at home. The combination of juicy chicken, creamy dill sauce, and crunchy pickles nestled inside toasted brioche buns is profoundly satisfying. Trust me when I say that once you taste this delightful union of flavors and textures, you’ll be returning to this recipe time and again.
Crispy Dill Chicken Sandwich Recipe: A Crunchy Delight
Let’s embark on this culinary journey together! Making your own Crispy Dill Chicken Sandwich isn’t just about putting ingredients together; it’s about crafting something extraordinary that brings joy to your table. Are you ready to dive in?
Ingredients:
Gathering the right ingredients is the first step toward culinary success. Each component plays a vital role in creating the symphony of flavors we’ll enjoy in our crispy dill chicken sandwich.
- 2 large boneless, skinless chicken breasts (about 6-8 ounces each). Choosing high-quality chicken is absolutely paramount for achieving that tender yet juicy texture we all crave in a good sandwich. Look for breasts that are plump and have a fresh appearance—these will yield the best results when marinated and fried. If you’re feeling adventurous, you can even opt for organic or free-range options to enhance flavor further.
- 1 cup buttermilk. This ingredient isn’t just there for moisture; it’s the secret weapon in our marinade! Buttermilk tenderizes the chicken beautifully due to its acidity while adding an unmistakable richness. If you don’t have buttermilk on hand, no worries! You can easily substitute it with regular milk mixed with a tablespoon of vinegar or lemon juice—just let it sit for about 5 minutes before using.
- 2 tablespoons dill pickle juice. Ahh, this little gem elevates our dish by introducing tangy depth and an irresistible zestiness! It complements the dill flavor perfectly while also acting as an additional tenderizer for the chicken. Don’t skip this ingredient—it’s what makes our marinade sing!
- 1 large egg. The egg serves as an essential binder in our marinade mix, helping everything adhere beautifully to the chicken during frying. Using room temperature eggs can yield better results; they will mix more homogeneously into your marinade.
- 1 teaspoon salt. Salt is crucial—not just for seasoning but also for drawing out moisture from the chicken during marination, enhancing its overall flavor profile. Remember to use kosher salt if possible; its larger grains dissolve more evenly during cooking.
- 1/2 teaspoon black pepper. Just enough to add warmth without overpowering other flavors, black pepper complements our seasonings beautifully while enhancing the overall profile of our crispy coating.
- 1/2 teaspoon garlic powder. Garlic powder adds a subtle yet familiar depth to our seasoning blend without any raw bite—perfect for marrying all those flavors together beautifully!
- 1/4 teaspoon paprika. Paprika lends a mild sweetness along with its vibrant color to our coating mixture—this not only creates visual appeal but contributes subtly to the flavor complexity we’re aiming for.
- 2 cups all-purpose flour. Flour forms the backbone of our crispy coating! It absorbs moisture from the chicken as it fries, creating that signature crunch we all adore when biting into fried food.
- 1/2 cup cornstarch. Cornstarch is non-negotiable if you want extra crispiness; it enhances texture by forming tiny bubbles during frying that help achieve that light crunch we crave!
- 1 tablespoon dried dill weed. Dried dill brings an aromatic freshness that ties back into our marinade beautifully—it’s like bringing sunshine into every bite! If you have fresh dill on hand, feel free to substitute—a little goes a long way!
- 1 teaspoon baking powder. Adding baking powder helps create lightness in our coating when it fries up; think of it as a leavening agent working its magic during cooking!
- 1 teaspoon salt (for coating). It’s essential here too—ensuring each layer has adequate seasoning so every bite bursts with flavor!
- 1/2 teaspoon black pepper (for coating). Just like before—adding warmth without overwhelming other notes present in our delightful meal!
- 1 cup mayonnaise. Mayonnaise serves as a velvety base for our aioli—it provides creaminess while allowing all those wonderful additional flavors to shine through!
- 2 tablespoons finely chopped fresh dill. Freshness matters! Adding real dill here elevates everything—it transforms ordinary mayo into something truly extraordinary!
- 1 tablespoon lemon juice. Lemon juice brightens up our aioli wonderfully while offering acidity—the perfect counterbalance against rich flavors throughout this dish.
- 1 clove garlic, minced. Freshly minced garlic offers another layer of bold flavor—this time with punchy intensity compared to garlic powder!
- 1 teaspoon Dijon mustard. Dijon adds depth and tanginess—a beautiful contrast against creamy elements within our aioli!
- Salt and pepper to taste (for aioli). Always adjust according to your preference—taste as you create so everything turns out just right!
- 4 brioche buns, split. Brioche buns are rich and buttery—they elevate any sandwich experience! Soft yet sturdy enough to hold everything together without falling apart under pressure.
- 4 slices cheddar cheese (or your favorite cheese). Cheese adds creaminess while melting gloriously over hot chicken—the gooey goodness enhances every bite dramatically!
- 1 cup shredded lettuce. Crisp lettuce provides freshness and crunch—a necessary textural element that contrasts nicely against crispy fried goodness!
- 1/2 cup dill pickle chips. The iconic pairing! Tangy pickles tie everything together wonderfully—they add zing alongside their satisfying crunch.
- 2 tablespoons butter, melted (for toasting buns). Buttering buns before grilling creates an unbeatable golden crust while adding unbeatable richness—we want every element here working harmoniously together!
- Vegetable oil (for frying – about 4–6 cups). Oil quality matters here too! A neutral oil with high smoke point ensures perfect frying conditions without imparting unwanted flavors onto delicate ingredients.
Equipment You’ll Need:
Having the right tools at your disposal makes everything smoother and more enjoyable when cooking! While they may not be ingredients, these essential partners will help us create something wonderful together.
- Large mixing bowl: This will be invaluable for combining ingredients seamlessly—you’ll need enough space to whisk things together without worrying about messes or spills!
- Shallow dish: Perfect for dredging those marinated chicken pieces—we want ample room so they can be coated evenly without any fuss involved.
- Whisk: A trusty whisk allows us to combine wet ingredients effectively while aerating them slightly—a small detail but one that helps improve overall texture later down line!
- Deep-frying thermometer: Ensuring oil reaches proper temperature (350°F) guarantees crispy results instead of greasy disasters—we want perfection every single time we fry up deliciousness like this sandwich!
- Slotted spoon or tongs: These handy tools help retrieve fried chicken safely from hot oil without splashing everywhere—safety first always!
- Wire rack lined with paper towels: This setup allows excess oil drainage post-frying which preserves crispiness instead of turning soggy prematurely—we’ve worked too hard on these beauties already!
With everything prepped ahead of time—from gathering ingredients down through choosing equipment wisely—we’re set up beautifully before diving into detailed steps necessary for crafting amazing sandwiches worth sharing around tables filled laughter & joy alike…
Step 1: Marinating Magic
First off, let’s talk about marination—the heart of flavor development in any great dish! In a medium bowl (your favorite mixing bowl will work wonders), whisk together buttermilk, dill pickle juice, egg, salt, black pepper, garlic powder, and paprika until smooth and well-blended—you want each ingredient harmonizing perfectly here because this is where all those beautiful flavors start their journey together! Now comes the fun part: submerge those plump chicken breasts fully within this marinade bath! Cover them snugly like they deserve some pampering after their long day at market—you’ll want them soaking up these luscious flavors as they refrigerate anywhere from two hours minimum up until overnight if possible—the longer they soak means more tenderness awaits upon cooking later down line…
Step 2: Creating Our Crunchy Coating
While our precious poultry absorbs those delectable notes during its beauty rest inside fridge cavity (trust me—you won’t regret waiting!), let’s prepare coating mixture next which holds another secret key toward achieving desired texture once fried golden brown outside—in large shallow dish combine all-purpose flour along with cornstarch (our crispy ally!), dried dill weed baking powder alongside salt & black pepper whisk thoroughly until evenly distributed throughout mixture—this step ensures consistent coverage across entire batch once applied later on ensuring maximum satisfaction per bite experienced afterwards…
Step 3: Dredging For Deliciousness
Now comes time-consuming yet rewarding section known as dredging where patience pays off big-time—I promise you’ll thank yourself later when enjoying final product outcomes!! Start by removing one piece from marinade allowing excess liquid drip off gently then press firmly into flour mix covering both sides completely shaking off any extra flour afterwards too which could lead towards unsightly clumps—we’re going after perfect even coating here folks!! Repeat process accordingly till all pieces coated nicely… For added crispiness option exists called double dredging where after initial dip back into buttermilk then re-coat again lightly pressing down firmly once more into flour mixture before frying sounds enticing doesn’t it? Trust me on this one if craving extra crunch factor definitely go ahead indulge yourself now!!
Step 4: Heating Up That Liquid Gold
Pour vegetable oil carefully inside large heavy-bottomed pot or Dutch oven deep enough allowing plenty room around each piece submerged approximately two-three inches deep… Heat over medium-high heat until temperature reaches 350°F using deep-fry thermometer checking accuracy continually during process—it’s crucial keeping consistent heat level prevents burning outside while ensuring thorough cooking inside leading us toward ultimate satisfaction achieved through proper technique utilized here…
With these steps laid out beautifully before us—the groundwork has been set perfectly well ahead preparing ourselves make magic happen within kitchen today transforming humble ingredients ordinary sandwiches into something extraordinarily unforgettable awaits eager taste buds next… Stay tuned because soon enough we’ll explore how assembly comes together flawlessly creating masterpiece enjoyed among friends family alike around tables filled laughter joy shared moments treasured forevermore…
Step 5: Frying to Perfection: Achieving Golden Crispiness
Now that we’ve marinated our chicken and coated it with that deliciously seasoned flour mixture, it’s time to move on to the heart of the Crispy Dill Chicken Sandwich Recipe: frying! This step is where the magic truly happens. Pour about 4 to 6 cups of vegetable oil into a large, heavy-bottomed pot or Dutch oven—make sure it’s deep enough to submerge the chicken breasts by at least 2-3 inches. The reason for using a heavy-bottomed pot is crucial; it helps maintain a consistent temperature throughout the frying process, which is absolutely paramount for achieving that perfect golden brown color and crunchy texture.
Heat the oil over medium-high heat until it reaches a sizzling 350°F (175°C). This temperature is critical because if your oil isn’t hot enough, your chicken will absorb too much oil and become greasy rather than crispy. Conversely, if the oil is too hot, the exterior will burn before the inside cooks through. To check if your oil is ready, you can drop a small bit of the flour mixture into the oil; if it sizzles immediately, you’re good to go! Carefully lower one or two chicken breasts into the hot oil using tongs or a slotted spoon—avoid overcrowding as this can drop the temperature and lead to uneven cooking. Fry them for about 6-8 minutes per side, turning only once to develop that beautiful crust. You’ll know they’re done when they reach an internal temperature of 165°F (74°C) and are gloriously golden brown. Trust me on this; the sound of that sizzling oil and the aroma wafting through your kitchen will be utterly intoxicating!
Step 6: Draining and Resting: The Key to Crispiness
Once those beautiful chicken breasts have achieved their glorious golden hue, it’s time to remove them from the oil—a step that’s just as important as frying itself. Using a slotted spoon or tongs, carefully transfer each piece onto a wire rack lined with paper towels. This resting stage allows excess oil to drain away while keeping your chicken crisp rather than soggy. Remember, nobody enjoys biting into a sandwich only to find a mushy piece of chicken!
As they rest, I encourage you to take a moment—breathe in that divine aroma filling your kitchen. It’s during this short interlude that flavors settle and textures firm up even more. Letting your fried chicken rest for about five minutes also helps redistribute juices within the meat itself; this means every bite will be juicy without being greasy! So don’t rush this step; patience here ensures you’ll achieve an extraordinary sandwich experience.
Step 7: Crafting Your Dill Aioli: A Flavorful Masterpiece
While our crispy chicken rests, let’s prepare our dill aioli—a truly extraordinary condiment that elevates this sandwich into something spectacular. In a small bowl, combine one cup of mayonnaise with two tablespoons of finely chopped fresh dill (the star ingredient!), one tablespoon of fresh lemon juice for brightness, one clove of minced garlic for depth, and one teaspoon of Dijon mustard for that slight tanginess. This combination not only adds layers of flavor but also complements our crispy chicken beautifully.
Make sure to season generously with salt and pepper to taste because these little additions make all the difference. Stir everything together until well combined; you’ll find yourself enchanted by its creamy texture and vibrant green flecks from the dill. For optimal flavor fusion, cover your bowl with plastic wrap and chill it in the refrigerator for at least 30 minutes—yes, chilling is non-negotiable here! This waiting period allows all those flavors to meld harmoniously together into what I like to call “liquid gold.” It’s worth it—I promise you won’t regret taking this extra time!
Step 8: Toasting Brioche Buns: The Essential Final Touch
Now we arrive at perhaps one of my favorite steps—the glorious transformation of our brioche buns! Take those lovely split buns (this type really captures butter beautifully) and brush melted butter generously on their cut sides. This buttery goodness will create an irresistible crust when toasted. Heat a skillet over medium heat; patience here is vital as we want these buns toasted perfectly without burning them.
Place each bun butter-side down onto your skillet and allow them to toast for about 1-2 minutes until they turn golden brown and crispy—keep an eye on them because they can go from beautifully golden to burnt in seconds! You’re looking for that satisfying crunch when you gently press down on them—this texture will be such a delightful contrast against our tender fried chicken! Plus, who doesn’t love a bit of crunch under their toppings? As these buns toast away in your kitchen, let their warm buttery scent envelop you—it’s pure comfort food bliss!
Conclusion:
As we wrap up our journey through this delightful Crispy Dill Chicken Sandwich Recipe, I can’t help but feel excited about all the wonderful flavors we’ve created together. From marinating the chicken in that tangy buttermilk blend infused with dill pickle juice—giving it such depth of flavor—to that heavenly crunch from frying it just right—it’s these little details that transform an ordinary sandwich into something truly extraordinary. The combination of crispy chicken with creamy dill aioli is nothing short of a symphony of flavors that dances on your palate.
This recipe is not just about satisfying hunger; it’s about creating moments filled with joy and laughter around the table. Whether you’re preparing it for a casual weeknight dinner or hosting friends for an unforgettable lunch gathering, this sandwich shines bright on any occasion. Just imagine pulling one from the skillet, hearing that satisfying crunch as you take your first bite—it’s pure bliss! And let’s not forget how versatile this dish is; pair it with sweet potato fries for a cozy night in or serve it alongside a crisp salad for a refreshing summer meal.
Imagine savoring one with a chilled glass of lemonade on a warm afternoon or enjoying it with friends during game day—it fits seamlessly into so many moments worth celebrating. For an afternoon pick-me-up or even as part of a picnic spread in the park, this sandwich stands tall as both comfort food and gourmet delight rolled into one. And if you want to elevate this experience even further? Think about adding some fresh avocado slices or swapping out traditional lettuce for peppery arugula—each variation bringing its own unique flair.
Feeling adventurous? This recipe is wonderfully adaptable! You could spice things up by using different herbs like cilantro or basil for the aioli instead of dill. Or perhaps introduce some heat by adding jalapeños or pickled peppers within your sandwich layers—it’s all about what excites your taste buds! Whatever path you choose to take with this recipe, I invite you to try it out yourself and share your experiences with me! Cooking is all about connection—let’s celebrate these delicious moments together!
Crispy Dill Chicken Sandwich
Discover the joy of homemade comfort food with this Crispy Dill Chicken Sandwich! Picture a tender, juicy chicken breast marinated in a zesty dill-infused buttermilk, then coated in a crunchy seasoned flour mixture and fried to golden perfection. Nestled inside a buttery brioche bun, this sandwich is topped with a creamy dill aioli, crisp lettuce, and tangy dill pickle chips — each bite is a delightful explosion of flavor and texture. Perfect for summer picnics, casual lunches with friends, or cozy dinners at home, this recipe will quickly become your go-to for satisfying cravings. Embrace the magic of cooking and create memorable meals that bring loved ones together!
- Prep Time: 20 minutes
- Cook Time: 20 minutes
- Total Time: 40 minutes
- Yield: Serves 4 sandwiches 1x
- Category: Dinner
- Method: Frying
- Cuisine: American
Ingredients
- 2 large boneless, skinless chicken breasts
- 1 cup buttermilk
- 2 tablespoons dill pickle juice
- 1 large egg
- 1 teaspoon salt
- 1/2 teaspoon black pepper
- 1/2 teaspoon garlic powder
- 1/4 teaspoon paprika
- 2 cups all-purpose flour
- 1/2 cup cornstarch
- 1 tablespoon dried dill weed
- 1 teaspoon baking powder
- 1 teaspoon salt (for coating)
- 1/2 teaspoon black pepper (for coating)
- 1 cup mayonnaise
- 2 tablespoons finely chopped fresh dill
- 1 tablespoon lemon juice
- 1 clove garlic, minced
- 1 teaspoon Dijon mustard
- 4 brioche buns, split
- 4 slices cheddar cheese (or your favorite cheese)
- 1 cup shredded lettuce
- 1/2 cup dill pickle chips
- 2 tablespoons butter, melted (for toasting buns)
- Vegetable oil (for frying – about 4–6 cups)
Instructions
- In a medium bowl, whisk together buttermilk, dill pickle juice, egg, salt, black pepper, garlic powder, and paprika. Submerge chicken breasts in the marinade and refrigerate for at least 2 hours (up to overnight).
- In a shallow dish, mix together flour, cornstarch, dried dill weed, salt, and black pepper for the coating.
- Heat vegetable oil in a large pot over medium-high heat until it reaches 350°F.
- Remove marinated chicken from the marinade; dredge each piece in the flour mixture until fully coated.
- Carefully place chicken in hot oil and fry for about 6-8 minutes per side or until golden brown and cooked through (internal temperature should reach 165°F). Drain on paper towels.
- Assemble sandwiches by spreading dill aioli on toasted brioche buns; add lettuce, fried chicken, cheese slices (optional), and dill pickle chips.
Nutrition
- Serving Size: 1 sandwich
- Calories: 670
- Sugar: 3g
- Sodium: 1020mg
- Fat: 37g
- Saturated Fat: 9g
- Unsaturated Fat: 24g
- Trans Fat: 0g
- Carbohydrates: 50g
- Fiber: 2g
- Protein: 38g
- Cholesterol: 125mg