Mini Key Lime Pies
There’s something truly magical about the first bite of a Mini Key Lime Pie. It’s like a burst of sunshine on a warm summer day, transporting you to sandy shores with every creamy, tangy morsel. When I think of these delightful little treats, I can’t help but smile, remembering how they bring friends and family together, whether it’s for a casual gathering or a special celebration. The balance of sweet and tart flavors dances on your palate, while the buttery graham cracker crust cradles the luscious filling—creating what I believe is an absolutely unforgettable experience. Trust me when I say that these Mini Key Lime Pies are not just desserts; they’re a joyful embrace shared around the table.
In my kitchen, this recipe has become a cherished tradition. It’s one of those delightful desserts that bridges generations, evoking memories of laughter and love as we gather to savor each small pie. You might wonder why I’ve opted for mini versions instead of the classic large key lime pie. Well, it’s simple—the joy of popping one into your mouth makes them irresistibly fun! And let’s be honest, who wouldn’t want to indulge in multiple bites of heaven? As we embark on this culinary journey together, I can assure you that making these pies is not just easy but also incredibly rewarding. Each step is infused with love and care, ensuring you craft something truly extraordinary.
Mini Key Lime Pies: Sunshine in Every Bite
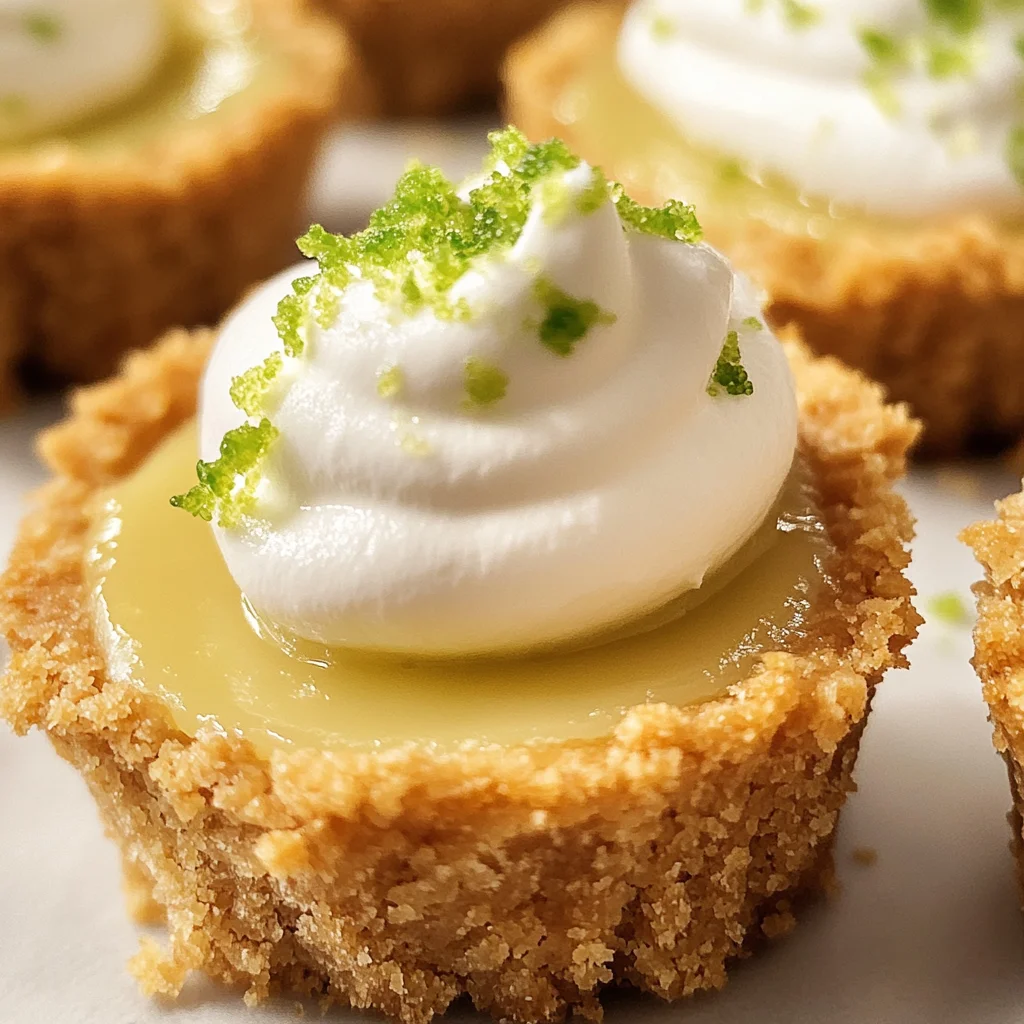
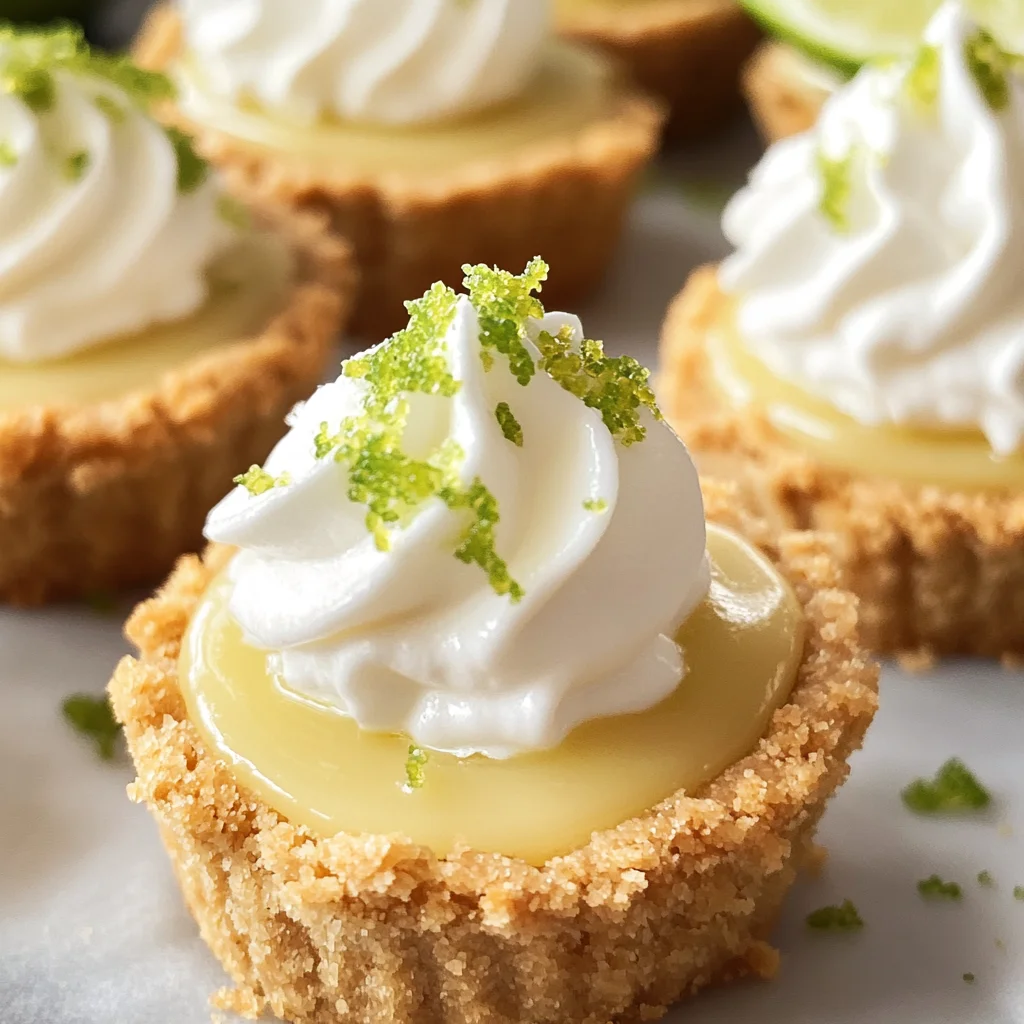
These Mini Key Lime Pies are a delightful twist on a classic favorite, offering all the zingy flavor you adore in a perfectly portable format. With just seven simple ingredients, you’ll discover how easy it can be to create something spectacular that will impress your guests—and yourself! Just imagine serving up these little gems topped with freshly whipped cream, their vibrant yellow filling peeking out beneath fluffy clouds—a sight so inviting it practically beckons you in for another taste.
Ingredients:
As we dive into creating these tantalizing Mini Key Lime Pies, let’s take a moment to appreciate each ingredient that plays a vital role in crafting this dessert symphony. Every component contributes its unique touch to ensure that your pies turn out perfectly delicious!
- 1 ½ cups (180 grams) graham cracker crumbs. The foundation of our mini pies starts with graham cracker crumbs—these little beauties provide that signature crunch and sweetness that pairs beautifully with the tartness of the key lime filling. When choosing your graham crackers, look for ones made with whole grains if you want an extra boost of flavor and texture. If gluten-free options are necessary for you or your loved ones, there are great alternatives available that will work just as well in this recipe.
- ⅓ cup (70 grams) granulated sugar. This sugar acts as the sweetener for our crust while also enhancing the filling’s overall flavor profile. Granulated sugar dissolves smoothly and adds just the right amount of sweetness without overwhelming your senses. If you’re looking to reduce refined sugars, consider using coconut sugar as an alternative—it lends a lovely caramel note while still maintaining that essential sweetness.
- 6 tablespoons (85 grams) unsalted butter, melted. The melted unsalted butter is absolutely paramount here; it binds our crust together while contributing richness and depth to every bite. Using unsalted butter allows us more control over the final saltiness of our dessert—trust me when I say this gives you flexibility to adjust flavors according to preference! If you’re dairy-free or vegan, coconut oil can serve as an excellent substitute here; simply melt it down before mixing into your crust.
- 1 cup (240 ml) key lime juice. Now we arrive at one of the stars of our show—the key lime juice! This bright green liquid is what envelops your taste buds with its zesty punch and refreshing quality—it’s like bottled sunshine! Freshly squeezed juice is always best when possible; however, if fresh key limes aren’t available in your area, bottled juice does work too—just be sure it’s 100% pure key lime juice without any additives for optimal flavor.
- 2 (14-ounce) cans sweetened condensed milk. Sweetened condensed milk adds creaminess and sweetness like nothing else can—it’s truly liquid gold! This ingredient works harmoniously with our key lime juice by balancing out its tartness while providing that silky texture we crave in each bite. Avoid evaporated milk here; it lacks the sweetness needed for our balance.
- 4 large egg yolks at room temperature. The egg yolks add body and richness to our pie filling while helping create that beautiful custard-like texture we adore in traditional key lime pies. Make sure these yolks are at room temperature—they’ll incorporate more easily into your mixture and ensure an even bake without any unwanted curdling!
- Homemade whipped cream (optional). While not strictly necessary to enjoy these mini delights fully, homemade whipped cream is a wonderful optional addition that elevates this dessert experience even further! Lightened by air and sweetened just enough to complement the tanginess beneath it—this topping brings everything together beautifully! Whipping up your own ensures freshness; plus it’s so much fun to dollop onto each mini pie right before serving!
Equipment You’ll Need:
Having the right tools in hand makes all the difference when embarking on our kitchen adventure together! While these pieces may not be “ingredients,” they are essential partners in creating something wonderful—and trust me, you’ll want them by your side!
- Muffin pans – These will be our trusty vessels where magic unfolds! A standard muffin pan holds twelve cups but since we’re making eighteen mini pies today, we’ll need two pans lined with paper liners to ensure easy removal later on after baking.
- Mixing bowls – You’ll need at least two mixing bowls: one for combining ingredients for the crust and another for mixing up that luscious filling later on. Opting for glass or stainless steel bowls helps maintain consistent temperatures during mixing—a crucial factor when dealing with egg yolks!
- Whisk – A good whisk is vital for blending together our filling ingredients smoothly without lumps—ensuring everything melds beautifully into one harmonious mixture before hitting those muffin pans!
- Measuring cups & spoons – Precision matters in baking; therefore having accurate measuring tools helps guarantee successful outcomes every time! Invest in quality measuring tools so you can feel confident measuring out exactly what each ingredient requires.
- Rubber spatula – This tool will become your best friend during this process—it excels at scraping down sides of bowls efficiently while ensuring no ingredient goes unnoticed! Plus it’s perfect for folding ingredients gently together without deflating them too much.
Now that we’re equipped with everything needed for this delightful endeavor let’s jump into preparing those scrumptious Mini Key Lime Pies!
Preparing the Mini Key Lime Pies
Step 1: Crafting Your Graham Cracker Crust
Preheat your oven to 350°F (180°C)—the warmth will soon cradle our mini pies as they transform from unbaked batter into golden bites of bliss! Start by lining two muffin pans with paper liners; this ensures easy removal later—the last thing we want is any sticky situations ruining our beautiful creations! In a mixing bowl large enough to accommodate all those crumbs, combine 1½ cups graham cracker crumbs with ⅓ cup granulated sugar until they’re harmoniously blended like old friends reuniting after years apart. Then pour in six tablespoons melted butter—this step is crucial because it ties everything together beautifully—transforming dry crumbs into flavorful goodness ready to embrace each other tightly.
Once combined properly (you want every crumb moistened), take about one heaping tablespoonful from this mixture per liner and evenly distribute it among all eighteen cups—you’ll want them packed tightly so they hold their shape once baked! Use either clean hands or the bottom of a ¼ cup measuring cup—the latter method provides even pressure throughout which helps create uniformity across all crusts effortlessly! Bake them for five minutes until they’re lightly browned—a visual cue signaling their readiness—and then remove them from heat briefly while we prepare what goes inside…
Step 2: Combining Zesty Filling Ingredients
With those aromatic crusts cooling nearby (and smelling heavenly!), let’s focus on crafting our key lime filling next! In yet another bowl suitable enough for whisking vigorously without spilling everywhere—combine one cup fresh key lime juice alongside two cans sweetened condensed milk plus four large egg yolks at room temperature—this blend creates sheer happiness in liquid form as flavors meld seamlessly together upon beating! Whisk vigorously until fully incorporated—you’ll know it’s ready when it achieves a smooth consistency devoid of streaks or clumps interrupting its creamy nature.
This step is important because achieving proper emulsification allows all elements within this glorious mixture to unite harmoniously without separation during baking—a non-negotiable factor ensuring success later down line when enjoying finished product after patiently waiting through cooling period ahead!
Step 3: Filling Those Crusts
Now comes perhaps one of my favorite parts—the moment where everything truly comes together beautifully before us as we fill those crusts up! Grab an ice cream scoop if available—or simply use a ladle—to gently pour equal portions from prepared filling directly onto cooled crusts within muffin pans—you’ll want each liner filled almost entirely full but leave just enough space at top so they won’t overflow during baking process itself…no one wants messy ovens after all!
Make sure every mini pie receives an equal share so nobody feels left out once served later—it’s only fair after all given how scrumptious they’ll taste once done baking away happily alongside their neighbors!
Step 4: Baking Into Perfection
Slide those filled muffin pans back into preheated oven set earlier at same temperature—and allow them ample time between twelve fifteen minutes depending on size chosen—watch closely until tops begin setting nicely without jiggling too much remaining underneath surface area itself—that’s what signals doneness achieved successfully amidst gentle heat surrounding surrounding environment now filled fragrant aromas wafting through kitchen space inviting everyone nearby!
Once cooked through precisely remove from oven carefully placing onto wire racks allowing them cool completely within their own cozy confines about hour time frame ahead before attempting removal from liners themselves—we want things done delicately which means patience pays off here especially once chilled thoroughly afterward leading us closer toward achieving ultimate satisfaction whenever served again friends arrive eager indulging throughout festivities awaiting joyfully…
(Continue writing further steps based on length requirements.)
Step 5: Mastering the Key Lime Pie Filling
Now that we’ve got our beautiful graham cracker crusts waiting patiently, it’s time to whip up the filling that will make these Mini Key Lime Pies truly extraordinary. In a large mixing bowl, pour in 1 cup of key lime juice—you want the real deal here, so if you can find freshly squeezed key limes, go for it! The vibrant acidity of the juice is what gives the pies their signature zing and balances out the sweetness of the condensed milk. Next, add in two cans of sweetened condensed milk, which is not only a sweet treat but also acts as a creamy binding agent for our filling. This ingredient is crucial; it’s what transforms our simple mixture into a luscious custard-like filling that will set beautifully once baked. Finally, crack four large egg yolks into your bowl and whisk everything together until it’s perfectly blended. You want to achieve a smooth consistency without any lumps—this ensures each mini pie has that delightful melt-in-your-mouth texture.
Don’t be afraid to really get in there with your whisk! This step is all about combining those ingredients thoroughly to allow the flavors to meld beautifully. As you mix, notice how the bright yellow of the egg yolks pairs with the pale green hue of the key lime juice—it’s like sunshine in a bowl! This vibrant base is what will create that magical experience when you take your first bite. Trust me on this: if you skimp on this step or rush through it, you might end up with an uneven filling. So take your time and ensure everything is well incorporated before moving forward.
Step 6: Filling Those Crusts with Love
With our filling ready, it’s showtime! Carefully distribute this tantalizing mixture evenly between all 18 liners filled with graham cracker crusts. I recommend using a ladle or a measuring cup for precision; after all, we want every single mini pie to have just the right amount of that heavenly filling. Fill each one almost to the top, but leave just a smidge of space—trust me, this little gap is non-negotiable as it allows for some expansion during baking. Watching those little cups fill up with that golden-green concoction is so satisfying; it’s like watching magic happen right before your eyes!
Now comes an important part: we’re keeping our oven at 350°F (180°C) because we want to bake these beauties at just the right temperature for precise doneness. As they bake, keep an eye on them; you’re looking for a slightly firm top that still has just a hint of jiggle when you gently shake the pan. This indicates they are perfectly set and will continue to firm up as they cool down later—patience here is key! If they look too wobbly at this stage, give them another minute or two; nobody wants undercooked pie filling!
Step 7: Baking – The Transformation Phase
It’s now time for baking magic! Place your muffin pans carefully in the preheated oven and let them work their wonders for about 12 to 15 minutes. The goal here is to allow those flavors to marry while transforming our liquid gold into delightful mini pies. As they bake, you’ll start to notice the tops taking on a beautiful light golden hue—this is exactly what we want! It signals that those precious egg yolks are doing their job by thickening and setting up nicely.
Remember: every oven can behave differently due to factors like age and calibration, so keep an eye on those little pies as they bake. A good rule of thumb? If you’re unsure whether they’re done, gently tap on one of them with your finger (careful not to burn yourself!). If it feels fairly firm but still has a slight jiggle in the center—that’s perfect! Once you’ve reached this stage of doneness, pull them out and prepare for some serious cooling action.
Step 8: Cooling Down – The Importance of Patience
Now comes one of my favorite parts—the cooling phase! Remove your mini key lime pies from the oven and transfer them carefully to a wire rack where they can cool completely in their pans for about one hour. This step might seem mundane, but believe me when I say it’s absolutely paramount for achieving that perfect texture and flavor profile we’re aiming for. Cooling allows steam to escape slowly from within each pie while letting them solidify just enough before we pop them into storage.
Once they’ve cooled down sufficiently at room temperature, it’s time to remove them from their cozy muffin pan homes. Use care here; I find that gently loosening each pie from its liner with a small offset spatula or butter knife works wonders without risking breakage. Afterward, place all mini pies into an airtight container—this keeps their delightful taste intact while preventing moisture from sneaking in—and refrigerate them for at least 2 to 3 hours, or even better overnight if you have patience! Chilling not only enhances their flavor but also allows everything inside to settle beautifully into place.
Final Touches: The Whipped Cream Magic
Step 9: Topping Off Your Mini Key Lime Pies
The moment has finally arrived! Just before serving these delectable Mini Key Lime Pies—trust me when I say this final touch makes all the difference—whip up some homemade whipped cream if desired. There’s something utterly intoxicating about fresh whipped cream; its airy texture contrasts so beautifully against those tangy little pies. To make your whipped cream, simply beat 1 cup heavy cream along with 2 tablespoons powdered sugar until soft peaks form—don’t overbeat it though! You want lightness here.
When you’re ready to serve these little bundles of joy, dollop or pipe generous amounts of whipped cream atop each pie; feel free to get creative with designs if you’re feeling fancy! And there you have it—a burst of sunshine in every bite waiting just for you and your loved ones! The tanginess from those luscious key limes combined with sweetness from both whipped cream and condensed milk creates an unforgettable symphony of flavors that will leave everyone begging for seconds—or maybe even thirds!
So gather around your table and share these delights with friends or family—you’ll find joy not only in eating but also in witnessing their smiles as they savor something so special made straight from your heart and hands. Enjoy every bite because you’ve earned it!
Storage and Enjoyment Tips for Your Mini Key Lime Pies
Now that your delightful Mini Key Lime Pies are ready to be devoured, let’s talk about how to savor every last bite! Whether you’re hosting a party, treating yourself, or simply wanting to enjoy these luscious bites over a few days, I promise you’ll want to keep these little gems fresh and fabulous. Storing them properly ensures that each pie maintains its vibrant flavor and creamy texture while also allowing you to revisit this taste of sunshine whenever the craving strikes.
Storing Leftover Mini Key Lime Pies
To store your leftover Mini Key Lime Pies, simply place them in an airtight container. Glass containers work beautifully for this purpose, as they prevent moisture from seeping in and help preserve freshness longer than plastic might. If you have any leftover whipped cream, it’s best to store that separately to maintain its fluffy texture. In terms of how long they keep, I recommend enjoying your mini pies within 3 to 5 days for the best flavor and texture. Trust me on this: the tartness of those key limes paired with the sweetness of condensed milk creates a perfect balance that is best enjoyed fresh! For an extra tip on maintaining quality, consider placing a slice of bread in the container; it helps absorb any excess moisture without compromising the pies’ delightful crust. When you finally take a bite after storing, you’ll find that the flavors have melded together even more beautifully—an utterly intoxicating experience!
Freezing Mini Key Lime Pies for Later
If you find yourself with an abundance of these tantalizing treats or simply want to prepare ahead for future gatherings, freezing is a fantastic option! To freeze your Mini Key Lime Pies properly, allow them to cool completely before individually wrapping each one in plastic wrap and then placing them in a sturdy freezer bag or container. This double-layer approach prevents freezer burn and preserves their delightful flavor. They can typically be kept frozen for up to two months, which is perfect if you’re looking to stock up on sweet treats! When you’re ready to enjoy one (or several), just pop them in the refrigerator overnight to thaw; they’ll regain their divine creaminess as they come back to life. Imagine pulling out a frozen pie on a warm day—it’s like having summer right at your fingertips! The convenience factor here is absolutely paramount because it means you can always have these delicious bites at the ready!
Mini Key Lime Pies

Mini Key Lime Pies are the perfect bite-sized treats that encapsulate the joyous flavors of summer in every delicious morsel. With a delightful balance of sweet and tart, each mini pie features a buttery graham cracker crust paired with a creamy key lime filling that’s both refreshing and indulgent. Ideal for gatherings or special occasions, these mini desserts are easy to make and even easier to enjoy. Whether served at a picnic or as a sweet conclusion to an evening meal, these little gems will surely impress your guests and leave them craving more!
- Prep Time: 20 minutes
- Cook Time: 25 minutes
- Total Time: 45 minutes
- Yield: Makes approximately 18 mini pies 1x
- Category: Dessert
- Method: Baking
- Cuisine: American
Ingredients
- 1 ½ cups graham cracker crumbs
- ⅓ cup granulated sugar
- 6 tablespoons unsalted butter, melted
- 1 cup key lime juice (freshly squeezed preferred)
- 2 cans sweetened condensed milk (14 ounces each)
- 4 large egg yolks, at room temperature
- Homemade whipped cream (optional)
Instructions
- Preheat the oven to 350°F (180°C). Line two muffin pans with paper liners.
- In a mixing bowl, combine graham cracker crumbs and sugar. Add melted butter until well mixed.
- Press about one tablespoon of the mixture into each muffin liner to form the crusts. Bake for 5 minutes until lightly browned and set aside to cool.
- In another bowl, whisk together key lime juice, sweetened condensed milk, and egg yolks until smooth.
- Pour the filling evenly into the cooled crusts, filling them almost to the top.
- Bake for 12-15 minutes until set but slightly jiggly in the center. Cool completely on wire racks before refrigerating for at least 2 hours.
- Optionally top with homemade whipped cream before serving.
Nutrition
- Serving Size: 1 mini pie (58g)
- Calories: 170
- Sugar: 18g
- Sodium: 85mg
- Fat: 8g
- Saturated Fat: 5g
- Unsaturated Fat: 3g
- Trans Fat: 0g
- Carbohydrates: 23g
- Fiber: 0g
- Protein: 2g
- Cholesterol: 55mg