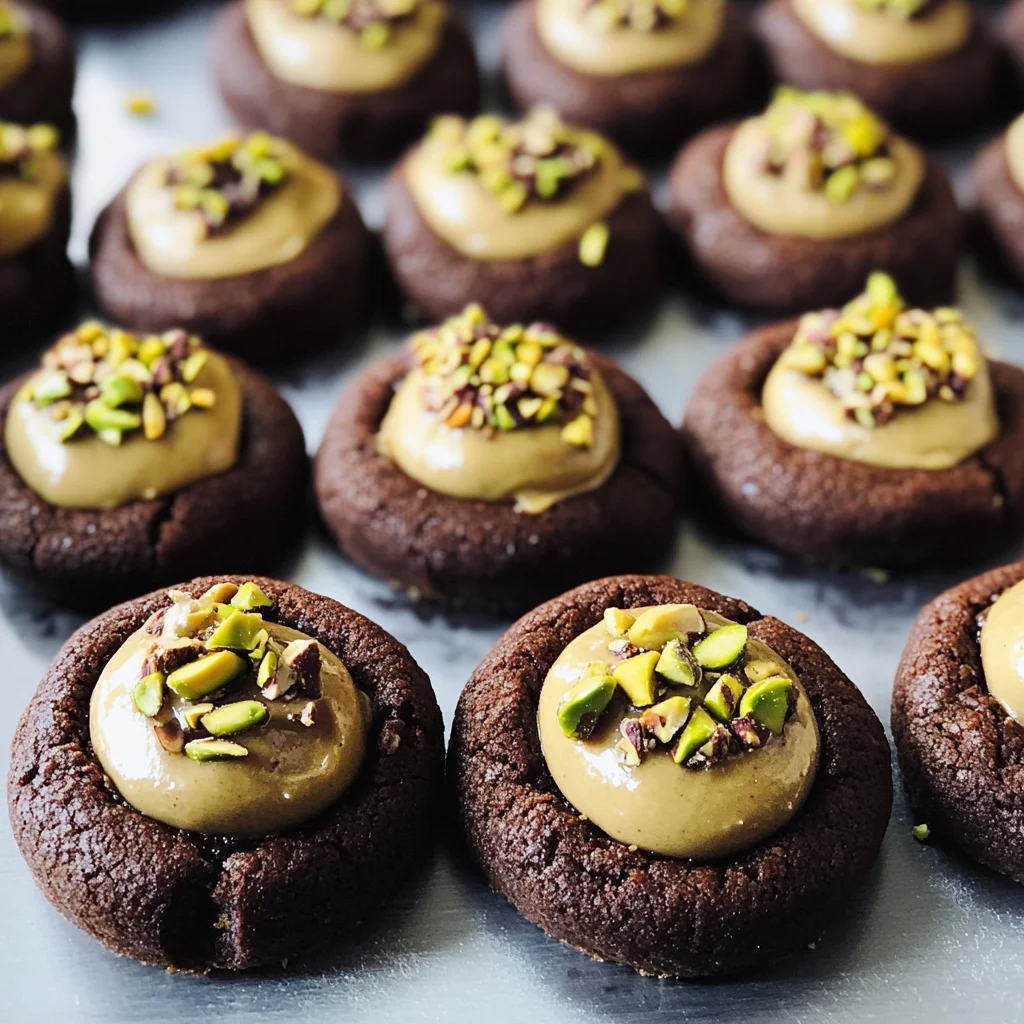
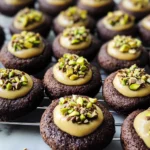
Chocolate Pistachio Cream Thumbprints
In the realm of baking, there exists a magical connection between food and emotion, a dance of flavors that transcends the mere act of cooking. One such recipe that beautifully embodies this sentiment is the Chocolate Pistachio Cream Thumbprints. As you journey through each step, you’ll find yourself immersed in an experience that intertwines tradition with innovation, all while enveloping your senses in a symphony of rich chocolate and nutty pistachio. The moment you bite into one of these heavenly cookies, you’ll be met with a delightful crunch, followed by a melt-in-your-mouth pistachio cream center that will undoubtedly take you to dessert nirvana. Honestly, I can hardly contain my excitement when sharing this recipe with you; it’s not just about creating cookies—it’s about crafting moments filled with joy, warmth, and comfort.
The beauty of these thumbprint cookies lies not only in their exquisite taste but also in their versatility. They make the perfect addition to any festive gathering or afternoon tea; imagine friends and family gathered around the table, laughter filling the air as they savor these treats. I’ve always been captivated by how certain flavors can evoke memories—perhaps a childhood spent indulging in pistachio gelato during summer days—or how they can create new memories worth cherishing. This recipe for Chocolate Pistachio Cream Thumbprints is sure to become a beloved favorite in your household. With every bite, you’ll experience the profound satisfaction that comes from sharing something truly extraordinary.
Chocolate Pistachio Cream Thumbprints: A Luxurious Delight
I can’t wait for you to embark on this culinary adventure! These Chocolate Pistachio Cream Thumbprints are not just cookies; they are little bites of bliss that will fill your kitchen with warmth and love. Let’s gather our ingredients and dive right into this delightful experience together!
Ingredients:
As we prepare to whip up these delectable thumbprints, let’s take a moment to appreciate each ingredient’s role in creating this masterpiece. Every component matters and contributes uniquely to the overall flavor and texture.
- 10 tablespoons unsalted butter (at room temperature). This is crucial for achieving that light and airy texture we’re striving for in our Chocolate Pistachio Cream Thumbprints. When butter is at room temperature, it creams beautifully with sugar, introducing air into the mixture and helping the cookies rise perfectly during baking. If your butter is too cold, it won’t blend well; if it’s melted or too soft, your cookies may spread excessively in the oven. Opt for high-quality unsalted butter to control the salt content in your recipe better—European-style butters work wonders here due to their higher fat content.
- 2/3 cup granulated sugar. Sugar does more than sweeten our cookies; it plays an essential role in texture as well. While granulated sugar helps create that lovely crisp edge we adore so much in cookies, it also aids in caramelization during baking, resulting in those beautiful golden-brown edges that are utterly intoxicating. Make sure to measure accurately because even slight variations can alter your cookie’s texture dramatically.
- 1 large egg yolk (reserve the white if you will be rolling in nuts). Egg yolks are responsible for enriching our dough, giving moisture and richness while helping bind everything together seamlessly. The fat within the yolk enhances flavor and contributes to a tender crumb—so don’t skip out on this! Remember to reserve that egg white if you’re planning on coating your cookies with chopped pistachios; using it gives them an appealing finish while adding extra nuttiness.
- 1 teaspoon vanilla extract. Ahh, vanilla—the quintessential flavor enhancer! It serves as an aromatic note that elevates all other flavors present while lending a comforting warmth to each bite of cookie. Always choose pure vanilla extract over imitation for its superior flavor profile—it makes all the difference.
- 1/4 teaspoon pistachio extract (optional). This optional ingredient adds another layer of nutty complexity, intensifying our cookie’s pistachio essence without overwhelming it. A little goes a long way! If you’re ever unsure about using extracts like these, start small—you can always add more if desired.
- 1 1/4 cups all-purpose flour. Flour is fundamental as it provides structure to our cookies while also absorbing moisture during baking—a non-negotiable component for achieving that perfect balance between chewy and crisp textures! When measuring flour, be sure not to pack it into your measuring cup; instead, scoop gently and level off for accuracy.
- 1/3 cup Dutch-processed cocoa powder (sifted). The cocoa powder brings rich chocolatey goodness into play here! Dutch-processed cocoa has been treated to neutralize its acidity—resulting in a smoother flavor profile compared to natural cocoa powder—and lends a gorgeous deep color to our dough as well.
- 1/2 teaspoon fine sea salt. Salt enhances every flavor present within our cookies; it’s absolutely paramount for balancing sweetness and bringing depth to our dessert overall! Using fine sea salt ensures even distribution throughout the dough without leaving any gritty texture behind—a must-have!
- 1/2 cup coarsely chopped pistachios. These beauties provide both texture and flavor—their delightful crunch contrasts beautifully against soft cookie centers while imparting that distinct nutty essence we adore so much! When selecting pistachios, look for bright green kernels without any signs of moisture or rancidity—freshness is key!
- 1.5 ounces white chocolate (chopped). White chocolate contributes further creaminess along with sweetness—it’s like liquid gold flowing into our filling! Be sure to use quality white chocolate with cocoa butter listed among its ingredients for optimal melting and flavor results.
- 3 tablespoons pistachio butter. Oh my goodness—this creamy delight infuses our filling with rich nuttiness that’s simply irresistible! You might even find yourself sneaking spoonfuls straight from the jar before they make it into these cookies (trust me—I won’t judge!). Look for natural varieties without added sugars or oils whenever possible!
- 2 teaspoons powdered sugar (sifted). Powdered sugar helps sweeten our filling while contributing smoothness—we want every bite of this luscious cream center to feel indulgent yet light at once! Sifting prevents clumps from forming during mixing; it’s worth taking those few extra seconds!
- 1/8 teaspoon fine sea salt. Just like before—the right pinch enhances flavors while ensuring balance within our filling too!
- 1/8 teaspoon pistachio extract (optional) & 1/8 teaspoon vanilla powder (optional). Both extracts serve similar purposes here as mentioned earlier—adding depth without overpowering—and are completely optional depending on how pronounced you’d like those flavors!
With these ingredients prepped and ready at hand, we’re all set for what promises to be an unforgettable baking adventure together.

Equipment You’ll Need:
Having the right tools makes all the difference when crafting something delicious like our Chocolate Pistachio Cream Thumbprints! These essential partners work hand-in-hand with our ingredients to ensure success every step along the way.
- Electric mixer: A stand mixer or handheld electric mixer streamlines the creaming process between butter and sugar—a crucial step toward achieving that light fluffy texture we desire! Hand mixing can be done but requires more effort; trust me—an electric mixer saves time here so you can focus on enjoying every stage of baking instead!
- Parchment paper or silicone baking mat: Prevent sticking while ensuring even browning by lining your baking sheets with either parchment paper or silicone mats before placing dough balls down—that way cleanup becomes effortless afterward too!
- Measuring spoons & cups: Accurate measurements mean everything when baking—they’re non-negotiable components toward achieving consistent results time after time! Invest in durable measuring tools made from stainless steel or good quality plastic.
- Sifter: Sifting flour helps aerate dry ingredients before combining them into wet ones—we want everything blended smoothly without lumps showing up unexpectedly later on!
With these vital tools assembled alongside us as we begin preparing our scrumptious thumbprint cookies let’s dive deeper into making magic happen!
Step 1: Preheating Our Oven & Preparing Baking Sheets
The first thing we need is a cozy environment where all this wonderfulness will come together—so let’s get that oven preheated to 350 degrees F! Preheating ensures consistent temperatures throughout baking—a critical factor ensuring even cooking across all batches produced here today! While we wait for those elements inside heating up nicely together we’ll line either medium-weight parchment paper or silicone mats upon heavy-weight sheets laid out on countertops nearby—these surfaces safeguard against sticking while promoting even browning too!
Step 2: Creaming Butter & Sugar
Once those preparations are complete it’s time we turn attention towards creaming together ten tablespoons unsalted butter along with two-thirds cup granulated sugar using either electric mixer set at medium-high speed or classic arm power if desired—it should take approximately two-to-three minutes until everything appears light fluffy resembling clouds floating above cotton candy skies! This process known as “creaming” introduces air bubbles within mixture making room later during rising stages achieved by incorporating eggs next—a crucial moment since skipping could result otherwise dense baked goods emerging from ovens instead tasty delights expected today!
Step 3: Adding Egg Yolk & Extracts
Next up comes adding one large egg yolk alongside one teaspoon vanilla extract plus optional quarter teaspoon pistachio extract directly into bowl containing buttery-sugar fluffiness created moments ago: watch how quickly things transform further becoming richer & more flavorful altogether—a delightful transformation indeed where aromatic notes waft throughout kitchen enticing appetites awaiting fresh-baked goodies soon-to-arrive shortly thereafter…
Step 4: Mixing Dry Ingredients
Now onto dry components—we’ll sift together one-and-a-quarter cups all-purpose flour alongside third cup Dutch processed cocoa powder plus half-teaspoon fine sea salt until evenly distributed throughout mixture formed prior—it’s vital mixing occurs thoroughly ensuring no lumps remain hiding within folds awaiting discovery later once baked preventing any surprises when biting into final product…
This process builds momentum towards achieving end results desired: luscious chocolatey morsels filled generously creamy pistachios waiting patiently inside awaiting indulgence upon bites taken thereafter…
Step 5: Flattening with Love
Now that your dough balls are beautifully formed and resting on the baking sheet, it’s time to create those signature thumbprint indentations. This step is crucial because it not only gives each cookie its distinctive look but also prepares a cozy little nook for our luxurious pistachio cream filling later. Take a moment to appreciate the texture of your dough; it should feel slightly firm yet malleable, a delightful result of the butter and sugar creaming together. With your thumb or the back of a round ½ teaspoon measuring spoon—dipped lightly in flour to prevent sticking—gently press down into the center of each ball. You’re aiming for an indentation deep enough to hold that creamy filling without cracking the edges.
Why do we want to avoid cracking? Think of it this way: a well-formed indentation ensures that every bite is perfectly balanced, a symphony of rich chocolate shortbread and smooth pistachio cream. If you find your dough crumbles too much while pressing, don’t worry! Just adjust the pressure you apply or roll the dough balls a tad tighter before placing them on the baking sheet. Trust me on this; these small adjustments make a world of difference in the final product.
Step 6: Coating with Crunch
For those who desire an extra layer of texture and flavor, here’s where things get exciting! Lightly dip each dough ball into the reserved egg white, which acts like glue for our coarsely chopped pistachios. Roll them gently between your palms until they’re thinly coated with egg white; this step is non-negotiable if you want those nuts to adhere beautifully during baking. Once coated, roll each ball in the chopped pistachios until they are covered evenly—a process that adds not just crunch but an irresistible nutty aroma that will waft through your kitchen as they bake.
Why go through this extra step? The added texture from the pistachios elevates these cookies to something truly extraordinary, offering both visual appeal and a delightful contrast against the soft chocolate base. Plus, those toasted pistachios will bring out their natural oils as they bake, infusing your cookies with an utterly intoxicating flavor that pairs so well with chocolate. So take your time here; this is about building layers of flavor and creating something truly spectacular!
Step 7: The Baking Ballet
Now comes one of my favorite parts—baking these beauties! Preheat your oven to 350 degrees Fahrenheit if you haven’t already done so; this temperature is perfect for achieving cookies that are crisp around the edges yet soft in the middle—exactly what we want! Place your baking sheet in the oven and let them dance for about 10 to 12 minutes. As they bake, keep an eye on them; you’ll notice their centers puffing up slightly while their edges darken ever so slightly in color—a beautiful signal that they’re nearing perfection.
But here’s where patience comes into play again. It’s essential not to rush opening that oven door too soon; doing so can cause temperature fluctuations that might affect how evenly they bake. Instead, allow them to puff up undisturbed for those first crucial minutes. When you see them set and just beginning to crack at the tops, that’s when you’ll know they’re ready to come out. Remember, these cookies will continue cooking slightly even after being removed from the oven due to residual heat—this is called carryover cooking and it’s absolutely paramount for achieving that perfect texture.
Step 8: Redefining Perfection
While those cookies are still warm and fresh from their brief adventure in the oven, we need to redefine those lovely indentations we created earlier. You’ll notice they’ve puffed up quite nicely during baking—this means we need to gently press down again using either your thumb or that trusty measuring spoon you used before. This step may seem trivial but trust me when I say it’s absolutely necessary if we want our filling to fit perfectly without spilling over.
Think about it: if we leave those indentations too shallow, our filling will overflow when we finally add it in, leading to messy cookies instead of beautifully presented treats! Aim for just enough pressure to create a nice little pool without cracking any edges—a delicate balance indeed! After all this effort, we want our Chocolate Pistachio Cream Thumbprints looking as delightful as they taste! Allow them ample time on the cooling rack before moving on; patience here allows flavors to settle and textures to meld beautifully.
Final Touches: Filling Up with Flavor
Step 9: Crafting Your Luxurious Filling
With your cookies perfectly shaped and cooling down patiently on their rack, it’s time for one of my favorite moments—the creation of our luscious pistachio cream filling! Begin by placing your chopped white chocolate into a small microwave-safe bowl; this ingredient serves as our base for richness and sweetness. Warm it gently in the microwave at 50% power, stirring every 30 seconds until it’s melted and smooth—this gentle approach prevents burning or seizing up that precious chocolate.
Once melted, stir in your pistachio butter along with sifted powdered sugar, fine sea salt, optional pistachio extract (if you’re feeling adventurous), and vanilla powder for depth of flavor—it’s like sprinkling magic dust on top! Each ingredient plays its role perfectly here: while powdered sugar adds sweetness and structure when it sets up later on, sea salt enhances all those nutty flavors beautifully without overwhelming them. Mix everything until smooth—you want a filling that’s both thick enough not to run off but still silky enough for easy spooning.
Now comes another moment where patience pays off: spoon about half a teaspoon of this decadent filling into each cookie’s indentation once they’ve cooled sufficiently—it should be rich enough not to overflow but generous enough for every bite! If you’re feeling extra generous (and who wouldn’t be?), you might even want to add just a tad more if those indentations are particularly deep!
Let these gems sit at room temperature for about two hours until set (or pop them in the fridge for 10-15 minutes if you’re impatient!). This setting time is vital because it allows all those flavors meld together into something profoundly satisfying—and believe me when I say there’s nothing quite like taking that first bite into these Chocolate Pistachio Cream Thumbprints! Store any leftovers in an airtight container at room temperature or refrigerate where they’ll stay fresh for up to five days—if they last that long!
And there you have it—a recipe filled with love and care from my kitchen straight to yours! Enjoy every moment spent making these delicious treats; I promise they will become a cherished addition to whatever occasion calls for some sweet indulgence!
Storage and Enjoyment Tips for Your Chocolate Pistachio Cream Thumbprints
Now that you’ve created these delightful Chocolate Pistachio Cream Thumbprints, it’s time to revel in the joy of enjoying them! The aroma wafting through your kitchen is just a taste of the bliss that awaits you. But what about when you have a few left to savor? Fear not! I’m here to guide you on how to keep these sweet treasures in perfect condition so you can enjoy them for days to come.
Storing Leftover Chocolate Pistachio Cream Thumbprints
To preserve your beautiful cookies, I recommend storing them in an airtight container, ideally lined with parchment paper to prevent any sticking. Place them at room temperature away from direct sunlight—this will help maintain their delightful texture and flavor. These cookies are best enjoyed within five days; however, trust me when I say they hold up surprisingly well! For an extra touch of moisture retention, you might want to toss in a slice of bread; this little trick creates a cozy environment that keeps the cookies soft and chewy. After storage, you’ll find that they still boast that lovely crumbly chocolate shortbread paired with creamy pistachio goodness, making each bite as blissful as when they first came out of the oven. If you’d like to warm them a bit before serving, pop them into the microwave for just a few seconds—this will refresh their flavors and melt that luscious filling just right!
Freezing Chocolate Pistachio Cream Thumbprints for Later
If you’re looking to enjoy your Chocolate Pistachio Cream Thumbprints beyond their usual shelf life, freezing is a fantastic option! To do this properly, let your cookies cool completely after baking and then arrange them in a single layer on a baking sheet. Pop this sheet in the freezer until the cookies are firm—about an hour should do the trick. Once frozen solid, transfer them carefully into a zip-top bag or an airtight container, layering parchment paper between cookies if you’re stacking them. They can stay happily nestled in your freezer for up to three months! When you’re ready for a sweet treat, simply take out however many cookies you’d like and let them thaw at room temperature or warm them briefly in the oven. This method not only allows you to enjoy these decadent delights any time but also brings back that fresh-baked charm with every bite!
What’s better than knowing that your favorite treats are just waiting for you? With these storage tips in mind, you’re all set to indulge whenever the craving strikes!
Chocolate Pistachio Cream Thumbprints
Experience bliss with Chocolate Pistachio Cream Thumbprints—rich chocolate meets nutty goodness. Bake now and indulge in this delightful treat!
- Prep Time: 30 minutes
- Cook Time: 12 minutes
- Total Time: 42 minutes
- Yield: Approximately 20 cookies 1x
- Category: Dessert
- Method: Baking
- Cuisine: American
Ingredients
- 10 tablespoons unsalted butter (at room temperature)
- 2/3 cup granulated sugar
- 1 large egg yolk
- 1 teaspoon vanilla extract
- 1 1/4 cups all-purpose flour
- 1/3 cup Dutch-processed cocoa powder (sifted)
- 1/2 teaspoon fine sea salt
- 1/2 cup coarsely chopped pistachios
- 1.5 ounces white chocolate (chopped)
- 3 tablespoons pistachio butter
- 2 teaspoons powdered sugar (sifted)
- 1/8 teaspoon fine sea salt
- 1/8 teaspoon pistachio extract (optional)
- 1/8 teaspoon vanilla powder (optional)
Instructions
- Preheat your oven to 350°F (175°C) and line baking sheets with parchment paper.
- In a mixing bowl, cream together the butter and granulated sugar until light and fluffy.
- Add the egg yolk and vanilla extract; mix until well combined.
- In another bowl, sift together the flour, cocoa powder, and salt before gradually incorporating into the wet mixture.
- Form dough balls and press your thumb into each to create indentations.
- Roll in chopped pistachios if desired.
- Bake for 10-12 minutes or until edges are set. Let cool slightly before pressing the centers again.
- Prepare the filling by melting white chocolate, then mixing it with pistachio butter and powdered sugar until smooth. Fill each cookie indentation with this mixture.
Nutrition
- Serving Size: 1 serving
- Calories: 120
- Sugar: 6g
- Sodium: 45mg
- Fat: 7g
- Saturated Fat: 4g
- Unsaturated Fat: 3g
- Trans Fat: 0g
- Carbohydrates: 12g
- Fiber: 1g
- Protein: 2g
- Cholesterol: 15mg