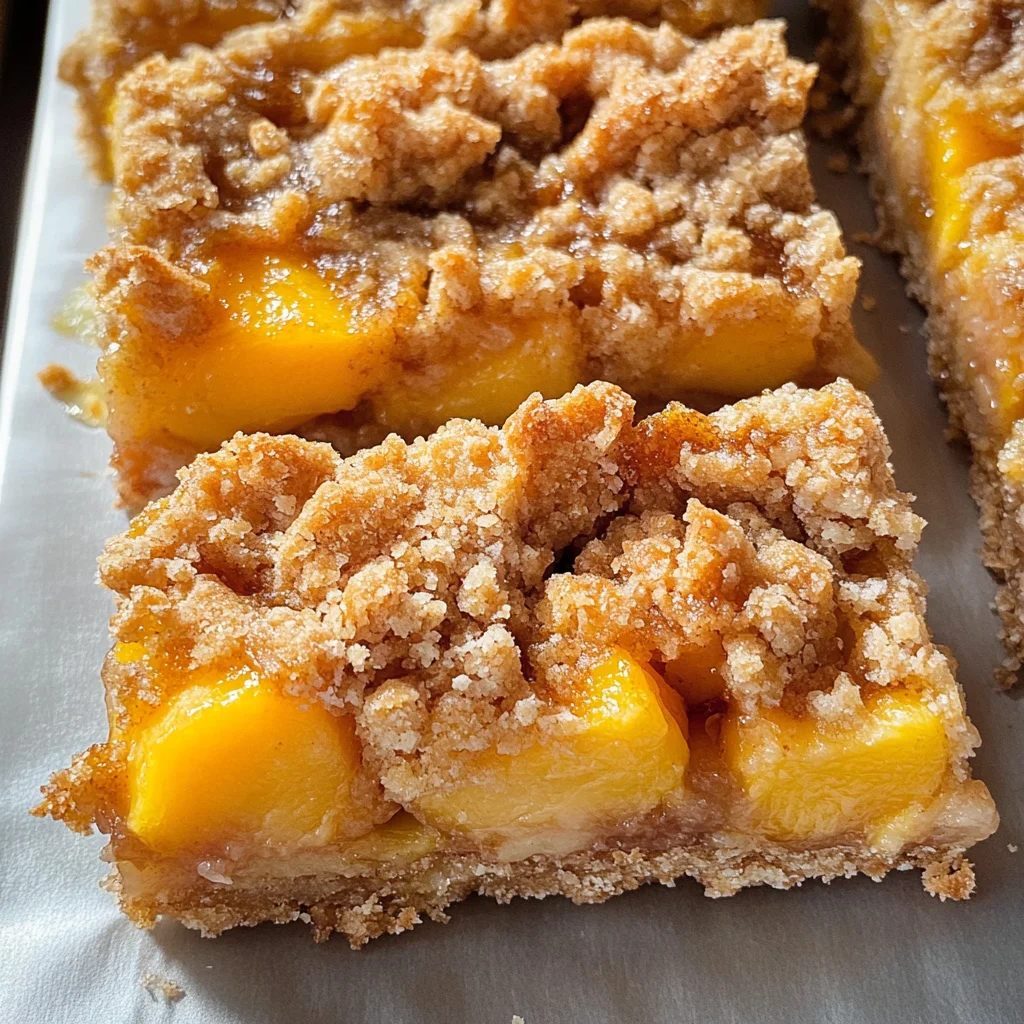
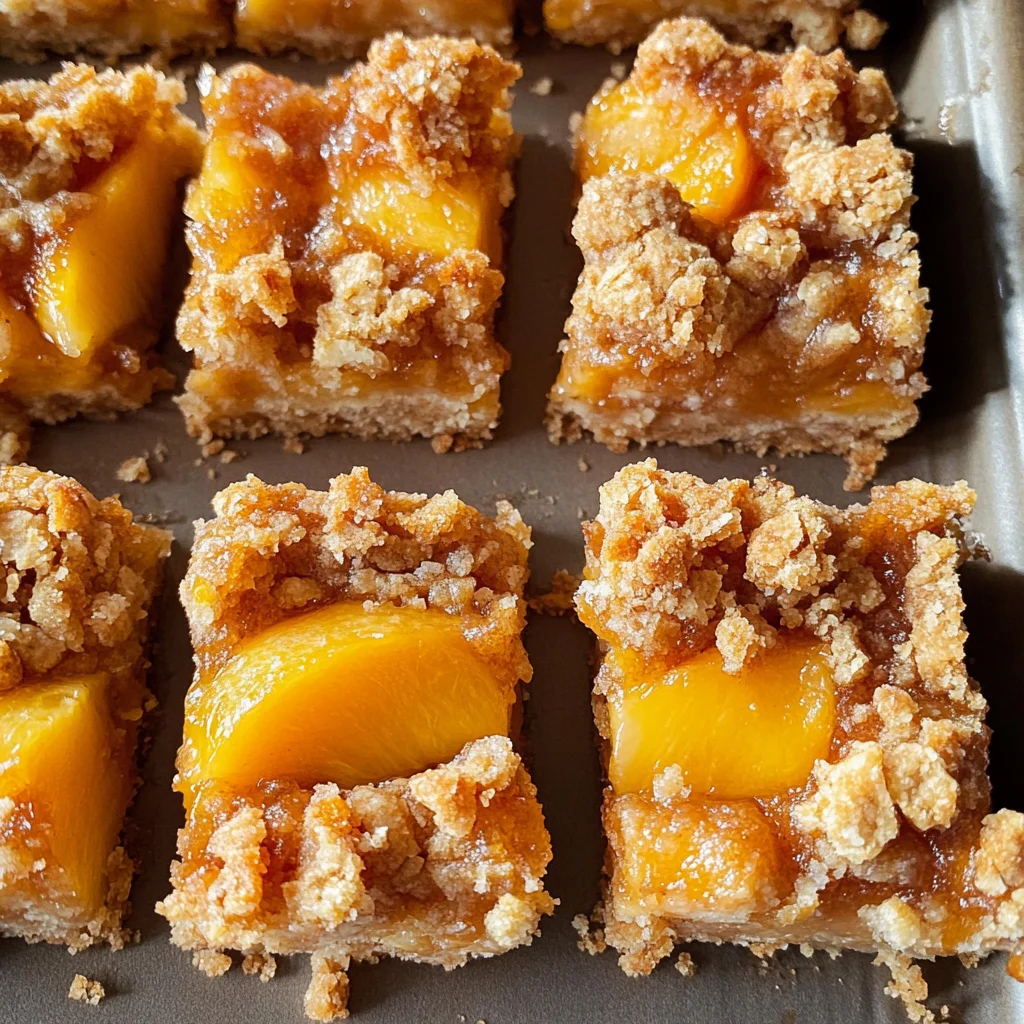
Peach Crumble Bars
There’s something utterly enchanting about the aroma of ripe peaches baking in the oven, intertwining with the warm, comforting scent of cinnamon and oats. As I sit here reminiscing about summer afternoons spent in my grandmother’s kitchen, I can’t help but feel that these Peach Crumble Bars are more than just a dessert—they’re a sweet passage to cherished memories. Every bite is like a hug from the inside, where the soft, juicy peaches meet a crunchy topping that sings of simplicity and love. These bars are not just food; they’re an experience, a celebration of flavors that remind us to slow down and savor life’s little pleasures.
The beauty of these bars lies in their delightful contrast—the crisp crumble that cradles the tender, syrupy peaches creates a symphony of textures that dance on your palate. I promise you, once you take that first bite, you’ll understand why this recipe has become one of my go-to favorites for gatherings and quiet evenings alike. They are perfect for sharing at picnics or enjoying with a cup of tea on your porch while watching the sun dip below the horizon. Truly, these Peach Crumble Bars embody everything I adore about cooking: bringing people together through deliciousness and heartfelt moments.
Peach Crumble Bars: A Taste of Summer in Every Bite
Welcome to the world of Peach Crumble Bars! This recipe is not only easy to make but also brings together two beloved ingredients—peaches and oats—in the most scrumptious way possible. You’ll find that both the crust and topping share the same delightful crumble texture, which means each mouthful is filled with joy. Get ready to embark on this culinary journey where we create bars that are crunchy on top yet soft in the center—a true treat for anyone who bites into them!
Ingredients:
As we dive into making these delightful bars, let’s talk about each ingredient and what it brings to our flavorful creation. The right ingredients will ensure your Peach Crumble Bars turn out perfectly, so let’s get excited about what we’ll be using!
- 140 grams (1 cup) all-purpose flour: This foundational ingredient provides structure to our bars. It binds everything together beautifully while allowing for a slightly tender texture. When selecting flour, look for a good-quality all-purpose flour—this makes all the difference in achieving that perfect crumbly crust. If you’d like to experiment further, whole wheat flour can add an earthy flavor but may alter the texture slightly.
- 130 grams (1 cup and 1/3 cup) rolled oats: Rolled oats are essential here; they add heartiness and chewiness that perfectly balances against the luscious peaches. Not only do they contribute to the crumb structure, but they also offer fiber and nutrients that make this dessert feel just a tad healthier! Always choose old-fashioned rolled oats for this recipe—quick oats will not yield quite the same satisfying texture.
- 155 grams (3/4 cup) granulated sugar: Sugar is more than just sweetness; it helps create that lovely golden-brown color when baked, adding depth and richness to our bars. Feel free to experiment with coconut sugar or brown sugar if you want deeper caramel notes—just remember it may slightly alter the final taste.
- 1 teaspoon cinnamon: Ahh, cinnamon—the warm spice that wraps around your senses like a cozy blanket! It enhances both flavor and aroma, creating a comforting backdrop for our sweet peaches. Be sure to use fresh ground cinnamon if possible; its vibrancy will elevate your bars beyond measure.
- 1/4 teaspoon salt (optional): Salt may seem small but is absolutely paramount in balancing sweetness in desserts. It magnifies flavors rather than overpowering them. If you’re sensitive to salt or watching your intake, feel free to skip it—but I encourage you not to underestimate its role!
- 150 g (⅔ cup) unsalted butter, melted and cooled: Butter adds richness and moisture while helping achieve those perfect crumbles we crave in dessert bars. Make sure it’s melted but not hot when mixing; otherwise, it could affect how well everything combines together.
- 450 grams (2 cups) peaches, peeled and cut into small pieces*: Fresh peaches are truly the star here! Their juicy sweetness creates natural sauce during baking—what could be better? Look for ripe yet firm peaches; too soft won’t hold up well during baking! If peaches aren’t in season, frozen ones work well too—just thaw them properly before using.
- 30 grams (2 tablespoons) granulated sugar: A touch more sugar is added specifically for our peach mixture to coax out their natural juices as they bake! This layer brings forth additional sweetness while helping thicken those delicious juices with cornstarch later on.
- 2 teaspoons cornstarch: This little magic powder thickens any excess peach juice into a lovely syrup without altering flavor! It ensures our filling remains cohesive instead of too runny—trust me; no one wants soggy bars!
- 1 teaspoon fresh lemon juice: Lemon juice adds brightness by cutting through sweetness while enhancing peach flavors—it’s essential for balance! Using fresh juice will always impart better flavor than bottled counterparts; don’t skip this step!
- 1 teaspoon almond extract: Almond extract infuses subtle nutty notes into our crumble bars—a non-negotiable addition! The marriage between almonds and peaches is simply divine; they complement each other beautifully.
Equipment You’ll Need:
Before we jump into making these delectable bars, having the right tools at hand will make your cooking experience smoother and more enjoyable. Think of these tools as essential partners in crafting something truly wonderful!
- 8 inch (20cm) square oven-proof dish: This size is perfect for our Peach Crumble Bars as it allows even baking throughout without overcrowding them! An appropriately sized dish ensures optimal texture so every bite is just right.
- Parchment paper: Lining your dish with parchment paper gives you an easy way to lift out your cooled bars effortlessly once baked—you’ll thank me later when slicing! Make sure there’s some overhang so you can easily pull them out without any hassle.
- Medium mixing bowl: A sturdy mixing bowl is vital for combining dry ingredients smoothly without spilling everywhere—a must-have in any baker’s kitchen!
- Spatula or wooden spoon: These tools help mix batter thoroughly while ensuring every last bit gets combined seamlessly—nothing should go wasted!
With these essentials gathered around you like trusted friends cheering you on, let’s start preparing those scrumptious Peach Crumble Bars!
Step 1: Preheat Your Oven & Prepare Your Dish
First things first—preheating your oven sets us up for success by ensuring even baking from start to finish! Preheat your oven to 350°F (177°C). While that’s warming up beautifully, let’s prepare our dish by greasing it lightly before lining with parchment paper. Make sure there’s about 2 inches (5 cm) hanging over each side so we can easily lift out our masterpiece later on—a crucial step in achieving picture-perfect slices!
Step 2: Toss Those Juicy Peaches
Now onto one of my favorite parts—the peaches! Chop them into small pieces around ½ inch (1–2 cm), ensuring even cooking throughout when baked. In a separate bowl, mix these chopped beauties with lemon juice first; this brightens their flavor while preventing browning from occurring during prep time. Next comes almond extract—it might seem subtle now but trust me when I say this step elevates peach flavor dramatically! Lastly, toss in cornstarch along with granulated sugar until everything glistens beautifully together before setting aside—we want those juices ready when layered atop our crust later on!
Step 3: Combine Dry Ingredients
In another medium bowl—which should be nice and roomy—let’s whisk together all-purpose flour, rolled oats, sugar(s), cinnamon spice goodness along with optional salt if using until fully combined –you want every particle working harmoniously towards creating an amazing base layer! Once mixed evenly enough visually speaking—you’ll notice how inviting this mixture looks already—we’re ready for melted butter next…
Step 4: Add Melted Butter & Create Crust
Pour melted butter into dry ingredients mixture gently then stir using either spatula or wooden spoon until everything comes together nicely resembling wet sand; think about building castles at beach level here folks—this consistency needs loving attention too! Remember not rush through blending stage—it allows those flavors meld beautifully while creating rich textures later down line when baked up perfectly golden brown atop fruity filling below…
With these steps set firmly underfoot—and confidence soaring high—we’re ready for assembling layers soon enough…stay tuned as excitement builds further ahead where final touches come alive within oven warmth enveloping kitchen space like hug itself feeling warmth emanating from created comfort food goodness shared amongst loved ones every time taken slice enjoyed altogether…
Creating Your Irresistible Peach Crumble Bars
As we dive deeper into crafting these Peach Crumble Bars, I can hardly contain my excitement! The blend of juicy, sweet peaches enveloped in a crunchy oat topping is nothing short of heavenly. Trust me, every layer adds its own unique dimension to these bars — each bite is a delightful dance of flavors and textures. Let’s continue on this journey together as we bring this enchanting dessert to life!
Step 5: Layering the Peach Filling with Love
Now that we have our crust nice and snug in the oven-proof dish, it’s time to introduce our peach mixture to the scene. Begin by carefully spooning the peaches directly onto the crust, allowing them to spread out evenly but leaving behind any excess liquid that may have accumulated in the bowl. This step is crucial because too much liquid can make your bars soggy rather than delightfully chewy. The cornstarch you’ve mixed with the peaches will help thicken any juices during baking, but you want to maintain just the right balance for that perfect texture.
As you layer those luscious peach chunks on top, take a moment to savor their fragrant sweetness and vibrant color – it’s truly a sight to behold! Why leave out that extra syrupy goodness? Well, here’s a little secret: if you’ve got some leftover juice, you can simmer it gently in a small pan until it thickens into a delectable sauce. Drizzling this over your baked bars not only elevates their presentation but adds an extra punch of flavor that’s simply irresistible! So, don’t rush this step; treat these peaches with care and respect – after all, they are the star of our show!
Step 6: The Art of Crumbling
With our peach filling nestled comfortably atop the crust, it’s time to sprinkle on that remaining crumble mixture. This is where we really get to play with texture! Take the remaining dough and, using your fingertips, break it apart into larger crumbles before generously scattering it over the peaches. If you want those big, beautiful crumble pieces that give your bars an artisanal feel, don’t hesitate to squeeze some mixture in your hands before letting it fall back down like delicious confetti.
Why does this matter? Well, when you create larger clumps of dough, they bake up into those satisfying crunchy bits that contrast beautifully with the soft peaches below. This is absolutely paramount for achieving that “wow” factor when someone takes their first bite! As you press down gently on these crumbles with your fingertips, you’re ensuring they stick nicely to the peaches beneath—this will help create a cohesive bar that doesn’t fall apart at the first touch.
Step 7: Baking Until Golden Perfection
Now comes one of my favorite moments—the transformation phase! Slide your assembled dish into a preheated oven set at 350°F (177°C). As it bakes for about 33-35 minutes — watch closely as the magic unfolds! You’ll notice how your kitchen begins to fill with an utterly intoxicating aroma of caramelizing sugars and warm spices wafting through the air; it’s like being wrapped in a cozy blanket on a chilly day.
Keep an eye on those edges; they should start turning a lovely golden brown while the center bubbles slightly. This bubbling action is an excellent sign that everything inside is melding together beautifully! Don’t be alarmed if there are some slight cracks forming on top—that’s completely normal and adds character. Once you’ve reached this golden state—where everything looks invitingly crispy—remove the dish from the oven. It’s vital at this stage not to skip letting them cool down completely; patience here will reward you greatly!
Step 8: Cooling for Ultimate Sliceability
Let your freshly baked Peach Crumble Bars cool at room temperature for about an hour before moving them into the fridge for an additional hour and a half or so. Yes, I know waiting can be tough when you’re craving something sweet! However, trust me on this; chilling allows all those flavors to deepen and intermingle while also firming up those layers so they slice beautifully later.
Why chill? Well, cooling helps set up both the fruit filling and crumble topping so they don’t collapse when cut—a major win for presentation! So often I’ve rushed through this step only to end up with messy slices rather than neat bars; learn from my experience! When they’re finally chilled enough to hold their form but still warm enough when served—oh my goodness—it’s pure bliss! Just imagine cutting through those layers with ease and revealing all that glorious peach goodness inside.
Final Touches: Serving Your Masterpiece
Step 9: The Grand Reveal
Once your Peach Crumble Bars have cooled completely and are tantalizingly firm from their time in the fridge, it’s time for the grand reveal! Gently lift them out of the dish using that delightful parchment paper overhang—you’ll feel like a professional baker unveiling their masterpiece at this moment! Place them on a cutting board and use a sharp knife (it should be clean) for cutting—this ensures you get clean edges without squishing all that lovely filling inside.
When serving these gorgeous bars, consider adding a scoop of dairy-free vanilla ice cream or perhaps even some whipped coconut cream drizzled delicately over each slice for an extra touch of indulgence. The cool creaminess against those warm peachy notes creates an extraordinary experience that’s simply unparalleled.
Each bite will transport you back to sun-soaked summers spent picking ripe peaches or enjoying family gatherings filled with laughter—and isn’t that what cooking is all about? I truly believe every recipe carries memories waiting to be made anew; enjoy every moment spent creating these Peach Crumble Bars as much as you’ll relish tasting them together with friends or family around your table. Happy baking! 🍑✨
Storage and Enjoyment Tips for Your Peach Crumble Bars
Now that you’ve crafted these delightful Peach Crumble Bars, it’s time to enjoy the fruits of your labor! The tantalizing aroma wafting through your kitchen is just a hint of the deliciousness waiting to be savored. But let’s talk about what happens after you’ve taken that first, glorious bite. You might find yourself with some leftovers (if you’re lucky!), and trust me when I say, you’ll want to keep them in their prime for as long as possible.
Storing Leftover Peach Crumble Bars
To ensure your scrumptious Peach Crumble Bars stay fresh and delicious, place them in an airtight container at room temperature if you plan to consume them within a few days. If you want to save them for later indulgence, pop them into the fridge; they’ll keep beautifully for up to a week. A little pro tip: If you want to maintain that perfect texture, consider placing a slice of bread in the container with your bars. This simple trick works wonders in keeping moisture levels balanced—ensuring those bars stay chewy while preventing any dryness! After storage, they might develop a bit more sweetness as the flavors meld together, making each bite even more satisfying. When you’re ready to serve, simply take them out and enjoy them chilled or let them come to room temperature. For an extra treat, you could warm them slightly in the microwave for about 10-15 seconds—the aroma will envelop you like a cozy hug!
Freezing Peach Crumble Bars for Later
Freezing your Peach Crumble Bars is another fantastic option if you want to enjoy this delightful dessert at a future date! To freeze them properly, allow your bars to cool completely before cutting them into portions. Wrap each piece tightly in plastic wrap or aluminum foil and then place them in a freezer-safe container or bag. They can stay happily frozen for up to three months! When you’re ready to enjoy one (or several!), simply remove the desired amount from the freezer and let them thaw at room temperature for about 30 minutes or pop one in the microwave for a quick reheating option. The beauty of freezing these bars is not only about convenience but also maintaining their luscious flavor and texture until you’re ready for that sweet satisfaction. Trust me—having these tucked away in your freezer feels like having a little treasure trove of joy waiting just for you!
Peach Crumble Bars
Indulge in the delightful experience of Peach Crumble Bars, where juicy peaches meet a crunchy oat topping for a perfect treat that combines simplicity and flavor. These bars are an invitation to savor the essence of summer with every bite, offering a delicious blend of textures that will have your taste buds dancing. Whether you’re enjoying them at a picnic or treating yourself after a long day, these bars are sure to become a favorite in your household. With easy-to-follow instructions and wholesome ingredients, this recipe is perfect for bakers of all skill levels. Let’s create something magical together!
- Prep Time: 15 minutes
- Cook Time: 35 minutes
- Total Time: 50 minutes
- Yield: Serves approximately 9 bars 1x
- Category: Dessert
- Method: Baking
- Cuisine: American
Ingredients
- 140 grams all-purpose flour
- 130 grams rolled oats
- 185 grams granulated sugar (155 grams plus 30 grams for peach mixture)
- 1 teaspoon cinnamon
- 150 grams unsalted butter, melted and cooled
- 450 grams fresh peaches, peeled and diced
- 2 teaspoons cornstarch
- 1 teaspoon fresh lemon juice
- 1 teaspoon almond extract
Instructions
- Preheat your oven to 350°F (177°C) and prepare an 8-inch square oven-proof dish by greasing it and lining it with parchment paper.
- In a medium bowl, combine flour, oats, sugar, cinnamon, and salt if using. Stir until well blended.
- Pour in melted butter and mix until crumbly.
- In another bowl, toss chopped peaches with lemon juice, almond extract, granulated sugar (30 grams), and cornstarch until coated.
- Press half of the crumble mixture into the bottom of the prepared dish to form the crust.
- Layer the peach mixture evenly over the crust.
- Sprinkle the remaining crumble mixture on top and gently press down.
- Bake for 33-35 minutes or until golden brown on top.
- Allow to cool completely before slicing into bars.
Nutrition
- Serving Size: 1 serving
- Calories: 223
- Sugar: 15g
- Sodium: 55mg
- Fat: 10g
- Saturated Fat: 6g
- Unsaturated Fat: 4g
- Trans Fat: 0g
- Carbohydrates: 33g
- Fiber: 2g
- Protein: 3g
- Cholesterol: 15mg