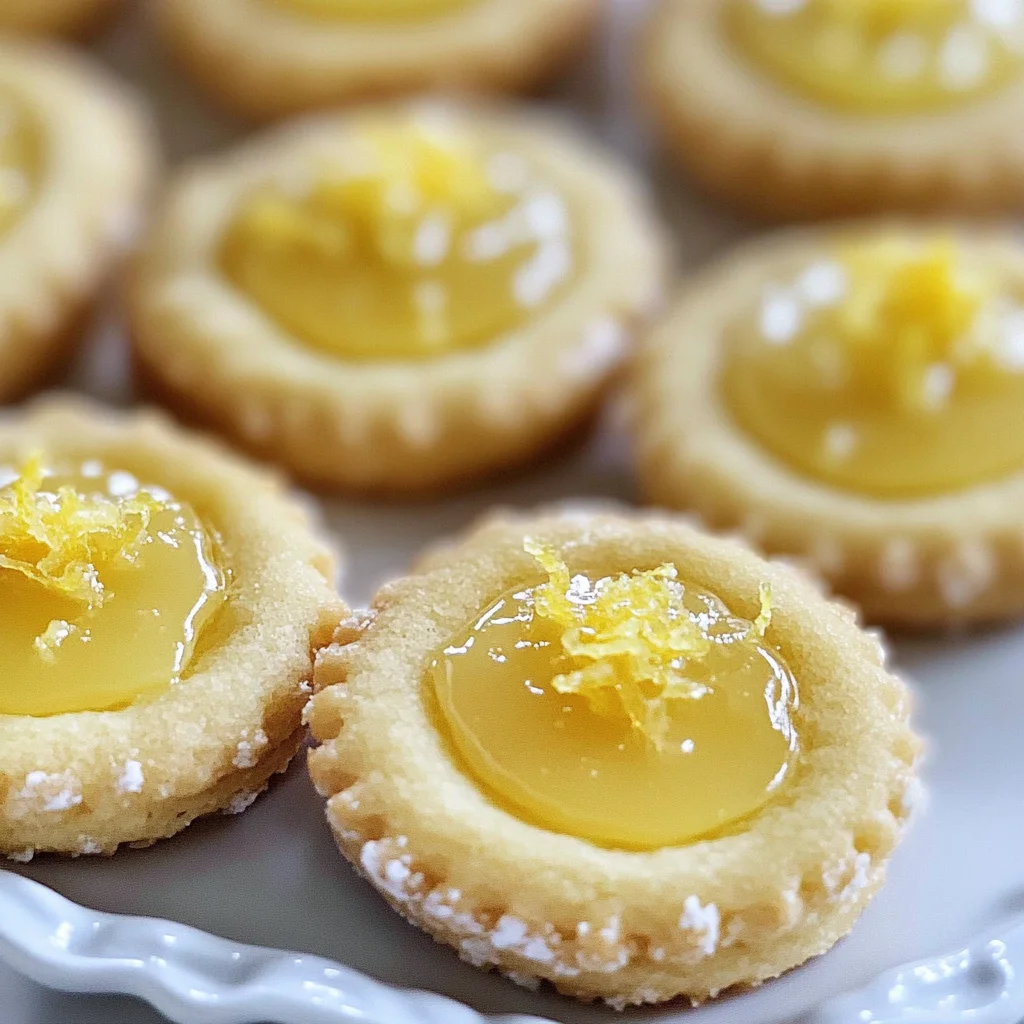
Lemon Curd Cookies Recipe
There’s something utterly magical about the way food can transport us back to cherished moments in our lives, isn’t there? The scent of freshly baked cookies wafting through the kitchen can evoke memories of warm summer days spent with loved ones, laughter ringing in the air as we gather around the table. This Lemon Curd Cookies Recipe is not just a simple dessert; it’s a heartfelt creation that celebrates the joy of baking and the bright, zesty flavor of lemons that add a touch of sunshine to any occasion. Each bite is like a refreshing embrace on a warm day, with the soft sugar cookie base cradling a luscious homemade lemon curd that dances on your palate. I promise you, these cookies will make your heart sing and leave everyone you’ve ever shared them with longing for more.
Now, let’s talk about what makes these cookies truly special. They’re not just another sweet treat; they’re tiny bites of happiness that bring people together—whether you’re celebrating a baby shower or simply enjoying a sunny afternoon with friends. The combination of buttery cookie and vibrant lemon curd creates an exquisite balance that is both comforting and invigorating. And really, who doesn’t adore the playful act of making thumbprint cookies? It’s an art form in itself! As you create little wells to fill with that golden liquid gold known as lemon curd, you’ll feel as if you’re crafting edible gems that are destined to delight. Trust me when I say this Lemon Curd Cookies Recipe will quickly become a beloved staple in your home.
Lemon Curd Cookies Recipe: Sunshine in Every Bite
Welcome to the delightful world of baking where we’ll embark on creating these scrumptious Lemon Thumbprint Cookies together! With their soft, pillowy texture and tangy lemon filling, these cookies are sure to impress anyone lucky enough to taste them. I’m excited to share this with you!
Ingredients:
Before we dive into the actual baking, let’s gather our ingredients—the stars of this culinary show! Each component plays an important role in harmonizing flavors and achieving that perfect texture, so let’s take a moment to appreciate what goes into these delightful cookies.
- 1 cup (2 sticks or 226g) unsalted butter, softened to room temperature. This is absolutely paramount for achieving that light and airy texture we crave in our Lemon Curd Cookies Recipe. When butter is at room temperature, it creams beautifully with sugar, creating tiny pockets of air that help your cookies rise perfectly during baking. If you’ve ever tried to cream cold butter directly from the fridge, you know how stubborn it can be! Always remember: quality matters—opt for European-style butter with its higher fat content for an even richer flavor.
- 2 cups sugar. Sugar not only sweetens our cookies but also contributes significantly to their texture—creating that delectable crisp exterior while keeping the center soft and chewy. By using granulated sugar here, we ensure those lovely caramel notes develop during baking for an irresistible taste sensation. Don’t rush adding it; letting it mix thoroughly with butter creates that luxurious consistency we desire.
- 2 tablespoons lemon zest. Ah, the zest! This fragrant powerhouse adds an exciting burst of citrus flavor that elevates our cookies from ordinary to extraordinary. Zesting fresh lemons releases those essential oils packed with flavor—making every bite feel like summer on your palate. When shopping for lemons, choose ones with vibrant yellow skin; they tend to be juicier and more flavorful!
- 2 large eggs (room temperature). Eggs are another key player in our recipe—they provide structure while keeping things moist and tender. Room temperature eggs blend seamlessly into our batter without cooling down everything else; this helps maintain that luscious texture we’re after. If you forget to take them out ahead of time, don’t fret! Simply place them in warm water for about 10 minutes before using.
- 2 teaspoons vanilla extract. This humble ingredient adds depth and warmth—a comforting note amidst all that bright citrus flavor! Using pure vanilla extract will give you far superior results compared to imitation vanilla; trust me when I say it makes all the difference when it comes to capturing hearts (and taste buds).
- 3/4 teaspoon salt. Salt is often overlooked but plays an incredibly vital role in balancing sweetness and enhancing overall flavor profiles in baking. Without it, your cookies may taste flat or one-dimensional—even if they have all the right ingredients! So don’t skip out on this crucial element; just remember moderation is key!
- 1 teaspoon baking powder & 1 teaspoon baking soda. Both leavening agents work together symbiotically here: baking powder provides lift while baking soda helps create browning via caramelization—a process I find utterly fascinating! The interplay between these two ensures our cookies are perfectly puffed up without being overly dense.
- 3 cups all-purpose flour. Flour serves as the backbone of our dough—it provides structure while absorbing moisture from other ingredients for optimal consistency. For best results, always sift your flour before measuring; this helps prevent clumping which could lead to uneven textures later on.
- 1 cup lemon juice & 3 egg yolks & 1 cup sugar & 1½ tablespoon corn starch & 2 tablespoons lemon zest & 1/4 cup butter (cold and cubed). These ingredients combine forces to create that luscious lemon curd filling which transforms our thumbprint cookie into something truly magical! Fresh lemon juice brings acidity while egg yolks enriches texture; corn starch thickens everything up beautifully so it holds its shape inside those delicate cookie cups—what’s not to love?
Now that we have gathered everything needed for our adventure into deliciousness…
Equipment You’ll Need:
Having the right tools at hand makes every step smoother and more enjoyable—just like having good friends by your side while baking! While equipment might not be technically classified as ingredients, think of them as essential partners in bringing this delightful recipe to life.
- Mixing bowls (various sizes). A good set of mixing bowls allows you flexibility when preparing different components of your dough—from creaming butter and sugar together in one bowl to whisking dry ingredients separately before combining them later on.
- Electric mixer or stand mixer with paddle attachment (preferred). While mixing by hand builds character (and muscles!), using an electric mixer saves time and energy when creaming butter and sugar—trust me: it’s worth investing in one if you bake regularly!
- *Rubber spatula or wooden spoon. These trusty utensils help scrape down sides of bowls ensuring every morsel gets incorporated properly without leaving behind any rogue flour clumps lurking below.
- Measuring cups & spoons (dry & liquid). Accurate measurements are non-negotiable in baking; investing in good quality measuring tools will guarantee consistent results every time—you want those gorgeous cookies turning out perfectly!
Step 1: Creaming Butter and Sugar
The first step towards creating these Lemon Curd Cookies Recipe begins by creaming together softened unsalted butter and sugar until light and fluffy—this process is known as creaming. Using either an electric mixer or stand mixer fitted with a paddle attachment makes this task feel effortless but still requires patience; aim for about three minutes at medium speed until your mixture has turned pale yellow, resembling fluffy clouds! Why does this matter? Well, it’s during this stage where tiny air pockets form within your butter-sugar blend providing volume during baking—that’s what gives us those beautiful puffy edges contrasted against soft centers!
Step 2: Incorporating Eggs and Vanilla
Next up comes adding room-temperature eggs one at a time followed by two teaspoons of pure vanilla extract—allowing each egg fully incorporate before adding another ensures maximum emulsification throughout your batter leading us closer toward perfection! Beat on low speed until uniformity reigns supreme—it should appear glossy rather than grainy—that’s exactly what we’re after here!
Step 3: Sifting Together Dry Ingredients
In another bowl whisk together three cups all-purpose flour along with one teaspoon each of baking powder & baking soda alongside three quarters teaspoon salt ensuring even distribution within dry mix components—it’s essential we do so because improper mixing could lead us towards uneven rising patterns later on down line!
Step 4: Combining Wet & Dry Mixtures
Finally it’s time we bring wet & dry mixtures together: start by gradually adding flour mixture into bowl containing creamy batter previously prepared whilst continuing mix gently until just combined—this part requires caution though since overmixing could lead us toward toughened dough rather than delicate crumb desired within finished product instead!
With these steps completed successfully—we’re well on our way towards establishing those tantalizing little cookie cups filled generously with homemade lemon curd awaiting indulgence ahead… Stay tuned as we’ll delve deeper into preparing that luscious filling next!
Step 5: Create the Perfect Lemon Curd
Now that your cookie dough is chilling beautifully in the refrigerator, let’s turn our attention to the lemon curd—this is where the magic truly happens! Start by combining 1 cup of fresh lemon juice and 1 cup of sugar in a medium saucepan over medium heat. As the mixture warms, you’ll want to whisk it gently but consistently until the sugar dissolves completely. This step is crucial because it ensures that your curd has a silky-smooth texture without any graininess. Once the sugar has dissolved, it’s time to add those vibrant egg yolks and whisk vigorously until everything is well combined. This is more than just mixing; you’re creating a luscious blend that will form the base of your curd.
Next, here comes the science part! Gradually add in 1½ tablespoons of cornstarch mixed with a splash of water—this will help thicken your curd and give it that decadent, creamy consistency we all adore. Keep stirring as you bring this mixture to a gentle simmer; you’ll notice it start to thicken after several minutes. Patience is key here! Trust me on this: if you rush this step, you might end up with a curd that’s too runny, which won’t hold its shape in those delightful little cookie cups. You want to see tiny bubbles forming at the edges of the pan while constantly whisking to prevent any cooking mishaps. Once thickened (about 5-7 minutes), remove from heat and stir in 2 tablespoons of cold, cubed butter and 2 tablespoons of lemon zest for that utterly intoxicating brightness. Let this cool slightly before using—it will set up beautifully!
Step 6: Shape Your Cookies
Now that your lemon curd is cooling and becoming even more divine, it’s time to shape your cookies! Preheat your oven to 350°F (175°C) while you prepare your cookie dough into delightful little cups. Take out your chilled dough from the fridge; it should be firm yet pliable—a perfect balance for rolling. Using a tablespoon or cookie scoop, portion out small balls of dough (about 1 inch in diameter). Roll them between your palms until they’re smooth—that little touch makes a world of difference in presentation!
Once shaped, place these cookie balls on ungreased baking sheets about two inches apart to allow room for spreading as they bake. Now comes a fun part: using either your thumb or the back of a small measuring spoon, create an indentation in the center of each ball. Don’t rush this step; take care to form a nice deep well because this will cradle all that luscious lemon curd later on! It’s important to ensure this indentation holds enough filling while still allowing some cookie surface area around it to crisp up beautifully. As you go along, keep an eye on those lovely shapes; they should look invitingly plump but not overly flattened.
Step 7: Bake Until Golden
With your cookies shaped and indented like little nests waiting for their lemon treasure, it’s time for them to hit the oven! Slide those trays into your preheated oven and set a timer for about 10-12 minutes. Keep an eye on them as they bake; you’ll notice how they start puffing up slightly—this is when their texture begins transforming from raw dough into wonderfully soft cookies! Look for that beautiful golden hue around the edges; that’s your cue they’re ready.
What’s fascinating here is how baking activates various ingredients—the butter melts and creates steam while also helping those edges crisp up just right, leaving you with tender-inside cookies encasing that glorious lemon flavor. Don’t worry if they seem soft when you take them out; they’ll firm up as they cool on the baking sheet for about five minutes before transferring them gently onto wire racks to cool completely. Make sure not to skip letting them cool adequately; serving warm could lead to gooey messes instead of delectable treats!
Step 8: Fill with Lemon Curd
This next step is where everything comes together, creating those adorable cookie cups bursting with bright flavors! Once your cookies have cooled completely—trust me when I say patience pays off—grab your lemon curd from earlier and give it a quick stir to ensure it’s smooth and spreadable again. Using either a small spoon or a piping bag (if you’re feeling fancy), fill each well with that luscious lemon curd generously—you want each bite packed with flavor!
Be careful not to overfill; just aim for a rounded top without spilling over too much because we want these beauties looking pristine! The combination of soft cookie and tangy curd creates an absolutely phenomenal taste experience that will transport you straight into summer bliss with every bite. After filling each cookie cup, let them sit at room temperature briefly so those flavors can meld together beautifully before serving.
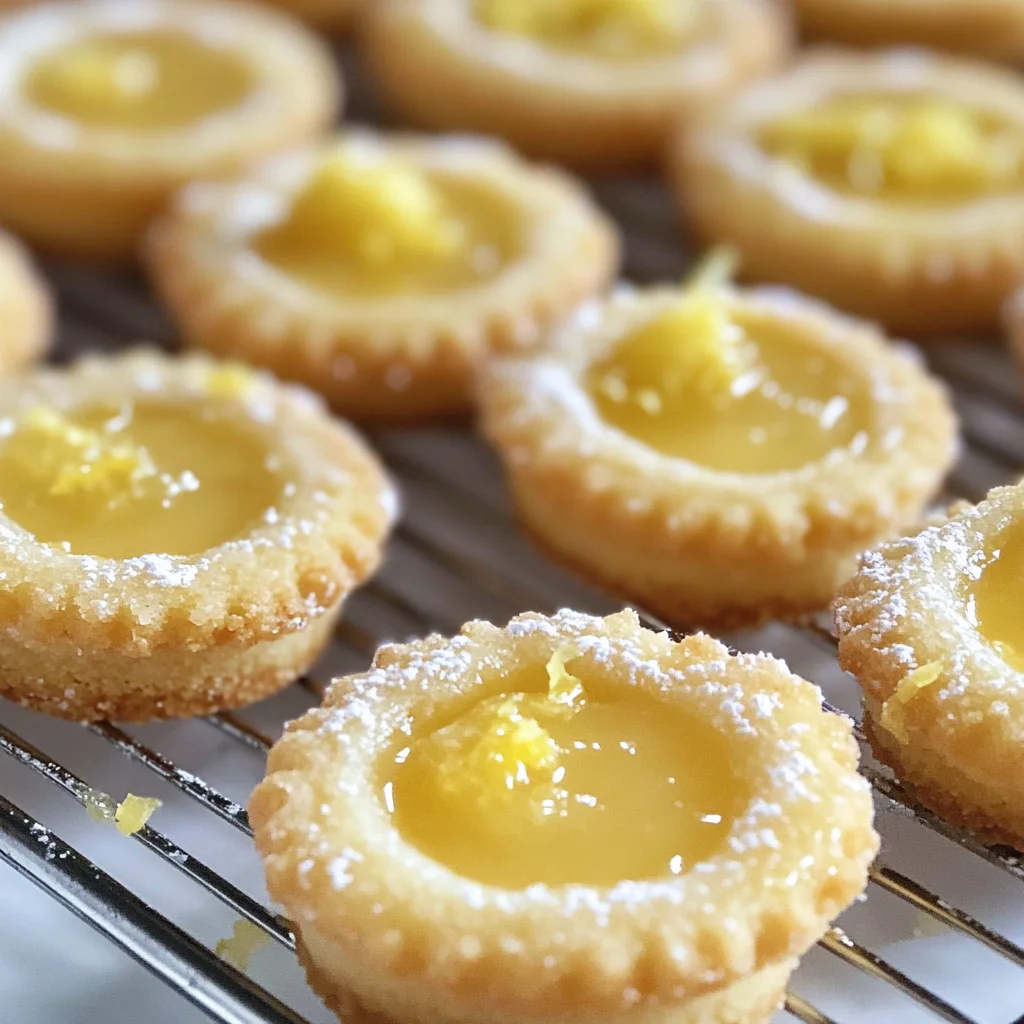
Final Touches: The Sweet Finish
Now that you’ve filled those delightful cookies with bright lemon curd goodness, let’s talk about presentation—because what’s more enchanting than serving beautiful treats? If you’re feeling adventurous (and I know you are!), garnish each filled cookie cup with a sprinkle of powdered sugar or even some extra zest for an added pop of color and flavor contrast. This simple touch elevates them from merely delicious to absolutely stunning!
Serve these Lemon Curd Cookies Recipe at summer gatherings or cozy afternoon teas—they’re bound to be an instant hit! I promise you’ll get compliments galore as friends savor each bite of these tender cookies bursting with citrusy joy. And remember, whether you’re sharing these with loved ones or savoring them all by yourself (no judgment here!), every bite should take you back to sun-drenched afternoons filled with laughter and love—a truly extraordinary culinary experience awaits you!
Storage and Enjoyment Tips for Your Lemon Curd Cookies Recipe
Now that your delightful Lemon Curd Cookies are baked to perfection, it’s time to savor each bite! These cookies, with their soft sugar cookie base and zesty lemon curd filling, are truly a slice of sunshine. But what happens if you have a few leftover? Don’t worry, I’ve got you covered! Properly storing these little treasures ensures that they maintain their flavor and texture, so you can enjoy them long after the baking session is over.
Storing Leftover Lemon Curd Cookies Recipe
To keep your Lemon Curd Cookies fresh and utterly irresistible, store them in an airtight container at room temperature. This is crucial because exposure to air can quickly cause them to dry out, losing that melt-in-your-mouth quality we all adore. When stored this way, they should stay delicious for about 4-5 days—although I doubt they’ll last that long in your home! For an extra trick to keep them moist, consider placing a slice of bread in the container; the cookies will absorb moisture from the bread, remaining soft and delightful. After storage, you’ll find that the flavors meld beautifully, creating an even more profound lemony taste experience. If you want to enjoy them warm again, simply pop them in the microwave for a few seconds—trust me; it will be like biting into sunshine!
Freezing Lemon Curd Cookies for Later
If you find yourself with an abundance of these tempting cookies or want to prepare ahead for a special occasion, freezing is an excellent option! To freeze them properly, place your cooled cookies in a single layer on a baking sheet until solid, then transfer them to a freezer-safe bag or container. This prevents them from sticking together and maintains their lovely shape. They can be frozen for up to three months—yes, three months of pure lemony delight waiting for you! When you’re ready to indulge, simply thaw them overnight in the fridge or leave them at room temperature for about an hour. The convenience of having these flavorful cookies on hand makes every day feel like a celebration!
Lemon Curd Cookies Recipe

Lemon Curd Cookies are a delightful treat that combines the soft, pillowy texture of sugar cookies with a tangy, homemade lemon curd filling. These thumbprint cookies are perfect for any occasion, bringing a burst of sunshine to gatherings or simply brightening up your day. Each bite offers a harmonious balance of sweetness and zestiness, making them an instant favorite among friends and family. Whether you’re hosting a summer picnic or enjoying an afternoon tea, these vibrant cookies are sure to impress. Plus, they are easy to make, allowing bakers of all skill levels to create something truly special!
- Prep Time: 30 minutes
- Cook Time: 12 minutes
- Total Time: 42 minutes
- Yield: About 24 cookies 1x
- Category: Dessert
- Method: Baking
- Cuisine: American
Ingredients
- 1 cup unsalted butter (softened)
- 2 cups granulated sugar
- 2 tablespoons lemon zest
- 2 large eggs (room temperature)
- 1 teaspoon vanilla extract
- 3 cups all-purpose flour
- 1 cup lemon juice
- 3 egg yolks
- 1½ tablespoons cornstarch
Instructions
- Preheat oven to 350°F (175°C). Grease baking sheets.
- In a bowl, cream together softened butter and sugar until light and fluffy.
- Beat in eggs one at a time, then stir in vanilla and lemon zest.
- In another bowl, whisk together flour, baking powder, baking soda, and salt.
- Gradually combine dry ingredients with the wet mixture until just mixed.
- Roll dough into balls and place on prepared baking sheets; create an indentation in the center of each ball.
- Bake for 10-12 minutes or until edges are golden; cool on wire racks.
- For the lemon curd: Heat lemon juice and sugar in a saucepan until sugar dissolves; whisk in egg yolks and cornstarch until thickened.
- Fill cooled cookie wells with lemon curd.
Nutrition
- Serving Size: 1 cookie (30g)
- Calories: 150
- Sugar: 12g
- Sodium: 60mg
- Fat: 7g
- Saturated Fat: 4g
- Unsaturated Fat: 2g
- Trans Fat: 0g
- Carbohydrates: 20g
- Fiber: <1g
- Protein: 2g
- Cholesterol: 35mg