Apple Pie Cinnamon Rolls
There’s something undeniably magical about the aroma of freshly baked cinnamon rolls wafting through the house, wrapping you in a warm embrace on a chilly morning. Imagine waking up to the soft, pillowy texture of these Apple Pie Cinnamon Rolls, each bite bursting with the comforting flavors of spiced apples and buttery dough. This recipe is not just about satisfying your sweet tooth; it’s an experience that brings together family and friends, melding memories with innovation. The secret lies in the apple butter filling, which elevates these rolls to an extraordinary level—each roll is a little piece of heaven, reminiscent of cozy autumn afternoons spent baking with loved ones. Trust me when I say, once you try these, they will become a cherished tradition in your home.
Baking this recipe feels like crafting a love letter to those who matter most in your life. The combination of tangy Granny Smith apples and warm spices creates a beautiful symphony of flavors that makes every gathering feel special. Whether it’s a holiday brunch or a simple Sunday morning, these Apple Pie Cinnamon Rolls are sure to draw people together around the table, sharing stories and savoring each delicious bite. And let’s not forget the luscious cream cheese frosting that finishes them off—it’s like draping these rolls in a blanket of sweet indulgence. So roll up your sleeves and get ready for an adventure in baking that will fill your heart as much as it fills your belly!
Apple Pie Cinnamon Rolls: A Sweet Comfort Wrapped in Dough
This delightful recipe transforms classic apple pie into soft, gooey cinnamon rolls that are perfect for breakfast or dessert. You’ll find that each step is filled with joy and anticipation as you watch dough rise and apples transform into a delectable filling. I can’t wait for you to experience the magic yourself!

Ingredients:
Embarking on this culinary journey requires some thoughtful selections from your pantry! Each ingredient plays a vital role in creating the perfect blend of flavors and textures that make these Apple Pie Cinnamon Rolls truly special.
- 2 medium Granny Smith apples (diced). These tart beauties are quintessential for adding brightness and balance to our rolls. Their crisp texture holds up beautifully during baking, delivering bursts of flavor that pair perfectly with the sweetness of the cinnamon sugar filling. When purchasing apples, look for firm fruit without bruises; you want them fresh so they can shine when cooked down into deliciousness.
- 1/4 cup apple butter. This thick, luscious spread adds depth and moisture to our filling while enhancing the apple flavor without being overly sweet—think of it as liquid gold! If you don’t have apple butter on hand, feel free to substitute with homemade applesauce; just reduce any added sugars since apple butter is already sweetened.
- 3 tablespoons granulated sugar. This ingredient is essential for sweetness but also helps create that lovely caramelization during baking, contributing to both flavor and color. I recommend using fine granulated sugar for even mixing; it dissolves more easily into our filling.
- 2 tablespoons water & 2 teaspoons water (used separately). Water may seem simple, but it’s crucial here for hydrating our ingredients during cooking—especially when we’re softening those diced apples before they join the party in our rolls!
- 1 teaspoon lemon juice. The acidity from lemon juice brightens up our filling and balances out the sweetness while preventing the apples from browning too quickly—a vital step if you’re prepping ahead!
- 1 teaspoon ground cinnamon & 2 teaspoons ground cinnamon (used separately). This warm spice is what gives our rolls their signature flavor profile! It invokes feelings of comfort and nostalgia; I promise you’ll be able to smell this heavenly scent long before they’re done baking.
- 1/8 teaspoon fine sea salt. Salt might seem minor compared to its sweeter counterparts but trust me—this tiny amount amplifies all other flavors beautifully! It’s non-negotiable if you want well-rounded taste.
- 1 teaspoon cornstarch. This thickening agent is key for creating a luscious filling by preventing excess liquid from making our dough soggy during baking—a crucial step if we want those beautiful swirls intact!
- 3/4 cup water & 1/4 cup bread flour (used separately). The combination of water with bread flour nourishes our dough; bread flour offers higher protein content than all-purpose flour which leads to better rise and chewy texture.
- 3 2/3 cups bread flour (See notes below for measuring). It’s important to measure carefully here; too much or too little will impact both consistency and flavor! Bread flour gives us strength and structure—helping our rolls hold their shape as they puff up beautifully.
- 1/3 cup granulated sugar (for dough). Again, sweetness comes into play—but this time it’s about enhancing dough flavor while also aiding yeast activation!
- 2 teaspoons instant yeast. Instant yeast works wonders here as it allows us to skip lengthy proofing times while still achieving incredible rise—a game-changer if you’re short on time but don’t want to compromise quality!
- 1 teaspoon fine sea salt (for dough). Similar reasoning applies here as earlier; balance is key!
- 1/3 cup whole milk (room temperature) & 1/3 cup heavy cream (room temperature). These two creamy elements enrich our dough’s texture significantly while adding subtle richness—it becomes utterly intoxicating! Using them at room temperature ensures better incorporation into dry ingredients.
- 1 large egg (room temperature). Eggs act as binders here—they give structure while also enriching flavor! Room temperature eggs incorporate more smoothly into mixtures than cold ones would.
- Tangzhong (from recipe above) – This Japanese technique involves cooking some flour with water beforehand—it results in extra fluffy results due to increased moisture retention!
- 6 tablespoons unsalted butter (room temperature) & 1/2 cup unsalted butter (room temperature) (used separately). Butter introduces richness that simply cannot be replicated—it creates layers upon layers within each roll when properly incorporated at room temperature!
- 2/3 cup brown sugar (packed) & 4 tablespoons unsalted butter (room temperature) (used separately). Brown sugar adds moisture along with deep caramel notes while melted butter helps achieve gooey goodness over top before baking begins!
- 2 ounces cream cheese (room temperature) & 1 cup powdered sugar & 2 1/2 tablespoons heavy cream & 2 tablespoons apple butter (for frosting). These elements combine into an irresistible frosting that’s creamy yet light enough not overpowering sweetness—all while keeping true flavors front-and-center throughout this experience!
You see how every single ingredient plays its part? Each one contributes something distinct yet harmonious towards achieving perfection within these rolls!
Equipment You’ll Need:
Before diving headfirst into preparation mode, let’s gather some essential tools that’ll support us along this delightful journey! Having everything organized will make your experience smooth sailing—from assembly through baking.
- Mixing bowls – A variety of sizes ensures you’re prepared at any stage—from mixing dry ingredients together upfront right through combining everything later on! Opt for glass or stainless steel that won’t retain odors over time.
- Measuring cups/spoons – Precision matters immensely here since slight variations could change outcomes drastically—investing in reliable measuring tools ensures success every single time!
- Stand mixer with paddle attachment or hand mixer – Both options work well when creaming butter/sugar together until light/fluffy textures emerge—which leads directly towards achieving proper aeration needed later on as things rise beautifully post-baking process!
- Rolling pin – Essential for rolling out dough evenly; look for one that’s comfortable within hands allowing proper control without excessive effort involved during application phase.
- Baking pan or dish (9×13-inch recommended) – Ensure even heat distribution across all surfaces so every element cooks through adequately without burning edges prematurely—glass pans work wonderfully too since they allow monitoring progress visually throughout duration spent inside oven environment.
As we prepare ourselves mentally alongside gathering necessary supplies required—let’s dive deeper into creating those warm Apple Pie Cinnamon Rolls together next!
Preparing the Apple Pie Cinnamon Rolls
Step 1: Creating Your Tangzhong
To start off strong—and trust me—we must first prepare what’s known as Tangzhong: mixing equal parts flour/water together over gentle heat until forming thick paste-like consistency resembling pudding should arise after several minutes stirring occasionally until bubbles form around edges indicating readiness! This process serves two purposes: increasing moisture retention within final product ensuring rolls remain soft longer AND helping activate gluten strands leading towards chewier final textures overall—making every bite count even more deliciously memorable than last one enjoyed previously!
Step 2: Soaking Those Apples
Next up? We need those diced Granny Smith apples softened nicely before incorporating them fully into filling mixture later on down road! Begin by combining diced apples along with measured sugar/lemon juice/cinnamon/water inside medium saucepan heating over medium-low flame stirring gently until juices begin bubbling gently around sides allowing natural sweetness emerge from fruits themselves heightening essence further adding delightful fragrance wafting throughout kitchen space surrounding us all present during creation time shared amongst friends/family members gathered close by enjoying moments spent together sharing laughter amidst culinary chaos unfolding around table set perfectly waiting patiently enjoy final product soon-to-be created effortlessly right next door nearby…
Step 3: Mixing Dough Ingredients
While apple mixture simmers away happily releasing aromas reminiscent fall festivities approaching soon—let’s gather remaining dry ingredients mixing them thoroughly within spacious separate bowl starting off by whisking together measured bread flours/sugar/salt until uniform consistency achieved throughout ensuring no lumps exist anywhere hiding from view lurking beneath surface waiting surprise us unexpectedly later once combined fully alongside wet components prior setting aside momentarily allowing rest keeping covered warm spot nearby awaiting arrival next important stages unfold where magic happens gradually shaping outcome desired ultimately leading us through journey taken today…
Step 4: Developing Gluten Structure
Now comes time activate instant yeast mixing entire contents alongside room temp liquids including milk/heavy cream egg/tangzhong created earlier whisking vigorously until smooth integrating perfectly followed gradually introducing dry mixture slowly bit-by-bit folding gently utilizing spatula ensuring no streaks visible showcasing incorporation complete finally kneading dough lightly onto floured surface working methodically pushing/pulling folding repeatedly until elastic developed approximately eight minutes total elapsed thereafter letting rise covered warm area double volume expected within hour timeframe passing swiftly by enjoying sight seeing transformation happening right before eyes witnessing changes unfold miraculously midst process engaging senses fully captivated surroundings growing anticipation building excitement heightened levels…
And there you have it—the beginning steps toward crafting those glorious Apple Pie Cinnamon Rolls! Keep going strong because we’re just getting started on this flavorful adventure together…
Step 5: The Art of the Dough – Kneading to Perfection
Now that you’ve prepared your ingredients, it’s time to bring them together into a beautiful dough that will form the base of your Apple Pie Cinnamon Rolls. In a large mixing bowl, combine the bread flour, sugar, instant yeast, and salt, creating a dry mixture that is the backbone of our rolls. Trust me on this: measuring your flour accurately is absolutely paramount. I encourage you to use the spoon-and-level technique—spooning the flour into your measuring cup and leveling it off for precision. This simple act can make all the difference between light and fluffy rolls and dense little bricks.
Once you’ve got your dry ingredients ready, it’s time to add in those rich liquids—the milk, heavy cream, and egg—along with our precious Tangzhong. (If you’re wondering what Tangzhong is, it’s basically a cooked mixture of flour and water that helps to create an incredibly soft texture in baked goods.) Now comes the kneading! Flour your countertop lightly and turn out the mixture onto it. Knead for about 8-10 minutes; this step is crucial because kneading develops gluten, which gives our rolls their delightful chewiness. You want to aim for a smooth, elastic dough that springs back when poked gently—a sure sign that it’s ready to rise. If your dough feels sticky or wet, don’t hesitate to sprinkle in just a touch more flour as needed; however, be careful not to go overboard!
Step 6: The First Rise – A Crucial Transformation
After kneading, shape your dough into a ball and place it in a lightly greased bowl—this is where the magic begins! Cover it with a clean kitchen towel or plastic wrap and set it in a warm environment. The ideal temperature for rising is around 75°F (24°C) or slightly warmer; I often find my oven is perfect if I turn it on for just a minute before turning it off again—just enough warmth without cooking the dough! Now comes the waiting game—let it rise for about 1-2 hours until it doubles in size.
Why is this patience so important? Well, during this time, yeast ferments and produces carbon dioxide gas, which creates those airy pockets we crave in our cinnamon rolls. This process also enhances the flavor of the dough through fermentation; you’ll be rewarded with an aroma that wafts through your home like a warm hug when you finally roll out your dough. Keep an eye on it; if you poke it gently with your finger and the indentation remains without springing back too quickly, you know it’s ready.
Step 7: Crafting Your Filling – A Symphony of Flavors
While waiting for that dough to rise beautifully, let’s turn our attention to crafting our apple filling because truly, this is where we get to infuse those rich flavors reminiscent of classic apple pie! Start by dicing your Granny Smith apples into bite-sized pieces; their tartness complements the sweetness perfectly. In a medium saucepan over medium heat, combine these diced apples with apple butter, granulated sugar, water, lemon juice, ground cinnamon, and sea salt. Stir everything together gently but thoroughly until combined.
As this mixture heats up over about 5-7 minutes—you’ll want to keep stirring occasionally—you’ll notice how the apples begin to soften and release their natural juices. This step is essential because cooking down the apples not only concentrates their flavor but also helps create a cohesive filling that won’t leak out while baking. Once softened but still holding their shape (think tender but not mushy!), add cornstarch mixed with water to thicken everything up nicely; stir continuously until thickened—this should take just another minute or two on the heat before removing from heat altogether. Let your filling cool completely; trust me here—it will be much easier to spread when it’s not hot.
Step 8: Rolling It All Together – The Joyful Assembly
With your beautiful dough having risen luxuriously and your apple filling cooling nearby like an excited friend waiting to join in on the fun, we now reach one of my favorite parts: rolling everything together! Begin by preheating your oven at this point so it’s nice and warm when you’re ready for baking—set it around 350°F (175°C). Lightly flour your work surface again as you carefully punch down your risen dough—a satisfying moment where all that air escapes! Roll out your dough into a large rectangle approximately 16×12 inches; don’t worry if it’s not perfect—homemade beauty lies in its individuality!
Once rolled out evenly about half an inch thick (the texture should feel soft yet sturdy), spread an even layer of softened unsalted butter across its surface—the butter acts like liquid gold here! Next comes that heavenly apple filling you prepared earlier; spread it evenly over the buttered surface while leaving about an inch border around all edges—this will help seal everything later on when we roll up our masterpiece! Combine brown sugar with ground cinnamon and sprinkle it generously atop this mixture for added sweetness—the kind that makes each bite utterly intoxicating.
To roll everything up tightly without squeezing too hard (we want those lovely spirals), start at one long edge and gently fold over while tucking in as you go along until you’ve reached the opposite edge. Pinch those seams closed like wrapping up a precious gift! Now slice into even pieces using dental floss or a sharp knife (seriously—dental floss works wonders here!) so they can fit snugly into your baking dish—aim for around 12 rolls total.
There you have it! Your delightful Apple Pie Cinnamon Rolls are ready to steal hearts at any holiday gathering or cozy brunch moment—and believe me when I say there won’t be any leftovers left behind either! Prepare yourself for compliments galore as friends gather ’round eager for another bite filled with appreciation—not just flavor crafted within—but lovingly made by you! Happy baking!
Storage and Enjoyment Tips for Your Apple Pie Cinnamon Rolls
Now that you’ve crafted these delightful Apple Pie Cinnamon Rolls, it’s time to savor the fruits of your labor! As the sweet, spiced aroma wafts through your kitchen, you might find it hard to resist diving right in. But if you happen to have leftovers—or if you’re just a little too full after that first glorious roll—don’t worry! I promise you, these rolls are just as delicious the next day (or even the day after) if stored properly.
Storing Leftover Apple Pie Cinnamon Rolls
To keep your Apple Pie Cinnamon Rolls fresh and delectably soft, store them in an airtight container at room temperature. Ideally, they should be consumed within 3-4 days for optimal flavor and texture, but if you’re like me and can’t help but eat a few more than planned, they can hold their own for up to a week. A little pro tip from my own kitchen: placing a slice of bread in the container can work wonders at maintaining moisture—trust me on this one; it’s a game changer! While they might not be as fluffy after storage as when they first came out of the oven, a quick reheating in the microwave or toaster oven can bring back their warm glory. Just 10-15 seconds in the microwave will make them ooze with that comforting cream cheese frosting once again!
Freezing Apple Pie Cinnamon Rolls for Later
If you want to keep some of that apple goodness for another day—or perhaps you’re planning ahead for a gathering—freezing these rolls is an excellent option! To freeze your Apple Pie Cinnamon Rolls properly, allow them to cool completely before wrapping each roll individually in plastic wrap and then placing them inside a freezer-safe bag. This way, they’ll stay fresh for about 2-3 months without losing their scrumptious charm. When you’re ready to enjoy one (or two!), simply remove them from the freezer and let them thaw overnight in the fridge. The next day, pop them into an oven preheated to 350°F (175°C) for about 10-15 minutes or until warmed through. This convenience factor is absolutely paramount; having homemade treats on hand makes every morning feel like a special occasion!
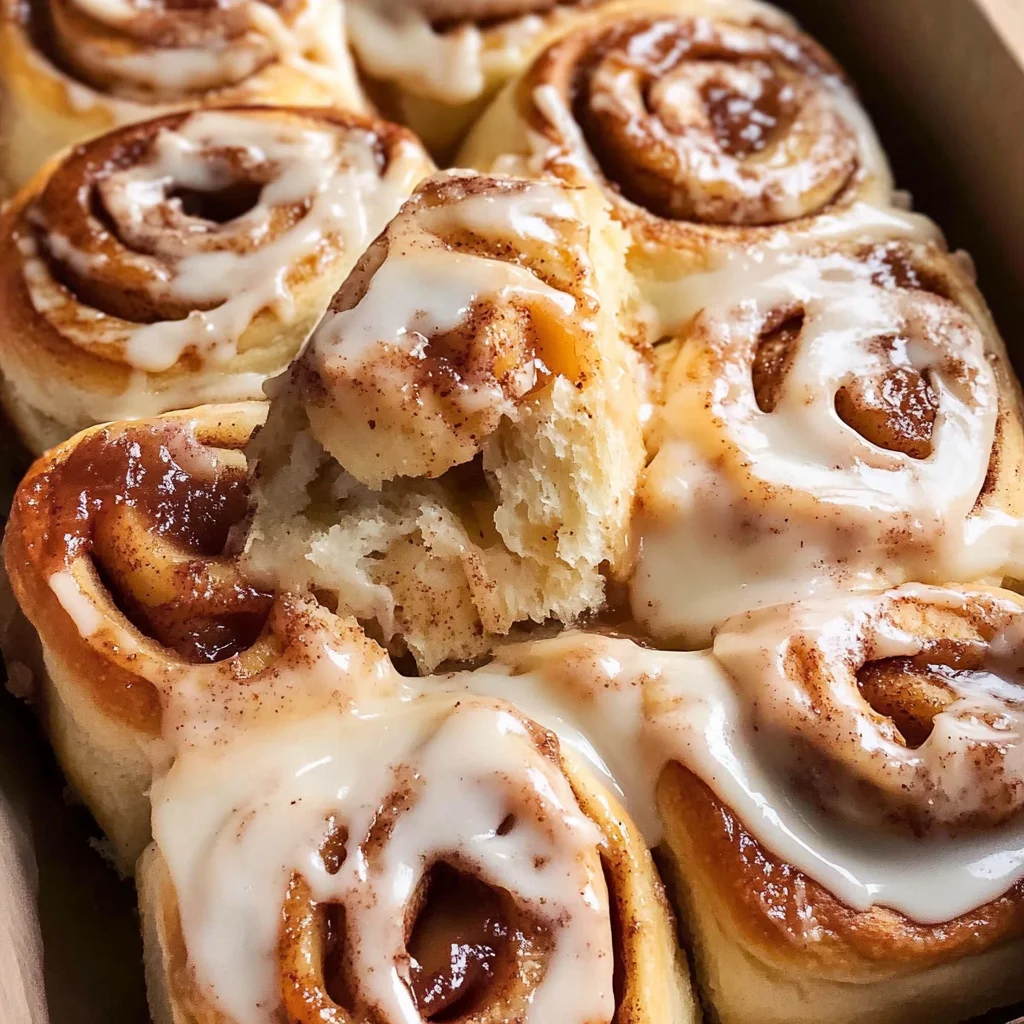
Apple Pie Cinnamon Rolls

Apple Pie Cinnamon Rolls are the ultimate sweet treat, blending the warm, comforting flavors of classic apple pie with soft, gooey cinnamon rolls. Each roll is filled with a luscious apple butter and cinnamon mixture, creating delightful swirls that will fill your home with an irresistible aroma. Topped with a creamy frosting, these rolls are perfect for breakfast, brunch, or dessert. Gather your loved ones around the table and enjoy these delightful pastries that evoke cozy memories and moments of togetherness.
- Prep Time: 45 minutes
- Cook Time: 30 minutes
- Total Time: 1 hour 15 minutes
- Yield: Approximately 12 servings 1x
- Category: Breakfast/Dessert
- Method: Baking
- Cuisine: American
Ingredients
- 2 medium Granny Smith apples (diced)
- 1/4 cup apple butter
- 3 tablespoons granulated sugar
- 2 tablespoons water
- 2 teaspoons water
- 1 teaspoon lemon juice
- 1 teaspoon ground cinnamon
- 2 teaspoons ground cinnamon
- 1/8 teaspoon fine sea salt
- 1 teaspoon cornstarch
- 3/4 cup water
- 1/4 cup bread flour
- 3 2/3 cups bread flour
- 1/3 cup granulated sugar (for dough)
- 2 teaspoons instant yeast
- 1 teaspoon fine sea salt (for dough)
- 1/3 cup whole milk (room temperature)
- 1/3 cup heavy cream (room temperature)
- 1 large egg (room temperature)
- Tangzhong (from recipe above)
- 6 tablespoons unsalted butter (room temperature)
- 2/3 cup brown sugar (packed)
- 4 tablespoons unsalted butter (room temperature)
- 2 ounces cream cheese (room temperature)
- 1 cup powdered sugar
- 2 1/2 tablespoons heavy cream
- 2 tablespoons apple butter (for frosting)
Instructions
- Prepare Tangzhong by combining equal parts flour and water in a saucepan over low heat until thickened. Set aside to cool.
- Soften diced apples in a saucepan with apple butter, sugar, lemon juice, and cinnamon over medium heat for about 5 minutes. Allow to cool.
- In a mixing bowl, whisk together bread flour, granulated sugar for dough, instant yeast, and salt.
- Add milk, cream, egg, and cooled Tangzhong to dry ingredients. Knead dough for about 8-10 minutes until elastic.
- Let dough rise covered in a warm spot until doubled in size (about 1-2 hours).
- Roll out dough into a rectangle; spread softened butter and apple filling evenly across it.
- Roll tightly and slice into individual rolls; place in a greased baking dish.
- Let rolls rise for about 30 minutes before baking at 350°F (175°C) for 25-30 minutes until golden brown.
- For frosting: whip cream cheese and butter until smooth; gradually add powdered sugar and cream until fluffy.
- Drizzle frosting over warm rolls before serving.
Nutrition
- Serving Size: 1 roll (90g)
- Calories: 320
- Sugar: 18g
- Sodium: 200mg
- Fat: 12g
- Saturated Fat: 7g
- Unsaturated Fat: 4g
- Trans Fat: 0g
- Carbohydrates: 46g
- Fiber: 2g
- Protein: 5g
- Cholesterol: 40mg