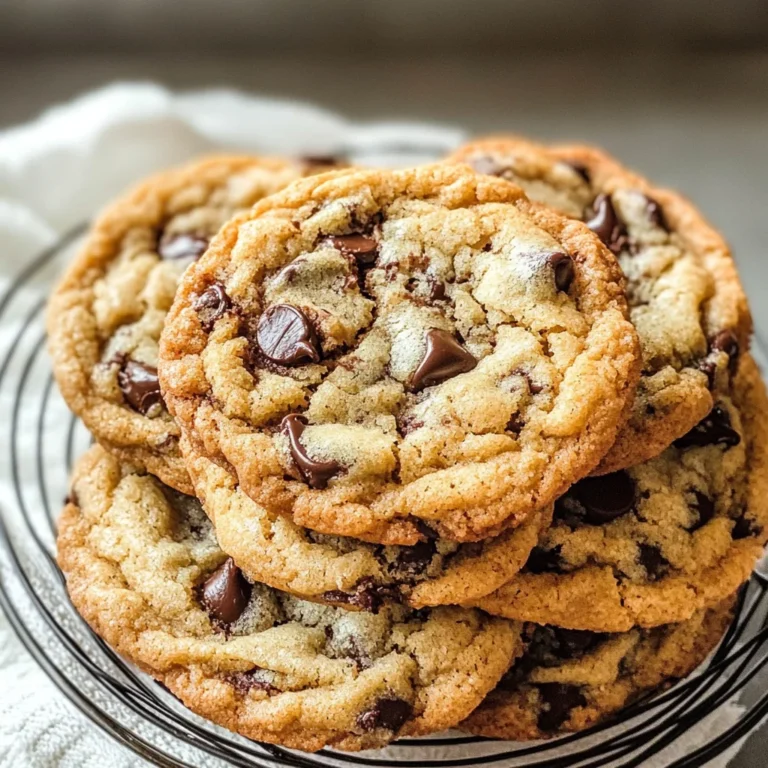
Espresso Fudge Cookies
It’s a crisp afternoon, and I’m nestled in my kitchen, the aroma of espresso wafting through the air, mingling with the sweet scent of chocolate. It’s moments like these that make me fall in love with baking all over again. Today, we’re diving into a delightful recipe that brings together two of life’s greatest pleasures: coffee and chocolate. Trust me when I say these Espresso Fudge Cookies are more than just a treat; they’re an experience that wraps you in warmth and comfort, like a hug from an old friend. Each bite is a symphony of flavors that dances on your tongue, perfectly balanced between rich cocoa and the bold kick of espresso.
What makes these cookies truly special is how they capture that perfect moment when coffee meets chocolate—a deep connection that many people cherish. You see, every time I indulge in one of these cookies, I’m transported to cozy evenings spent with friends, sharing laughter and stories over steaming mugs of coffee. These cookies are not just about satisfying a sweet tooth; they embody the spirit of togetherness, making them ideal for gatherings or simply enjoying during quiet moments at home. So grab your apron and let’s embark on this delicious journey together!

Espresso Fudge Cookies: A Heavenly Union of Coffee and Chocolate
These Espresso Fudge Cookies are not only for the caffeine aficionado but also for anyone who loves a decadent, fudgy treat! With each bite, you’ll discover how well espresso complements the sweetness of chocolate—it’s truly magical. Whether you’re looking to impress guests or simply want to indulge yourself after a long day, this recipe is your ticket to cookie bliss.
Ingredients:
As we gather our ingredients for this culinary adventure, think of them as essential players in a beautiful symphony—each one contributing its unique notes to create something extraordinary.
- 2 cups all-purpose flour. This is the backbone of our cookies! All-purpose flour provides structure while allowing the cookies to remain soft and chewy. When measuring flour, be sure to spoon it into your measuring cup rather than scooping directly from the bag; this helps prevent compacting and ensures you have just the right amount for our recipe. If you find yourself out of all-purpose flour, you can substitute it with a mix of whole wheat and all-purpose flour for added depth.
- ¾ cup unsweetened cocoa powder. Here’s where we get that rich chocolate flavor that pairs so beautifully with espresso! Cocoa powder adds both color and depth to our cookies while keeping them wonderfully moist. Look for high-quality Dutch-processed cocoa powder if possible; its smoother taste will elevate your cookies to another level. Remember, do not confuse sweetened cocoa with unsweetened—this distinction is crucial because we’re balancing sweetness throughout our recipe.
- 1 tsp baking soda. This little powerhouse is responsible for helping our cookies rise! Baking soda reacts with acidity in our ingredients (like brown sugar) to create carbon dioxide bubbles that give our cookies their light texture. Always check your baking soda’s freshness by adding a small amount to vinegar; if it fizzes vigorously, it’s good to go!
- ½ tsp salt. Salt is often overlooked but plays an absolutely paramount role in enhancing flavors! It balances sweetness and brings out the richness in both chocolate and espresso. Without salt, your cookies may taste flat or overly sweet—so don’t skip this ingredient!
- 1 cup unsalted butter, at room temperature. Butter is crucial for creating that creamy texture in our batter! Using unsalted butter allows us control over the salt content in our cookies; plus, bringing it to room temperature ensures it blends seamlessly with sugars for optimal creaming—this will make your dough light and fluffy.
- 1 cup granulated sugar. This sugar will help sweeten our cookies while providing structure through caramelization during baking. The granulated variety creates a crisp edge while allowing us to maintain a chewy center—a perfect contrast!
- ¾ cup brown sugar, packed. Brown sugar adds moisture thanks to its molasses content which results in soft, fudgy centers—a must-have for any cookie lover! Make sure to pack it firmly into your measuring cup so you get every bit of sweetness possible!
- 2 large eggs. Eggs are vital for binding ingredients together while adding richness to our dough! They provide moisture and contribute to the cookie’s overall texture—aiming for room temperature eggs ensures they incorporate evenly without cooling down your batter.
- 1 tsp pure vanilla extract. Vanilla extract adds warmth and depth—a secret ingredient that elevates the flavor profile beautifully! Always opt for pure vanilla over imitation; trust me on this one—it makes all the difference.
- 2 tbsp finely ground espresso beans. Here’s where we infuse our cookies with that irresistible coffee essence! Finely grinding fresh espresso beans releases their oils and flavors more effectively than instant coffee or coarse grounds would—this step is non-negotiable if you want truly rich flavor throughout each cookie.
- 1 ½ cups chocolate chips (semi-sweet or dark). Chocolate chips add bursts of melty goodness throughout each bite! Use high-quality semi-sweet or dark chocolate chips depending on your preference—dark chocolate offers an intense flavor contrast against the sweetness which can be utterly intoxicating.

Equipment You’ll Need:
Having the right tools can make all the difference between an enjoyable baking experience or a frustrating one! Let’s gather some essential equipment so we can breeze through this process smoothly.
- **Mixing bowls – A set of sturdy mixing bowls will be your best friend here! Choose ones that are easy to grip since you’ll be doing quite a bit of stirring and folding as we combine our ingredients into one harmonious batter.’
- **Whisk – A good whisk will help aerate dry ingredients before mixing them with wet components ensuring even distribution throughout dough which leads to consistent results.’
- **Electric mixer – An electric mixer saves time when creaming butter and sugars together giving you smooth consistency effortlessly.’
- **Cookie scoop or spoon – A cookie scoop takes guesswork out portioning dough keeping sizes uniform leading them bake evenly.’
- **Baking sheets lined with parchment paper or silicone mats – These ensure no sticking occurs during bake time making clean-up much easier afterward too!’
Now that we’re equipped with all we need let’s dive into preparing these delightful Espresso Fudge Cookies!
Preparing the Espresso Fudge Cookies
Step 1: Preheat Your Oven
First things first: your oven needs some love too! Preheat it to 350°F (175°C) so it’s nice and hot by the time we’re ready for baking—this will help achieve those perfectly set edges while keeping centers delightfully soft. Lining two baking sheets with parchment paper or silicone mats prevents sticking; trust me when I say nothing ruins cookie joy faster than struggling to pry them off trays later!
Step 2: Whisk Together Dry Ingredients
In a medium bowl—make sure it’s spacious enough—we’re going whisk together our flour, cocoa powder, baking soda, and salt until fully combined (about 30 seconds should do). This process helps distribute ingredients evenly throughout ensuring no clumps form later on when mixed into wet components which could result uneven textures across finished product!
Step 3: Cream Butter & Sugars
Now comes my favorite part—the creaming stage! In another larger bowl (or using stand mixer if available), beat together room temperature butter along granulated sugar brown sugar until mixture becomes light fluffy appearance around 3 minutes should suffice here.’ This vital step incorporates air into mixture resulting lighter textured end result—you’ll know it’s perfect once pale color change occurs indicating transformation underway!’
Step 4: Add Eggs & Flavorings
Once creaming achieved it’s time introduce eggs into mix one at time allowing full incorporation before next addition.’ Don’t rush this step as proper blending creates uniformity within dough leading better rise during bake time!’ Follow up by pouring vanilla extract alongside finely ground espresso beans ensuring robust flavor permeates entire batch—oh how intoxicating those aromas become already!
I can’t wait for you to try these delightful Espresso Fudge Cookies—they’re bound to become a new favorite you’ll cherish sharing with friends (or savoring all on your own!). Happy baking!
Step 5: Embrace the Dry Ingredients
Now that you’ve whisked together your flour, cocoa powder, baking soda, and salt in a medium bowl, it’s time to bring a little magic into the mix. Gradually add those fluffy, dry ingredients to your luscious butter-sugar mixture. This step is crucial because it allows you to control the incorporation of these elements into the wet ingredients without creating a floury cloud in your kitchen! I recommend adding the dry mix in three additions—this method helps ensure a well-combined batter that avoids overmixing. You see, overmixing can lead to tough cookies, and we absolutely want our Espresso Fudge Cookies to be soft and chewy with that delightful melt-in-your-mouth quality.
As you gently fold in the flour mixture using a spatula or wooden spoon, take a moment to savor the rich aroma wafting up from the bowl; this is where coffee lovers will start to feel their hearts race with excitement! The goal here is to combine everything until you see no visible streaks of flour, but do take care not to go overboard—there should still be some air remaining in your dough. This air is essential for creating that perfect texture as they bake. Trust me on this one; it’s all about finding that balance between mixing enough for structure and keeping it tender for the ultimate cookie experience.
Step 6: Fold in Chocolate Delight
This next step is where we make things truly decadent! It’s time to fold in those glorious chocolate chips. Whether you choose semi-sweet or dark chocolate, these little gems will create pockets of molten richness within each cookie that will have your taste buds dancing with delight. Using a spatula, gently incorporate the chocolate chips into your dough with careful folding motions—almost like you’re cradling them rather than stirring aggressively. This gentle approach ensures that none of those beautiful chips break apart and lose their potential for oozy goodness when baked.
Take a moment here to appreciate how everything has come together—the glossy sheen of your dough, speckled with bits of chocolate waiting to melt into sheer bliss. At this point, you may want to sneak a little taste (I won’t tell anyone!). Remember though, this step is about creating harmony; ensuring every cookie has an even distribution of chocolate is non-negotiable for optimal flavor experience. So don’t rush through this—enjoy the anticipation of what’s to come!
Step 7: Scoop and Shape Your Cookies
With your sumptuous dough complete, it’s time to give these cookies their final form before they embark on their baking journey! Grab a cookie scoop or just a regular spoon if that’s more your style—either way works wonderfully. Start dropping heaping tablespoonfuls of dough onto your prepared baking sheets. Give each scoop some space; about two inches apart will suffice since these little beauties will spread as they bake—not too much but enough to create that lovely shape we’re after!
As you place each scoop on the baking sheet, take a moment to admire how they look; there’s something so satisfying about seeing them lined up and ready for action! If you’re feeling particularly fancy, you could even press a few extra chocolate chips on top of each mound of dough for an eye-catching finish—you know how they say we eat with our eyes first? That little touch goes a long way in making them irresistible! Now comes the fun part: don’t forget that you can use this opportunity to engage your kids or friends for some cookie-scooping fun—after all, sharing joy while baking makes it all the more special!
Step 8: Bake Until Perfection
Preheat your oven to 350°F (175°C) if you haven’t already done so—it’s absolutely paramount that our cookies bake evenly from start to finish. Once that timer goes off at around 10-12 minutes later, you’ll be greeted by an utterly intoxicating aroma filling your kitchen—a smell so heavenly it might just whisk everyone in the house into the room! Keep an eye on them as they bake; you want the edges set while allowing the centers to stay soft—this contrast creates that delightful chewy texture.
To check for doneness without sacrificing any cookies prematurely (because let’s face it, nobody wants underbaked dough!), gently touch one of the edges with a fingertip; if it feels firm yet gives slightly under pressure while still looking slightly glossy on top, they’re ready! Remember: cookies continue cooking even after being pulled from the oven due to residual heat—this transformative effect is what ensures they remain perfectly chewy rather than turning crispy.
Next Major Phase – Finishing Touches
Step 9: Cooling Down for Ultimate Enjoyment
Once those gorgeous Espresso Fudge Cookies are out of the oven and have cooled slightly on their baking sheets (give them about five minutes), it’s important not to rush this next step! Carefully transfer them onto wire racks using a spatula so they can cool completely. Cooling allows flavors to deepen and develop further while achieving that ideal texture—still soft yet firm enough not to crumble at first bite.
Patience pays off here; I promise you won’t regret giving them this time! As they cool down, take a moment for yourself—a cup of coffee or tea would pair beautifully with these cookies right now—and savor what culinary magic you’ve created! Once cooled completely (if you can resist diving right in!), serve them up with pride or store them in an airtight container at room temperature for up to five days—or freeze some if you’re lucky enough not to devour every last one immediately.
And there you have it—the ultimate Espresso Fudge Cookies! These are more than just dessert; they’re little portals filled with rich flavors and memories waiting to happen. Each bite offers warmth and comfort—a sweet reminder of why we love baking and sharing our creations with those we cherish most. Now go ahead, share these delightful gems with family and friends—or keep them all for yourself (no judgment here!). Happy baking!
Storage and Enjoyment Tips for Your Espresso Fudge Cookies
Now that your kitchen is filled with the intoxicating aroma of freshly baked Espresso Fudge Cookies, you might be wondering how to savor these delights beyond the first batch. Trust me when I say that while they’re utterly irresistible right out of the oven, learning how to store them can elevate your cookie experience to new heights. With a few simple tips, you can ensure that every bite remains soft, chewy, and packed with that rich coffee flavor.
Storing Leftover Espresso Fudge Cookies
To keep your Espresso Fudge Cookies in pristine condition, it’s essential to choose the right type of container. A snug, airtight container is absolutely paramount—this will help lock in moisture and prevent them from drying out too quickly. If you have a batch left over (which I’m sure will be a challenge!), these cookies will keep beautifully at room temperature for about 4-5 days with proper storage. For an extra tip, consider placing a slice of bread in the container; it’s a little trick I swear by! The cookies absorb moisture from the bread slice, keeping them soft and satisfying for longer. Even after a few days, you’ll find that they still boast their rich flavor and delightful fudginess—though trust me when I say they might disappear before you even get to worry about that! And if you want to enjoy them warm again, simply pop one in the microwave for about 10-15 seconds—it’s like a comforting hug all over again!
Freezing Espresso Fudge Cookies for Later
If you want to make your baking efforts last even longer, freezing these divine cookies is an incredible option that brings convenience right into your kitchen! To freeze your Espresso Fudge Cookies perfectly, simply let them cool completely and then layer them between sheets of parchment paper in a freezer-safe bag or container. It’s best to seal them tightly to avoid freezer burn—no one wants that to dull their delicious flavors! These cookies can be stored in the freezer for up to three months without losing their charm. When you’re ready to indulge again, just take out as many as you desire and let them thaw at room temperature or warm them up directly from frozen in the oven at 350°F (175°C) for about 8-10 minutes. The sheer joy of pulling out a cookie from the freezer on a busy day or unexpected guests is such a rewarding experience—trust me; it feels like having a little piece of magic waiting just for you!
Espresso Fudge Cookies

Dive into decadent Espresso Fudge Cookies that blend rich coffee and sweet indulgence—perfect for any occasion! Bake yours today!
- Prep Time: 20 minutes
- Cook Time: 12 minutes
- Total Time: 32 minutes
- Yield: Approximately 24 cookies 1x
- Category: Dessert
- Method: Baking
- Cuisine: American
Ingredients
- 2 cups all-purpose flour
- ¾ cup unsweetened cocoa powder
- 1 tsp baking soda
- ½ tsp salt
- 1 cup unsalted butter (room temperature)
- 1 cup granulated sugar
- ¾ cup brown sugar (packed)
- 2 large eggs (room temperature)
- 1 tsp pure vanilla extract
- 2 tbsp finely ground espresso beans
- 1½ cups chocolate chips (semi-sweet or dark)
Instructions
- Preheat your oven to 350°F (175°C) and line two baking sheets with parchment paper.
- In a medium bowl, whisk together flour, cocoa powder, baking soda, and salt.
- In a large bowl, cream the room temperature butter with granulated and brown sugars until light and fluffy.
- Add eggs one at a time, mixing well after each addition. Stir in vanilla extract and ground espresso beans.
- Gradually incorporate the dry ingredients into the wet mixture until just combined.
- Fold in chocolate chips gently to maintain their shape.
- Using a cookie scoop or spoon, drop heaping tablespoonfuls of dough onto prepared baking sheets, leaving space between each cookie.
- Bake for 10-12 minutes until edges are set but centers remain soft. Allow cooling on sheets for 5 minutes before transferring to wire racks.
Nutrition
- Serving Size: 1 cookie
- Calories: 150
- Sugar: 12g
- Sodium: 80mg
- Fat: 7g
- Saturated Fat: 4g
- Unsaturated Fat: 2g
- Trans Fat: 0g
- Carbohydrates: 18g
- Fiber: 1g
- Protein: 2g
- Cholesterol: 20mg