Easter Cookie Cake
There’s something truly magical about baking, don’t you think? It’s an enchanting journey that transcends mere measurements and ingredients; it’s a dance of flavors, an alchemy that transforms simple components into something profoundly satisfying. Today, we’re diving into a recipe that embodies this spirit: the Easter Cookie Cake. Imagine a giant, soft cookie baked to perfection, overflowing with gooey chocolate chips and vibrant Easter candies that pop with color and sweetness. This creation is not just dessert; it’s a celebration of spring, joy, and togetherness—a centerpiece for your holiday gatherings that beckons everyone to indulge in its lusciousness.
As I think back on my own experiences cooking during the holidays, I can’t help but recall the warmth and laughter shared around the kitchen table. This Easter Cookie Cake is reminiscent of those cherished moments, where every slice brings a wave of nostalgia. The delightful aroma wafting from the oven conjures memories of family traditions and the excitement of unwrapping candy eggs. Each bite transports you to a whimsical world where sweetness reigns supreme, making it perfect for festive occasions or simply as a treat to brighten your day.
Easter Cookie Cake: A Sweet Celebration of Spring
This Easter Cookie Cake is not just another dessert; it’s a hug in cake form! With its chewy texture and rich flavors, it’s like having all your favorite cookies wrapped up in one delightful slice. The melted chocolate mingles beautifully with bursts of colorful candies, creating an irresistible combination that your friends and family will adore. Trust me when I say this recipe is incredibly easy to whip up—perfect for both seasoned bakers and those just starting their culinary adventure!
Ingredients:
As we embark on this sweet culinary journey together, let’s take a moment to appreciate each ingredient that brings this Easter Cookie Cake to life. Each component plays its unique role in crafting that perfect bite!
- ½ cup butter (1 stick or 4 ounces): Butter is truly the heart of any baked good! It not only adds richness but also contributes to the cookie’s chewy texture once baked. When selecting butter for this recipe, opt for unsalted butter; this way you can control the saltiness yourself later on. Make sure it’s at room temperature so that it creams properly with the sugars—this step is crucial for achieving that light, fluffy consistency we all love!
- ¾ cup brown sugar: This sugar does more than just sweeten; it brings moisture and depth of flavor thanks to its molasses content. Brown sugar creates a beautifully chewy texture while giving our cookie cake its lovely caramel notes. If you’re ever in a pinch, light brown sugar works just as well as dark brown sugar—but do keep in mind that dark brown will impart an even richer flavor.
- ¼ cup sugar: The granulated sugar not only sweetens but also contributes to the crisp edges of our cake when baked. It helps create contrast against the gooey centers from the chocolate chips and candies. It’s amazing how such simple ingredients work together harmoniously!
- 1 egg: Eggs are essential in baking as they provide structure and stability while also adding moisture. Make sure your egg is at room temperature before mixing—this helps it incorporate better into our batter.
- 2 teaspoons vanilla: Ahh, vanilla—nature’s magic potion! Its warm fragrance elevates sweet dishes like nothing else can. Always choose pure vanilla extract over imitation if possible; it makes a noticeable difference in flavor.
- 1 ⅓ cups flour: Flour serves as the foundation for our cookie cake’s structure. Using all-purpose flour gives us just the right balance between chewiness and fluffiness. Remember not to overmix when combining with wet ingredients—this prevents gluten formation which could lead to tougher cookies.
- ½ teaspoon baking soda: This leavening agent works wonders by helping our cake rise beautifully while providing lift and tenderness. Make sure your baking soda is fresh; otherwise, it won’t be effective in creating those soft edges we desire.
- ¼ teaspoon salt: Even though it’s just a small amount, salt enhances every flavor in our cake—even the sweetness! It’s like seasoning for baked goods — absolutely non-negotiable.
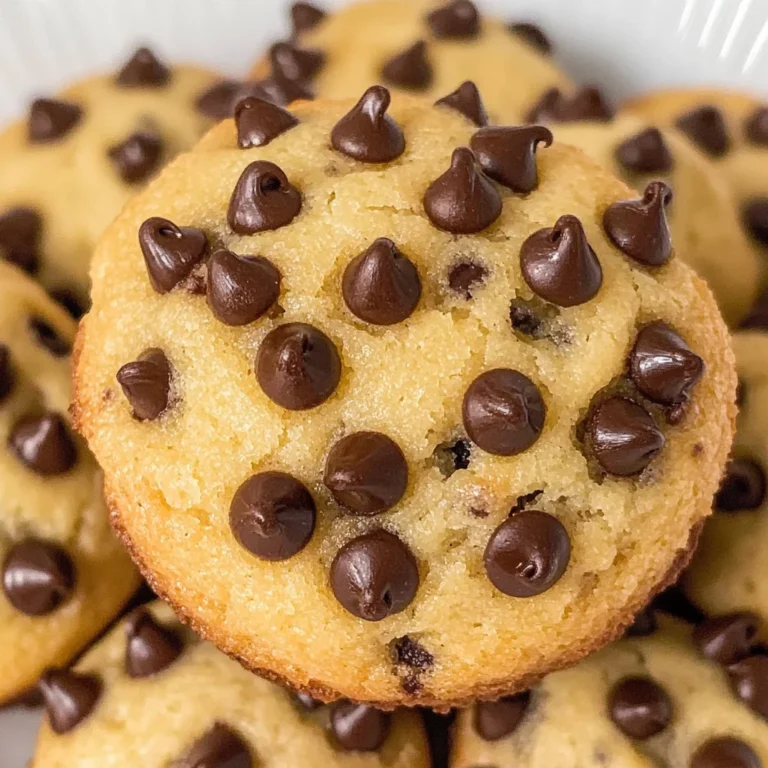
- ½ cup chocolate chips: These little morsels are what dreams are made of! They melt beautifully during baking, adding pockets of rich chocolatey goodness throughout our cookie cake—you can never go wrong with extra chocolate!
- ¾ cup chocolate candies (I used Easter M&M’s and mini Cadbury eggs), divided: The colorful candies bring joy both visually and taste-wise! Not only do they add crunch and sweetness but they also make this dessert festive—perfect for celebrating Easter or any special occasion!
Equipment You’ll Need:
Before we dive into making this delightful Easter Cookie Cake, let’s talk about the essential tools you’ll need along the way. Having these kitchen companions will ensure that your experience is smooth sailing from start to finish!
- 9-inch pie plate or baking dish: A sturdy pie plate is essential here because we’re creating a thick cookie cake rather than individual cookies; thus it needs proper support during baking. If you don’t have one on hand, feel free to use an 8-inch square pan instead—it’ll still yield delicious results!
- Large microwave-safe bowl: You’ll be melting butter in this bowl, which makes life so much easier! Look for something spacious enough to accommodate mixing without spilling over later on—trust me; nobody enjoys cleaning up melted butter off countertops!
- Medium mixing bowl: This will be used for whisking together dry ingredients before folding them into our wet mix—a crucial step that ensures even distribution throughout our batter.
- Whisk: A good whisk helps incorporate air into your mixture while breaking up any lumps—making sure everything combines smoothly before heading into the oven.
- Offset spatula or rubber spatula: These tools are perfect for scraping down sides of bowls as well as smoothing out batter evenly across your pie plate—a lovely trick to achieve that beautiful finished look!
Now that we have all our ducks (or should I say ingredients?) lined up neatly and ready to go… let’s get started on preparing this delightful Easter Cookie Cake!
Step 1: Preheat Your Oven & Prepare Your Pan
Begin by preheating your oven to 350ºF (that’s about 175ºC). This step might seem straightforward but trust me—it’s absolutely paramount! Preheating ensures even baking throughout your cookie cake instead of leaving you with raw centers or overly crispy edges later on! While that’s warming up nicely, grab your 9-inch pie plate—spraying it generously with non-stick cooking spray will prevent any sticky situations down the road when serving up slices after baking.
Step 2: Melt That Butter!
In a large microwave-safe bowl (the same one you’ll use later!), toss in your stick of butter—yes, we’re going straight for melting here! Microwave it until fully melted but not bubbling—that liquid gold needs time to cool slightly before mixing with sugars or else we might scramble our egg when added next! Stirring gently into melted butter are both types of sugar until fully incorporated—a process known as “creaming” which allows air pockets to form through mixing creating those tender textures we crave every time we indulge ourselves with cookies!
Step 3: Add Egg & Vanilla
Now comes my favorite part! Crack open that room temperature egg right into our buttery-sugary mixture along with those fragrant teaspoons of vanilla extract—oh my gosh… can you smell it already? Whisk everything together until smooth; this step adds richness alongside subtle warmth from vanilla which balances perfectly against sweetness coming from sugars earlier combined! Take note here friends; allowing mixtures ample time ensuring proper blending creates harmonious flavors throughout final bake without any clumps left behind ruining each delicious bite!
Step 4: Combine Dry Ingredients
Next up—grab that medium mixing bowl again because we’re whisking together flour along side baking soda & salt until uniformly mixed throughout—this ensures even rise during baking so there are no surprises later on either! Once ready slowly fold adding dry mix into wet concoction while being careful not overwork dough here—as tempting as mixing intensely sounds—it could lead us down tough-textured road instead yielding soft chewy bites expected from classic cookies like ours today… so gentle folds only please folks!!
And there you have it—the beginning steps towards creating something truly extraordinary! Stay tuned because we’ll explore how those divine morsels come together soon enough…
Step 5: Bake to Golden Perfection
Now, this is where the magic happens! Preheat your oven to a cozy 350ºF, which is basically like wrapping your cookie cake in a warm blanket of heat. While that’s happening, let’s prep our pie plate. Take your trusty non-stick cooking spray and give that 9-inch pie plate a generous mist. This is crucial because we want our Easter Cookie Cake to release effortlessly once it’s baked to perfection; nobody likes the heartbreak of a stuck dessert!
Once the oven is preheated and your pan is ready, it’s time to take action. Carefully scrape the cookie dough into the prepared pie plate. Use an offset spatula to smooth the top. Don’t rush this step—take your time! You want an even layer so that every bite bakes uniformly, resulting in a beautifully golden crust on top and a chewy interior. When you put this in the oven, keep an eye out for those visual cues: after about 25 minutes, you should see the edges turn a lovely golden brown while the center will still appear slightly soft—this is completely normal and exactly what we want! Trust me on this; when it comes out and you gently press the remaining candies into its warm surface, it’ll create a divine pocket of sweetness that will make your heart sing.
Step 6: Pressing in Sweetness
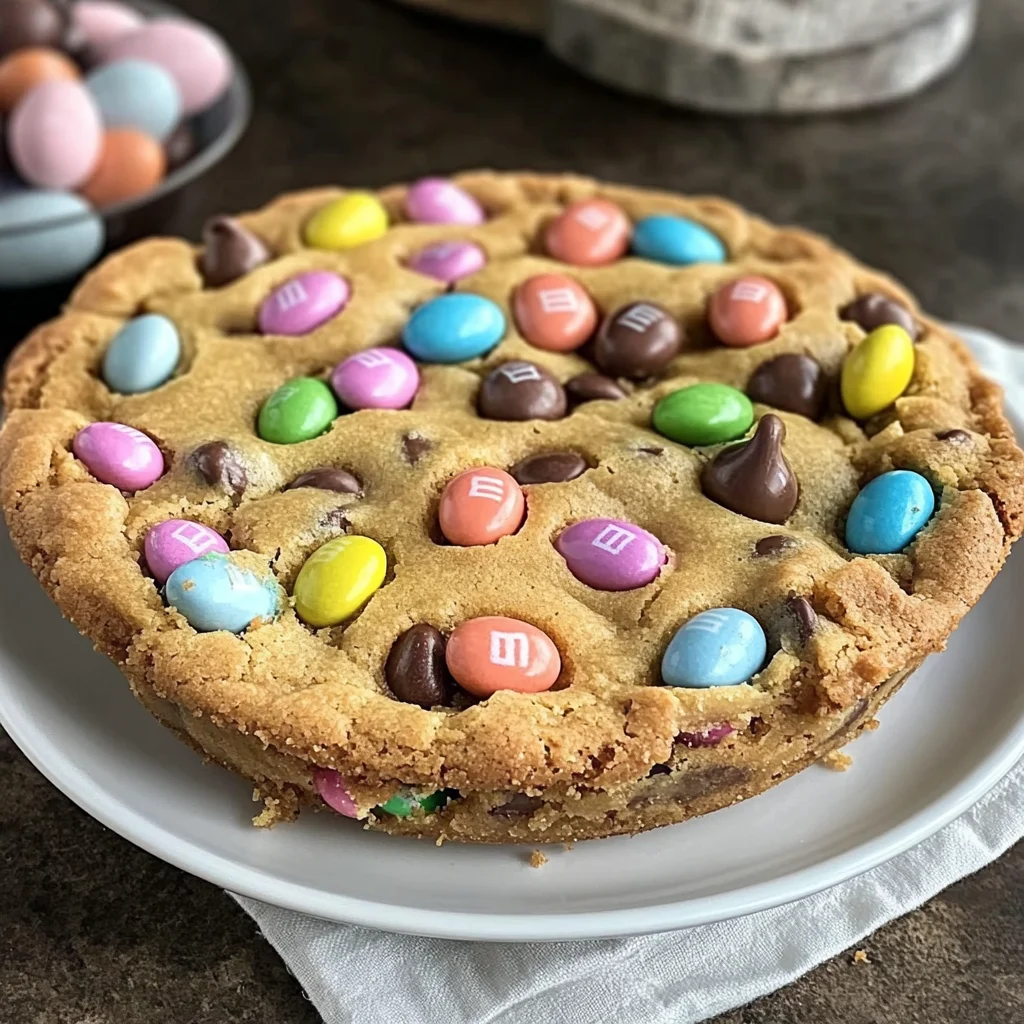
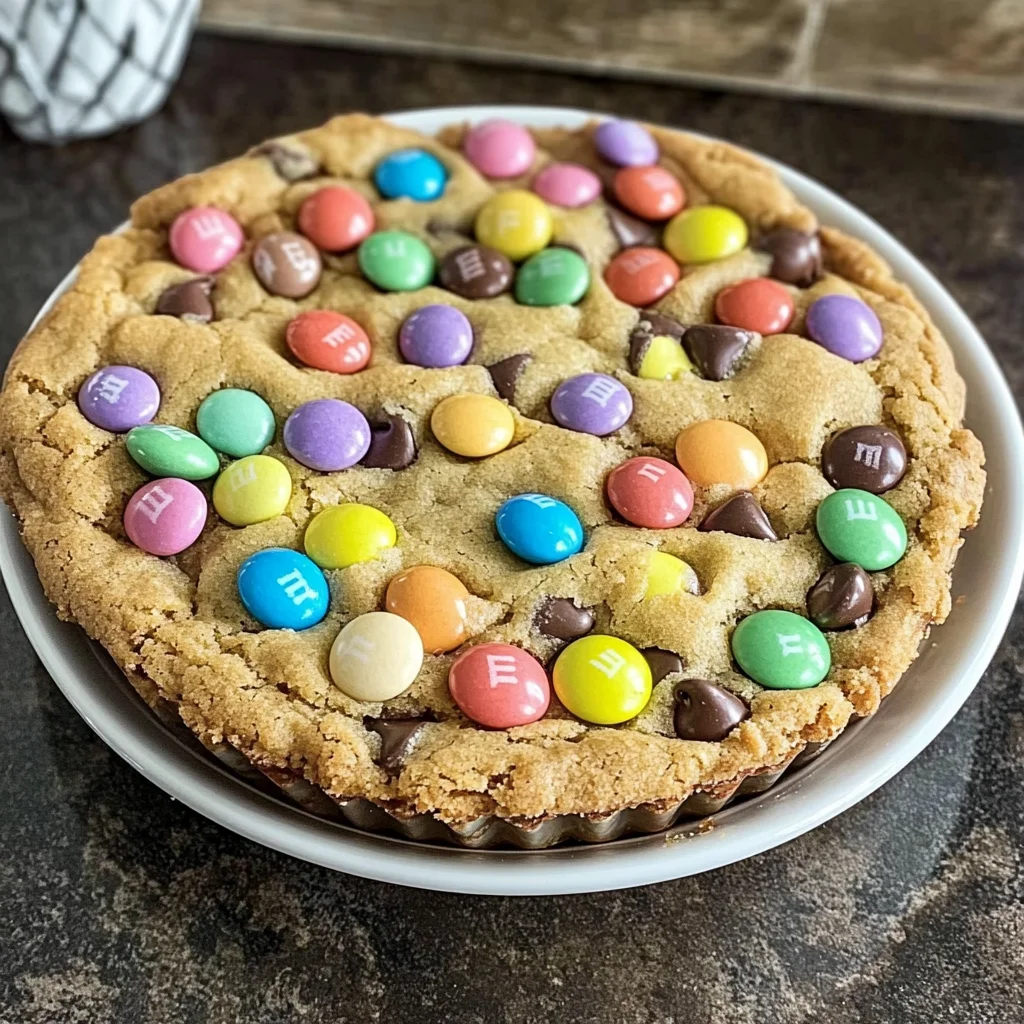
As soon as you pull this heavenly creation from the oven, prepare yourself for one of those moments that will truly elevate your Easter Cookie Cake into something extraordinary. While it’s still warm—this part is absolutely paramount—you’ll want to gently press those reserved candies onto the surface of your cookie cake. I used colorful Easter M&M’s and mini Cadbury eggs, both of which not only add delightful pops of color but also bring bursts of chocolatey goodness with each bite.
Now, why do we do this while it’s hot? The warmth from the cookie cake allows those candies to melt slightly, creating an almost glaze-like effect that enhances both flavor and presentation. Imagine cutting into that gooey masterpiece later and uncovering all those beautiful candies nestled right within! It’s this moment that truly makes it special—it’s like adding little jewels of sweetness on top of what’s already a delicious base. So don’t skimp on this step; really take time to arrange them just right!
Step 7: The Cooling Hour
After you’ve pressed in those vibrant candies, it’s essential to allow your cookie cake some time to cool before slicing into it. I know, patience can be tough when you’re surrounded by such fragrant baked goods wafting through your kitchen—but trust me when I say it’s worth it! Cooling allows the structure of our cake to set properly, ensuring each slice holds together beautifully instead of crumbling apart like a sad puzzle piece.
While it cools for about 15-20 minutes—just enough time for you to breathe in those enticing aromas—take this moment to set up your serving platter or grab some napkins because once those slices are cut, they’ll disappear faster than you can say “Easter Cookie Cake”! The cooling process not only helps with texture but also intensifies the flavors as they meld together beautifully. Just imagine each bite being perfectly chewy with little bursts of chocolate candy delight; oh yes!
Step 8: Slice and Serve Your Creation
Now comes perhaps my favorite part—the slicing and sharing! Once you’ve given your beloved Easter Cookie Cake enough cooling time (remember, we’re looking for it to be warm but not hot), take a sharp knife and slice right down through its golden crust. You’ll notice how satisfying it feels as you glide through that soft center filled with melted chocolate chips and colorful candies; I promise you’ll feel like an artist unveiling their masterpiece.
When plating these slices, don’t hold back on showcasing all those vibrant colors peeking through each piece—after all, we eat with our eyes first! If desired, sprinkle over some additional mini chocolate eggs or M&M’s for flair—it adds that extra touch without much effort at all. Serve them warm alongside a scoop of vanilla ice cream or simply enjoy them as they are; either way, you’re in for an utterly intoxicating experience.
Conclusion:
As we wrap up our journey through this lovely recipe, I can’t help but feel excited about sharing my passion with you! Baking this Easter Cookie Cake feels like wrapping up warm in a favorite blanket; it’s comforting yet invigorating. Each layer of sweetness—from the buttery dough to those colorful chocolate candies—creates a symphony of flavors that dance on your taste buds. The texture is nothing short of heavenly; soft yet slightly chewy with that perfect hint of crunch from all those delightful candies nestled within. It’s truly extraordinary how something so simple can become such a cherished tradition.
You see, what makes this recipe a must-try isn’t just its delightful taste; it’s the joy that comes from creating something beautiful and delicious right in your own kitchen. Imagine gathering friends and family around while pulling this beauty from the oven—the aroma wafting through your home will invite everyone in like an old friend! This cookie cake shines during holiday gatherings but also makes any ordinary day feel special. Each bite is accompanied by smiles and laughter—a true testament to how food brings us together.
Now, let’s talk about serving suggestions because we all know dessert deserves some good company! Imagine savoring one warm slice alongside a scoop of creamy vanilla ice cream—just think about that contrast between hot and cold! For an afternoon pick-me-up with tea or coffee, there’s nothing quite like indulging in this cake with your favorite brew beside you. And if you’re feeling adventurous? Drizzle some melted chocolate over top or add fresh fruits for an extra burst of flavor—everything pairs beautifully with this delightful base!
Feeling adventurous? This recipe is wonderfully adaptable! You could swap out chocolate candies for pastel-colored ones during springtime or even add nuts for that delightful crunch factor. Want something different? Try folding in some peanut butter chips or using different types of flour—it might yield surprising results that are equally delicious! I encourage you to play around with flavors and make this recipe uniquely yours. Share your baking adventure by trying out these variations and connecting with others through food—it’s an experience worth savoring!
Easter Cookie Cake
Easter Cookie Cake is a delightful celebration of spring that brings joy to any gathering. This giant, chewy cookie cake is packed with rich chocolate chips and vibrant candies, making it not only a feast for the palate but also a visual delight. Perfect for family gatherings or festive occasions, this easy dessert recipe captures the essence of togetherness and sweetness.
- Prep Time: 15 minutes
- Cook Time: 25 minutes
- Total Time: 40 minutes
- Yield: Approximately 12 servings 1x
- Category: Dessert
- Method: Baking
- Cuisine: American
Ingredients
- ½ cup unsalted butter (1 stick or 4 ounces)
- ¾ cup brown sugar
- ¼ cup granulated sugar
- 1 large egg
- 2 teaspoons vanilla extract
- 1 ⅓ cups all-purpose flour
- ½ teaspoon baking soda
- ¼ teaspoon salt
- ½ cup chocolate chips
- ¾ cup colorful chocolate candies (divided)
Instructions
- Preheat your oven to 350ºF (175ºC) and grease a 9-inch pie plate with non-stick spray.
- In a large microwave-safe bowl, melt the butter and then mix in the brown sugar and granulated sugar until combined.
- Whisk in the egg and vanilla extract until smooth.
- In a separate bowl, whisk together the flour, baking soda, and salt; gradually fold into the wet mixture until just combined.
- Stir in the chocolate chips and half of the colorful candies.
- Spread the dough evenly in the prepared pie plate, smoothing out the top.
- Bake for about 25 minutes, until golden brown around the edges but soft in the center.
- Immediately press remaining candies into the warm surface before letting cool for about 15-20 minutes before slicing.
Nutrition
- Serving Size: 1 slice (75g)
- Calories: 320
- Sugar: 23g
- Sodium: 150mg
- Fat: 14g
- Saturated Fat: 8g
- Unsaturated Fat: 5g
- Trans Fat: 0g
- Carbohydrates: 43g
- Fiber: 1g
- Protein: 3g
- Cholesterol: 30mg