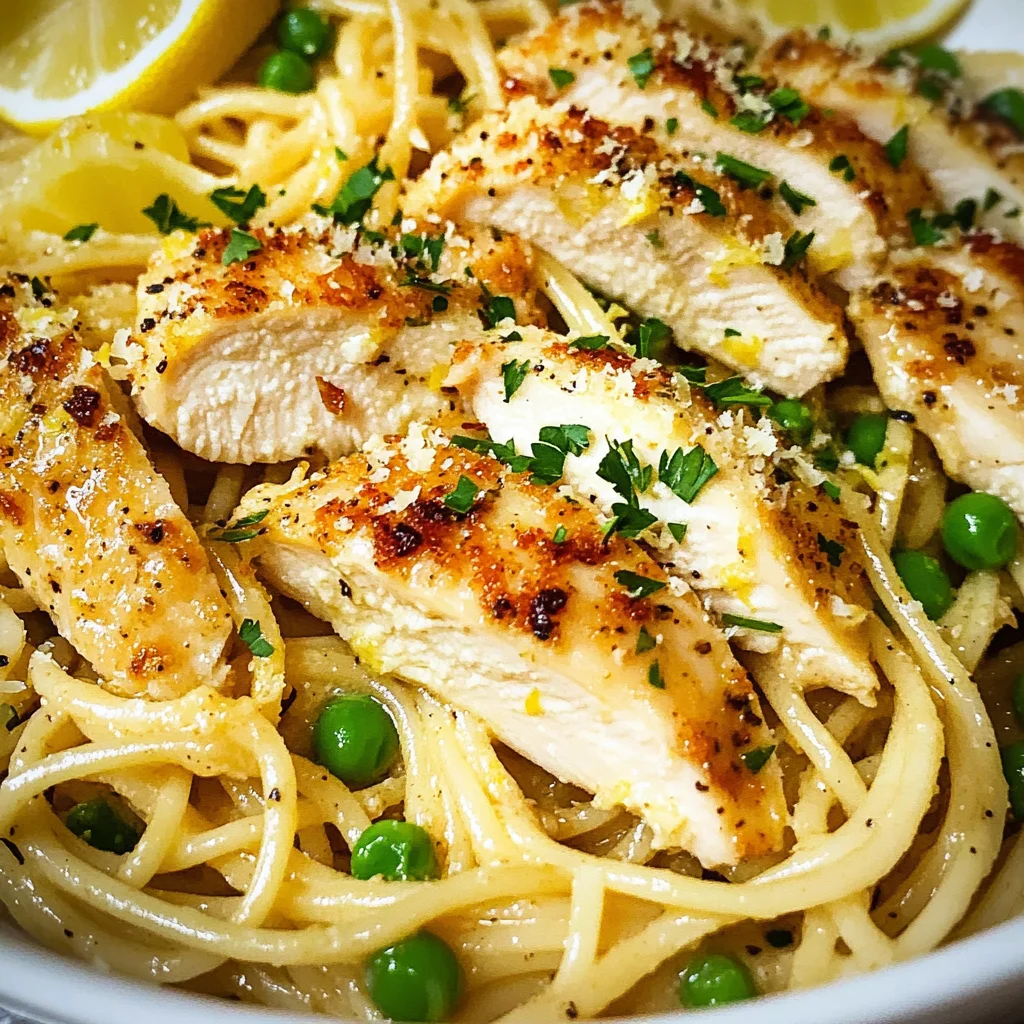
Lemon Chicken Pasta
There’s something profoundly comforting about a plate of pasta, isn’t there? It’s like a warm hug on a chilly evening or a gentle reminder of cherished moments shared over dinner with loved ones. This Lemon Chicken Pasta is more than just a meal; it’s an experience that dances between brightness and creaminess, where every bite tells a story steeped in tradition yet kissed by innovation. Imagine the tangy zest of lemon mingling harmoniously with the rich cream sauce, all enveloping tender pieces of chicken that have been lightly breaded and cooked to golden perfection. The sweet peas add a pop of color and flavor that brings everything together in this symphony of flavors.
When I first stumbled upon this recipe, I was captivated by how it effortlessly combines simplicity with elegance. It’s perfect for any occasion — whether you’re hosting friends for dinner or simply treating yourself to something special after a long day. The beauty of this dish lies in its ability to evoke warmth and satisfaction while remaining approachable for even the novice cook. Trust me, once you master this Lemon Chicken Pasta, it will quickly become a staple in your culinary repertoire.
Lemon Chicken Pasta: A Bright Twist on Comfort Food
Let’s dive into making this delightful dish together! The process is straightforward and filled with little moments that make cooking so enjoyable. You’ll find that each ingredient plays its own unique role, contributing not only to flavor but also to texture and visual appeal. So grab your apron, and let’s embark on this culinary journey!
Ingredients:
As we gather our ingredients, think about how each one contributes to the overall masterpiece we’ll create together. Cooking is all about balance—between flavors, textures, and colors—and each component plays its part beautifully.
- 2 large boneless skinless chicken breasts cut in half lengthwise. This is the star of our show! Using chicken breasts ensures lean protein while allowing us to create those crispy edges when we lightly bread them. Make sure they’re fresh—look for breasts that are plump and firm to the touch for the best results. If you’re feeling adventurous, you can even substitute them with turkey cutlets for a different twist.
- 1/4 cup flour. This humble ingredient is absolutely paramount for creating that lovely golden crust on our chicken. As we dredge the chicken in flour mixed with Parmesan cheese and lemon pepper, it forms a protective coating that locks in moisture while achieving that delightful crunch when cooked. When selecting flour, all-purpose works perfectly here—just ensure it’s fresh for optimal results.
- 3/4 cup fresh grated parmesan cheese. Ahh, the magic of Parmesan! Freshly grated cheese not only adds depth of flavor but also helps create the crispy layer on our chicken. Opting for freshly grated over pre-packaged is non-negotiable here; it melts beautifully and offers that authentic taste that will elevate your dish from good to extraordinary.
- 2 teaspoons lemon pepper. This seasoning blend brings zestiness and warmth which complements our creamy sauce beautifully. Lemon pepper has both citrusy brightness from dried lemon peel and savory notes from black pepper—creating an aromatic experience with every bite! If you’re unable to find it pre-mixed, feel free to combine fresh lemon zest with cracked black pepper as a substitute.
- 3 tablespoons olive oil. We’ll use olive oil not just for cooking but as an agent that helps transport flavors throughout our dish while keeping everything moist during cooking. It’s rich in healthy fats and adds an unmistakable depth to our chicken’s flavor profile. Always opt for extra virgin olive oil; it has the best taste and health benefits!
- 12 ounces spaghetti pasta. The perfect vehicle to carry our luscious lemon cream sauce! Spaghetti is ideal because its long strands hold onto sauce beautifully, ensuring every forkful is coated in deliciousness… Don’t forget to cook it al dente; this means just firm enough to hold its shape without being mushy—a critical texture point!
- 3 cloves garlic minced. Garlic is where we start layering flavor! When sautéed gently until fragrant, it releases its natural oils and sweetness into our sauce—creating an aromatic base that’s simply irresistible. Make sure your garlic is fresh; older garlic can lack potency and may even sprout green shoots which can be bitter.
- 1 ¼ cups heavy cream. This liquid gold transforms our sauce into something truly decadent! Heavy cream has a high fat content which allows us to create that velvety texture we’re after without curdling under heat—trust me when I say skimping on quality here would be a mistake you won’t want to make!
- ½ cup low sodium chicken broth. Adding broth enhances flavor while keeping things light—it’s essential for balancing richness with some savory undertones in our sauce without overwhelming it with saltiness.
- ⅔ cup frozen peas. These little green gems are not just colorful additions; they bring sweetness and nutrition too! They cook quickly right within our sauce, adding texture contrast against the creamy backdrop while providing a pop of vibrant color.
- 1 lemon zested and juiced. Here lies the heart of our dish’s bright personality! Zest adds aromatic oils, while juice provides acidity which cuts through creaminess—both elements are crucial for achieving balance in flavor profiles.
- 2 tablespoons butter cut in small cubes. Butter finishes off our sauce splendidly by enriching it further—and trust me when I say it makes everything taste better! Ensure it’s cold when added at the end so you get those lovely little bursts of creamy goodness throughout your dish.
- 2 tablespoons fresh chopped Italian parsley. This herb isn’t just for garnish; it provides freshness that will awaken all other flavors on your plate! Always choose fresh herbs whenever possible—they elevate dishes in ways dried alternatives simply can’t match.
- Salt and black pepper to taste. Never underestimate these simple seasonings—they’re essential for enhancing all flavors present in any dish you prepare! Season gradually as you build layers throughout cooking so you achieve perfect balance by the end.

Equipment You’ll Need:
Having the right tools at your disposal makes all the difference—not only does it simplify processes but also enhances enjoyment during cooking! Here’s what you’ll need:
- Large skillet: A sturdy non-stick or cast iron skillet works wonders here as it helps achieve even browning without sticking issues—a vital step since we want those beautiful golden pieces of chicken!
- Large pot: For boiling pasta efficiently—you’ll want enough space so noodles can move freely without clumping together!
- Cutting board & sharp knife: Essential for prepping ingredients quickly—and safety matters too! A sharp knife makes clean cuts which help maintain integrity during cooking.
With these tools at hand, you’re set up for success!
Preparing the Lemon Chicken Pasta
Step 1: Dredging Chicken Perfection
To begin this delectable journey, we must prepare our chicken breasts by cutting them in half lengthwise—this reduces their thickness ensuring quicker cooking times while still delivering juiciness inside! Next comes our flour mixture: combine flour with Parmesan cheese (the true MVP) and lemon pepper in a shallow bowl before dredging each piece thoroughly until coated evenly on both sides—you want this step done right since it’s what gives us that gorgeous crust when they hit hot oil later on! Heat two tablespoons of olive oil over medium heat until shimmering (but not smoking!) then place your chicken into the skillet gently—from there allow them three to four minutes per side until beautifully golden brown—the aroma filling your kitchen will be utterly intoxicating! Once completed, transfer them onto plates tented loosely with aluminum foil (this keeps heat trapped!) while we move forward towards building out those sumptuous noodles!
Step 2: Boiling Pasta Like A Pro
While tending carefully over your sizzling chicken masterpiece is important (don’t rush this step!), let’s turn attention towards boiling up water within another large pot—we’re aiming for rapid boil action here! Generously salt your water—it should taste similar to seawater—before adding spaghetti noodles straight into bubbling chaos according package instructions (being vigilant about timing!). Keep stirring occasionally so they don’t stick together (trust me on this!). Once cooked al dente—a term meaning “to the tooth”—simply drain well before setting aside until needed later; remember any residual starchy water would help thicken sauces if desired down line!
Step 3: Crafting Liquid Gold
Now comes perhaps my favorite part: we’re crafting an utterly intoxicating creamy sauce infused beautifully with garlic fragrance dancing around gingerly heated oil left behind from frying chicken earlier—it’s pure magic unfolding right before us! Begin by wiping out excess bits from skillet using paper towels then add remaining tablespoon olive oil before introducing minced garlic directly into heated pan… oh man—the scent wafting through air should take you straight back home where comfort food reigns supreme! After about one minute or until fragrant (don’t let garlic burn!), pour heavy cream inside coaxing forth bubbles forming along surface… keep stirring whilst gradually adding low sodium chicken broth bit by bit allowing mixture slowly reduce down (you’re looking at roughly one third reduction here).
Step 4: Final Touches
Once reduced sufficiently—as it’s thickened slightly yet remains pourable—add frozen peas along bright zest & juice from that glorious lemon we prepped earlier… at once you’ll see colors pop vibrantly against backdrop creating culinary art spread across stove top like masterpiece waiting eagerly upon canvas waiting patiently underneath brush strokes… continue simmering gently till everything melds together beautifully whilst nourishing aromas fill every nook & cranny around kitchen—this step alone will leave mouths watering!!! Finally reduce heat down low letting last bit melt generous portion additional half cup Parmesan cheese stirred incrementally till fully incorporated… don’t be afraid if things look thickening too much because once pasta joins party soon enough it’ll loosen up again bringing harmony across entire plate awaiting presentation!
Stay tuned as we prepare to finish assembling this sensational Lemon Chicken Pasta next!
Final Touches: Bringing It All Together
With our Lemon Chicken Pasta nearly complete, let’s make sure we finish strong by adding some freshness before serving! First off, don’t forget about our resting chicken breasts waiting patiently on their plate under foil; now’s the time to slice them thinly across their width—the presentation matters after all! Lay those succulent slices atop your pasta masterpiece just before serving so they maintain warmth while also providing visual appeal.
To elevate each serving further, sprinkle freshly chopped Italian parsley over everything just before digging in—it adds not only vibrant color but also herbaceous brightness which complements our dish wonderfully! Finally, season generously with salt and black pepper according to taste; remember every palate differs slightly so adjust as needed. Serve promptly as nothing beats enjoying this dish while still warm—trust me when I say there’s something profoundly satisfying about sharing homemade meals fresh from stovetop magic!
And there you have it—your very own Lemon Chicken Pasta ready for devouring alongside loved ones or maybe just treating yourself after a long day! Enjoy every flavorful bite knowing you’ve created something incredibly special from scratch; I can’t wait for you all to experience how utterly delightful this dish truly is!
Storage and Enjoyment Tips for Your Lemon Chicken Pasta
Now that your Lemon Chicken Pasta is all dressed up and ready to be devoured, let’s talk about how to ensure you can enjoy those vibrant flavors even longer. It’s always a joy when we can stretch a delicious meal into multiple culinary experiences! Storing leftovers properly not only helps maintain the dish’s delightful essence but also allows you to relish the creamy lemon goodness another day. Trust me, there’s nothing quite like discovering an unexpected treasure in your fridge, just waiting for you when hunger strikes again!
Storing Leftover Lemon Chicken Pasta
For your leftover Lemon Chicken Pasta, the ideal storage method involves using an airtight container; this is absolutely paramount to keep the dish fresh and prevent it from drying out. If you have a glass container with a lid, I highly recommend using it as it seals in moisture beautifully. You can stash your pasta in the refrigerator where it will stay good for about 3-4 days—plenty of time to savor those flavors! Now, here’s a little pro tip: if you want to keep the pasta from getting too clumpy, consider placing a bread slice inside the container. It works wonders at absorbing excess moisture! When you reheat it, you might find that the sauce has thickened a bit, but fear not! Just add a splash of chicken broth or cream while gently warming it on the stovetop or microwave.
Freezing Lemon Chicken Pasta for Later
If you’re thinking ahead and want to make this dish last longer, freezing is an excellent option! To freeze your Lemon Chicken Pasta, allow it to cool completely before transferring it into freezer-safe containers or bags—be sure to remove as much air as possible to avoid freezer burn. This dish will keep well for about 2-3 months in the freezer. When you’re ready to enjoy it again, simply thaw it in the refrigerator overnight and reheat slowly on the stove with a touch of broth or cream, stirring occasionally until heated through. Imagine pulling out this comforting meal on a busy weeknight; it’s like having a little piece of sunshine in your kitchen whenever you need it! How convenient is that?
Lemon Chicken Pasta
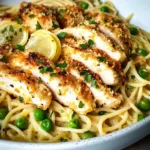
Experience the comfort of homemade Lemon Chicken Pasta, a dish that brings together tender chicken and a luscious, creamy lemon sauce. Each bite is a delightful balance of zesty citrus and savory richness, making it perfect for any occasion—from casual weeknight dinners to elegant gatherings with friends. With fresh ingredients and straightforward preparation steps, this recipe is both accessible and rewarding. You’ll love how the bright flavors elevate traditional pasta into something extraordinary while still being easy enough for beginner cooks to master. Serve it with a sprinkle of parsley for an extra touch of freshness and prepare to impress everyone at the table!
- Prep Time: 15 minutes
- Cook Time: 30 minutes
- Total Time: 45 minutes
- Yield: Serves approximately 4 people 1x
- Category: Main
- Method: Stovetop
- Cuisine: Italian
Ingredients
- 2 large boneless skinless chicken breasts
- 3/4 cup fresh grated Parmesan cheese
- 1/4 cup all-purpose flour
- 2 teaspoons lemon pepper
- 12 ounces spaghetti pasta
- 1 ¼ cups heavy cream
- ½ cup low-sodium chicken broth
- Zest and juice of 1 lemon
- 3 cloves garlic, minced
- 2 tablespoons olive oil
- ⅔ cup frozen peas
- Salt and black pepper to taste
- Fresh chopped Italian parsley for garnish
Instructions
- Cut the chicken breasts in half lengthwise and coat with a mixture of flour, Parmesan cheese, and lemon pepper.
- Heat olive oil in a large skillet over medium heat. Cook the chicken for about 3–4 minutes on each side until golden brown. Remove from the skillet and cover loosely to keep warm.
- In the same skillet, add minced garlic and sauté until fragrant (about one minute).
- Pour in heavy cream and low-sodium chicken broth; bring to a simmer and stir until slightly thickened.
- Add frozen peas, lemon zest, and lemon juice; simmer for another few minutes.
- Gradually stir in half a cup of grated Parmesan until melted and smooth.
- Cook spaghetti according to package instructions; drain well and toss with sauce. Slice the rested chicken and place on top.
- Garnish with freshly chopped parsley before serving.
Nutrition
- Serving Size: 1 plate (approximately 350g)
- Calories: 650
- Sugar: 5g
- Sodium: 680mg
- Fat: 32g
- Saturated Fat: 16g
- Unsaturated Fat: 14g
- Trans Fat: 0g
- Carbohydrates: 60g
- Fiber: 3g
- Protein: 36g
- Cholesterol: 150mg