Chickpea Salad Wraps
Chickpea Salad Wraps are not just a meal; they’re a celebration of freshness, a canvas for vibrant flavors, and an embodiment of wholesome goodness. Each bite reminds me of summer picnics and friendly gatherings, where laughter mingles with the scent of herbs and spices. The creamy chickpeas, bright vegetables, and zesty dressing all come together in a symphony that dances across your palate. Trust me when I say this isn’t just food; it’s an experience that nourishes both body and soul. And the best part? This recipe is incredibly simple, making it perfect for busy weeknights or leisurely weekends alike.
As I reminisce about the many times I’ve made these Chickpea Salad Wraps for friends and family, I can’t help but smile at how they’ve become a staple in my kitchen. They’re versatile enough to adapt to whatever fresh ingredients you have on hand, while still being deeply satisfying. These wraps are not only healthy but also beautifully customizable—swap in your favorite veggies or spices! They’re perfect for lunch, dinner, or even as snacks, elevating everyday dining into something truly extraordinary.
Chickpea Salad Wraps: A Wholesome Delight
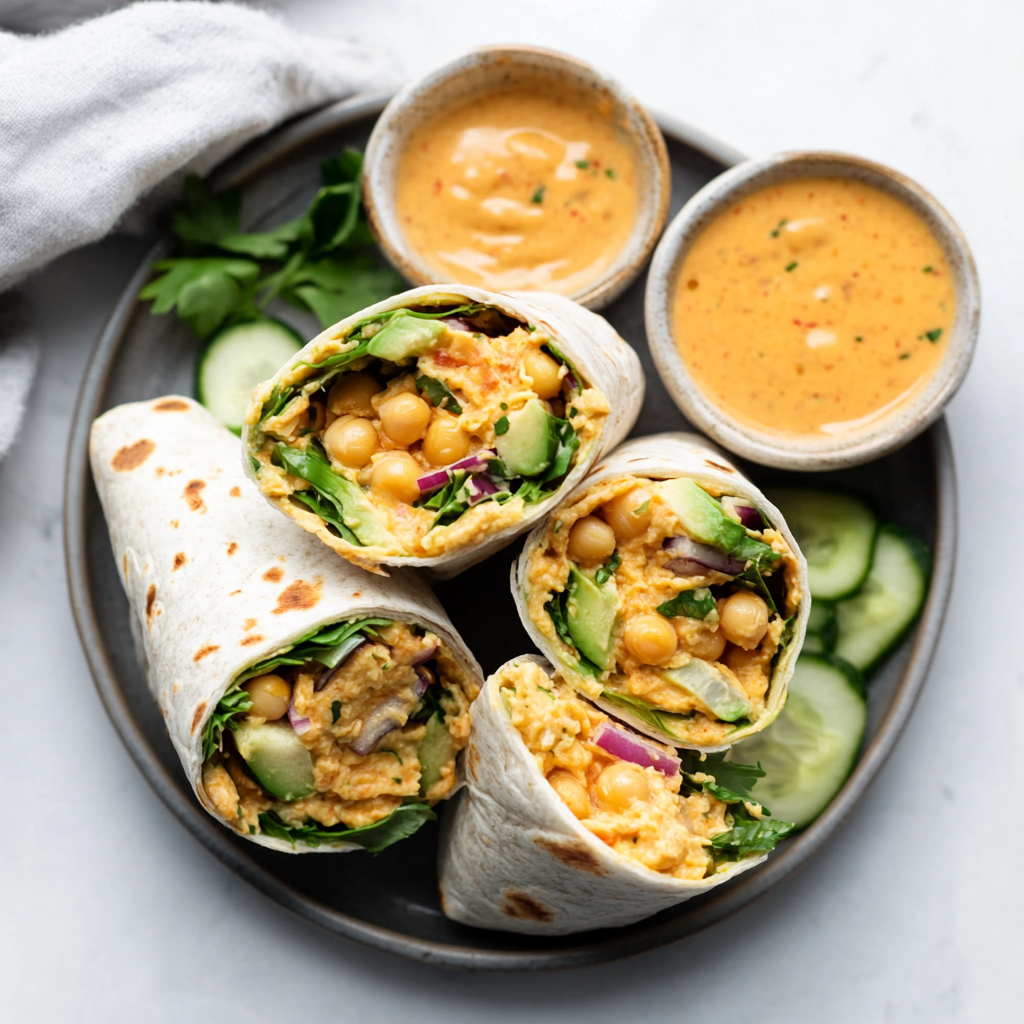
These Chickpea Salad Wraps are a delightful way to enjoy a fusion of flavors and textures that will undoubtedly leave you craving more. The combination of creamy chickpeas with crunchy cucumbers and juicy tomatoes creates a medley that’s refreshing and nourishing. Plus, the addition of hummus adds a delightful creaminess that binds everything together beautifully. Let’s embark on this culinary journey together!
Ingredients:
As we gather our ingredients for these Chickpea Salad Wraps, it’s essential to appreciate each component’s role in creating this vibrant dish. Each ingredient plays its part in this harmonious blend of flavors.
- 1 can chickpeas (15 oz), drained and rinsed: Chickpeas are the star of this wrap! Not only do they provide a hearty base filled with plant-based protein and fiber, but their nutty flavor complements the vibrant vegetables beautifully. When selecting canned chickpeas, opt for those labeled low sodium for better control over salt content. Rinsing them well removes excess sodium while enhancing their flavor—this step is crucial in preventing any metallic aftertaste from the canning process.
- 1 tablespoon olive oil: This liquid gold is more than just fat; it’s packed with heart-healthy monounsaturated fats that help to enhance the absorption of fat-soluble vitamins like A, D, E, and K from the veggies in your wrap. Using high-quality extra virgin olive oil elevates the dish with its rich flavor profile while keeping everything wonderfully moist.
- 1 teaspoon lemon juice: The bright acidity of lemon juice adds a refreshing zing that cuts through the creaminess of the chickpeas and hummus. It balances flavors perfectly—don’t skip this! Freshly squeezed lemon juice is always preferable as it has a vibrancy that’s simply unmatched compared to bottled versions.
- 1/2 teaspoon ground cumin: Cumin brings warmth and earthiness to your wraps—it’s like adding an aromatic hug! This spice has been cherished in various cuisines for centuries for its depth of flavor. Toasting cumin seeds before grinding them releases even more essential oils if you’re feeling adventurous!
- 1/4 teaspoon paprika: This subtle spice introduces a hint of smokiness that pairs beautifully with the other ingredients without overpowering them. You can use sweet or smoked paprika depending on your preference; both variations add their unique charm to this dish.
- 1/4 teaspoon salt: Salt is crucial—it enhances flavors by bringing out the natural sweetness in vegetables and balancing the overall taste profile. Remember to taste as you go; adjusting seasoning is key!
- 1/4 teaspoon black pepper: Freshly cracked black pepper adds a gentle heat that livens up each bite without overwhelming your palate. It’s amazing how such a small amount can add so much complexity!
- 1/2 cup diced cucumber: Cucumbers lend crunchiness and hydration to our wraps—a refreshing contrast against creamy chickpeas! Choose firm cucumbers without soft spots for optimal texture; English cucumbers are great because they have fewer seeds.
- 1/2 cup diced tomato: Juicy tomatoes add sweetness and acidity that elevate every element within these wraps. When selecting tomatoes, look for ones that feel heavy for their size—those usually indicate ripeness and juiciness.
- 1/4 cup chopped red onion: Red onions contribute sharpness and color to our dish! Finely dicing them ensures even distribution throughout each wrap while allowing their flavor to mellow slightly when combined with other ingredients.
- 1/4 cup chopped fresh parsley: Fresh parsley brightens up our wraps both visually and taste-wise! Its herbaceous notes uplift every ingredient involved—always opt for flat-leaf parsley if possible as it boasts superior flavor compared to curly varieties.
- 4 whole wheat tortillas: Tortillas serve as our lovely vehicle for all these delicious fillings! Whole wheat tortillas bring added fiber while offering nutty notes compared to traditional white flour options—their sturdiness makes them perfect for holding all those tasty fillings without tearing easily.
- 1/4 cup hummus: Hummus acts as both spread and glue here! It’s creamy goodness ties everything together beautifully while adding an additional layer of flavor—plus it’s an excellent source of protein!
- 1/4 cup crumbled feta cheese: Feta cheese introduces tangy creaminess into our wraps—it compliments all other flavors brilliantly! If you want a dairy-free option, try using crumbled tofu marinated in lemon juice instead—it works wonders too!
Equipment You’ll Need:
Before we dive into assembling these delicious Chickpea Salad Wraps, let’s make sure we have everything we need on hand in terms of equipment! Having the right tools makes cooking smoother—and trust me, when you enjoy cooking as much as I do, having good equipment feels like magic at work!
- Medium-sized bowl – A sturdy bowl is essential for mixing your chickpeas without fear of splashing ingredients everywhere! Choosing one that’s large enough allows you room to combine everything thoroughly while preventing spills—plus it helps keep things tidy during clean-up!
- Fork or potato masher – For mashing those lovely chickpeas into submission (but don’t go overboard; some chunks are delightful!). Both tools work well here; use whichever you prefer or have handy at home!
- Cutting board & knife – A good quality cutting board provides ample space for chopping veggies safely while protecting countertops from scratches—and using sharp knives makes prep easier too (no one likes struggling with dull blades).
- Measuring spoons & cups – Precision matters when it comes down to balancing flavors perfectly! Accurate measurements ensure consistent results every time—you wouldn’t want too much cumin overpowering everything now would you?
Preparing the Chickpea Salad Wraps
Step 1: Rinse Those Chickpeas
Begin by opening your can of chickpeas—a sound I find oddly satisfying—and draining them through a colander. Give them a good rinse under cold water; this process not only removes excess sodium but cleans off any residual canning liquid that could detract from their lovely flavor profile. After rinsing thoroughly, lay them out on some clean kitchen towels or paper towels—they need some time to dry off excess moisture which helps achieve better texture once mashed!
Step 2: Mash It Up
In your medium-sized bowl, gently introduce those dried-off chickpeas. Using either a fork or potato masher (my personal favorite), start mashing away until they resemble chunky yet cohesive mush—you want some texture here! This step doesn’t just make eating easier later on; it also allows all those wonderful spices we’ll be adding next to infuse beautifully throughout each bite.
Step 3: Add Flavorful Elements
Once you’ve achieved that perfect mash consistency (think small chunks mixed with smooth areas), drizzle one tablespoon of olive oil over your creation along with one teaspoon of freshly squeezed lemon juice—the zesty acidity will awaken every single ingredient involved! Next up comes ground cumin followed by paprika along with salt & black pepper… mix it all together until well-combined—this balance is absolutely paramount—don’t rush through this step so take time getting acquainted with those glorious spices mingling together!
Step 4: Prepare Your Veggies
Now let’s bring some crunch into play! Dice half a cucumber into bite-sized cubes; think about ensuring uniformity here—the smaller they are cut means easier bites later on (and no awkward chewing)! Transfer these little green gems into another bowl alongside similarly sized pieces from one diced tomato—those juicy beauties will brighten things up wonderfully too! Then grab your red onion & chop it finely before tossing it all together into one larger mixing vessel… trust me when I say this blend will create pure magic once added atop our wraps later down the line!
Final Touches: Elevate Your Experience
Step 9: Presentation Perfected
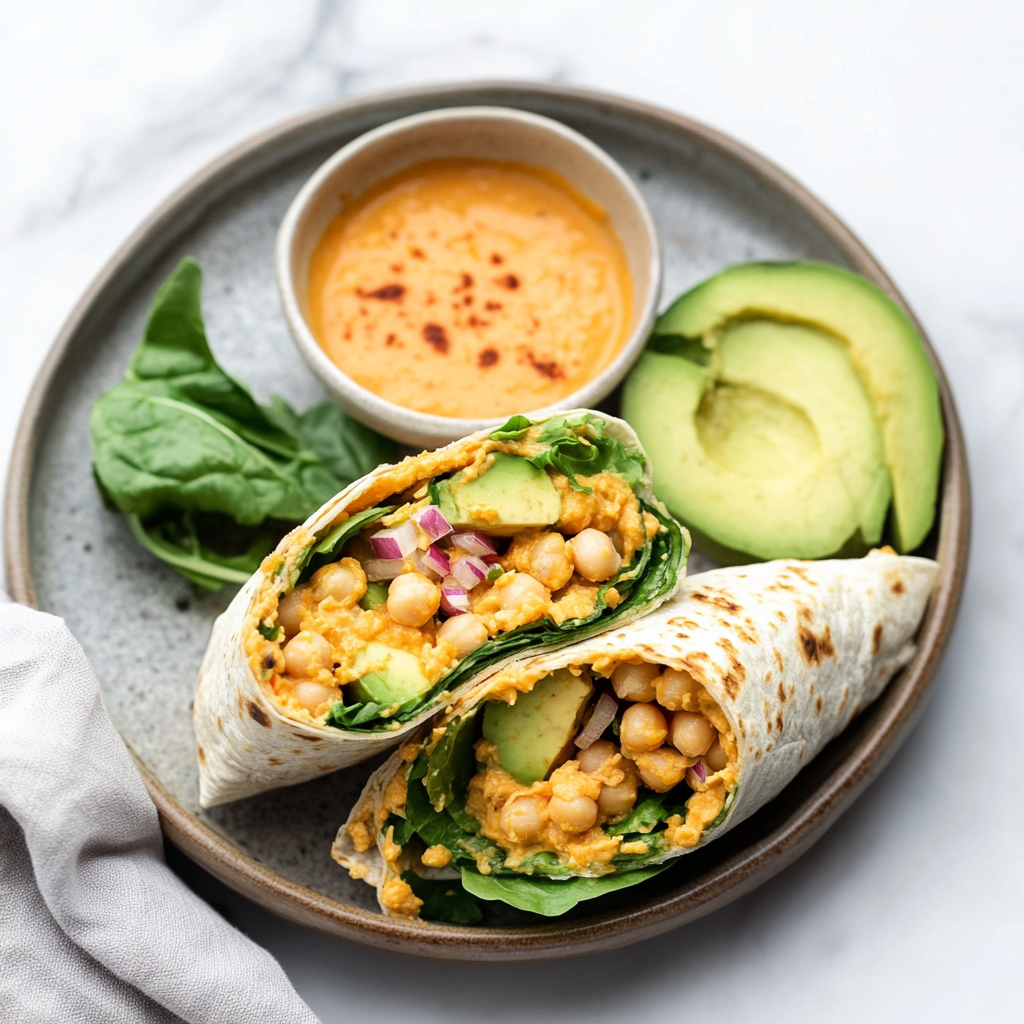
Before diving into these scrumptious wraps, let’s take a moment to elevate their presentation because we eat with our eyes first! Arrange your cut wraps on a beautiful platter or individual plates—consider garnishing with extra chopped parsley or even some lemon wedges for an added touch of brightness that beckons everyone closer.
And there you have it—the perfect Chickpea Salad Wraps ready to be devoured! Whether you’re enjoying them during lunch at home or packing them up for a picnic adventure, I promise these wraps will bring joy and satisfaction like no other dish can. With every bite bursting with freshness and flavor, you’ll find yourself returning again and again to this recipe—a true staple in my kitchen that I know will become one in yours too!
So gather your loved ones around, share stories while savoring these delightful wraps together—and remember: cooking is not just about feeding ourselves; it’s about creating memories around food we cherish deeply.
Storage and Enjoyment Tips for Your Chickpea Salad Wraps
And just like that, your Chickpea Salad Wraps are ready to be devoured! The vibrant colors and delightful aromas wafting from your kitchen make it impossible not to feel excited about this dish. Whether you’re preparing them for a quick lunch or a light dinner, these wraps are not just a meal; they’re an experience bursting with flavor that you’ll want to share with everyone around you. Now, let’s talk about how to keep these beauties fresh so you can enjoy them even longer!
Storing Leftover Chickpea Salad Wraps
When it comes to storing your leftover Chickpea Salad Wraps, the right container can make all the difference. I recommend using an airtight container to lock in freshness and flavor; this helps prevent any unwanted sogginess. If you’re planning to indulge over the next few days, these wraps can last up to three days in the refrigerator—so you can always have a delicious option at hand! To maintain their delightful texture, consider placing a slice of bread in the container alongside the wraps; it acts as a moisture absorber, keeping everything just right. Trust me, you’ll appreciate how wonderfully they hold up! When you’re ready for another bite, serve them straight from the fridge or give them a quick toast on a skillet for that lovely warmth and crunch.
Freezing Components for Later
If you find yourself with extra Chickpea Salad filling (which is truly hard to believe because it’s so delicious!), freezing it is an excellent option that gives you flexibility for future meals. To freeze properly, simply portion out the chickpea mixture into freezer-safe bags or containers—be sure to press out as much air as possible before sealing. This method will keep well for about three months in the freezer without losing its vibrant flavor. When you’re ready to use it, just take out what you need, let it thaw overnight in the fridge, and then pile it onto fresh tortillas along with your favorite toppings! This makes meal prep so convenient and ensures you’re never more than a few minutes away from enjoying these delightful wraps again.
Chickpea Salad Wraps

Freshly made Chickpea Salad Wraps are bursting with flavor! Try this vibrant recipe today for an easy and healthy meal option!
- Prep Time: 15 minutes
- Cook Time: 0 minutes
- Total Time: 15 minutes
- Yield: Serves 4
- Category: Main
- Method: No-Cook
- Cuisine: Mediterranean
Ingredients
- 1 can (15 oz) chickpeas, drained and rinsed
- 1 tablespoon olive oil
- 1 teaspoon lemon juice
- 1/2 teaspoon ground cumin
- 1/4 teaspoon paprika
- 1/4 teaspoon salt
- 1/4 teaspoon black pepper
- 1/2 cup diced cucumber
- 1/2 cup diced tomato
- 1/4 cup chopped red onion
- 1/4 cup chopped fresh parsley
- 4 whole wheat tortillas
- 1/4 cup hummus
Instructions
- Rinse and drain the chickpeas thoroughly; let dry.
- In a medium bowl, mash the chickpeas until chunky but cohesive.
- Mix in olive oil, lemon juice, cumin, paprika, salt, and black pepper until well combined.
- Add diced cucumber, tomato, red onion, and parsley; stir gently.
- Spread hummus evenly over each tortilla.
- Place the chickpea mixture in the center of each tortilla; sprinkle with feta if desired.
- Roll up tightly from the bottom to secure the filling; slice in half if preferred.
Nutrition
- Serving Size: 1 wrap (approximately 150g)
- Calories: 360
- Sugar: 5g
- Sodium: 300mg
- Fat: 12g
- Saturated Fat: 2g
- Unsaturated Fat: 9g
- Trans Fat: 0g
- Carbohydrates: 54g
- Fiber: 10g
- Protein: 14g
- Cholesterol: 0mg