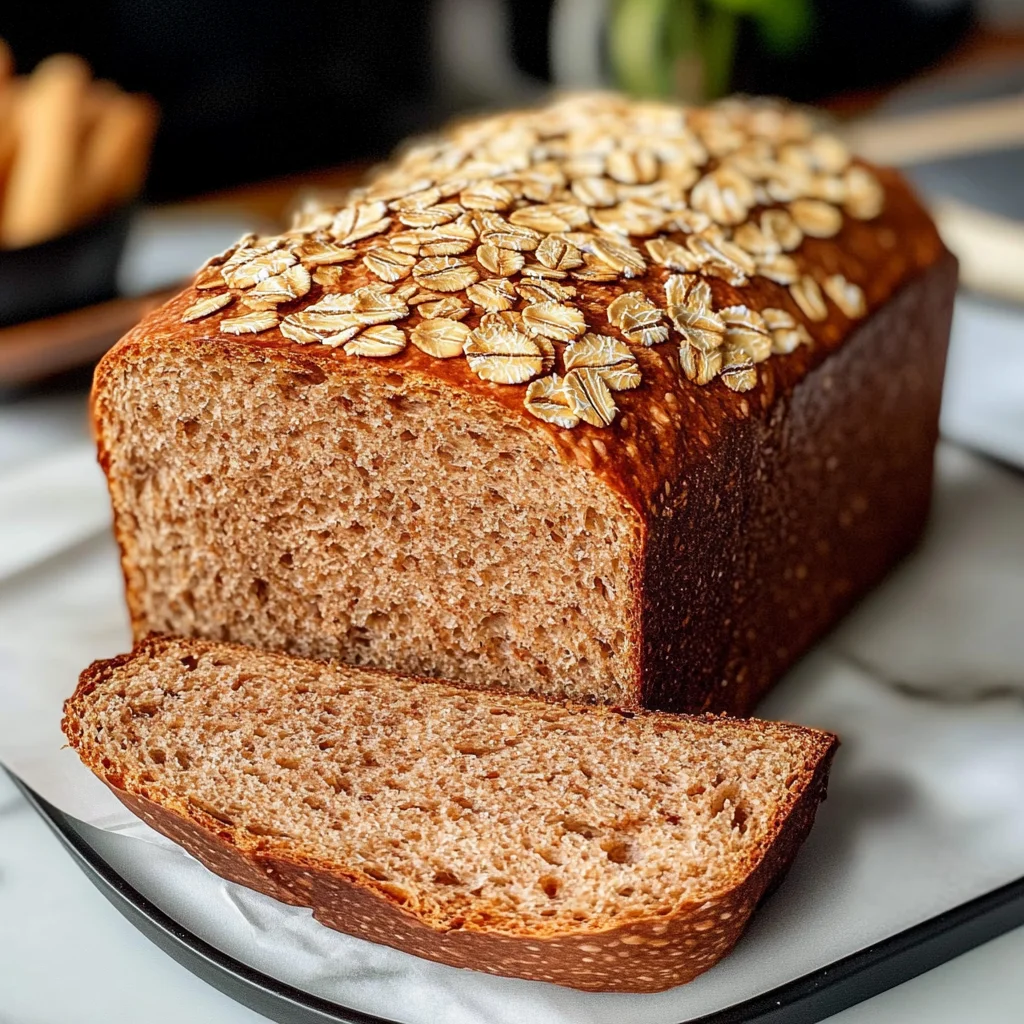
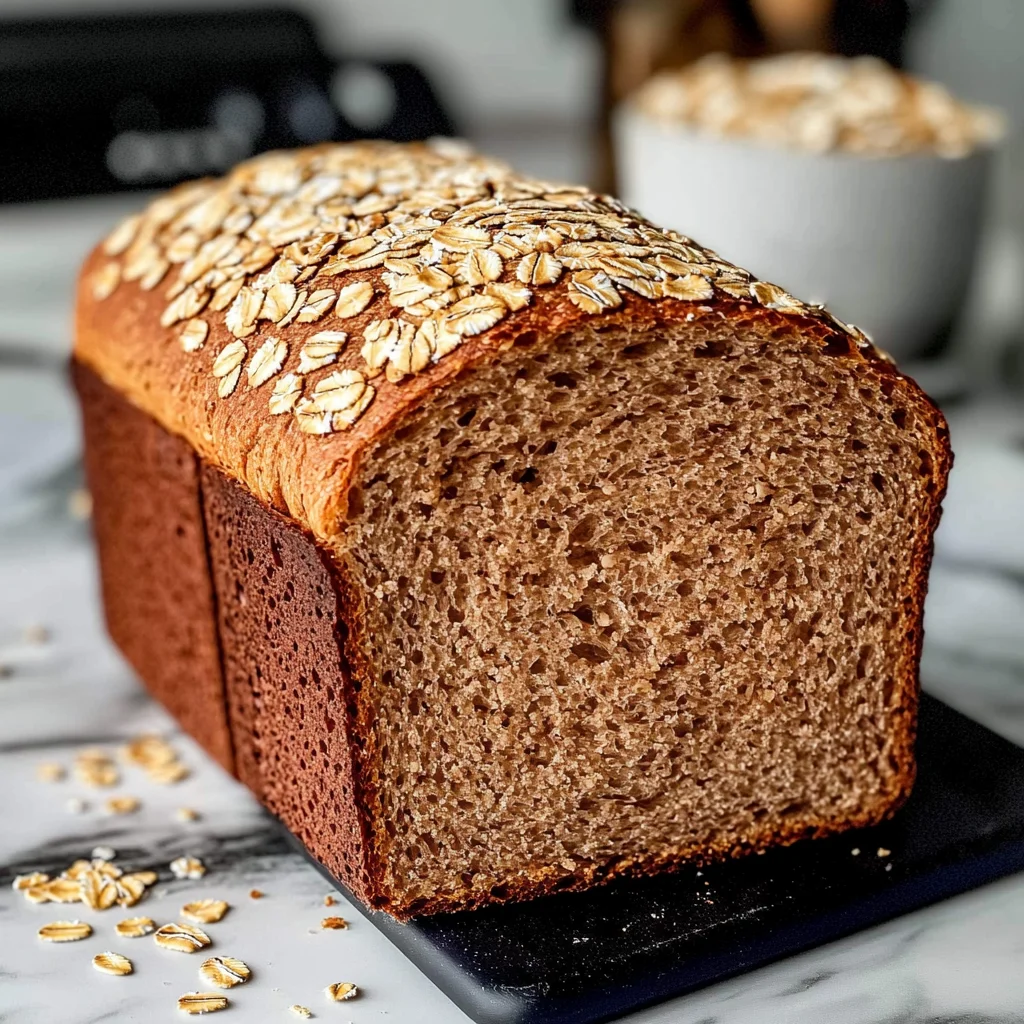
Whole Wheat Bread
There’s something profoundly satisfying about the aroma of freshly baked bread wafting through your home, isn’t there? It’s as if each loaf carries with it a whisper of warmth, comfort, and nostalgia, beckoning you to gather around the table with loved ones and share not just a meal but a moment. This Whole Wheat Bread recipe isn’t just about combining ingredients; it’s a heartfelt invitation to reconnect with the simple pleasures of home baking. The soft yet hearty texture of this bread, paired with its rich flavor profile, creates an experience that transcends mere sustenance. I promise you, once you taste this delightful creation, you’ll find that store-bought bread simply cannot compare.
As we embark on this culinary journey together, let me share a little secret: baking bread can be incredibly therapeutic. Kneading the dough is not just a task—it’s an opportunity to pour your love into every fold and press. The yeast will work its magic as it ferments and rises, transforming those humble ingredients into something truly extraordinary. Trust me on this—the satisfaction of pulling a warm loaf from the oven after nurturing it through each step is unparalleled. So grab your apron and let’s dive into making this Whole Wheat Bread that will elevate any meal, whether it’s slathered with butter for breakfast or turned into the perfect sandwich for lunch!
Whole Wheat Bread: A Heartfelt Classic
Let’s talk about what makes this Whole Wheat Bread so special. First off, it’s made with wholesome ingredients that blend beautifully to create a loaf that’s not only delicious but also nourishing. Whether you’re enjoying it fresh from the oven or using it for sandwiches throughout the week, each bite is packed with flavor and nutrients that simply make you feel good. And guess what? You only need eight simple ingredients to bring this masterpiece to life! With every slice, you’ll taste the care that went into making it—a true labor of love.
Ingredients:
Before we dive into the magic of baking, let’s take a moment to explore our cast of characters—the ingredients that will come together to create our Whole Wheat Bread. Understanding each component will not only enhance your cooking skills but also deepen your appreciation for what goes into every loaf.
- 1 cup (240ml) water, warmed to about 110°F (43°C): Water is the foundation of our bread-making process; it activates the yeast and helps dissolve other ingredients like honey and salt. It’s essential that we warm it gently—not too hot or too cold—to create an optimal environment for yeast growth. Think of water as the spark that ignites our dough’s potential!
- 1/3 cup (80ml) whole milk, warmed to about 110°F (43°C): Milk adds richness and flavor to our bread while contributing to its tender crumb. Just like with water, warming the milk helps activate yeast without shocking it. The creamy texture enhances moisture in our final product—resulting in bread that’s soft and inviting.
- 2 and 1/4 teaspoons (7g) active dry or instant yeast (1 standard packet): Yeast is our little miracle worker! It ferments sugars in the dough and produces carbon dioxide gas as well as alcohol (which evaporates during baking). This fermentation process causes our dough to rise—creating those lovely air pockets that make bread fluffy yet substantial. If you’re using instant yeast, feel free to mix it straight into your dry ingredients!
- 2 cups (260g) whole wheat flour (spooned & leveled): This flour is where we get most of our flavor and nutrition from! Whole wheat flour contains all parts of the wheat berry—meaning it’s rich in fiber and nutrients compared to white flour. It gives our bread that hearty texture while imparting a nutty flavor that’s utterly delightful. Make sure you spoon and level your flour properly; too much can lead to dense bread.
- 3 Tablespoons (63g) honey: Honey isn’t just a natural sweetener; it plays several roles in our dough! It feeds the yeast for better rising while also adding moisture which keeps our loaf soft even days later. Plus, there’s something comforting about knowing we’re using nature’s sweetest gift in our baking.
- 3 Tablespoons (43g) unsalted butter, softened to room temperature: Butter enriches our dough and contributes to its flavor while providing tenderness—making each slice melt-in-your-mouth delicious! Using unsalted butter gives us control over the salt levels in our bread so we can season perfectly without any surprises.
- 1 teaspoon fresh lemon juice (or apple cider vinegar): This ingredient might seem small but trust me—it’s crucial! The acidity from lemon juice or vinegar strengthens gluten development while enhancing flavor complexity in our bread. It’s one of those non-negotiables that elevates this recipe from ordinary to extraordinary.
- 1 and 1/3 cups (173g) whole wheat flour (spooned & leveled), plus more as needed: We’ll add this additional flour gradually as we knead until we achieve just the right consistency—a soft yet slightly tacky dough that’s manageable but not dry. This careful balance is key for achieving perfectly risen loaves.
- 1 and 1/4 teaspoons salt: Salt does more than just season; it’s vital for controlling yeast activity during fermentation as well as enhancing flavors overall. It creates harmony among all ingredients—bringing out their best qualities while preventing over-fermentation.
- optional oat topping: 1 beaten egg white + 1 Tablespoon whole oats: If you’re feeling fancy, this optional topping adds visual appeal along with extra texture on top of your loaf! The egg wash gives a beautiful sheen while oats introduce heartiness—it’s like giving your loaf an impressive hat before sending it off into the oven!
Equipment You’ll Need:
Now that we have all our ingredients ready, let’s talk about some essential equipment that’ll make your whole wheat bread-baking experience smooth sailing! These tools are like trusted companions in your kitchen adventure—they’ll help ensure everything turns out beautifully.
- Large bowl or stand mixer – A sturdy bowl is crucial for mixing ingredients effectively without splattering everywhere. If using a stand mixer with a dough hook attachment instead means less effort on your part—allowing you more time sipping tea or planning conversations around dinner!
- Spatula or wooden spoon – These reliable utensils are perfect for stirring thick batters without risking injury! They help incorporate ingredients thoroughly—ensuring nothing remains stuck at the bottom while blending flavors seamlessly together.
- Dough hook attachment – If you opt for a stand mixer—which I highly recommend if you’re new—you’ll want this handy attachment! It works wonders by kneading dough efficiently without straining yourself so much—letting technology do some work while you supervise progress lovingly!
- Loaf pan (9×5 inches) – An essential vessel where all magic happens! Choose one made from metal or glass; both conduct heat well resulting in evenly baked loaves. Remember—to grease properly so baked goodness pops right out when ready!
- Cooling rack – Once your masterpiece has come out from its warm cocoon known as an oven—it needs space to breathe! A cooling rack allows air circulation underneath which prevents soggy bottoms while keeping crust crisp longer post-baking!
With these trusty tools by your side—and these wonderful ingredients waiting patiently—we’re ready now more than ever before dive deeper into preparing our Whole Wheat Bread!
Step 1: Whisking Up Magic
Begin by grabbing that large bowl or stand mixer—we’re going to start building layers upon layers of flavor here! In this initial step, combine your warmed water, warmed whole milk—and sprinkle in active dry or instant yeast together gently whisking them until they unite harmoniously within their surroundings like old friends at a reunion party! This mixture should sit undisturbed covered lightly allowing everything inside double in size over approximately sixty minutes up towards ninety minutes maximum depending on ambient temperatures around you—don’t rush this step; patience yields results worth savoring later on when indulging freshly sliced goodness!
Step 2: Adding Flavorful Components
Once you’ve achieved bubbly froth atop those yeasty waters greeting everyone cheerfully—it’s time add remaining elements giving birth glorious dough ahead! Incorporate those two cups whole wheat flour first along honey bringing sweetness forth before adding softened butter melting beautifully alongside zesty lemon juice completing ensemble cast performance next followed closely by additional measured flour plus salt ensuring everything blends nicely creating cohesive ball forming beneath fingers’ kneading motion afterward when prompted forward onward toward next stage deliciousness awaits ahead…
Step 3: Kneading Your Way To Perfection
Now comes my favorite part—the kneading phase where hands meet dough creating synergy between them through rhythmic motion pushing folding rolling stretching shaping until smooth elastic forms begin appearing before eyes unfolding sweeter aromas waft through air surrounding kitchen space inviting everyone nearby join midst festivities happening within walls filled laughter joy anticipation awaiting scrumptious bites later down road ahead… Knead meticulously anywhere between eight ten minutes depending how energetic feeling today; remember—it doesn’t matter if imperfect shapes emerge—it’s what happens inside during rising phase ultimately counts most here…
Step 4: Rising To The Occasion
Once satisfied with kneaded ball placed gently inside greased bowl coated lightly oil surface covering securely prevent drying out during resting period now set aside warm cozy nook somewhere undisturbed allowing rise miracle unfold slowly gradually doubling volume roughly one-and-a-half hours maybe pushing towards two depending environmental conditions surrounding… Keep close watch observing transformation taking place keeping spirits high reminding self how beautiful life can be watching simple things evolve magical ways…
With every step taken so far—you’re crafting something truly remarkable from scratch—and I couldn’t be prouder sharing secrets behind my beloved Whole Wheat Bread recipe alongside journey today together celebrating moments shared kitchen filled laughter warmth love nourishment awaiting ahead… Stay tuned for next stages leading towards golden crusty finale soon completed baked perfection soon enough…
Step 5: Prepare Your Dough for Rising
Now that you’ve lovingly kneaded your dough, it’s time to give it a cozy place to rise. This step is crucial because rising allows the yeast to work its magic, creating those delightful air bubbles that will make your whole wheat bread soft and airy. Start by lightly greasing a large bowl with oil or nonstick spray; this will prevent the dough from sticking as it expands, which can be a little heartbreaking if it gets stuck! Place your kneaded dough into the bowl, turning it gently in the oil until every surface is coated. Cover the bowl with a clean kitchen towel or plastic wrap to keep that warmth in—think of it as tucking in your dough for a nice long nap.
Now, let’s talk about timing and temperature because both are absolutely paramount for this step. You’ll want to let your dough rise in a warm environment for about 1.5 to 2 hours, or until it has doubled in size. Don’t rush this step; it’s where the flavor develops and the texture becomes sublime. A good rule of thumb is to look for visual cues: ideally, your dough should look puffy and have almost doubled in volume, with a slightly domed top. If it hasn’t risen as much as you’d like after two hours, don’t despair; sometimes, cooler kitchen temperatures can slow things down. Just give it a bit more time—trust me, it’s worth every minute!
Step 6: Shaping Your Loaf
Once you’ve witnessed that beautiful transformation—your dough now resembling a fluffy cloud—it’s time to shape it into the loaf that will grace your kitchen table. Start by lightly flouring your work surface, hands, and rolling pin—this helps prevent any stickiness that can lead to frustration. Gently punch down the risen dough to release some of those lovely air bubbles you created during rising; this isn’t just about deflating—it’s also about redistributing those yeast cells and enhancing the flavor profile of your bread.
Now shape the dough into an 8-inch log by rolling it out into a rectangle approximately 8×15 inches. Don’t worry about getting it perfect—rustic is charming! The edges might round off a bit; that’s completely normal and adds character. Once you roll it up tightly from one long side to the other, pinch the seams together gently but securely; this step ensures that your loaf holds its shape during its final rise and baking. Place this lovingly shaped log into your greased loaf pan seam-side down. Give yourself a little pat on the back—you’re doing wonderfully!
Step 7: Final Rise Before Baking
As we approach the climax of our bread-making journey, we need to allow our shaped loaf one last rise before sending it off into the oven’s embrace. Covering your loaf again is essential here; use either plastic wrap or a clean kitchen towel to keep moisture around so that the surface does not dry out while rising. Let your masterpiece rest for about 45-60 minutes or until it’s risen about an inch above the top of the pan—the excitement builds as you watch this transformation unfold!
During this phase, I recommend keeping an eye on how puffy and full-looking your loaf becomes; it should feel light and airy when you gently poke at it (a little poke test never hurt anyone!). This final rise is significant because it’s giving those yeast cells one last chance to produce carbon dioxide gas that creates air pockets within the bread—this leads us straight towards that wonderfully fluffy texture we all crave! If you notice any areas not rising evenly, don’t fret! Just rotate your pan gently every now and then if needed; even bread needs a little encouragement sometimes!
Step 8: Prepping for Baking Glory
With our loaf now beautifully puffed up and ready for action, we need to prepare our oven for what promises to be an aromatic explosion of baked goodness! Begin by adjusting your oven rack so that it’s positioned lower than usual—this ensures even baking without burning that precious top crust too quickly. Preheat your oven to 350°F (177°C), allowing enough time for even heat distribution throughout.
While you’re waiting on that preheat moment—which typically takes around 10-15 minutes—you might want to consider whether you’d like an oat topping on your bread—a lovely addition that offers both texture and visual appeal! If you’re feeling adventurous (and I know you are), go ahead and whisk an egg white until frothy in a small bowl; brush this onto your risen loaf right before baking followed by a generous sprinkle of whole oats across the top. This finishing touch elevates not just aesthetics but also creates an appealing crunch against the soft interior of each slice.
As you slide that baby into the oven after all this love and care you’ve poured into making it, don’t forget about timing! Bake for approximately 36-40 minutes while keeping an ear out for sounds—you’ll know it’s close when you hear a hollow thud if you tap on its crust gently with knuckles (a baker’s secret!). And remember: if you see browning happening too quickly on top during those last few minutes, don’t hesitate to loosely cover with aluminum foil—that’s merely protecting all those delightful flavors waiting inside!
Conclusion:
As we reach the end of our journey with this wholesome whole wheat bread recipe, I sincerely hope you’ve felt my excitement throughout this process—it truly is contagious! This isn’t just any loaf; it’s a labor of love crafted with simple ingredients that come together to create something profoundly satisfying. The combination of earthy flavors from the whole wheat flour with a touch of sweetness from honey creates a symphony of tastes that elevate each bite into something truly extraordinary. Every step along the way—from mixing to kneading—builds anticipation for that moment when you finally slice into golden-brown perfection.
This recipe is an absolute must-try not only because of its delicious taste but also because of the joy that comes from making something so nourishing from scratch. Imagine pulling this loaf from the oven; as you catch its warm aroma wafting through your home, you can’t help but feel accomplished! It’s versatile enough for breakfast toast slathered with nut butter or as the perfect base for savory sandwiches filled with fresh veggies and hummus during lunch. Each occasion becomes special when you serve this bread; whether at family gatherings or quiet evenings at home, it adds warmth and comfort.
For serving suggestions, imagine savoring one warm slice topped with creamy avocado and a sprinkle of salt for breakfast bliss. For an afternoon pick-me-up, enjoy it toasted with almond butter and banana slices. And if you’re feeling indulgent? Create an unforgettable grilled cheese sandwich bursting with gooey plant-based cheese paired with ripe tomatoes—heavenly! The possibilities are endless as you explore what pairs beautifully with this hearty loaf.
Feeling adventurous? This recipe is wonderfully adaptable! You could swap out some whole wheat flour for spelt flour if you’re looking for nuttier notes or add seeds like sunflower or flaxseed directly into the dough—each variation brings its own unique character to this beloved staple! Don’t hesitate to experiment; I encourage you to make this recipe yours! Share your experiences and variations with me—let’s connect over our love for baking!
Whole Wheat Bread
Whole Wheat Bread is a delightful homemade staple that brings warmth and comfort to any meal. This recipe is simple yet rewarding, allowing you to enjoy the satisfying process of baking while filling your home with the irresistible aroma of freshly baked bread. With its hearty texture and rich flavor, this whole wheat loaf is perfect for breakfast toast, sandwiches, or simply enjoyed warm with a bit of butter. Made from wholesome ingredients, it not only nourishes but also delights!
- Prep Time: 30 minutes
- Cook Time: 40 minutes
- Total Time: 1 hour 10 minutes
- Yield: About 12 slices 1x
- Category: Bread
- Method: Baking
- Cuisine: American
Ingredients
- 1 cup warm water (110°F/43°C)
- 1/3 cup warm whole milk (110°F/43°C)
- 2 and 1/4 teaspoons active dry or instant yeast
- 2 cups whole wheat flour
- 3 tablespoons honey
- 3 tablespoons softened unsalted butter
- 1 teaspoon fresh lemon juice (or apple cider vinegar)
- 1 and 1/3 cups additional whole wheat flour (as needed)
- 1 and 1/4 teaspoons salt
Instructions
- In a large bowl or stand mixer, combine warm water, warm milk, and yeast. Let sit for about 60 minutes until frothy.
- Stir in the first two cups of whole wheat flour, honey, softened butter, lemon juice or vinegar, additional flour, and salt until a dough forms.
- Knead the dough on a floured surface for about 8–10 minutes until smooth and elastic.
- Place the kneaded dough in a greased bowl, cover it with a kitchen towel, and let it rise in a warm area for about 1.5–2 hours or until doubled in size.
- Punch down the dough gently to release air; shape it into an 8-inch log and place it in a greased loaf pan.
- Cover again and let rise for another 45–60 minutes until puffy.
- Preheat oven to 350°F (177°C). Optionally brush with egg white and sprinkle oats on top before baking.
- Bake for 36–40 minutes until golden brown; allow cooling before slicing.
Nutrition
- Serving Size: 1 slice (45g)
- Calories: 120
- Sugar: 3g
- Sodium: 150mg
- Fat: 4g
- Saturated Fat: 2g
- Unsaturated Fat: 2g
- Trans Fat: 0g
- Carbohydrates: 20g
- Fiber: 3g
- Protein: 4g
- Cholesterol: 10mg