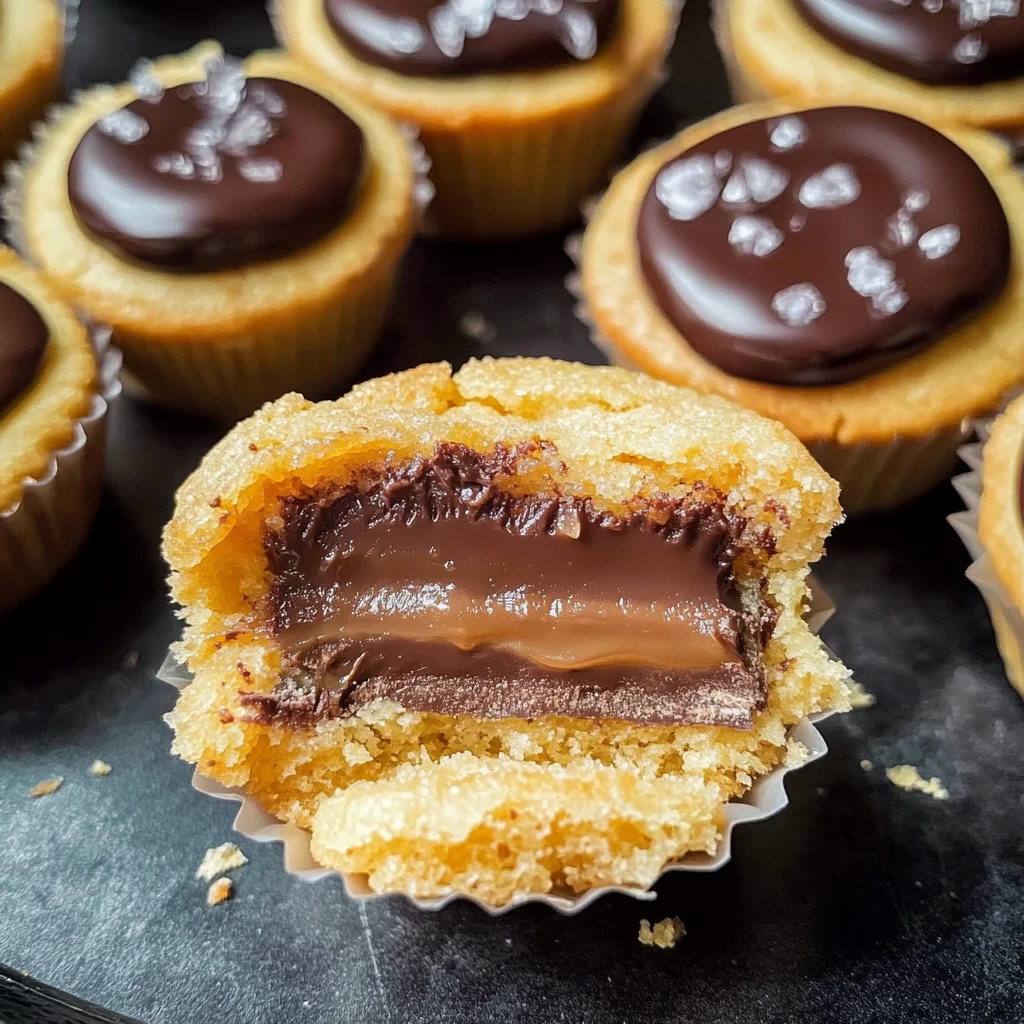
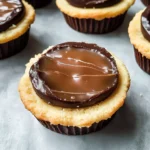
Twix Cookie Cups
If you’re looking for a fun and delicious treat that brings back memories of candy bars, you’ve come to the right place! These Twix Cookie Cups are not just delightful to look at; they’re a joy to eat. With a soft sugar cookie base, a luscious layer of creamy caramel, and a smooth chocolate topping, these little gems have all the flavors you love from the classic Twix bar—but in cookie form! They are perfect for busy weeknights when you need a quick dessert or for family gatherings that call for something special.
What makes this recipe even better is how easy it is to whip up. You’ll be surprised at how simple it is to create such an impressive treat that everyone will rave about. Ready to dive into making these Twix Cookie Cups? Let’s get started!
Why You’ll Love This Recipe
- Super Easy to Make: The steps are straightforward, making this recipe perfect even for beginner bakers.
- Family-Friendly Fun: Kids love helping out in the kitchen, and decorating these cookie cups is a blast!
- Perfect for Any Occasion: Whether it’s a casual dessert or a special event, these cookie cups fit right in.
- Make Ahead Convenience: You can prepare them in advance and store them until you’re ready to serve.
- Irresistible Flavor: With layers of cookie, caramel, and chocolate, every bite is pure bliss.
Ingredients You’ll Need
Creating these Twix Cookie Cups requires just a handful of simple, wholesome ingredients that you probably already have in your pantry. Gather these items before you start baking:
For the Cookie Base
- 1/2 cup (111g) salted butter
- 1/2 cup (115g) granulated sugar
- 1 tsp vanilla extract
- 1 egg white
- 1 1/2 cups (228g) all-purpose flour
- 1 tsp baking powder
For the Caramel Topping
- 20 caramels (unwrapped)
- 1 tbsp milk
For the Chocolate Layer
- 2 cups (400g) milk chocolate chips
Variations
This recipe is wonderfully flexible! Feel free to get creative with your Twix Cookie Cups. Here are some fun ideas:
- Add Nuts: Sprinkle chopped nuts on top of the caramel for an extra crunch.
- Try Different Chocolates: Use dark chocolate or white chocolate chips instead of milk chocolate for a new twist.
- Flavor It Up: Mix in a bit of sea salt with the caramel for a sweet-and-salty flavor explosion.
- Go Gluten-Free: Substitute all-purpose flour with gluten-free flour blend for a gluten-free option.
How to Make Twix Cookie Cups
Step 1: Preheat Your Oven
First things first—preheat your oven to 350°. This step ensures that your cookies bake evenly and come out perfectly fluffy.
Step 2: Cream Together Butter and Sugar
In a mixing bowl, cream together the salted butter and granulated sugar. This process helps incorporate air into your mixture, giving your cookies that light and airy texture we all love.
Step 3: Add Egg and Vanilla
Next, add in the egg white and vanilla extract. Mix until everything is well combined. The vanilla adds warmth and depth to your cookies that will have everyone asking for seconds!
Step 4: Combine Dry Ingredients
Now it’s time to add the dry ingredients—mix in the all-purpose flour and baking powder. This combination is what gives your cookie cups structure while keeping them soft inside.
Step 5: Roll Out Dough and Cut Shapes
Roll out your dough until it’s about 1/4 to 1/2 inch thick. Use a round cookie cutter to cut out circles. Place them on an ungreased pan. This step creates little bases where all the yummy toppings will go!
Step 6: Bake Your Cookies
Bake at 350° for about 6-8 minutes. Keep an eye on them; you’ll know they’re ready when they look puffy and no longer glossy on top.
Step 7: Cool Down Time
Once baked, transfer the cookies onto a wire rack and let them cool completely. Cooling allows them to set properly before adding those divine layers.
Step 8: Prepare Caramel Topping
While your cookies cool down, grab those unwrapped caramels and combine them with milk. Microwave this mixture for one minute, stirring halfway through. You want it smooth and creamy—the perfect topping!
Step 9: Spoon On That Caramel
Carefully spoon a few teaspoons of caramel onto each cooled cookie. Spread it out just enough so it almost covers each cookie—this layer adds that rich Twix flavor we adore.
Step 10: Chill Cookies Again
Pop those caramel-covered cookies into the fridge for about 10-15 minutes or until completely cold. Chilling helps set the caramel nicely before adding our final touch.
Step 11: Melt Chocolate Chips
Now let’s melt our chocolate chips! Heat them in intervals of 30 seconds until completely melted. Stir well so everything combines smoothly.
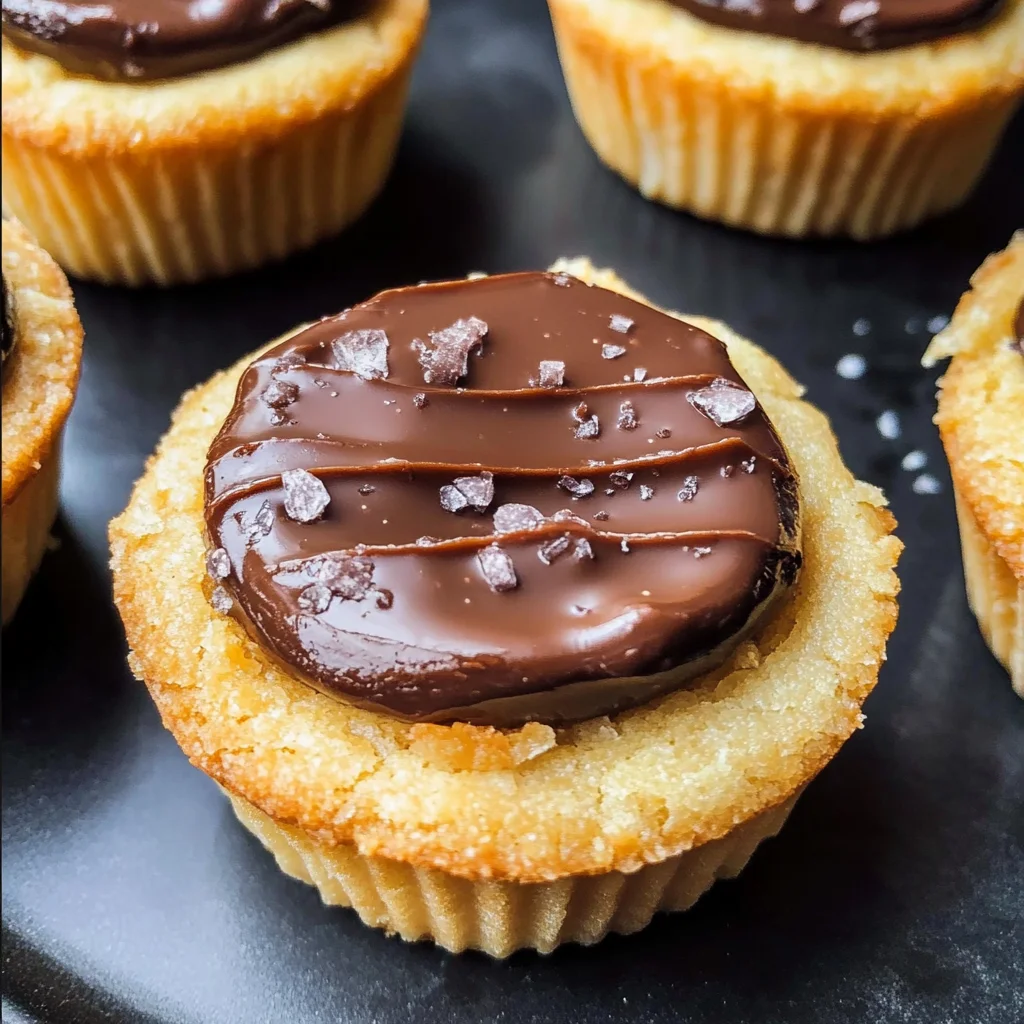
Step 12: Finish Off with Chocolate Layer
Finally, spread a small amount of melted chocolate over each cookie cup. Allow this layer to cool and set up before serving—you want that perfect chocolate finish!
And there you have it—your very own homemade Twix Cookie Cups! Enjoy sharing these sweet delights with friends or savoring them all by yourself—they’re too good not to indulge!
Pro Tips for Making Twix Cookie Cups
Creating delicious Twix Cookie Cups is a delightful experience, and with these handy tips, you’ll be sure to impress your friends and family!
- Use room temperature butter: This ensures that the butter creams well with the sugar, creating a light and fluffy cookie base that’s perfect for holding the caramel.
- Don’t overbake: Keep an eye on your cookies as they bake; they should be puffy and just losing their glossy sheen. Overbaking can lead to dry cookie cups that won’t hold the caramel well.
- Chill before chocolate: Allowing the caramel-topped cookies to chill in the fridge helps set the caramel and ensures that the warm melted chocolate doesn’t make it runny when you apply it.
- Microwave chocolate in intervals: Melting your chocolate chips in 30-second bursts prevents overheating and burning, resulting in a smooth, glossy finish that’s perfect for topping your cookies.
- Experiment with toppings: Feel free to add a sprinkle of sea salt or crushed nuts on top of the chocolate for an extra flavor boost and a touch of elegance.
How to Serve Twix Cookie Cups
These delightful Twix Cookie Cups are not only a treat for the taste buds but also a feast for the eyes! Present them beautifully to elevate your dessert game at parties or gatherings.
Garnishes
- Sea salt flakes: A sprinkle of flaky sea salt on top brings out the sweetness of the caramel and chocolate, adding a gourmet touch.
- Chocolate drizzle: A quick drizzle of additional melted chocolate can create an elegant design that makes your cookie cups even more enticing.
Side Dishes
- Vanilla ice cream: The creamy richness of vanilla ice cream pairs wonderfully with the chewy texture of the cookie cups, creating a delightful contrast in every bite.
- Fresh berries: A side of juicy strawberries or raspberries adds a refreshing acidity that balances out the sweetness of the cookies.
- Whipped coconut cream: A dairy-free alternative that’s light yet indulgent; it complements the flavors without overpowering them.
- Coffee or tea: Offering a warm cup of coffee or herbal tea alongside these treats can enhance their flavors and provide a cozy finish to any meal.
With these serving suggestions in mind, you’re all set to enjoy your homemade Twix Cookie Cups! Happy baking!
Make Ahead and Storage
These Twix Cookie Cups are perfect for meal prep, allowing you to enjoy a sweet treat whenever the craving hits! Here’s how to store them properly to maintain their deliciousness.
Storing Leftovers
- Store any leftover cookie cups in an airtight container at room temperature.
- They will stay fresh for up to 3 days.
- If you want to preserve their texture longer, consider refrigerating them.
Freezing
- Allow the cookie cups to cool completely before freezing.
- Place them in a single layer on a baking sheet and freeze until solid.
- Once frozen, transfer them to a freezer-safe bag or container. They can be stored for up to 2 months.
Reheating
- When you’re ready to enjoy your frozen cookie cups, let them thaw in the refrigerator overnight.
- For a warm treat, you can pop them in the microwave for about 10-15 seconds or until warmed through.
FAQs
Here are some common questions you might have about making Twix Cookie Cups!
Can I make Twix Cookie Cups without eggs?
Absolutely! You can substitute the egg white with a flaxseed meal mixed with water (1 tablespoon of flaxseed meal and 2.5 tablespoons of water) as an egg replacement.
How do I store leftover Twix Cookie Cups?
Store leftover Twix Cookie Cups in an airtight container at room temperature for up to 3 days or refrigerate them for longer freshness.
Are Twix Cookie Cups suitable for meal prep?
Yes! These cookie cups are excellent for meal prep and can be made ahead of time, stored, and enjoyed throughout the week.
What variation can I try with Twix Cookie Cups?
Feel free to experiment by adding chopped nuts or drizzling caramel sauce over the chocolate layer for extra flavor!
How long do Twix Cookie Cups last?
When stored properly, Twix Cookie Cups can last up to 3 days at room temperature or up to 2 months in the freezer.
Final Thoughts
I hope you enjoy making these delightful Twix Cookie Cups as much as I do! They’re not only fun to prepare but also provide that nostalgic candy bar flavor right in your kitchen. Whether you’re treating yourself or sharing with friends, these cookie cups are sure to bring smiles all around. Happy baking!
Twix Cookie Cups
Twix Cookie Cups are a delightful twist on the classic candy bar, combining a soft sugar cookie base with luscious caramel and a rich chocolate topping. Perfect for any occasion, these easy-to-make treats will bring joy to both kids and adults alike. Whether you’re whipping them up for a family gathering or enjoying them during a cozy night in, these cookie cups are sure to impress and satisfy your sweet tooth. With just a handful of simple ingredients, you can create these indulgent bites that taste as good as they look.
- Prep Time: 20 minutes
- Cook Time: 8 minutes
- Total Time: 28 minutes
- Yield: Approximately 12 cookie cups 1x
- Category: Dessert
- Method: Baking
- Cuisine: American
Ingredients
- 1/2 cup salted butter
- 1/2 cup granulated sugar
- 1 tsp vanilla extract
- 1 egg white
- 1 1/2 cups all-purpose flour
- 1 tsp baking powder
- 20 unwrapped caramels
- 1 tbsp milk
- 2 cups milk chocolate chips
Instructions
- Preheat your oven to 350°F (175°C).
- Cream together salted butter and granulated sugar in a mixing bowl until light and fluffy.
- Add egg white and vanilla extract; mix until well combined.
- Incorporate all-purpose flour and baking powder until just combined.
- Roll out dough to about 1/4 inch thick and cut into circles; place on an ungreased baking pan.
- Bake for 6-8 minutes or until puffed and no longer glossy; let cool completely on a wire rack.
- Combine unwrapped caramels and milk in a microwave-safe bowl, heating for one minute until smooth.
- Spoon caramel onto each cooled cookie base and chill in the fridge for 10-15 minutes.
- Melt chocolate chips in intervals of 30 seconds, stirring until smooth.
- Spread melted chocolate over the caramel layer; allow to cool before serving.
Nutrition
- Serving Size: 1 cookie cup (30g)
- Calories: 140
- Sugar: 12g
- Sodium: 50mg
- Fat: 7g
- Saturated Fat: 4g
- Unsaturated Fat: 2g
- Trans Fat: 0g
- Carbohydrates: 17g
- Fiber: <1g
- Protein: <1g
- Cholesterol: 15mg