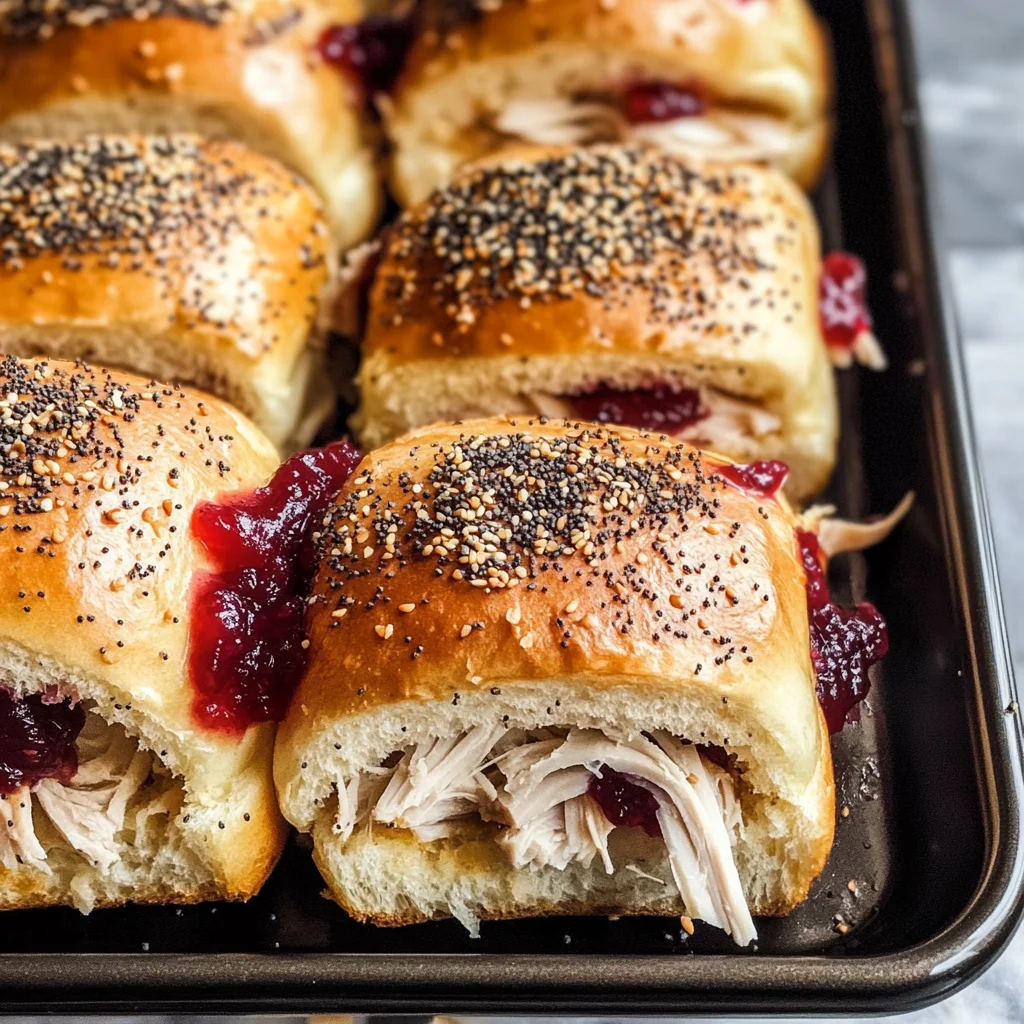
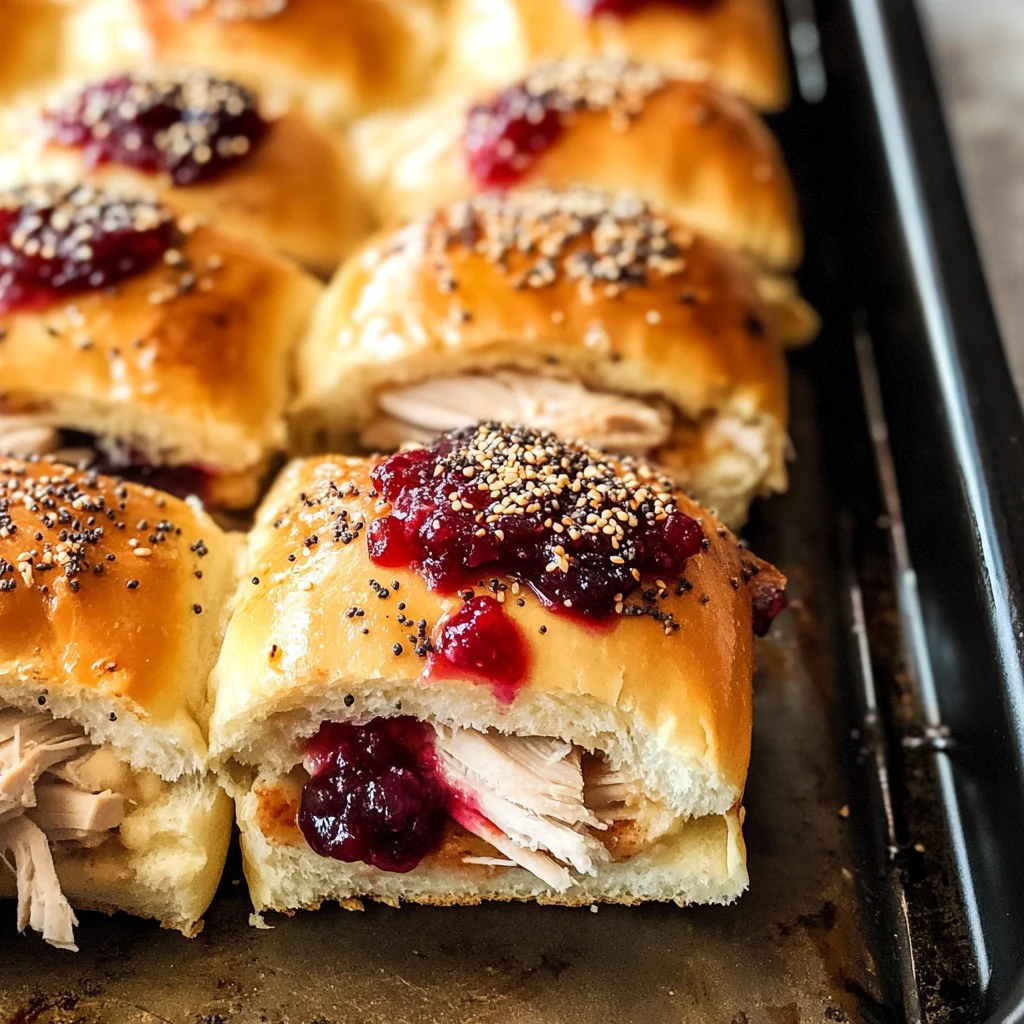
Turkey Cranberry Sliders
There’s something wonderfully nostalgic about the blend of turkey and cranberry sauce that whisks me back to cozy family gatherings, laughter echoing through the halls, and the warm aroma of a holiday feast wafting through the air. These Turkey Cranberry Sliders are more than just a recipe; they’re a delightful embrace of tradition and innovation, capturing the very essence of what makes food such a profound connector in our lives. The moment you sink your teeth into one of these sliders, you’re met with a symphony of flavors—the sweet Hawaiian rolls cradling tender turkey, tangy cranberry sauce, and melted provolone cheese that oozes comfort. Trust me when I say this dish will become an instant favorite, whether you’re serving it for dinner or bringing it to your next holiday gathering.
What makes these Turkey Cranberry Sliders truly special is their versatility. They are perfect for repurposing leftover Thanksgiving turkey, turning what might be a mundane meal into something extraordinary. Imagine gathering with friends and family around a platter of these sliders during festive occasions or even just a casual weeknight dinner. It’s all about making memories, and there’s nothing quite like sharing food that evokes nostalgia while introducing new flavors to your loved ones. So grab your apron, and let’s dive into this delicious culinary adventure together!
Turkey Cranberry Sliders: A Taste of Tradition in Every Bite
These Turkey Cranberry Sliders are not only simple to prepare but also utterly irresistible! Combining the sweet softness of Hawaiian rolls with savory turkey and zesty cranberry sauce creates a flavor explosion that’s hard to resist. Whether you’re entertaining guests or simply indulging on a cozy night in, these sliders promise satisfaction in every bite.
Ingredients:
As we embark on this culinary journey together, let’s gather our ingredients! Each element plays a pivotal role in crafting these flavorful sliders that will surely become beloved staples in your kitchen.
- 12 Hawaiian rolls. These delightful little rolls are the cornerstone of our sliders; their sweet flavor and soft texture create the perfect base for holding all our delicious fillings together. When you bite into them, they offer an almost pillowy experience that complements the heartiness of the turkey beautifully. Look for fresh rolls at your local bakery or grocery store—trust me, it’s worth it! If Hawaiian rolls aren’t available, you can substitute them with any soft dinner roll; just ensure they’re slightly sweet to maintain that signature taste.
- 3 cups shredded turkey (12 ounces). This is where we get to bring those holiday leftovers back into play! Shredded turkey adds not only protein but also moisture and richness to our sliders. If you don’t have leftover turkey on hand, rotisserie chicken is an excellent alternative—it’s tender and seasoned perfectly for this dish. What’s crucial here is ensuring that the meat is juicy; dry turkey can lead to lackluster sliders, so consider adding a bit more cranberry sauce if needed for extra moisture.
- 1 cup cranberry sauce. The star ingredient! Its tartness balances out the savory notes from the turkey and cheese while providing that beautiful pop of color. Homemade cranberry sauce can elevate this dish even more; I love making mine with fresh cranberries simmered down with orange juice and zest for added brightness! If you’re short on time or prefer convenience, store-bought works just fine too—just be sure to choose one that’s not overly sweetened.
- 4 ounces provolone cheese (6 slices). Cheese is essential here—not only does it melt beautifully over our toppings but it also brings a creamy element that ties everything together harmoniously. Provolone has a mild flavor that complements rather than competes with other ingredients, but feel free to swap it out for mozzarella or even gouda if you’re feeling adventurous! Just make sure whatever cheese you choose melts well; we want gooey perfection with every bite!
- 1 tablespoon butter (melted). This liquid gold will serve as our glaze—brushing it over the tops of the rolls ensures they bake up golden brown and crispy while adding an irresistible richness to each slider. Always use unsalted butter so you can control the saltiness; plus, melting it fully allows for smooth application over the rolls without any clumping.
- 2 teaspoons honey. Adding honey gives us a touch of sweetness that enhances all those flavors while balancing out any tartness from the cranberry sauce. It’s important not to skip this step; I promise you’ll notice its absence if omitted! If you prefer another natural sweetener like agave nectar or maple syrup, feel free to substitute.
- 1 teaspoon dijon mustard. This ingredient might seem small but trust me—it packs quite a punch! The mustard adds depth with its slight tanginess and helps brighten up all those rich flavors. Plus, it acts as an emulsifier when mixed with butter and honey—ensuring our glaze is silky smooth and evenly distributed across those lovely rolls.
- 1 teaspoon everything bagel seasoning. This versatile blend of sesame seeds, poppy seeds, dried garlic, onion flakes, and sea salt is absolutely paramount in elevating our sliders’ flavor profile! Sprinkling this seasoning mix not only adds texture but also introduces layers of flavor that make each slider feel gourmet without much extra effort on our part.
Equipment You’ll Need:
Before we dive into making these mouthwatering sliders, let’s talk about some essential tools you’ll need on this delicious journey! Having the right equipment makes everything smoother—from prep work to baking—and ensures your end result is nothing short of perfection.
- Baking dish (9×13 inches) – This classic dish will hold all your assembled sliders snugly together as they bake up beautifully in the oven. Opt for glass or ceramic if possible; they distribute heat evenly which helps achieve that perfect golden crust!
- Pastry brush – A pastry brush is key when applying our buttery glaze over the top—we want every inch coated so we get maximum flavor in each bite! If you don’t have one handy, feel free to use a clean paintbrush reserved solely for kitchen use—just be sure it’s food-safe!
- Sharp knife – A good sharp knife comes in handy when cutting those sweet Hawaiian rolls horizontally without squishing them flat or tearing them apart—no one wants torn sandwiches at their gathering!
- Mixing bowl – You’ll need this bowl for whisking together our glaze ingredients; using one large enough ensures no spills occur while mixing—let’s keep things tidy!
Now you’re equipped not just with ingredients but also tools ready for action! Let’s move forward—these delicious Turkey Cranberry Sliders await us!
Preparing the Turkey Cranberry Sliders
Step 1: Preheat Your Oven
Preheating your oven is absolutely crucial before diving into assembling these delightful sliders because it sets us up for success right from the start! Set your oven temperature to 350°F (about 175°C) so it reaches optimal baking conditions while we prepare our slider masterpiece. This ensures even cooking throughout—the last thing we want are cold centers or overly dry edges when we finally pull them out after baking! Plus, having that warm oven ready means less waiting time once everything’s assembled—a win-win if you ask me!
Step 2: Whisk Together Your Glaze
In a small mixing bowl (the kind you’d whisk eggs in works perfectly!), combine 1 tablespoon melted butter with 2 teaspoons honey and 1 teaspoon dijon mustard using either a whisk or fork until smooth—a quick process that takes less than two minutes tops! This glaze serves multiple purposes: it enhances flavor while helping create an appetizing golden crust atop our buns as they bake away happily in their dish below. Make sure all ingredients blend well—this mixture should look glossy rather than separated; if it’s too thick add another drizzle of melted butter until desired consistency achieved.
Step 3: Assemble Your Sliders
Now comes one of my favorite parts—the assembly process! Start by carefully slicing each Hawaiian roll horizontally through its center so you’ve got two halves per roll (think burger style!). Lay down all bottom halves neatly spaced apart within your baking dish like little beds awaiting their toppings! Begin layering by generously covering each bottom half with approximately 3 cups shredded turkey evenly distributed across them—don’t skimp here since this will provide hearty goodness packed full of protein inside each slider later on!
Next up? Dollop spoonfuls upon spoonfuls of cranberry sauce directly onto those lovely piles we’ve constructed—you want an even layer spread across each portion giving us maximum flavor infusion come baking time ahead… Don’t forget about placing six slices provolone cheese atop this tangy goodness before capping off everything gently using corresponding top halves from earlier—we’re creating magic beneath those fluffy lids!
Step 4: Brush That Glaze!
With faithful hands ready now comes brushing time! Using your pastry brush dipped generously into glistening glaze mixture begin applying upwards toward topside surfaces ensuring even coverage occurs across both areas thoroughly… Feel free adding extra touches between sandwiches themselves too should desire arise—it’ll seep down creating stronger flavor profiles as they bake away harmoniously together later on… The goal? Achieving beautiful sheen reflecting light off baked beauty awaiting us post-cooking session underway shortly thereafter!
Now glance over at those beauties nestled cozily within their baking dish—aren’t they stunning already? Next step involves sprinkling everything bagel seasoning atop final layer before sliding pan inside preheated oven yielding mouthwatering results shortly thereafter…
Final Thoughts on Your Turkey Cranberry Sliders Journey
As you take that first bite of your homemade Turkey Cranberry Sliders—a harmonious blend of savory turkey mingling with sweet-tart cranberry enveloped in melted cheese—all I can say is wow! This recipe encapsulates comfort food at its best; approachable yet indulgent enough for special occasions. Whether you’re using leftover turkey or preparing this dish fresh for family gatherings or weeknight dinners, know that you are creating something truly extraordinary.
So gather around with friends or family—these sliders are meant to be shared! Feel free to experiment by adding other toppings like fresh arugula or sliced avocado if you’re feeling creative; after all, cooking is all about bringing joy into our lives through food. Remember each ingredient plays its role in crafting not just a meal but cherished memories around your table. Enjoy every moment spent making—and devouring—your Turkey Cranberry Sliders!
Storage and Enjoyment Tips for Your Turkey Cranberry Sliders
Now that you’ve whipped up a delightful pan of Turkey Cranberry Sliders, it’s time to dig in and enjoy the symphony of flavors that will dance on your palate! But what if there are leftovers (which I truly doubt, but just in case)? Worry not—I’m here to share some tips on how to preserve this culinary masterpiece while maintaining its deliciousness.
Storing Leftover Turkey Cranberry Sliders
To keep those Turkey Cranberry Sliders fresh and utterly delectable, it’s best to store them in an airtight container. This is crucial because it protects the sliders from drying out and keeps them flavorful. You can easily pop them in the fridge where they’ll stay good for about 3-4 days. If you want to maintain that lovely softness of the Hawaiian rolls, consider placing a slice of bread in the container with them; this little trick helps retain moisture, ensuring every bite remains as satisfying as the first. When reheating, I suggest using an oven or toaster oven instead of a microwave—trust me on this! The oven allows the edges to crisp up beautifully while keeping everything inside warm and gooey, making each slider feel freshly baked all over again.
Freezing Components for Later
If you’d like to prepare ahead or save some for a rainy day, freezing these sliders is a fantastic option! To freeze properly, wrap each slider individually in plastic wrap or aluminum foil, then place them in a freezer-safe bag or container. They can stay frozen for up to three months without losing their flavor or texture, so you have plenty of time to enjoy them at your leisure. When you’re ready to indulge again, simply thaw them in the fridge overnight and reheat them in the oven as mentioned earlier. This convenience factor makes it easy to impress guests or satisfy late-night cravings without much effort—nothing beats having homemade sliders waiting for you when hunger strikes!
Dinner
Turkey Cranberry Sliders

Indulge in the delicious nostalgia of Turkey Cranberry Sliders, a delightful twist on traditional flavors that’s perfect for any occasion. These sliders combine the sweet softness of Hawaiian rolls with tender shredded turkey and zesty cranberry sauce, creating a symphony of tastes in every bite. Ideal for repurposing holiday leftovers or impressing guests at your next gathering, these sliders are simple to prepare and utterly irresistible. With melted provolone cheese adding a creamy touch and a golden buttery glaze bringing it all together, these sliders promise to become a staple in your kitchen. Whether enjoyed during festive gatherings or cozy weeknight dinners, they’re sure to evoke warmth and fond memories around the table.
- Prep Time: 15 minutes
- Cook Time: 20 minutes
- Total Time: 35 minutes
- Yield: Serves 12 1x
- Category: Main
- Method: Baking
- Cuisine: American
Ingredients
- 12 Hawaiian rolls
- 3 cups shredded turkey
- 1 cup cranberry sauce
- 4 ounces provolone cheese (6 slices)
- 1 tablespoon melted butter
- 2 teaspoons honey
- 1 teaspoon dijon mustard
- 1 teaspoon everything bagel seasoning
Instructions
- Preheat your oven to 350°F (175°C).
- Whisk together melted butter, honey, and dijon mustard until smooth.
- Slice Hawaiian rolls in half and place the bottoms in a baking dish.
- Layer shredded turkey evenly over the roll bottoms.
- Spread cranberry sauce over the turkey, followed by slices of provolone cheese.
- Place the top halves of the rolls on top and brush with the prepared glaze.
- Sprinkle everything bagel seasoning on top.
- Bake for 18-22 minutes until cheese is bubbly and tops are golden brown.
Nutrition
- Serving Size: 1 slider (90g)
- Calories: 290
- Sugar: 9g
- Sodium: 480mg
- Fat: 12g
- Saturated Fat: 5g
- Unsaturated Fat: 6g
- Trans Fat: 0g
- Carbohydrates: 30g
- Fiber: 1g
- Protein: 15g
- Cholesterol: 40mg