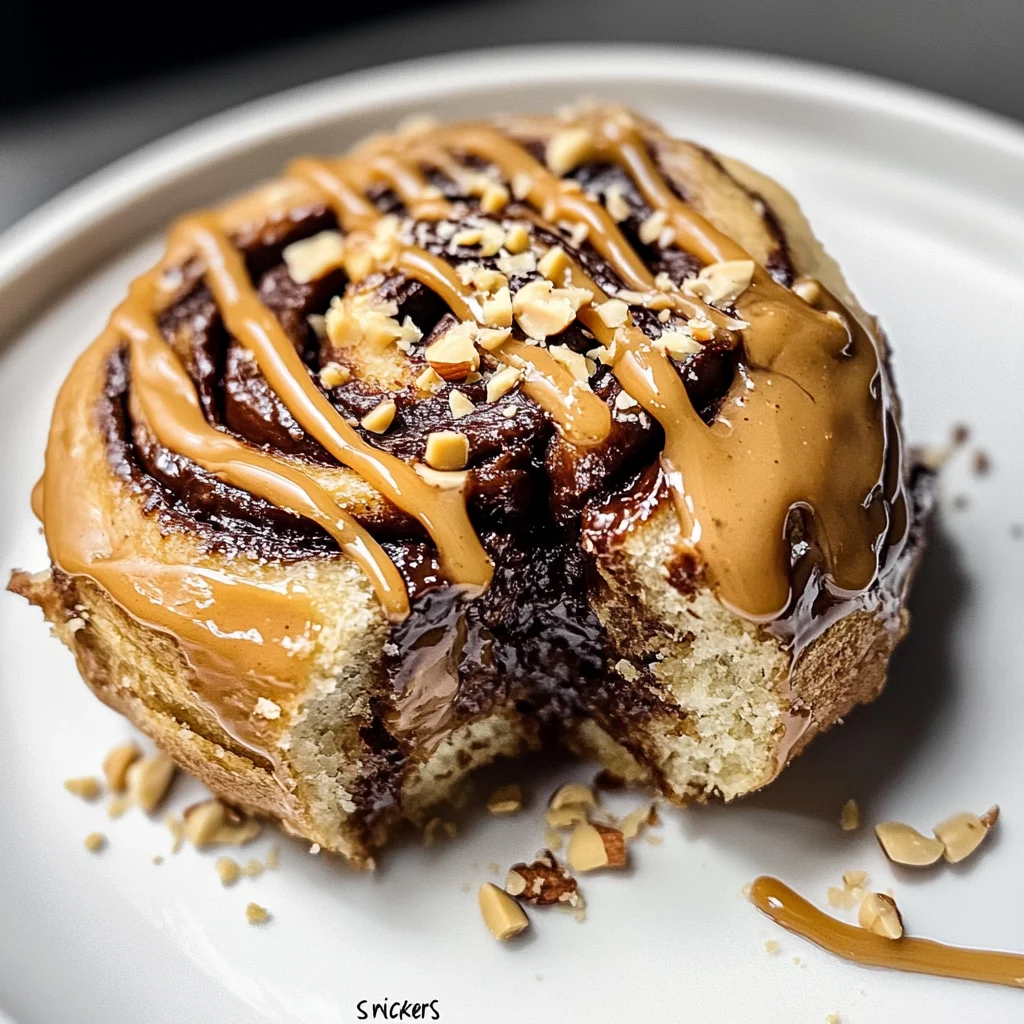
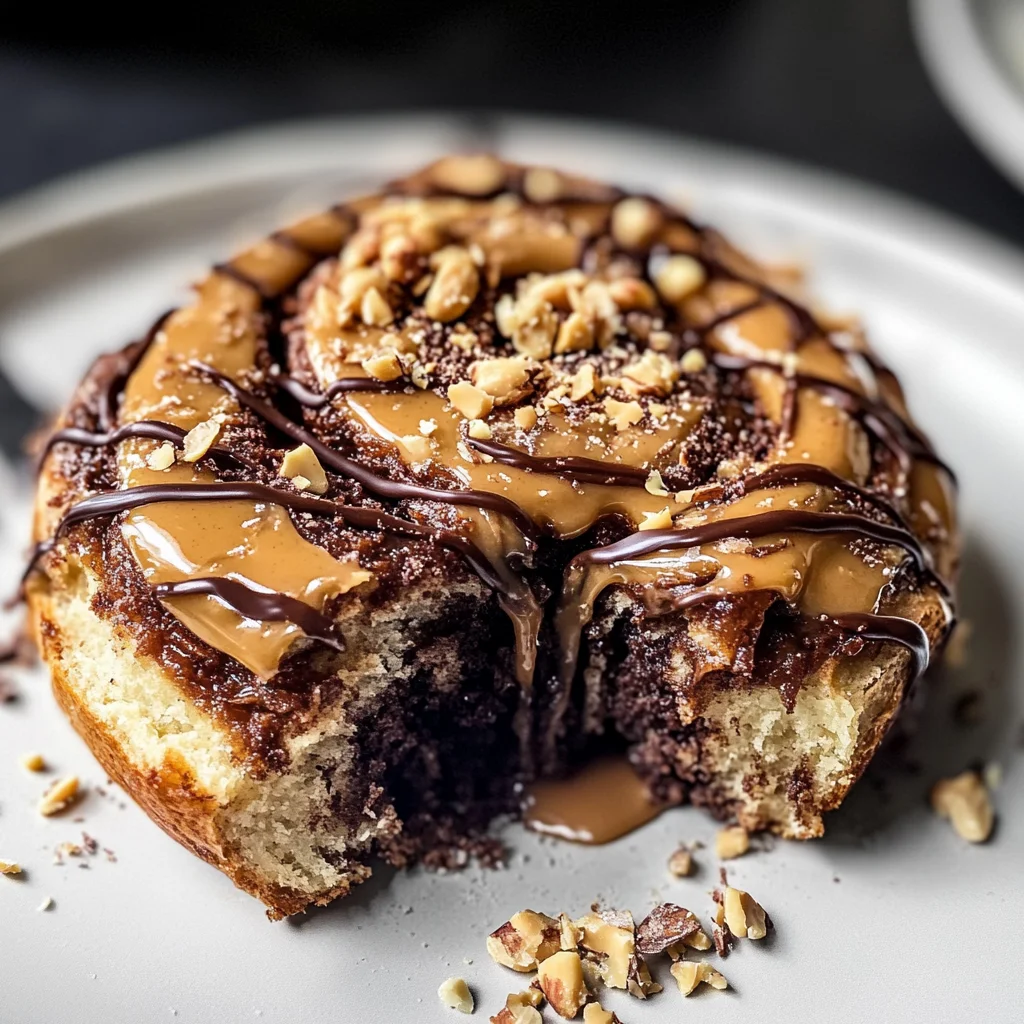
“Snickers” Cinnamon Rolls
There’s something profoundly beautiful about the act of baking, isn’t there? It’s not just about mixing flour and sugar; it’s an experience that transcends the mundane and transforms simple ingredients into a moment of joy. This is especially true when we talk about Snickers Cinnamon Rolls, which are not just a treat but a celebration of flavors. Imagine the warm aroma wafting through your kitchen as rich chocolate mingles with the nutty essence of peanuts, all enveloped in soft, fluffy dough that gives each bite a heavenly texture. The delightful contrast between sweet and salty creates a symphony of flavors that dances on your palate, leaving you craving more. These rolls are a testament to how food can evoke feelings, spark memories, and bring loved ones together around the table.
When I first stumbled upon this recipe, I was captivated by its unique twist on traditional cinnamon rolls. It wasn’t just the idea of incorporating chocolate and peanuts that caught my attention; it was the way this recipe bridges nostalgia with innovation. The classic flavors we adore from our favorite candy bars have been reimagined into something extraordinary yet comforting. Perfect for breakfast or brunch gatherings, these Snickers Cinnamon Rolls will impress your friends and family with their incredible taste while accommodating various dietary needs. Trust me, once you make these rolls, you’ll find every excuse to whip them up again and again—they’re that good!
Snickers Cinnamon Rolls: A Decadent Morning Delight
Let’s dive into this delightful recipe together! The process may take some time, but every minute spent is well worth it when you pull those warm rolls from the oven, drizzled in luscious peanut butter caramel icing. So grab your apron and let’s embark on this scrumptious culinary adventure!
Ingredients:
As we gather our ingredients for these sensational Snickers Cinnamon Rolls, it’s essential to appreciate each one and understand its role in creating this masterpiece. This journey is not just about following steps—it’s about knowing why each component matters.
- 3 cups cassava flour. This gluten-free flour is truly special; it brings a wonderfully light and fluffy texture to our cinnamon rolls while being grain-free! Cassava flour acts like regular wheat flour in many recipes but without the gluten—making it perfect for those with dietary restrictions. When shopping for cassava flour, look for finely ground options to ensure an even dough consistency that will rise beautifully.
- 3 teaspoons psyllium husk powder. This ingredient is absolutely paramount when baking gluten-free goods since it mimics the binding properties of gluten. Psyllium husk powder helps create that desirable stretchiness in our dough, giving it a chewy texture reminiscent of traditional rolls. It’s essential to measure accurately here; too little might lead to crumbliness, while too much could make your dough too dense.
- 2 tablespoons date sugar. Not only does date sugar add sweetness to our dough, but it also provides a subtle caramel flavor that pairs seamlessly with the peanuts in our filling. Made from dehydrated dates, this natural sweetener retains some fiber and nutrients compared to refined sugars—talk about a win-win! If you can’t find date sugar, coconut sugar can be used as an alternative.
- 1 teaspoon baking powder and 1 teaspoon baking soda. These leavening agents work together to ensure our cinnamon rolls rise beautifully in the oven! Baking powder reacts immediately when mixed into wet ingredients while baking soda requires acid (like vinegar or lemon juice) to activate fully—both contribute to that pillowy-soft texture we crave.
- 1/2 teaspoon salt. Salt might seem like an afterthought in baking recipes, but trust me—it enhances all the other flavors in your rolls! It balances sweetness and elevates the taste profile immensely.
- 1 pack instant yeast (2 teaspoons). Yeast is what allows our dough to rise and develop flavor over time. Instant yeast doesn’t need proofing beforehand like active dry yeast does; simply mix it directly with your dry ingredients! It’s crucial for achieving those airy swirls we love so much in cinnamon rolls.
- 1 cup water. Water serves as the base for activating our yeast when mixed with warm water before combining with dry ingredients. The temperature of the water is vital here—too hot will kill the yeast while too cold will prevent activation altogether!
- 2 cups flax milk (or other plant milk). Flax milk adds moisture and richness without any dairy products—perfect for our vegan-friendly recipe! You can opt for other plant milks like almond or oat milk if you prefer; just ensure they’re unsweetened so they don’t alter the sweetness of your rolls.
- 4 tablespoons coconut butter. This wonderful ingredient brings both fat content and flavor into our cinnamon roll dough—a beautiful fusion of tropical coconut essence complements every bite! Melt it down gently before adding so that it combines seamlessly with other ingredients.
- 1 cup date sugar (for filling). Just like earlier mentioned date sugar, this will create a sweet filling that harmonizes perfectly with chocolate! Feel free to adjust based on your sweetness preference.
- 1 cup chocolate chips, melted with 1/4 cup coconut butter. Oh yes—the heart of our Snickers Cinnamon Rolls lies in this decadent chocolate layer! Use high-quality dairy-free chocolate chips for melty goodness; melting them together with coconut butter creates an irresistibly creamy filling.
- 2 tablespoons coconut butter, again for enhancing flavor within our filling—this adds richness alongside texture!
- 2 tablespoons cacao powder adds depth—you’ll taste pure chocolatey deliciousness when combined with sweet ingredients!
- 1/2 cups peanuts, chopped bring that signature crunch factor reminiscent of Snickers bars! They add both flavor complexity along with textural contrast against soft roll interiors.
- A pinch of salt balances out sweetness within both fillings & frosting alike!
- 2.5 cups organic powdered sugar provides structure & smoothness needed when making icing—opt for organic brands whenever possible!
- 1 cup natural peanut butter, creamy or crunchy based on preference—this serves as another layer packed full of nutty goodness while offering protein boost too!
- 1 teaspoon pure vanilla extract, because who doesn’t love vanilla? Its aromatic essence complements all flavors beautifully without overpowering them!
- Finally, add another 1/2 cup unsweetened flax milk (or other plant milk) along with 2 tablespoons maple syrup which provide moisture plus additional sweetness—a perfect combination indeed!
Now that we’ve gathered everything we need let’s get ready to bake magic together!
Equipment You’ll Need:
Before we begin crafting these fabulous Snickers Cinnamon Rolls, let me share some essential tools that will make this experience smoother and more enjoyable! Having the right equipment not only simplifies each step but also ensures consistent results throughout your baking adventure.
- Mixing bowls – A set of mixing bowls in various sizes is indispensable when preparing any recipe! Large bowls are perfect for mixing dry ingredients together or allowing doughs to rise comfortably without spilling everywhere! Opting for glass or stainless steel versions ensures durability while allowing you easy visibility during preparation phases.
- Measuring cups & spoons – Precision is key in baking; using proper measuring tools guarantees accurate ingredient portions resulting in successful outcomes every time! Invest in dry measuring cups specifically designed for fluffy powders like flour versus liquid measuring jugs meant more towards liquids—it makes all difference later on!
- Rolling pin – A good rolling pin becomes your best friend at shaping out those beautiful rectangles ready for filling! Look out for one made from hardwood since they provide better control over pressure applied during rolling process leading evenly sized layers throughout creation stage.
- Baking dish – Choose an appropriate size dish where swirled beauties can bake up side-by-side comfortably without crowding —usually an 8×8 or 9×13 inch pan works well depending upon how big/small desired rolls turn out!
Preparing the Snickers Cinnamon Rolls
Step 1: Activate Your Yeast
To start off this magical journey toward fluffy perfection, we’ll first activate our yeast by proofing it in warm water—a crucial initial step you won’t want to skip! Take your warm water (not overly hot!) and sprinkle over instant yeast gently before letting it sit undisturbed for about 10 minutes until you see tiny bubbles forming atop—that foamy layer signifies successful activation! This process encourages fermentation which leads us toward light-as-air dough later on; don’t rush because patience pays off here!
Step 2: Combine Dry Ingredients
While waiting on yeast magic unfold before us let’s whisk together all dry components within large mixing bowl: cassava flour alongside psyllium husk powder date sugar(s), baking powder/baking soda along pinch salt ensuring even distribution across mixture base—we want every bite infused with balanced flavor throughout later stages too! Mixing thoroughly now also eliminates any clumps hiding among fine flours making sure consistency remains smooth before moving forward toward wet additions once foaming yeast completed its task ahead!
Step 3: Create Your Dough Mixture
Now comes one of my favorite parts where things get exciting—we’re going combine everything into cohesive unit destined become delicious cinnamon roll bliss soon enough! After confirming readiness from proofed yeast earlier gently pour it along remaining wet ingredients including flax milk melted coconut oil straight onto whisked dry mixture then stir until cohesive mass forms resembling sticky dough ball shape emerging through fingers—a sign you’ve nailed consistency perfectly here folks!
Step 4: Allow Dough To Rise
It’s time now to nurture our newly formed ball by covering it lovingly using kitchen towel allowing warmth circulate around letting rise undisturbed anywhere between forty-five minutes up hour long depending upon room temp conditions around—this resting period encourages development flavors enriching overall experience yielding delightful treat afterwards ahead trust me on this one folks!!
Stay tuned as I guide us through more steps leading ultimate indulgence awaiting us soon enough…
Step 5: Roll Out the Dough – The Canvas of Deliciousness
Now we’re entering a magical phase where we’ll transform our delightful dough into a beautiful rectangle, ready to be filled with those luscious flavors. Start by generously dusting your clean cutting board with cassava flour. This gluten-free flour will not only keep our dough from sticking but also add a lovely nutty flavor to our rolls. With your hands, gently press down the dough to flatten it slightly before rolling it out with a rolling pin. Aim for a rectangle that measures about 9 by 24 inches. Why this size? Well, it allows for ample filling and gives you those signature swirls that are so irresistible!
As you roll, take care not to rush this step; the more even and flat your dough is, the better the rolls will rise and bake. You want to create a uniform thickness of about 1/4 inch throughout—this ensures that every bite is consistent in texture and flavor. Keep an eye out for any cracks or tears in the dough; if you encounter them, simply pinch them back together. Trust me on this: a smooth surface is crucial for achieving those stunning cinnamon roll swirls!
Step 6: Crafting the Filling – A Decadent Symphony
Next up, let’s talk filling—a step that’s nothing short of transformative! In a microwave-safe bowl, combine your chocolate chips with 1/4 cup of melted coconut butter. Microwave them together in bursts of 30 seconds at first, then reduce to 10 seconds as needed. This slow melting process is vital because it prevents burning and ensures that everything melts evenly into a luxurious chocolate mixture that will glide beautifully over our dough.
Once melted and silky smooth, remove it from the microwave and whisk in the date sugar, cacao powder, and salt along with those additional two tablespoons of coconut butter. This blend creates an utterly intoxicating filling that melds rich chocolate with just the right amount of sweetness and depth from the cacao powder. Now’s the time to let your senses guide you—take a moment to inhale that heavenly chocolate aroma! It’s crucial to leave out the chopped peanuts for now; they’ll act as a delightful crunch topping once we’ve spread our velvety filling over the dough.
Step 7: Spread the Filling – The Art of Generosity
With your filling ready, it’s time to bring this beauty together! Gently pour the melted chocolate mixture onto your rolled-out dough. Oh my goodness—it looks divine already! Using your fingers (it should feel like an edible paintbrush!), start spreading the filling all the way to every edge of the rectangle. Take your time here; don’t rush this step! Allowing yourself this moment of savoring each movement is essential because it ensures that every part of your cinnamon roll is infused with that luxurious chocolatey goodness.
As you spread, don’t worry if some of it melts slightly—that’s entirely normal and actually helps it spread more easily across the surface. The warmth from your hands will make it pliable; think of this as an intimate dance with your ingredients, getting them acquainted before they come together in harmony later on. Once you’ve got an even layer covering all parts of the dough, sprinkle those chopped peanuts over top like confetti at a celebration! This will ensure each bite has that delightful crunch reminiscent of everyone’s favorite candy bar.
Step 8: Rolling Up Your Creation – A Careful Embrace
Now comes one of my favorite parts—the rolling up process! Starting from the short edge closest to you, carefully begin to roll up your dough into a log shape. I can’t emphasize enough how important it is to keep this roll fairly tight but gentle—remember, gluten-free dough doesn’t have quite as much elasticity as traditional dough due to its lack of gluten structure. So while you want it snug enough for good form during baking, be mindful not to squish it too tightly; otherwise, you’ll lose those beautiful swirls we’ve worked so hard on!
As you roll, keep checking for any sticking or tearing—if there are small tears forming, simply pinch them back together gently as you go along. Once you’ve rolled it all up neatly into one thick log (and oh boy, does it look scrumptious!), it’s time to cut those rolls into pieces. Aim for slices about 1-1.5 inches thick; these will be just perfect for baking! Place them in a greased baking dish with their swirls facing upward—this ensures they get nice and golden while maintaining their gorgeous form.
Next Major Phase: Baking Your Perfect Snickers Cinnamon Rolls
Step 9: Baking Bliss – The Transformation Begins
Ahh, baking—the moment when all those beautiful elements come together in pure harmony! Preheat your oven to a cozy 350 degrees F (175 degrees C)—this temperature is absolutely paramount as it allows our rolls to rise gently while developing that lovely golden hue they’re known for (even if gluten-free rolls take on a different color than their gluten counterparts). The smell wafting through your kitchen will be nothing short of heavenly!
Once preheated, slide those swirled beauties into the oven and set a timer for about 20-25 minutes. But here’s where patience plays its critical role; it’s often tricky to know when gluten-free baked goods are perfectly done since they won’t necessarily take on that classic golden color we’re used to seeing with wheat-based treats. Instead, watch closely and look for slight puffing around the edges—they should feel springy yet firm when touched lightly on top.
Trust me; don’t over-bake these little gems! You want them soft and fluffy inside—if unsure whether they’re done or not after about 20 minutes have passed, check them at five-minute intervals until you’re confident they’re perfectly baked through but still tender.
Step 10: Whipping Up That Irresistible Peanut Butter Caramel Icing
While those rolls are baking away blissfully in their warm cocoon inside the oven, let’s pivot our attention toward creating what I can only describe as liquid gold—the peanut butter caramel icing! Grab your mixer (either stand or hand-held), and place your creamy natural peanut butter inside its bowl. Begin mixing on low speed—it helps avoid any splatters while incorporating air into our icing without losing its richness.
Next comes my secret weapon: flax milk combined with maple syrup and vanilla extract which adds layers upon layers of flavor while keeping everything beautifully vegan-friendly! Slowly add in organic powdered sugar until fully blended—this creates an icing that’s both decadent yet light enough not to overwhelm those glorious cinnamon rolls we’ve crafted so lovingly.
Once everything is well-combined into a smooth consistency (it should be perfectly spreadable but not too runny), allow yourself another moment here—taste test if you’d like! This icing is crucial because every generous dollop transforms each bite into something profoundly satisfying—you’ll feel like royalty indulging in such luxury!
Final Touches: Glazing Your Rolls & Savoring Every Bite
After patiently waiting for what feels like an eternity (but trust me—it’s worth every second), pull those golden-brown cinnamon rolls from the oven once they’re perfectly baked through but still soft at heart. Let them cool slightly—about five minutes—to prevent scorching yourself while icing them generously with our heavenly peanut butter caramel creation.
As you drizzle or spread this luscious icing over warm rolls still radiating warmth from their bake-off adventure in the oven—a wave of excitement will wash over you because let’s face it—the anticipation has been building since we started this culinary journey together!
Serve immediately while they’re still warm; watching everyone’s faces light up as they take their first bites is truly extraordinary—it’s moments like these that bind us together around food in joyous celebration! Any leftovers? Store them covered on your counter—though I promise they’ll hardly last long beyond two days—they’re simply too enticing!
And that’s how you make Snickers Cinnamon Rolls—a labor of love that brings comfort and joy right from my kitchen into yours! Enjoy every bite—and remember—you deserve all things deliciously sweet and unforgettable!
Storage and Enjoyment Tips for Your Snickers Cinnamon Rolls
And just like that, your kitchen is filled with the intoxicating aroma of freshly baked Snickers Cinnamon Rolls! As you pull them from the oven, the soft, fluffy dough paired with the rich chocolate and peanut caramel icing beckons you to dive in. But what if I told you that these delightful rolls not only taste divine fresh out of the oven but can also be enjoyed later? Let’s explore how to preserve that heavenly goodness so you can savor every bite in the days to come.
Storing Leftover Snickers Cinnamon Rolls
To keep your Snickers Cinnamon Rolls as soft and scrumptious as they were on baking day, it’s essential to store them properly. The best way to do this is by using an airtight container or wrapping them tightly in plastic wrap. This will protect them from drying out and maintain their luscious texture. If stored correctly, these gems will last for about 2-3 days at room temperature, but trust me when I say they won’t last that long! For an extra tip, consider placing a slice of bread in the container with the rolls; this simple trick helps keep them moist and fresh longer. When it comes time to indulge again, simply warm one in the microwave for about 15-20 seconds, allowing that gooey icing to soften just enough for a truly extraordinary experience!
Freezing Snickers Cinnamon Rolls for Later
If you want to save those indulgent flavors for another day (or just want to prepare ahead!), freezing your Snickers Cinnamon Rolls is a fabulous option. To freeze them perfectly, allow the rolls to cool completely, then place them in a freezer-safe bag or container. They’ll stay deliciously good for up to three months! When you’re ready to enjoy one (or two), simply take out as many as you desire and let them thaw overnight in the fridge. For a quick fix, pop them straight into the microwave or oven until warmed through—nothing beats that freshly-baked feeling! This makes it incredibly convenient for busy mornings or surprise brunch gatherings; imagine pulling out these delights from the freezer and treating your loved ones to an unexpected sweet surprise!
“Snickers” Cinnamon Rolls
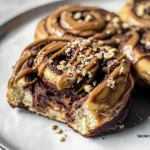
Indulge in the delightful world of “Snickers” Cinnamon Rolls, a vegan and gluten-free twist on a classic treat. These soft, fluffy rolls are filled with rich chocolate, crunchy peanuts, and drizzled with a creamy peanut butter caramel icing that transforms every bite into pure bliss. Perfect for breakfast or as an indulgent dessert, these rolls not only satisfy your sweet tooth but also bring warmth and joy to your kitchen. The aroma wafting through your home will have everyone eagerly anticipating a taste of this sweet creation. So gather your ingredients, roll up your sleeves, and let’s create a moment of happiness together!
- Prep Time: 30 minutes
- Cook Time: 25 minutes
- Total Time: 55 minutes
- Yield: Approximately 12 servings 1x
- Category: Dessert
- Method: Baking
- Cuisine: American
Ingredients
- 3 cups cassava flour
- 3 teaspoons psyllium husk powder
- 2 tablespoons date sugar
- 1 teaspoon baking powder
- 1 teaspoon baking soda
- 1/2 teaspoon salt
- 1 pack instant yeast (2 teaspoons)
- 1 cup warm water
- 2 cups flax milk (or other plant milk)
- 4 tablespoons coconut butter (melted)
- 1 cup chocolate chips (dairy-free)
- 1/2 cup chopped peanuts
Instructions
- Activate yeast by mixing it with warm water; let sit for 10 minutes until bubbly.
- In a large bowl, whisk together cassava flour, psyllium husk powder, date sugar, baking powder, baking soda, and salt.
- Combine activated yeast mixture with dry ingredients along with flax milk and melted coconut butter; mix until a sticky dough forms.
- Cover the dough and let rise for 45 minutes to an hour in a warm place.
- Roll out the dough into a rectangle (9×24 inches) on a floured surface.
- Prepare the filling by melting chocolate chips with coconut butter; add date sugar, cacao powder, and salt.
- Spread the filling over the rolled-out dough, top with chopped peanuts, then roll tightly into a log.
- Cut into 1-inch slices and place in a greased baking dish; allow to rise for another 30 minutes.
- Preheat oven to 350°F (175°C); bake for 20-25 minutes until lightly puffed.
- For icing: Mix peanut butter with maple syrup and powdered sugar until smooth; drizzle over warm rolls.
Nutrition
- Serving Size: 1 serving
- Calories: 280
- Sugar: 12g
- Sodium: 190mg
- Fat: 12g
- Saturated Fat: 5g
- Unsaturated Fat: 7g
- Trans Fat: 0g
- Carbohydrates: 40g
- Fiber: 5g
- Protein: 6g
- Cholesterol: 0mg