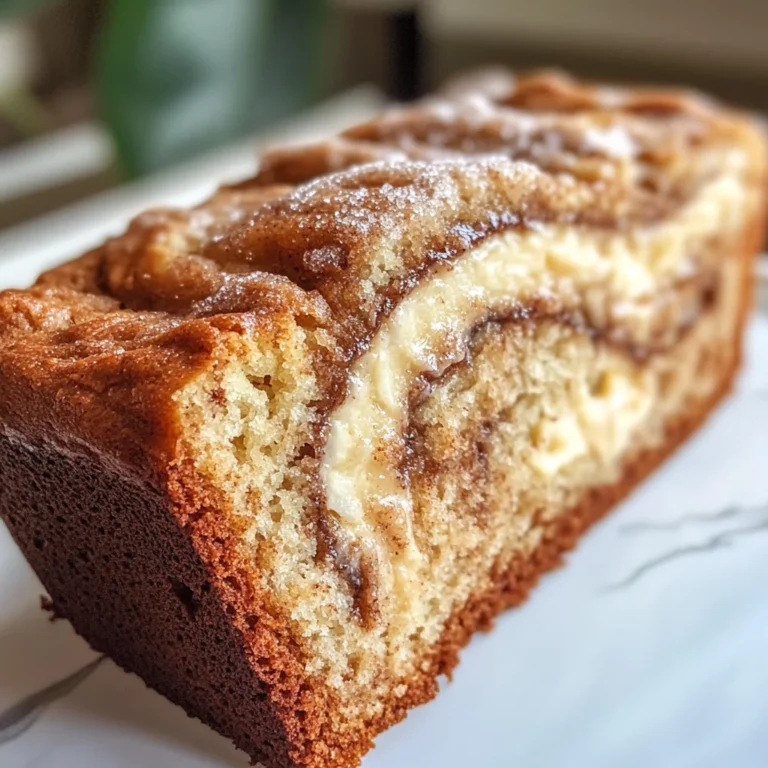
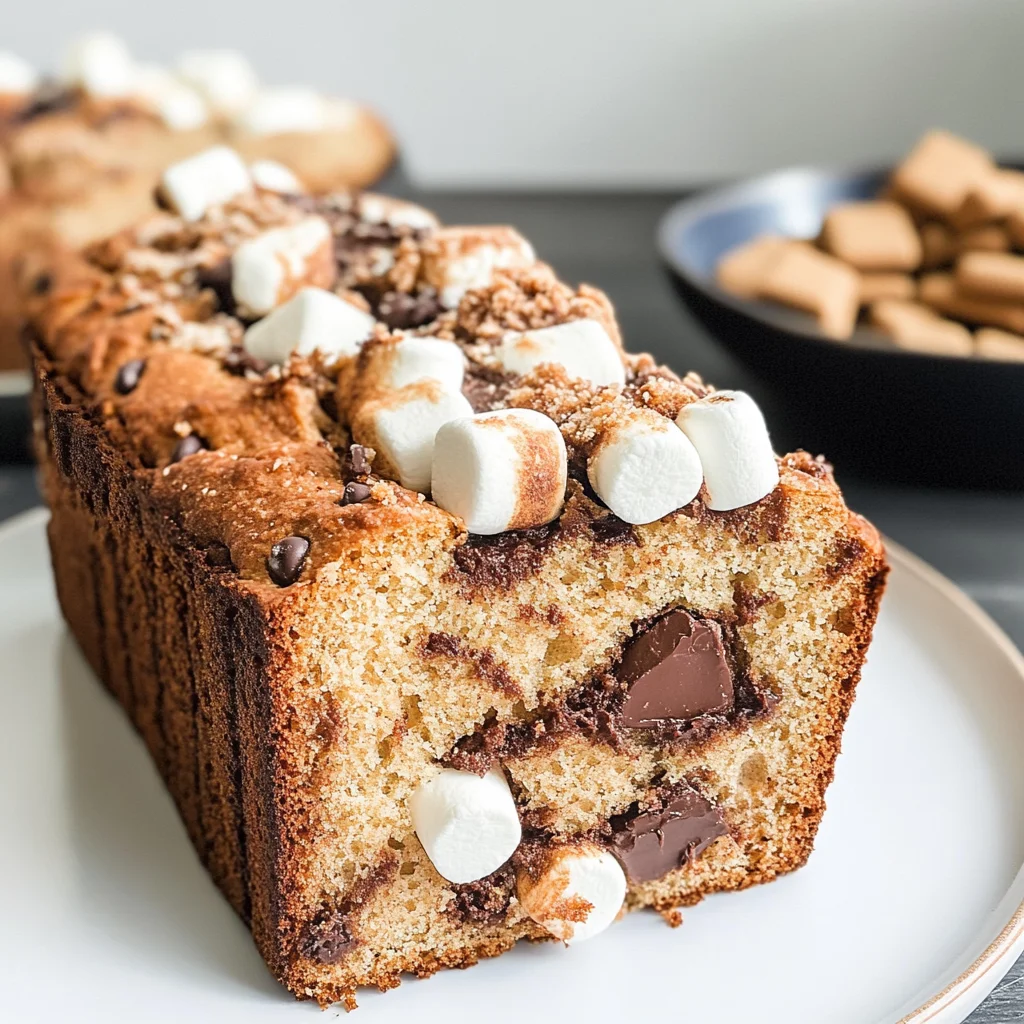
S’mores Bread
There’s something incredibly enchanting about the aroma of freshly baked bread wafting through your home, isn’t there? It’s more than just a scent; it’s a warm embrace that beckons you to gather around with loved ones, sharing stories and laughter. Today, I want to take you on a beautiful journey into the heart of comfort food with my beloved S’mores Bread. Imagine if you will, the nostalgic flavors of campfire s’mores—graham crackers, melty chocolate, and fluffy marshmallows—infused into a moist, tender quick bread that makes any moment feel special. This recipe is an experience, a revelation that invites us to blend tradition with innovation while creating something utterly extraordinary.
Every bite of this S’mores Bread transports me back to summer nights spent under the stars, surrounded by friends and the gentle crackle of a fire. The way the chocolate melts into gooey perfection and how the marshmallows toast to that perfect golden hue—it’s nothing short of magical. And here we are, bringing those cherished memories into our kitchens! Whether it’s for breakfast, brunch, or just a well-deserved afternoon treat, this bread is sure to become a cherished staple in your home. I promise you’ll find joy not just in baking but also in sharing this delightful creation with those you hold dear.
S’mores Bread: A Sweet Taste of Nostalgia
Let’s dive into making this blissful S’mores Bread together! I can’t wait for you to experience this wonderful creation in your own kitchen.
Ingredients:
As we embark on this culinary adventure, let’s gather our ingredients. Each component plays a vital role in crafting our S’mores Bread—a true symphony of flavors that will echo the warmth of campfires long past.
- 1 1/4 cups all-purpose flour. Flour serves as the backbone of our bread structure—it’s what gives it body and texture. I recommend using all-purpose flour for its perfect balance; it creates a light crumb while holding everything together beautifully. When measuring flour, be sure to spoon it into your measuring cup and level it off with a knife—packing it down can lead to dense bread!
- 3/4 cup fine graham cracker crumbs (+ additional for topping). These delightful crumbs are key to achieving that iconic s’mores flavor! They bring sweetness and texture while infusing our bread with a subtle nuttiness. You can easily crush store-bought graham crackers or blend them yourself; just make sure they’re finely crushed so they incorporate smoothly into the batter.
- 1/2 teaspoon baking powder. This leavening agent is absolutely paramount for giving our bread that lovely rise! It helps create a light texture by producing carbon dioxide bubbles when mixed with wet ingredients and then heated in the oven. Make sure your baking powder is fresh; old baking powder can result in flat bread!
- 1/2 teaspoon baking soda. Similar to baking powder but slightly different in function, baking soda works best in conjunction with acidic ingredients like honey and sour cream in our recipe here. It adds an extra lift and ensures our S’mores Bread is fluffy rather than dense—trust me on this one!
- 1/2 teaspoon salt. Salt is crucial as it enhances all flavors! It may seem small, but it brings out the sweetness of chocolate and balances the richness of butter in every single bite.
- 1/2 cup (1 stick) unsalted butter, softened. Butter is liquid gold when it comes to flavor! Using softened butter allows us to cream it properly with sugar, creating an airy texture that’s essential for achieving that melt-in-your-mouth quality we crave in baked goods. If you can find high-quality European-style butter with higher fat content, go for it—it’ll elevate your bread even further!
- 1/2 cup brown sugar. This adds moisture and depth of flavor thanks to its molasses content—think caramel notes mingling beautifully throughout each slice! Brown sugar also contributes to that tender crumb we desire; don’t skip it!
- 1/4 cup honey. Honey not only adds natural sweetness but also contributes moisture and helps keep our bread soft longer. Plus, its distinct floral notes complement the other flavors beautifully—what’s not to love?
- 2 large eggs. Eggs are non-negotiable—they bind everything together while adding richness and enhancing flavor too! Make sure they’re at room temperature before mixing; this helps them combine more evenly into the batter.
- 1 teaspoon vanilla extract. A splash of vanilla elevates every baked good! It adds warmth and complexity that rounds out all those sweet flavors perfectly—don’t skimp on quality here!
- 1 cup sour cream. This ingredient adds moisture and tanginess—which means every slice remains delectably rich without being overly sweet! If you’re looking for alternatives due to dietary preferences or availability, Greek yogurt works wonders as a substitute without sacrificing creaminess.
- 3/4 cup mini chocolate chips (+ additional for topping). Chocolate chips are where indulgence meets nostalgia! Mini chips melt throughout the loaf beautifully while providing pockets of gooey goodness—each bite feels like pure magic!
- 1/2 cup mini vegan marshmallows (+ additional for topping). These adorable little puffs add that quintessential marshmallow flavor without any animal-derived gelatin! When baked into the bread, they turn slightly chewy yet still maintain their fluffy character—it’s such an amazing contrast against the rich chocolate!
- 1 1.55-ounce Hershey’s chocolate bar (coarsely chopped). Nothing says s’mores like chunks of melted chocolate! The coarsely chopped pieces will create delightful melty spots within your bread that ooze decadence—just imagine biting into one!
Equipment You’ll Need:
Having the right tools makes all the difference when creating something as delightful as S’mores Bread—it sets you up for success and makes everything smoother! Let’s gather our trusty partners in this delicious endeavor so you can focus solely on enjoying this experience.
- Loaf pan (8 1/2 x 4 1/2) lined with parchment paper – This size is ideal for our quick bread; it ensures even baking while allowing easy removal after cooling thanks to parchment lining—a must-have trick!
- Stand mixer or electric hand mixer – A stand mixer makes creaming butter and sugar effortless while ensuring consistency throughout mixing—you’ll appreciate how much easier this step becomes! If you don’t have one handy, don’t worry; an electric hand mixer works just as well.
- Mixing bowls (large & medium) – You’ll need these for combining dry ingredients separately from wet ones before bringing them together later on—this prevents clumping and ensures even distribution throughout your batter.
- Measuring cups & spoons – Accurate measurements are key when baking; invest in good quality measuring tools so you can replicate success time after time!
Now that we’re all set up with our ingredients and equipment ready at hand let’s move on to preparing our scrumptious S’mores Bread!
Step 1: Preheat Your Oven & Prepare Your Pan
The first thing we need to do is preheat our oven to 350°F (that’s about 175°C). This step is crucial because starting with an already hot oven ensures even cooking from start to finish—a vital component when creating baked goods like quick breads where rising occurs quickly once heat hits those ingredients! While waiting for it heat up nicely, grab your loaf pan (the parchment-lined one) so we can get ahead on preparation; nobody likes scrambling at the last minute when batter’s ready!
Step 2: Combine Dry Ingredients
In a large bowl, whisk together your flour, graham cracker crumbs, baking powder, baking soda, and salt until they’re well combined—it should feel almost like sand beneath your fingers once done correctly! This process ensures uniformity throughout every slice later on; skipping or rushing could lead some bites being bland compared others full-flavored if clumps remain hidden within batter.
Step 3: Cream Together Butter & Sugar
Now comes one of my favorite steps—the creaming process! In your stand mixer bowl (or using an electric hand mixer), combine softened unsalted butter along with brown sugar until it’s lightened significantly—in both color & texture—as air gets incorporated during mixing time (around three minutes should do!). This step forms those tiny air pockets essential later during baking when leavening agents activate from oven heat—the result? A lovely rise that’ll give us that glorious tenderness we crave!
Step 4: Add Wet Ingredients
Next up: let’s mix things up by adding honey followed by eggs one at a time along with vanilla extract & sour cream—all these delicious elements add layers upon layers of flavor while keeping moisture levels high throughout bake cycle ahead too! With each addition continue mixing until thoroughly combined before moving onto next step—it’s important not leave behind any chunks here since uneven distribution could affect overall taste later down line too—all worth taking time necessary for success over rushing through things!
I hope you’re feeling excited about diving deeper into creating this tender loaf filled with sweet nostalgia—we’re almost there! Stay tuned as we continue crafting each step towards perfection together…
Step 5: Mixing Wet Ingredients – The Heart of Your S’mores Bread
Now that you have your dry ingredients ready, it’s time to transition to the wet ingredients, which are truly the heart of your S’mores Bread. In a stand mixer—if you have one, but a good old-fashioned bowl and whisk will also work wonderfully—add the softened butter and brown sugar. You want to beat these together until they’re light and fluffy, which usually takes about 2-3 minutes on medium speed. This step is crucial because creaming the butter with sugar incorporates air into the mixture, resulting in a beautifully tender crumb when baked. As you mix, take a moment to inhale that sweet aroma wafting up; it’s the promise of deliciousness ahead!
Next, gradually add in the honey, eggs, vanilla extract, and sour cream. The honey not only adds sweetness but also contributes moisture and a bit of stickiness that mimics that gooey texture we associate with classic s’mores. I like to crack the eggs into a separate bowl first to ensure there are no shell fragments before adding them to the mix—better safe than sorry! Beat everything together until well combined; this will take another minute or so. You should have a smooth, creamy mixture that’s almost velvety—a beautiful base for your bread.
Step 6: Combining Dry and Wet Ingredients – The Magic Moment
Now comes one of my favorite moments in baking: combining the wet and dry ingredients. It feels like bringing two long-lost friends together for an epic reunion! With your mixer on low speed (to avoid flour explosions!), gradually add in your bowl of dry ingredients. This gentle approach is essential; if you mix too aggressively at this stage, you risk developing gluten too much, which can lead to a dense rather than fluffy loaf. We want every bite of our S’mores Bread to be light and airy while still being moist—trust me on this one!
Once all the dry ingredients are incorporated, stop mixing as soon as there are no more streaks of flour visible. It’s perfectly okay if there are some lumps; they’ll bake out beautifully as it cooks in the oven. Take a moment to appreciate how thick and luscious your batter is—it should cling to your spatula like a soft cloud! This is where excitement builds as you think about all those chocolate chips and marshmallows that are about to be folded in.
Step 7: Adding Chocolate Chips and Marshmallows – A Decadent Touch
Oh boy, here comes the fun part! With your batter ready, it’s time to fold in those mini chocolate chips and vegan marshmallows. This is where we truly embrace that s’mores magic! Gently add approximately 3/4 cup of mini chocolate chips into the batter along with half a cup of mini vegan marshmallows. Using a spatula or wooden spoon (I prefer wood for its sturdiness), fold them in carefully until evenly distributed throughout your mixture. Be gentle here; we want those adorable marshmallows intact so they can melt slightly during baking and create little pockets of gooey goodness!
As you fold them in, think about how each bite will be an adventure—a delightful surprise waiting just beneath the golden crust. Don’t rush this step; take your time to ensure everything is well mixed without overworking it. Once you’re satisfied with how everything looks, pour this heavenly concoction into your prepared loaf pan—it should feel thick yet pourable, like liquid gold pouring out from a treasure chest!
Step 8: Baking Your S’mores Bread – The Transformation Begins
Now comes my absolute favorite part—the baking! Place your loaf pan into the preheated oven set at 350°F (175°C). Depending on your oven’s quirks (because let’s be real—every oven has its personality), you’ll want to check for doneness around the 50-minute mark but know it could take anywhere from 50-60 minutes total. As it bakes, keep an eye on it—the kitchen will start smelling utterly intoxicating, with hints of toasted graham crackers mingling with melted chocolate wafting through the air.
To test for doneness without ruining that lovely top crust you’ve developed, gently insert a toothpick into the center of the loaf after about 50 minutes. If it comes out clean or with just a few moist crumbs clinging to it—that’s perfect! Remember that it’s normal for some melted chocolate or gooey marshmallow bits to cling onto the toothpick; they’ll just add more character! If it comes out doughy or wet-looking batter clings onto it instead, pop it back in for another five minutes before checking again.
Once done baking, allow your S’mores Bread to cool completely in the pan before transferring it onto a wire rack—this step helps maintain its structure so slicing doesn’t become an exercise in frustration! Cooling allows steam to escape while keeping that lovely moisture locked inside.
Conclusion:
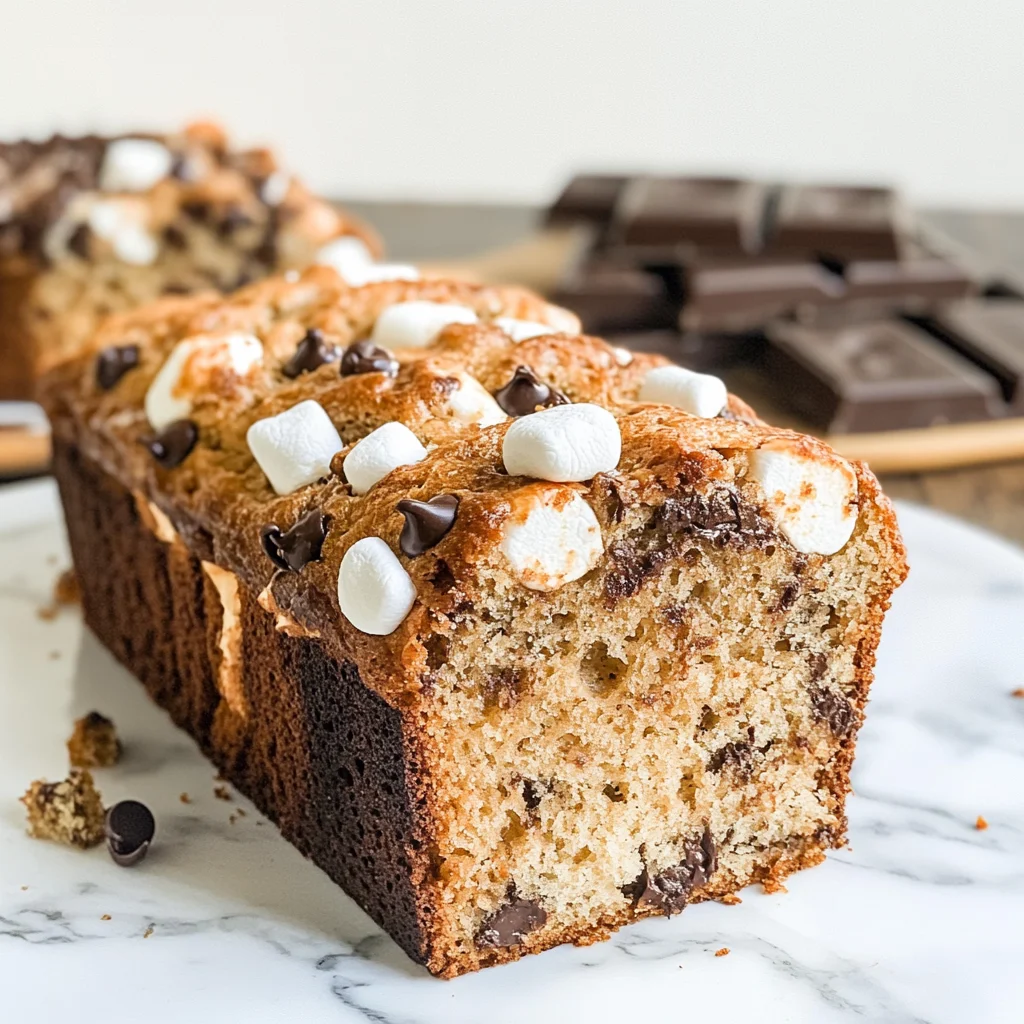
As we wrap up our journey through this delightful recipe for S’mores Bread, I can’t help but feel an overwhelming sense of excitement! From mixing together your ingredients to smelling that beautiful loaf baking away in your oven, every step is infused with warmth and nostalgia—reminding us of summer evenings spent around campfires with friends and family. The balance of textures—the soft bread enveloping pockets of melted chocolate and chewy marshmallows—is what elevates this recipe beyond ordinary quick breads; it’s a true celebration of flavor that brings joy to any occasion.
This S’mores Bread isn’t just about taste; it’s about creating memories. Imagine pulling it from the oven, still warm and inviting, ready to be shared with loved ones at brunch or as an afternoon pick-me-up during those busy weekdays. It’s incredibly versatile too! Whether served alongside steaming cups of coffee or tea or even as part of a festive dessert spread during gatherings, this bread shines brightly no matter where it’s enjoyed.
For serving suggestions, imagine savoring one slice paired with a dollop of whipped coconut cream on top—it’s heavenly! Or perhaps consider indulging in one alongside fresh berries for a refreshing contrast against the rich sweetness. And if you’re feeling extra adventurous? Consider drizzling some homemade chocolate sauce over warmed slices for an utterly intoxicating experience that will surely leave everyone craving more.
Feeling adventurous? This recipe is wonderfully adaptable! You could swap out mini chocolate chips for dark chocolate chunks if you crave richer flavors or even add crushed nuts for delightful crunchiness throughout each bite. Maybe try incorporating different flavored extracts—almond or hazelnut could create fascinating new layers of flavor. Whatever direction you choose to take this recipe, I invite you to experiment wholeheartedly! Your experiences are what make cooking so very special; share them with friends and family—and don’t forget to connect with me! I’d love nothing more than to hear how your own S’mores Bread turns out!
S’mores Bread
S’mores Bread is a delightful and nostalgic treat that brings the flavors of campfire s’mores straight to your kitchen. This moist, tender quick bread is infused with sweet graham cracker crumbs, gooey vegan marshmallows, and rich chocolate chips, creating a comforting dessert perfect for breakfast or an afternoon snack. Each slice captures the essence of summer nights spent around a roaring fire, inviting you to share moments of joy with loved ones. With easy-to-follow steps and simple ingredients, this recipe is not just about baking; it’s about creating memories that will linger long after the last bite.
- Prep Time: 15 minutes
- Cook Time: 60 minutes
- Total Time: 1 hour 15 minutes
- Yield: Approximately 10 servings 1x
- Category: Dessert
- Method: Baking
- Cuisine: American
Ingredients
- 1 1/4 cups all-purpose flour
- 3/4 cup fine graham cracker crumbs (+ additional for topping)
- 1/2 teaspoon baking powder
- 1/2 teaspoon baking soda
- 1/2 teaspoon salt
- 1/2 cup (1 stick) unsalted butter, softened
- 1/2 cup brown sugar
- 1/4 cup honey
- 2 large eggs
- 1 teaspoon vanilla extract
- 1 cup sour cream (or Greek yogurt)
- 3/4 cup mini chocolate chips (+ additional for topping)
- 1/2 cup mini vegan marshmallows (+ additional for topping)
- 1 coarsely chopped chocolate bar (optional)
Instructions
- Preheat your oven to 350°F (175°C) and line an 8.5" x 4.5" loaf pan with parchment paper.
- In a large bowl, whisk together flour, graham cracker crumbs, baking powder, baking soda, and salt until well combined.
- In a stand mixer or mixing bowl, cream softened butter and brown sugar until light and fluffy.
- Add honey, eggs (one at a time), vanilla extract, and sour cream to the butter mixture; mix until smooth.
- Gradually incorporate the dry ingredients into the wet mixture on low speed until just combined.
- Gently fold in mini chocolate chips and vegan marshmallows until evenly distributed.
- Pour batter into prepared loaf pan and bake for 50-60 minutes or until a toothpick comes out clean.
- Allow to cool in the pan before transferring to a wire rack for complete cooling.
Nutrition
- Serving Size: 1 slice (60g)
- Calories: 220
- Sugar: 15g
- Sodium: 150mg
- Fat: 9g
- Saturated Fat: 5g
- Unsaturated Fat: 3g
- Trans Fat: 0g
- Carbohydrates: 33g
- Fiber: 1g
- Protein: 3g
- Cholesterol: 45mg